The Esri Story Map Series app presents a series of maps and other types of content, such as images or videos, via a set of tabs, bullets, or side accordion controls. This app is excellent for showing a structured set of maps as well as different places on the same map. It also can be used to compare multiple datasets.
Here’s a short tip (with plenty of images to walk you through the steps) that explains how to quickly create a Story Map Series app.
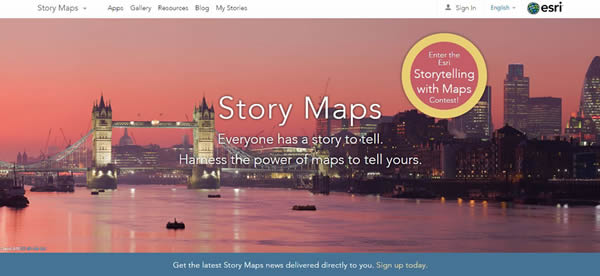
Step 1—Go to the Esri Story Maps website. At the top of the page, click Apps.
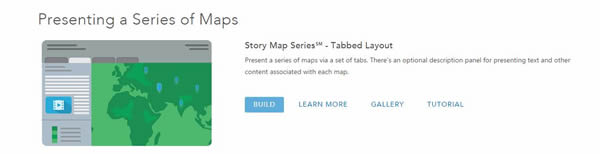
Scroll down the page until you reach Presenting a Series of Maps. Story Map Series has three layouts to choose from: Story Map Series—Tabbed Layout, Story Map Series—Side Accordion Layout, and Story Map Series—Bulleted Layout.
For this tip’s purposes, choose Story Map Series—Tabbed Layout and click Build. Sign in to your ArcGIS account if prompted.
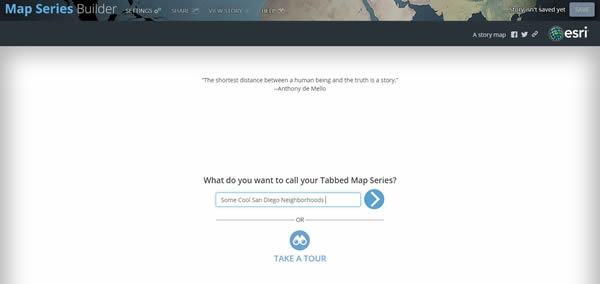
Step 2—When the Map Series Builder opens, enter a name for your story, such as “Some Cool San Diego Neighborhoods”.
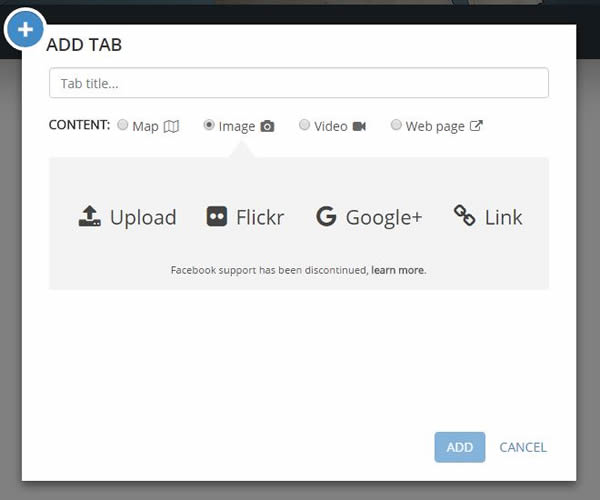
The ADD TAB dialog box opens, letting you add the first tab to your story map. Since this will be the cover of your story map, choose Image.
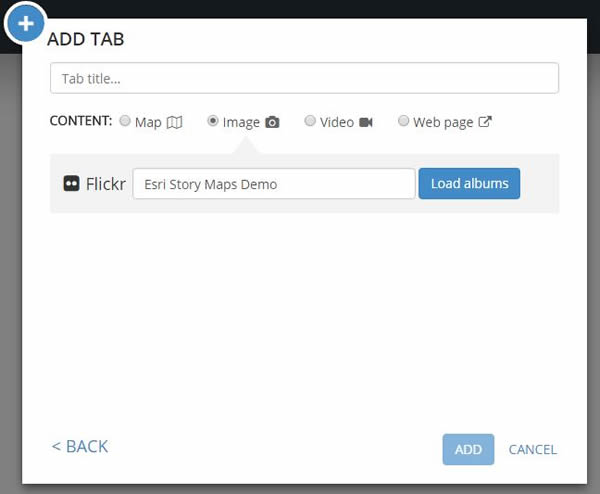
Next, select the Flickr option and type Esri Story Maps Demo in the search box. Click Load albums.
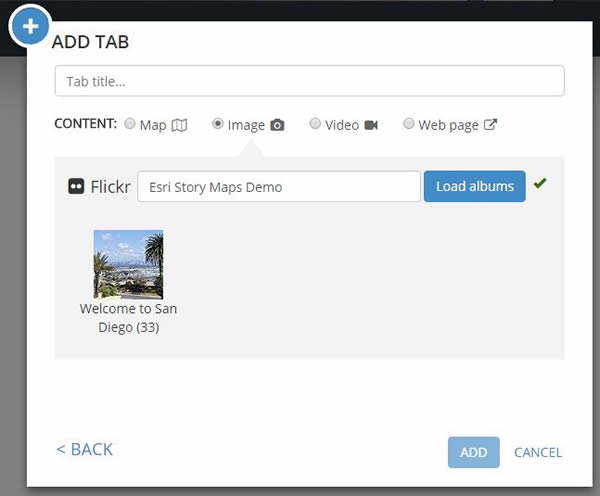
You will see the Welcome to San Diego album.
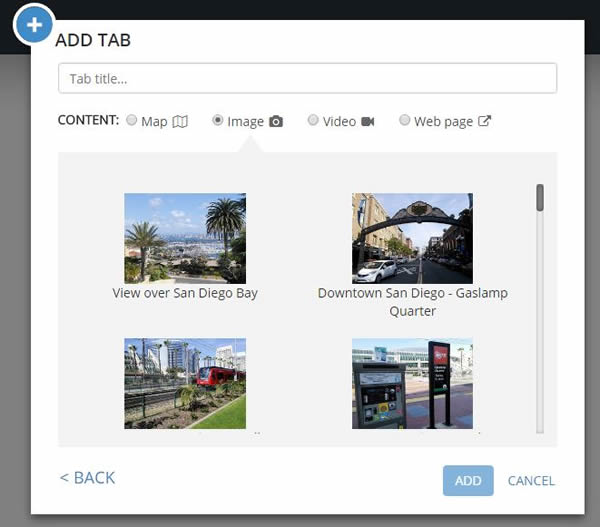
Step 3—Click on the Welcome to San Diego album and then on the photograph Downtown San Diego – Gaslamp Quarter.
Make sure that the Position default is Fill. This will fill the first tab of your story map with your image. If you use an infographic or other image that you want to make sure doesn’t get cropped at different browser widths, you would use Fit instead of Fill. Enter Intro as the title of your tab.
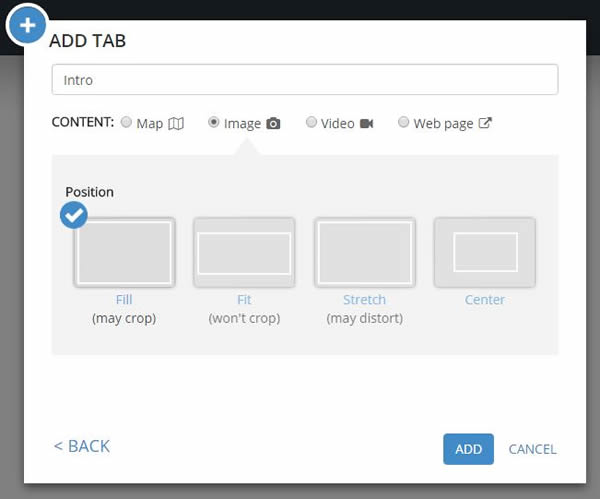
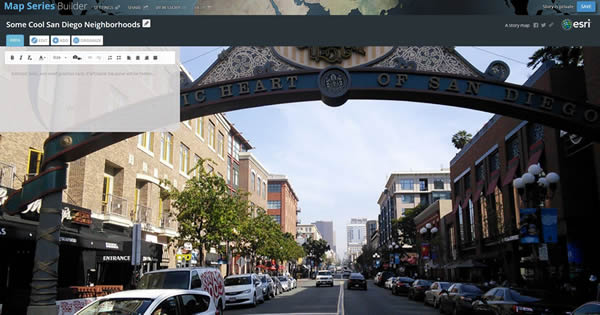
Click ADD. Below you will see an image of what your story map should look like at this stage.
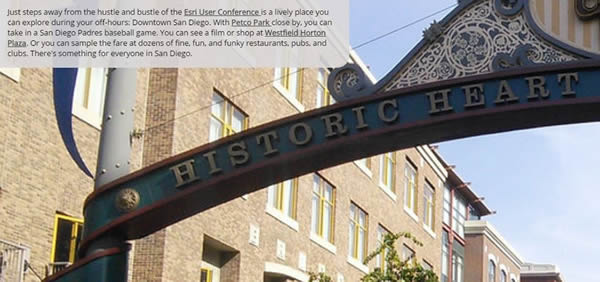
Step 4—Begin to write your story in the text box, including links in the text if you wish. You can also insert images, videos, or web pages in the box. Click SAVE.
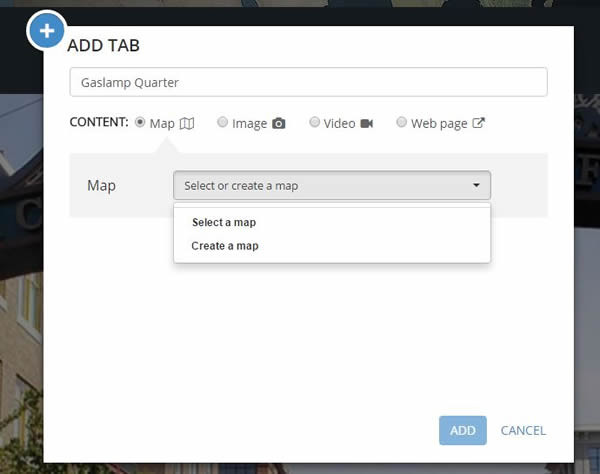
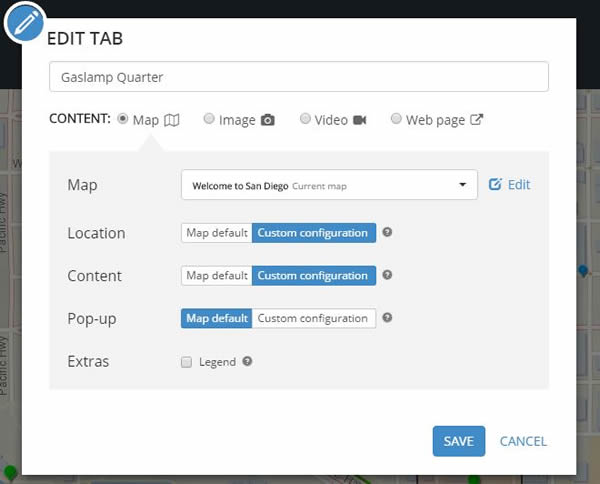
Step 5—Now click ADD to create a new tab title called Gaslamp Quarter. Select Map as the CONTENT option, then click the Map drop-down arrow and choose Select a map.
Step 6—Choose ArcGIS Online from the drop-down menu. This lets you find a publicly shared web map that someone else has created. Search for StoryMapsWorkshop San Diego and choose the Welcome to San Diego map.

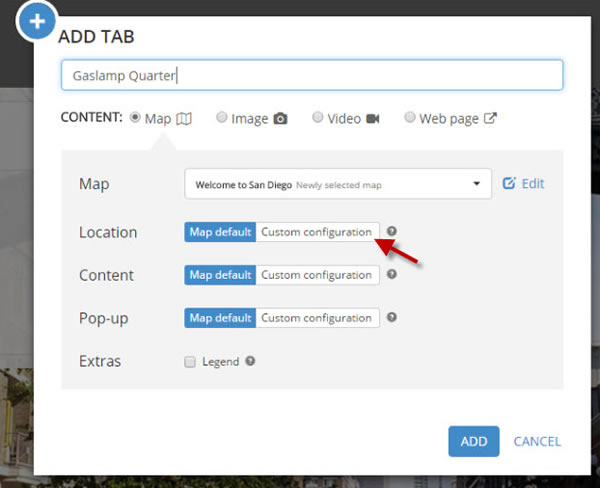
On the ADD TAB dialog box, type Gaslamp Quarter as the tab title. Next to Location, click Custom configuration (rather than Map default).
The map will be added to your app.

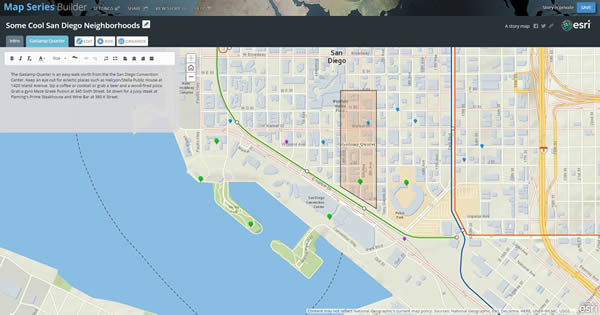
Step 7—Zoom to the location on the map you want to show. In this case, zoom to the Gaslamp Quarter in downtown San Diego. If you have been to the Esri User Conference, you will likely know this district well. If not, zoom in to downtown San Diego, north of the San Diego Convention Center. The Gaslamp District is outlined on the map. When you set your map extent, click SAVE MAP LOCATION. On the ADD TAB dialog box, click ADDto add the Gaslamp Quarter tab.
Write some descriptive text about your map. You can also include extra layers to your map if you wish. Click EDIT on the Map Series Builder toolbar. On the EDIT TAB dialog box, go to Content and choose Custom configuration.
Under MAP CONTENT, you will see a list of layer choices: Fun, Food, Design, Trolley Stations, Trolley Lines, Ferries, and Neighborhoods. Fun, Ferries, and Neighborhoods are already checked. Check off other layers you wish to add.
After making your choices, click SAVE MAP CONTENT. The EDIT TAB dialog box for the map will reappear. Click SAVE.
Your story map should now look like the one below. Click SAVE on the Map Series Builder toolbar occasionally to make sure you keep your changes intact.
Step 8—You’ve now added a map tab to your Story Map Series app. Next, add maps and tabs for other San Diego neighborhoods. Click ADD on the Map Series Builder toolbar. On the ADD TAB dialog box, the Welcome to San Diego map will reappear. Enter a tab title such as Little Italy. The Location box will say, “Inherited from the first map.” To change this, go to SETTINGS and click Map options. Uncheck Synchronize map locations. Click APPLY. Now zoom in to Little Italy. Click EDIT, and when the EDIT TAB dialog box opens, go to Location and click Custom configuration. Next click SAVE MAP LOCATION. When the EDIT TAB dialog box reappears, click SAVE. Return to the EDIT TAB dialog box to custom configure your content and pop-ups too.
Feel free to experiment.
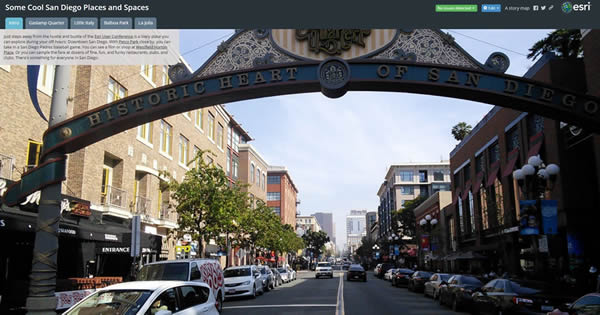
During the editing process, URL links were added in the text. Small images of the neighborhoods were placed inside the text boxes along with captions. You can also change the name of your story map. Just click the pencil icon to the right of your story map title. We did, so the Story Map Series app built for this tip is now called Some Cool San Diego Places and Spaces.
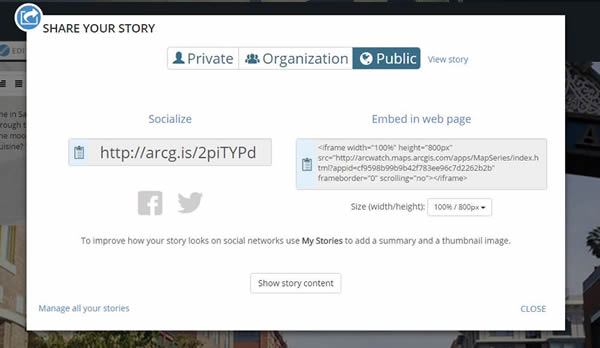
Step 9—Don’t forget to share your story map. Go to Map Series Builder at the top of your screen and click SHARE. You can either make your Esri Story Map Series app public or share it only within your organization. And you can socialize the app on Facebook or Twitter.
To learn more about building Story Maps apps, visit the Apps page on the Esri Story Maps website and read the tutorials for each of the apps.
Visit the Story Map Series web page to learn more about the Tabbed, Side Accordion, and Bulleted layout options for the Esri Story Map Series apps. You can find examples of Story Map Series apps in the Story Map Series Gallery.