
Esri Story Maps apps are simple to author, but you’ll likely need to put in a little extra effort to craft a truly great one. It’s like playing the guitar; it’s easy to learn the F, C, G, and E chords and start strumming away. But if you want to become a true Story Maps virtuoso, it will take some thought, study, preparation, and practice. To build awesome story maps, follow these 10 steps for success.
Before You Begin
Sign in to your ArcGIS Online account. Check in at the Story Maps website, where you’ll find information and resources such as featured story maps, blog posts, and tutorials that can help you author great story maps. Bookmark the site.
Step 1: Envision Your Story
A great story map requires an idea, some thought, and even some inspiration. Think about how you want your ideas and inspiration to unfold. Envision how a viewer might experience your map. Sure, you can dive right in and start building a story map, but spending a little time mulling things over will make it easier for you to organize your story, hone it to the essential elements, and find the right story maps app to bring your story to life. This brings us to step 2.
Step 2: Choose the Right Story Map App
Currently there are eight Story Maps apps to choose from on the Apps page of the Story Maps website, including Esri Story Map Tour, Esri Story Map Journal, and Esri Story Map Cascade. Most of the apps have different layout options. How do you decide which one is the best for telling your story in a compelling way? Answering that question will require some review and perhaps some experimentation. You may need to rethink your idea.
How can you find the right story maps app? First, get inspired by what others have done by browsing the galleryat the Story Maps website. In the Story Map App section, go through the galley and see what each app has to offer. You can also filter by subject, industry, format, and author. Just scroll down, look along the left side, and choose one.

Use the Create Story option to guide you to the right app. You’ll find the CREATE STORY button by clicking either Apps or My Stories on the Story Maps website.

After you click the button, you can either click Pick an App for a catalog of choices with concise, single-sentence descriptions.

Or you can click Ask the Pros. You will be guided to a story map app by answering questions about your story and how you want to tell it.

Step 3: Craft the Story Components
A well-crafted story map includes attractive maps accompanied by multimedia and narrative text that is both interesting and informative. A great map is visually appealing, simple, focused on the story, and performs well.
You’ll find lots of resources in the ArcGIS Online Help and the ArcGIS Blog posts to help you learn how to make web maps that perform well. Don’t overlook the fine details. Make sure your pop-ups are configured, the layer names make sense, and the symbols are clear and well chosen.
Media (photos and videos) should also be optimized for web use. Make sure image sizes are appropriate for the way they will be used in your story map. Using a 5 MB photo is never a good idea in a web app, especially when the photo will be used as a thumbnail.
Media storage should also be considered. Flickr is good place to store photos at different sizes and resolutions, and Story Maps is smart enough to fetch the appropriate size from Flickr. If you’re storing your images elsewhere, you may need to do the resizing and optimization work manually. Your text and narratives, including the title and subtitle, should be clear and compelling. Avoid using jargon and acronyms that may be confusing to viewers unfamiliar with the topic. Use a tone and a style that lure viewers in and engage them so that they will continue the journey through your story.
Step 4: Build It
You’ve got ideas, maps, and media. You have given some thought to the best story map app to use. Now it’s time to take a first cut at making one.
Launch the Story Maps builder for the app of your choice. It will guide you through the steps. Although it almost always delivers the best results, don’t be afraid to challenge the defaults and to experiment. As you build your app, you’ll know what works and what doesn’t. After you’ve finished your first pass, squint hard and scrutinize your work.
Step 5: Refine and Simplify
Take a step back and consider the story’s merits. More importantly, consider its shortcomings. What works? What doesn’t? Are you missing maps or graphics, or do you have too many? How can your story be improved?
Think about the narrative. Is there too much or not enough? Keep refining your story map to see how you can improve the overall result. Don’t be afraid to consider another story maps app if you find yourself wrestling with the one you’ve chosen.
Whether you’re on a mission to highlight the plight of an endangered species or to showcase your city’s improvement projects, too much information or a lengthy story can cause your viewers to tune out, lose interest, and become distracted. Simpler is always better. And simplicity will increase the odds your story map will be viewed from beginning to end.
Step 6: Repeat
Go back to Step 5 and repeat it as necessary.
I repeat: go back to Step 5 and repeat it as necessary.
Step 7: Get Fresh Eyes to Review Your Story
So you think you’ve created a prize-winning story map? Perhaps you want to enter it in next year’s Esri Storytelling with Maps Contest. You are enthralled by your clever work. You love your maps, your media, and your narrative.
But—swallow hard here—your opinion really doesn’t count.
The goal is to tell your story before an audience that’s larger than you, the proud author. Before unleashing your story map on the world, have others take a look at it. Wear your thick skin. That map or graphic you worked on for hours and are so happy with may be the first thing that makes someone else say, “Huh?” The details that you puzzled over for an eternity might leave your viewers confused.
It’s invaluable to get a review from others who don’t share your personal investment in the story. Toughen up and listen to what they say.
Step 8: Test Your Story Map by Using Different Monitors, Devices, and Browsers
It’s always a good idea to test your story map in environments that are different than the one in which it was authored. You may have authored it using your awesome 27-inch retina display, but your audience might be viewing it on a dusty 4:3 monitor, a bargain tablet, or an old Droid with a cracked screen. While story maps are responsive and will accommodate a device of any size, the two-sentence description that fits on your large monitor could require scrolling for those less fortunate. Think about the size/device sweet spot for your target audience.

Try your story map using different browsers. While the story map will work in any browser, there may be issues with some of the media you’ve chosen to include. It’s also a very good idea to clear your browser cache and test the story map as an anonymous user. Clearing your browser cache can reveal images that are too large and other web bottlenecks. And testing as an anonymous user will shake out any access issues.
Step 9: Go for the Green
Use My Stories to view all your story maps. Think of it as a lens applied to your ArcGIS Online content. It not only lists your story maps apps, it also has some really useful tools to help you manage and share your story maps. You’ll find My Stories at the top of the Story Maps landing page.

Use My Stories to verify the availability of subscription or premium content, maps, images, or media. Click Check Stories or just click the title of the story map for a thorough inspection.

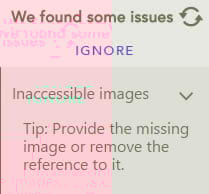
If something is amiss, you’ll get a red flag noting the issues and offering tips on how to remedy them.
When everything checks out, you’ll get a green banner.

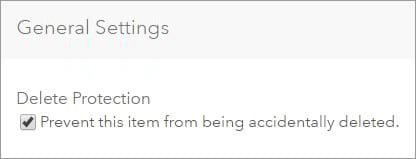
Tip: Set Delete Protection to prevent the accidental removal of the maps and other items used by your story map that are stored in your ArcGIS Online account. Check the box for Delete Protection on the Settings tab of the Item Details pages and click Save.
Step 10: Socialize and Share
Congratulations! You’ve got a great story to tell, so now it’s time to share it with others. Even if your story map is only for internal use, it’s still important to share it.
Make sure you’ve got an impressive thumbnail image. It will be an essential part of your story’s appearance in ArcGIS Online and for when you share it with others. . On the Item Details page, click the default thumbnail to replace it.
Your story map deserves the accolades of a broader audience. Add it to your organization’s home page gallery and email it to your colleagues. Most story maps are public, so put the link or embed the story map on your website. Add it to your blog. Tweet it and share it on Facebook.
Some Final Words
Making story maps is easy, like learning those basic guitar chords. The hardest part—and the part that can elude even seasoned GIS professionals—is telling the right story for your audience, developing the correct narrative, and getting the best media and maps you can. But if you follow these 10 steps, you will put your best story map forward.