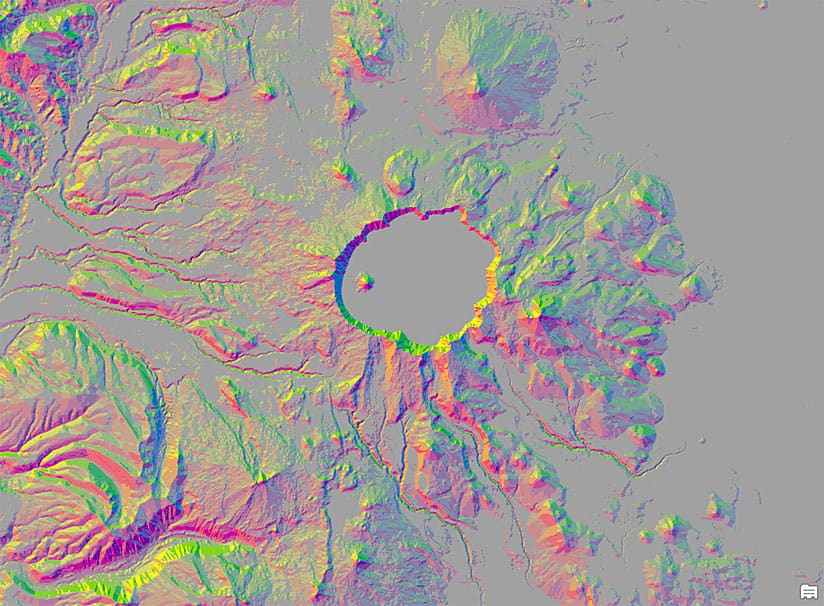
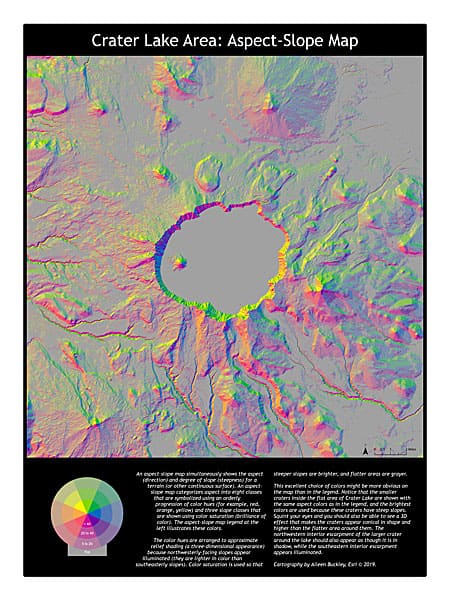
An aspect-slope map simultaneously displays the aspect (direction) and slope (steepness) of a continuous surface such as terrain represented in a digital elevation model (DEM). This type of map is useful for identifying landscape features such as ridges and valleys, determining the amount of solar illumination on a surface, and predicting fire risk and behavior. These maps can also be striking visualizations in themselves, such as in the example below.
In this tip, you will learn how to create an aspect-slope map quickly and easily in ArcGIS Pro. But first, here is a little background information about aspect-slope maps.
In these maps, color hues such as red, green, and blue represent different directions. The hues are brighter, or more saturated, on steeper slopes and duller on flatter slopes. Lighter hues (such as yellow) on northwest-facing slopes and darker hues (like purple) on southeasterly slopes give the impression of illumination on the terrain, which mimics the appearance of a three-dimensional landscape.
You can create an aspect-slope map by using the Aspect-Slope function in ArcGIS Pro, which creates a raster layer that simultaneously displays the aspect and slope of a surface. By doing this, the data is processed and displayed all in one step. Not only does this function make aspect-slope mapping faster and easier than ever before, it also does not require a new output dataset to be created (although you can save the raster layer file if you want).
Follow the steps below to create an aspect-slope map in ArcGIS Pro. In this example, an aspect-slope map of the Crater Lake area in Oregon was created using the Terrain layer from ArcGIS Living Atlas of the World. To complete the exercise in this tip, you will need access to ArcGIS Pro and ArcGIS Online.
Step 1: Add Elevation Data to the Map
- Make sure ArcGIS Spatial Analyst is enabled for ArcGIS Pro by checking your ArcGIS Online account.
- Start ArcGIS Pro and create a new project using the Map template.
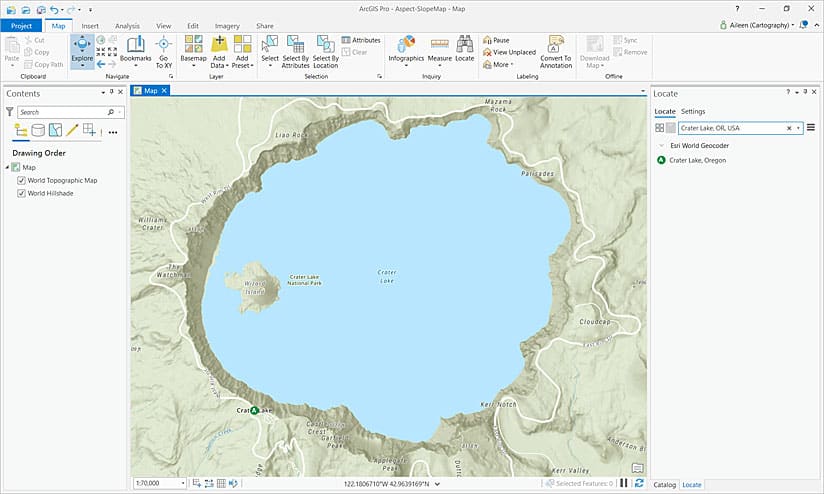
- On the Map tab in the Inquiry group, click the Locate icon and search for Crater Lake, Oregon.
- Pan and zoom to see the entire lake area.
5. Close the Locate pane.
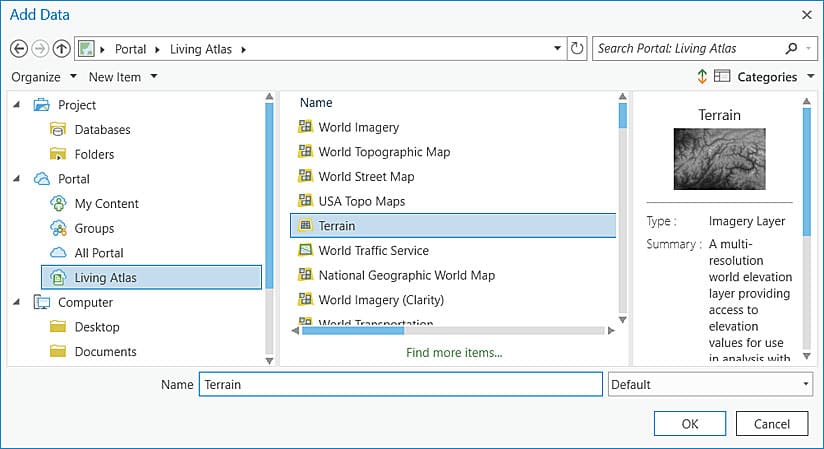
6. On the map tab in the Layer group, click the Add Data icon. In the left pane of the Add Data dialog box under Portal, select Living Atlas. If necessary, use Search at the upper right to locate the Terrain layer (choose the layer that is simply named Terrain, not other layers with “Terrain” as part of the name) and add it.
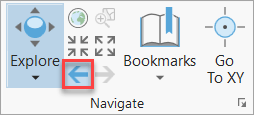
7. On the Map tab in the Navigate group, click the Previous Extent icon highlighted below to return to the Crater Lake area.
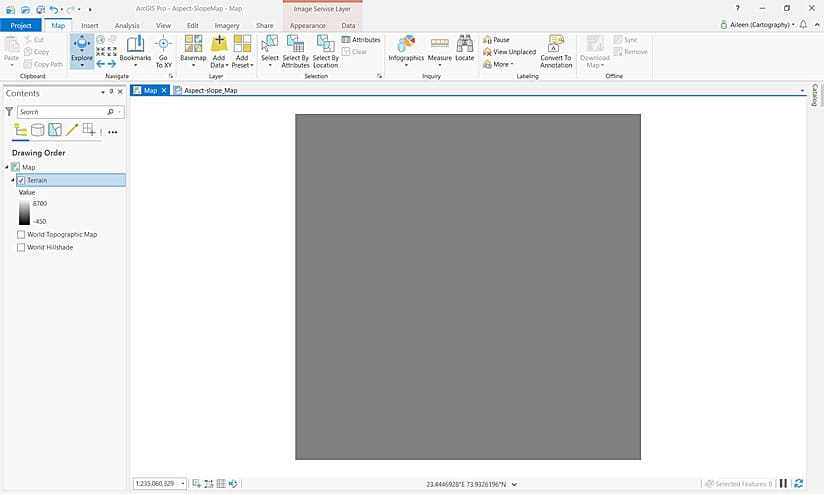
The Terrain layer will appear gray because ArcGIS Pro is trying to display the layer using information about all the data in the dataset.
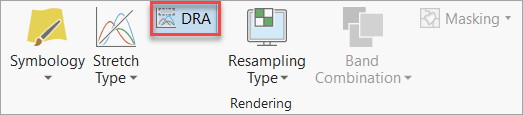
Instead, display the layer using information about the data in the current view. Use the Dynamic Range Adjustment (DRA) feature to do that, as described below. DRA will automatically adjust the display based on only the pixel values for the data in the current view. As you pan and zoom, the display will update automatically to use information about the pixels in the new view.
Note: It is best to use the DRA feature in ArcGIS Pro 2.1 or later versions.
8. On the Appearance tab in the Rendering group, click the DRA icon.
The map display will update to show the data.

Step 2: Create the Aspect-Slope Map
You can now create the aspect-slope map using a raster function.
Raster functions are operations applied on the fly directly to the pixels of imagery and raster datasets. Only the pixels in the current view are processed, and the output is a virtual raster layer. This can save storage space and processing time, especially if either the map extent or raster dataset is large. This is often the case for the Terrain data. In addition, ArcGIS Pro makes it easy to find and use raster functions that are designed specifically for the kind of elevation data that is in the Terrain layer.
To create the aspect-slope map, follow the steps below:
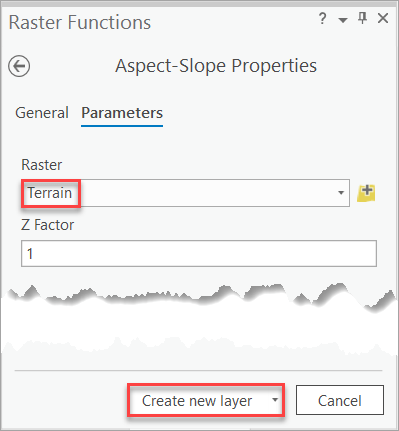
- In the Contents pane, select the Terrain layer.
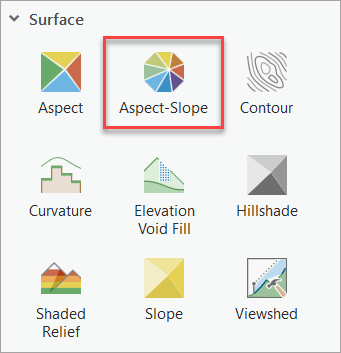
- Click either the Analysis or Imagery tab and click the Raster Functions icon.
- At the bottom of the pane, expand the Surface category and click the Aspect-Slope raster function.
4. Set Raster to the Terrain layer and click Create new layer.
The Aspect-Slope_Terrain layer is added to the map and displayed in the Contents pane.
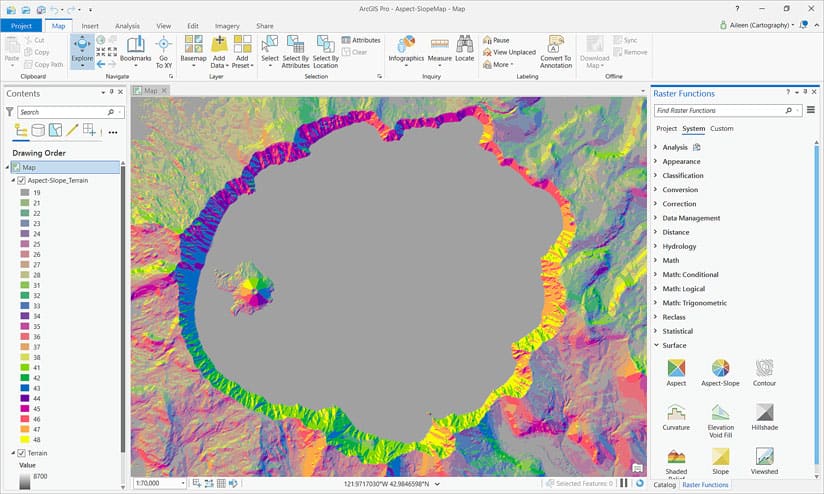
You can now use the layer in a print map, as below, or as a layer in a web map.
With the Aspect-Slope raster function, making these special maps has never been easier. To make the aspect-slope map above, see this project package.
To learn more about using the Living Atlas Terrain layer, read this tip, which appeared in the January 2019 issue of ArcWatch.
To learn more about raster functions, see this online help topic.
To learn more about aspect-slope maps, read Color Representation of Aspect and Slope Simultaneously.
About the author