The main purpose of authoring and sharing a web map is to communicate information. But did you know that people can also communicate directly with your organization using email embedded in an online map?
Web map pop-ups can be configured to display data-driven text, links, and photos and, yes, even send email. Email can be sent directly from configured web map pop-ups. Which configuration approach is best will be determined by how the email addresses are stored in the layer attributes. This tip shows you how to send an email directly from a pop-up and covers one example of how the email might be stored—as an email address (somebody@company.com). To learn how to store it as a mailto link (mailto:somebody@company.com?subject=Hello), read this blog.
You can follow along using a sample web map. Save a copy of the map in your ArcGIS Online account before you begin.
The map contains two layers: Office Location (original) and Office Location (configured). The original layer does not have a configured pop-up; it’s the default and unimproved display of attributes. Use this layer to follow along with the instructions below. The configured layer has a configured pop-up using all the email options described in this tip.
The unconfigured pop-up
Click the symbol on the map to display the pop-up. In the original pop-up shown below, the email address is stored in two ways. The Email field stores the address as a string in the format somebody@company.com. The Mailto field stores the address as a string in the format mailto:somebody@company.com?subject=Hello.

Note that both are displayed as text strings rather than links. Using the techniques described below, the pop-up can be configured to use both email string formats as clickable email links in the layer pop-up.
To configure the pop-up, click Content and move your mouse pointer over the layer name to highlight it, then click the layer context menu (the dots) to reveal More Options.

Choose Configure Pop-up from the options list. This will display the pop-up properties.

Email stored as a mailto link
The Mailto string can be configured as a mailto link in the pop-up by either of two methods using pop-up properties:
Method 1—Using a custom attribute display
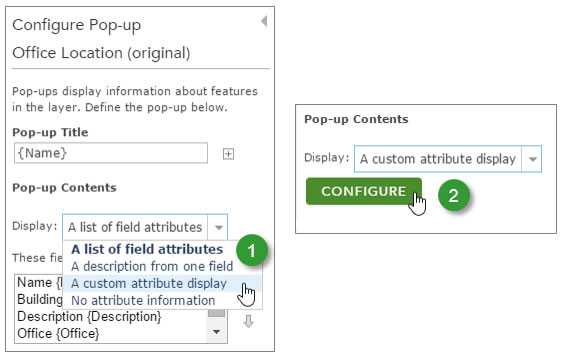
- From the pop-up properties dialog box, choose A custom attribute display.
- Click CONFIGURE.
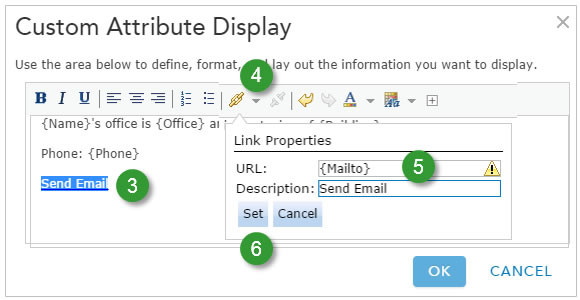
- Along with other desired text and attributes, enter a text string to use for the email link and then select it.
- Click Create Link to add a link to the selected text.
- In the URL text box, enter the field name containing the mailto string enclosed in the curly braces—in this case, the field name is {Mailto}.Note: You can add the Mailto field to your custom attribute display, then copy and paste it into the URL text box instead of typing. A warning will appear, but you can disregard it.
- Click the Set button to the link properties.
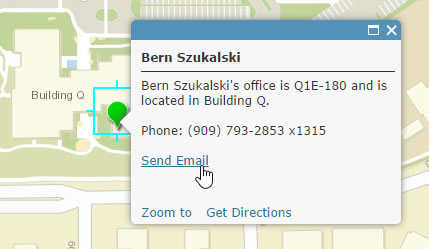
- Click OK, then save the pop-up configuration and map. The pop-up now includes the mailto attribute as a clickable link.
Method 2—Using an image link
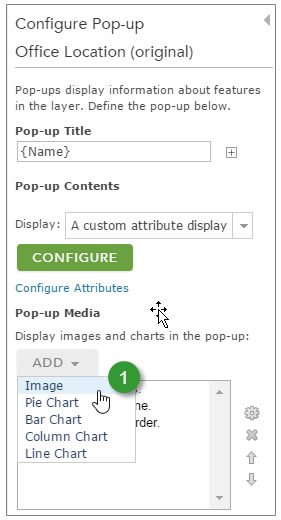
- Open the Configure Pop-ups dialog for the same layer. From the Pop-up Media section of pop-up properties, choose ADD Image.
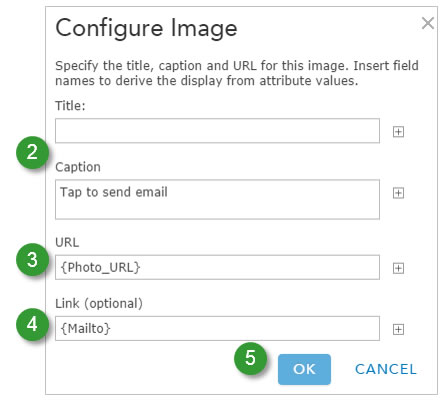
- In the Configure Image dialog box, add a title and caption as desired.
- Choose a field name for the URL. This field contains the URL to an image that will be displayed. In this example, it is of the symbol for an envelope.
- Add the field name containing the mailto string to the Link text box.
- Click OK.
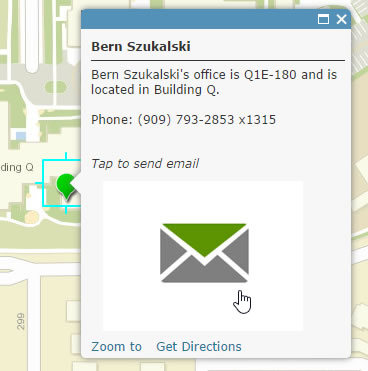
- Save your pop-up configuration and your map. The pop-up now includes an image that can be clicked (or tapped, if using a device) to send an email.
For more information, see Configure pop-ups.