Many GIS professionals find that historical topographic maps are useful in their work. The United States Geological Survey (USGS), with the help of Esri, has posted almost 186,000 topographic maps from its national map series online. You can view these maps in an app called USGS Historical Topographic Map Explorer.
You can also add images of the maps to your map in ArcMap then use the images to digitize features, make measurements, or perform other operations. For example, you could add an image to your ArcMap session and then create features by tracing them off the scanned map while in an edit session. This is called heads-up, on-screen digitizing, and it is one of the easiest ways to create features in ArcMap.
Step one: Find maps in the USGS Historical Topographic Map Explorer app.
- In a web browser, open the USGS Historical Topographic Map Explorer app. Finding the historical maps you want is simple. Just search for them by name or use the map to find your area of interest. Then click on a place on the map and you will see, in the timeline at the bottom of the app, which scales and dates of maps are available for that area.
- Find the maps you are interested in using.
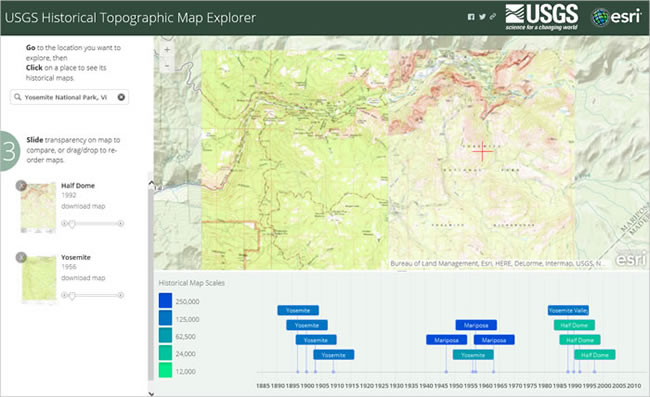
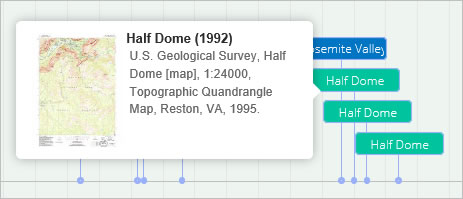
- In the timeline, point to a map to see its name, date, and map scale.
Step two: Find the names of the scan files for the maps that interest you.
- In a web browser, go to ArcGIS.com and open a new map.
- Sign in with your ArcGIS organizational account.
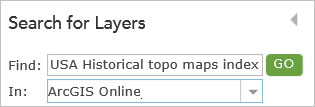
- At the upper left of the ArcGIS Online window, click the Add dropdown arrow and choose Search for Layers.
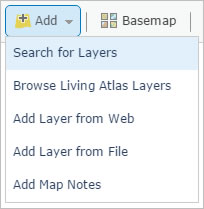
- In the Find box, type USA Historical Topo Maps Index.
- Click the In box dropdown arrow and choose ArcGIS Online.
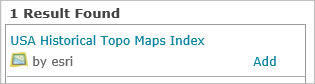
The USA Historical Topo Maps Index item will be displayed.
This layer contains the footprints of the maps in the image service that are displayed in the USGS Historical Topographic Map Explorer app.
- To the right of the item, click Add and at the bottom click DONE ADDING LAYERS.
- Pan and zoom to the extent of the contiguous United States.
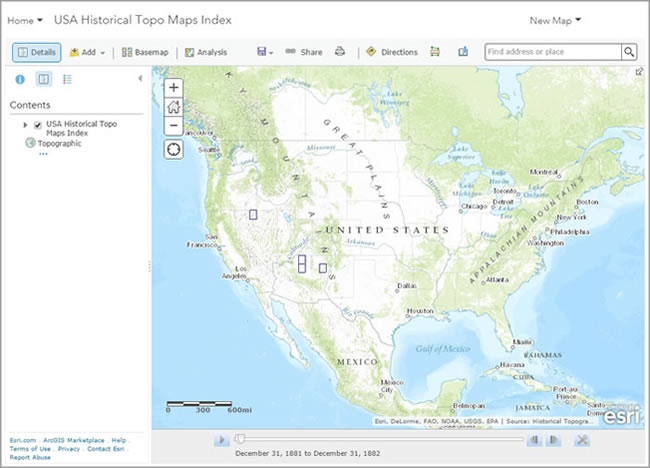
As you zoom in, you will see the outlines of the extents of the maps.
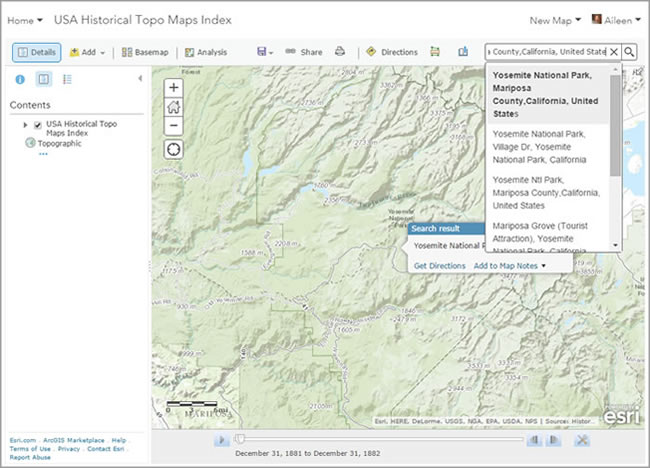
- Use the Search box or the navigation tools to zoom to your area of interest.
- Use the time slider to specify the time period of the map you want to use.

- Click the arrow to the left of the USA Historical Topo Maps Index to see the layers in the service—there are separate layers for each map scale.
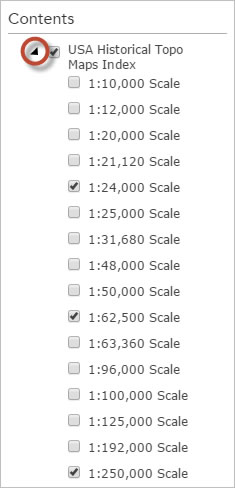
- Turn layers on/off to see the extent of the maps you plan to use.
Note: You may need to zoom in or out to see the extent of the maps.
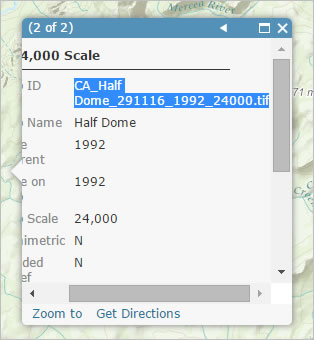
- Once you have found your area of interest, click a point on the map to see information about the available maps.

If multiple maps are available, you will see the number of maps at the top of the pop-up window. Use the arrow at the upper right of the pop-up window to scroll through the records for the available maps.
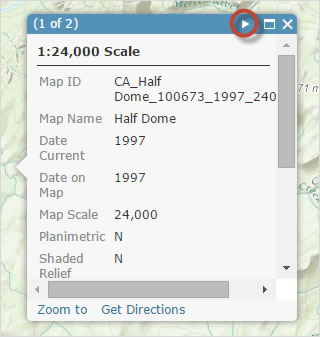
- Copy the name of the map at the top of the pop-up window (for example, CA_Half Dome_291116_1992_24000.tif).
Step three: Add the map images from ArcGIS Online.
- In ArcMap, sign in to your organizational account by clicking File on the main menu, then clicking Sign In.
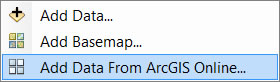
- On the Standard toolbar, click the Add Data button.

- Choose Add Data from ArcGIS Online.
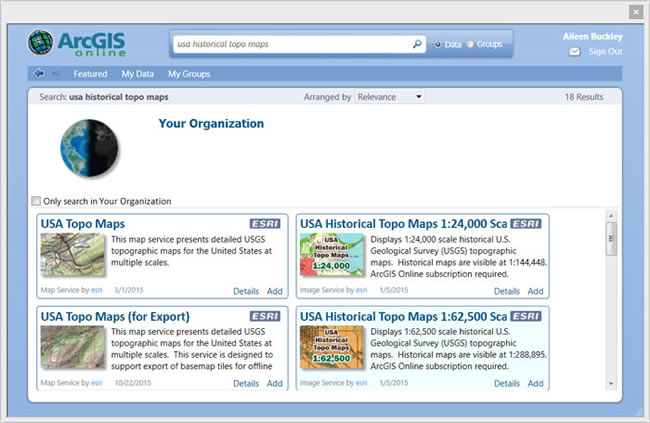
- In the Search ArcGIS Online box, type USA Historical Topo Maps.
Alternatively, use this hyperlink: http://www.arcgis.com/home/item.html?id=b973b38edd774edbbb55238da8ff77c0
- At the upper left of the screen, uncheck Only search in [your organization].
- For the map scale layer with the map you are interested in seeing (for example, 1:24,000 scale), click Add.
- Right-click the layer in the table of contents and choose Properties.
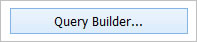
- On the Definition Query tab, click the Query Builder button.
- Create an expression that identifies the scan file name as the one you are interested in seeing (for example, “Scan_File_Name” = ‘CA_Half Dome_291116_1992_24000.tif’. (Note the use of single quotes around the file name.)
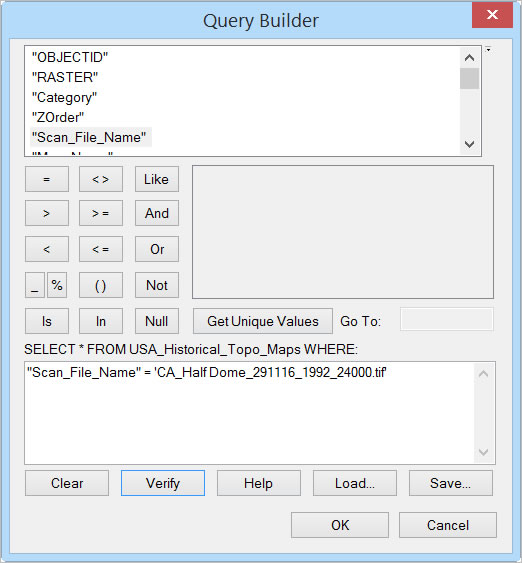
- Verify the expression and then click OK to keep the expression and close the Query Builder dialog box.
- Click OK to close the Layer Properties dialog box.
- Right-click the layer in the table of contents and choose Zoom to Layer.
Note that the map may not appear if your map display is not within the scale range set for the map. If this happens, follow the steps below.
- Check to see whether the visibility of the map is disabled in the table of contents. If it is, the check box to the left of the layer name will be unavailable.
- In the table of contents, right-click the layer and choose Properties.
- On the General tab, note the Scale Range settings.
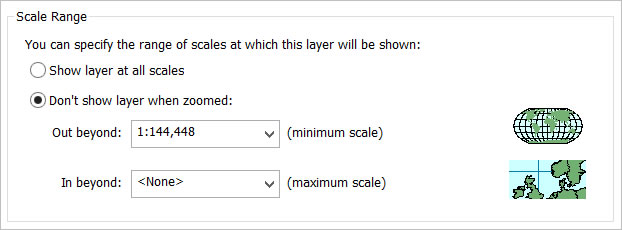
- Either choose the Show layer at all scales option and click OK to close the Layer Properties dialog box, or click Cancel to close the Layer Properties dialog box and use the Zoom tool on the Standard toolbar to zoom in beyond the minimum scale.
The map will now display.
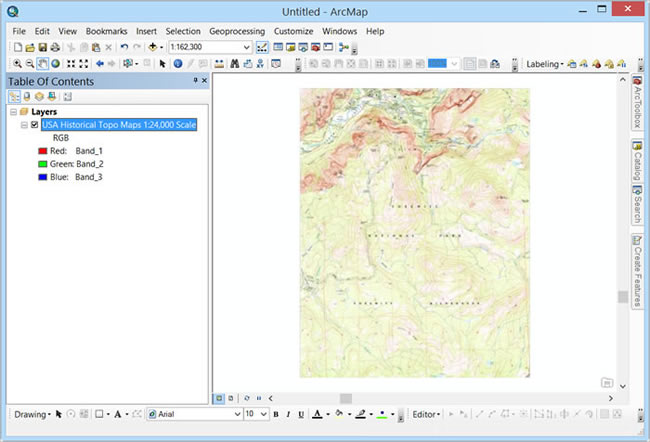
At this point, you can use the scanned map image to digitize features, make measurements, or perform other operations in ArcMap.
To learn more about digitizing in ArcMap, see the What is editing? help topic.
To learn more about measuring in ArcMap, see the Making measurements from imagery online help topic.
To learn more about analysis in ArcMap, see the An Introduction to commonly used GIS tools online help topic.
About the author