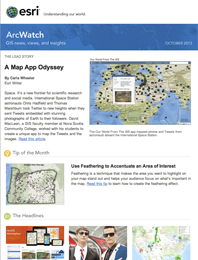
Feathering is a technique that makes the area you want to highlight on your map stand out. This helps your map readers focus on the area that’s important on the map. With feathering, you can fade a dark edge of any color into the background. In the first map below, only the data gives you a clue about the area of interest. In the second map, the feathered edge makes the area of interest stand out.


Feathering involves the use of multiple buffer rings symbolized using transparency. This technique works really well when you overlay your data on an ArcGIS Online basemap and want to show the area of interest in addition to the data. Using transparency allows you to see through the feathered edge to the background, whereas symbolizing the buffers without transparency obscures background features. In the close-ups below, features below the feathered edge, such as the rivers and labels, remain partially visible.
Feathering allows the background to remain visible.
To create the feathering effect in ArcMap, you will use the Multiple Ring Buffer tool, which is available at all ArcGIS license levels—Basic, Standard, and Advanced. You will also use a polygon feature class that represents the extent of your area of interest. You will follow three steps to create this effect: create the buffers, add a transparency attribute, and symbolize the buffers.
Step One: Create the buffers
- In ArcMap, open ArcToolbox and in the Analysis Tools > Proximity toolset, open the Multiple Ring Buffer tool.
- Set the Input Features to a polygon feature class of the perimeter of your area of interest.
- Set the Output Feature class to FeatheredEdge.
- Input the Distances. Twenty 1,000-meter buffers were used for the 20,000-meter-wide feathered border on the Oregon Dam Storage map. Using between 10 and 20 buffers assures a smooth-looking gradation. The width of the buffers you use will depend on the area you are mapping. In general, a feathered edge that is a total of 5 to 10 percent of the length or width of the area of interest (whichever is largest) often looks good.
- Optionally set the Buffer Units parameter, particularly if the input features are in a geographic coordinate system. If the feature class is in a projected coordinate system, the buffer units will default to the units of the PCS.
- Check the option to create Outside Polygons Only.

- Click OK.
Step Two: Add a transparency attribute
- Right-click the FeatheredEdge layer in the Table of Contents and click Open Attribute Table.
- Click Options and click Add Field.
- Check that the Type is set to Short Integer.
- Set the name to Xpar (the abbreviation for “transparency”) and click OK.
- Right-click the Xpar field heading and clickField Calculator.
- Enter an expression that will set the transparency for the buffer with the longest distance to 1,000 and the buffer with the shortest distance to 0 or nearly 0. For the twenty 1,000-meter buffers, you can use the expression [distance]/200.

- Click OK.
The result: A set of transparency values that will be used to symbolize the feathered edge in the final step.

Step Three: Symbolize the buffers
- Double-click the FeatheredEdge feature class in the Table of Contents to open the Layer Properties dialog box.
- On the Symbology tab, show the features using a single symbol with a gray fill and no outline (set the outline color to No color).
- Click the Advanced button and click Transparency.

- Set the field to Xpar and click OK twice to see the results.
To learn more about feathering and other cartographic design techniques, read Make Maps People Want to Look At.
About the author