The release of ArcGIS Enterprise 10.5.1 introduces many new exciting features to Scene Viewer that can help you create striking and compelling scenes. We’ve added smart mapping to Scene Viewer to help you visualize your data in 3D, many new layer types are now supported in Scene Viewer, and we’ve introduced new enhancements for touch screen and animation. To learn more about Scene Viewer, please visit What’s new in ArcGIS Online.
Introducing Smart Mapping and Styles
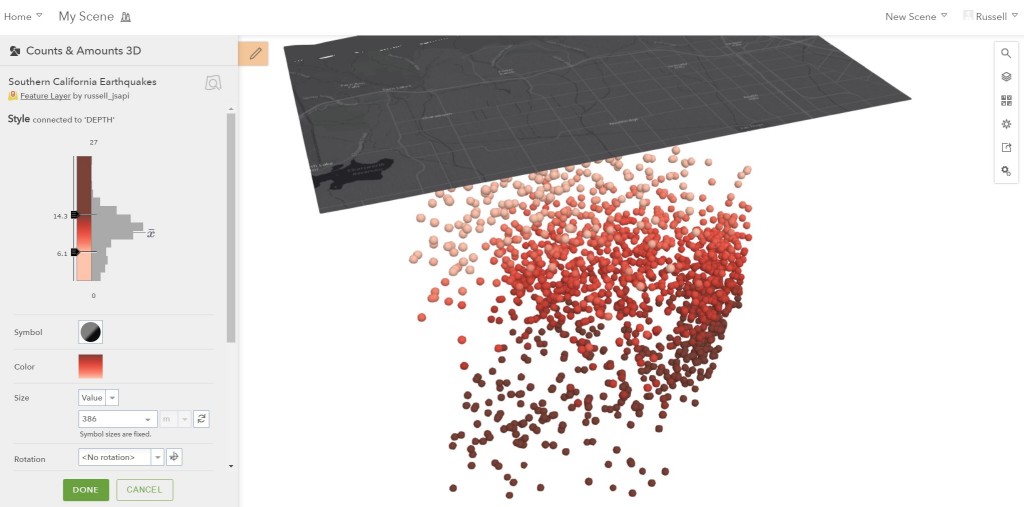
Smart Mapping styles for points
This release is marked by Scene Viewer adding smart mapping capabilities similar to those in Map Viewer. You can apply 2D and 3D styles to your layers that emphasize the features in a more uniform way or symbolize the data with real-world sizes based on the attributes of your data. You can also utilize counts and amounts styles to use the attributes of your point data to drive the appearance of your features. All this makes it easier for you to create attractive web scenes which can be leveraged in templates, Web AppBuilder, story maps, or in custom applications built on the 4.x JS API. Here is a sample of a local scene using smart mapping styles to give earthquakes a continuous color showing the depths of recorded seismic activity.
New Symbols
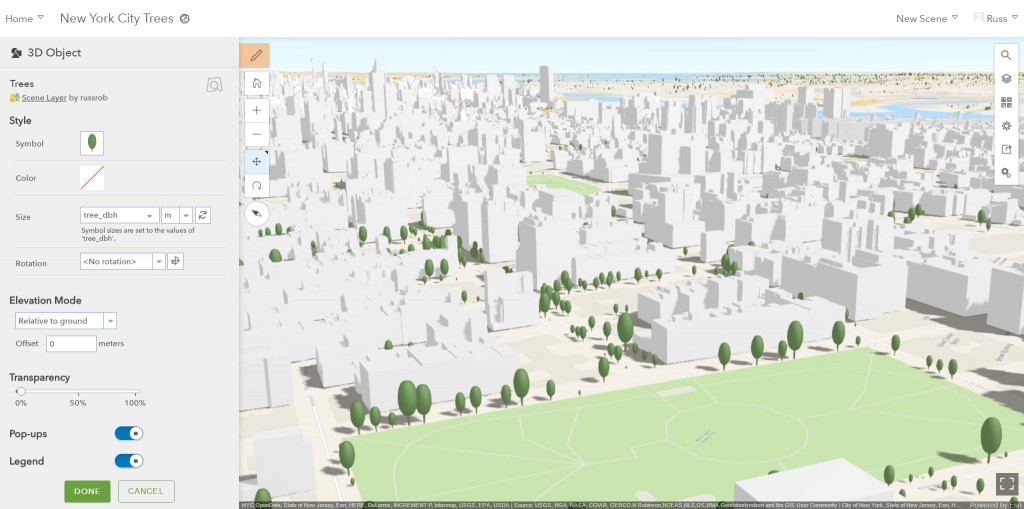
Now in ArcGIS Enterprise 10.5.1 when you add styles to your point layers, you can select from a wide gallery of 2D and 3D symbols. For example, you could choose to use realistic or thematic tree symbols in your scene. Check out this scene of New York City with a 3D Object scene layer of one million buildings and a point scene layer with just under 450,000 features. The points use 3D thematic tree symbols with their height and size driven by their recorded height attribute.
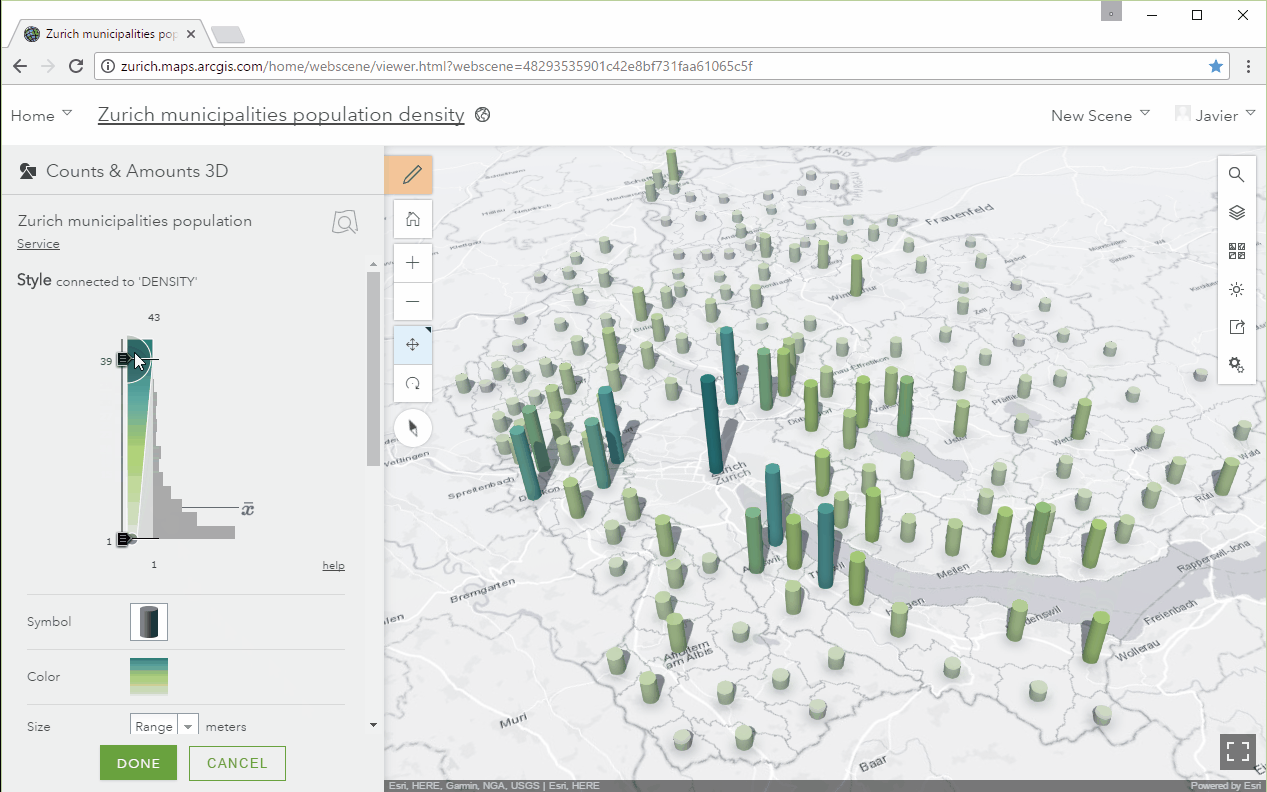
Scene Viewer in ArcGIS Enterprise 10.5.1 now allows you to symbolize 3D geometry with the concept of “tall” symbols. We call them “tall” symbols because the attribute you choose to visualize the point style will drive the height of the symbol, while keeping a constant width and depth. You can choose between “tall cylinder”, “tall cone” and “tall cube” symbols and they are very well suited for thematically displaying attribute data.
Another enhancement we’ve added with point styles is that you can choose the size units when entering a symbol size.
Label Support
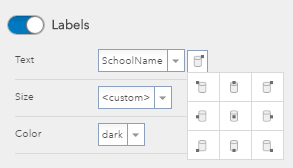
We’re also excited to present a powerful addition to the 2D and 3D point layer styles: You can now configure your labels in your scene. Choose the attribute to use for your labels as well as nine placement positions, which work both with 2D and 3D symbols.
You can also configure label properties like size and color. It is important to note that the labels are automatically deconflicted in 3D space, so that they don’t overlap.
New Layers Supported in the Scene Viewer
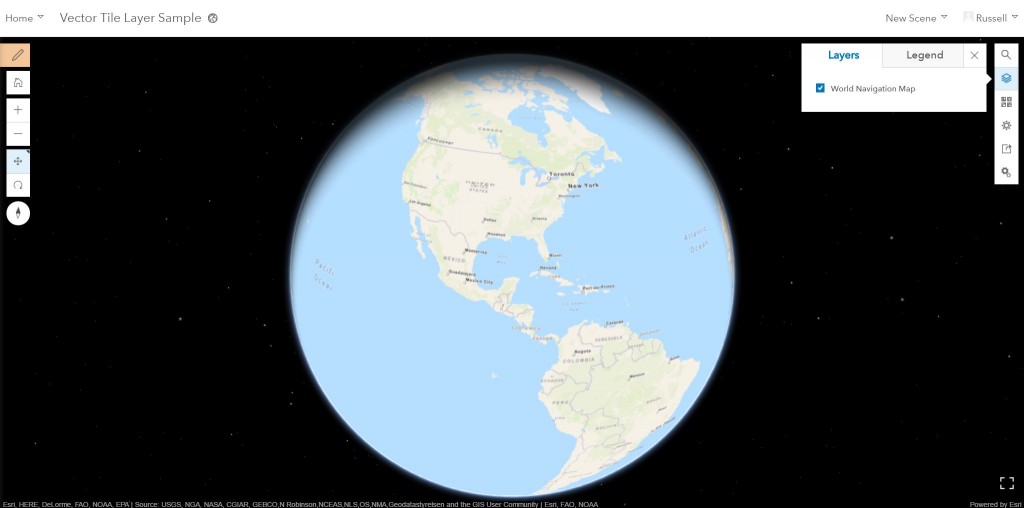
In Scene Viewer, we’ve added support for many new layer types that can be accessed in ArcGIS Enterprise. We added support for Scene Viewer now supports vector tile layers, point cloud scene layers and, dynamic renderers on map image services, and OGC Web Map Tile Service (WMTS) layers.
Vector Tile Layer
A vector tile layer references a set of web-accessible vector tiles and the corresponding style for how those tiles should be drawn. Vector tiles are similar to image tiles, but they store a vector representation of the data. The combination of tile access performance and vector drawing allows the tiles to adapt to any resolution of the display, which may vary across devices. You can use the vector tile layer as an operational layer or as a basemap. It also works with the elevation layer in the web scene. You can update a style file that can change the appearance of the vector tile layer to suit your requirements or you can use ArcGIS Pro to create a vector tile package and publish your own vector tiles to ArcGIS Online and leverage them in Scene Viewer. Check out this web scene with an esri vector tile layer as an operational layer.
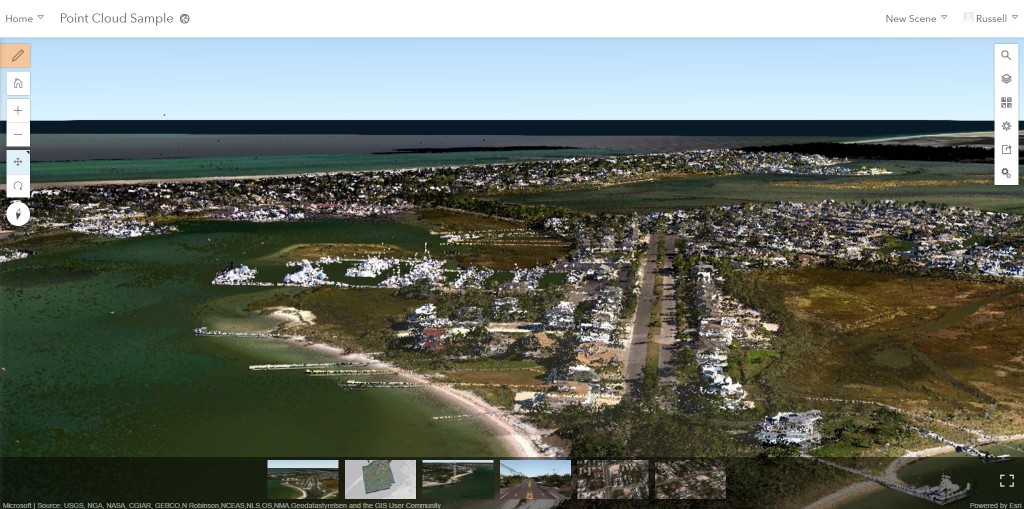
Point Cloud Scene Layer
This release has also brought support for a new scene layer type, point cloud scene layers. Point cloud scene layers allow for fast consumption and display of large volumes of point cloud data in Scene Viewer and ArcGIS Pro. You can configure these layers in ArcGIS Pro and publish them to ArcGIS Enterprise. Depending on the configuration, when you view point cloud scene layers in the scene viewer they can appear different based on the symbology renderer type used. The scene viewer supports the following renderer types:
- Stretch
- Classify
- Unique Values
- RGB
Check out this sample of a point cloud scene layer in a web scene. The point cloud layer was published from a scene layer package that was just under 8 gigs and contains 1.1 billion points, the data was provided by NOAA.
Map Image Layer
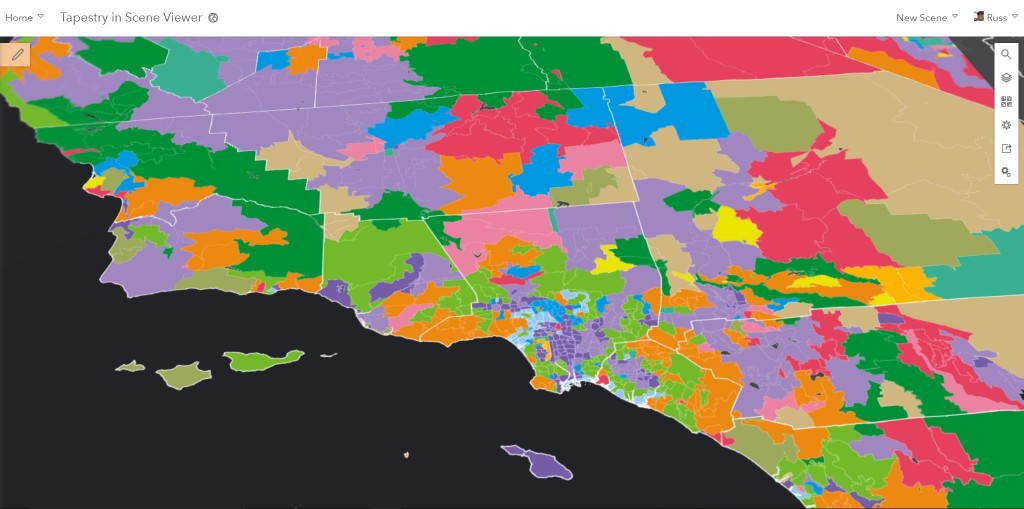
Scene Viewer has expanded support for map image layers by now supporting dynamic rendering on map image layers. The map image layer will create images on the fly as they are requested. Before this release you would see the default renderer set on the server but now Scene Viewer will support what is set on the map image item. This requires that the map image layer has a dynamic renderer enabled on the ArcGIS Server map service. Many of our demographic living atlas layers use this feature on map services to drive the appearance of the layer. The tapestry layer below provided by Esri Demographics is a great example showing this new support.
WMTS layer
You can now add WMTS layers into Scene Viewer by clicking the “Open in Scene Viewer” option displayed with the item. You can also search for the item in Scene Viewer which will add the item from your Organization. Currently custom parameters are not supported at this release.
Additional Scene Viewer Enhancements
Improved Animation
When you create slides in a web scene, search for a location, or zoom to a layer in Scene Viewer, the animation has been improved as you move from the current view in the scene to the next location.
Touch Navigation
Another great feature we’ve added to Scene Viewer is full touch navigation. With on touch screen laptops and monitors you can pan, zoom, rotate and tilt the scene with simple touch gestures. You can zoom by pinching with two fingers and pan using one or multiple fingers. You can also double-tap the scene to zoom in a step towards the tapped location. To rotate the scene, move two fingers in a clockwise or counterclockwise direction. In 3D you can tilt the scene by dragging two fingers up or down the screen.
Please add your comments on our latest features below. We’d love to hear from you.


Commenting is not enabled for this article.