This post was contributed by Cyrus Maden. Cyrus is a Product Engineer intern on the Geoprocessing and Analysis development team at Esri.
In ArcGIS Pro 2.0 a number of geoprocessing tools have been enhanced so you can create new input features on the fly. Let’s work through an analysis of graffiti abatement in New York City to show this new capability.
First, let’s set the scene: You work for the New York City Economic Development Corporation (NYCEDC) as a planner. Two of your (many) jobs are to manage 311 data and coordinate graffiti cleanups. Today you received four new complaints of graffiti vandalism in Queens and your team springs into action. This is the existing graffiti dataset from NYC OpenData:

You can leverage interactive feature inputs to quickly add the new graffiti locations to your map and streamline your geoprocessing workflows. Depending on the geoprocessing tool you use, you can draw points, lines, polygons, or 3D multipatches interactively on your map or scene, and immediately use these new features as input to the tool.
For this scenario we will use the Summarize Nearby tool to identify existing graffiti near the new complaints. Since the crew will already be in the area, they can clean up this nearby graffiti too. The mayor will be over the moon.
Open the Summarize Nearby tool, and click on the pencil icon to open a menu of feature types. We want to add new point locations to the map, so select Points.
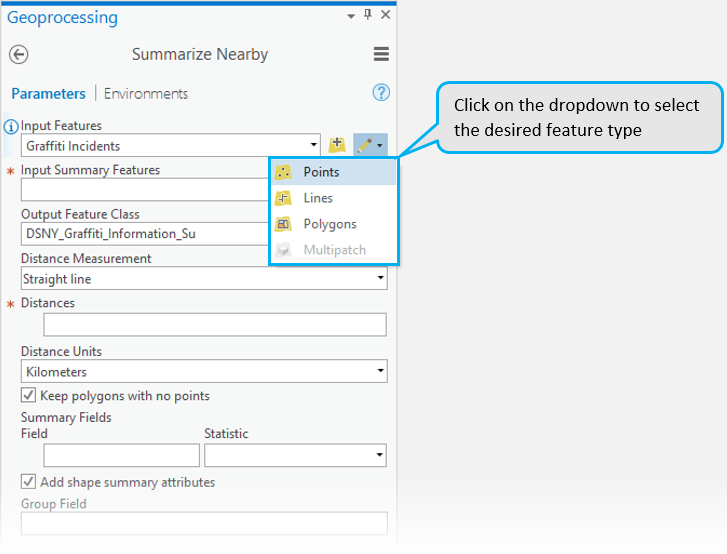
After selecting Points, a new, empty feature class is created in your project geodatabase, and a new point layer is added to the map.
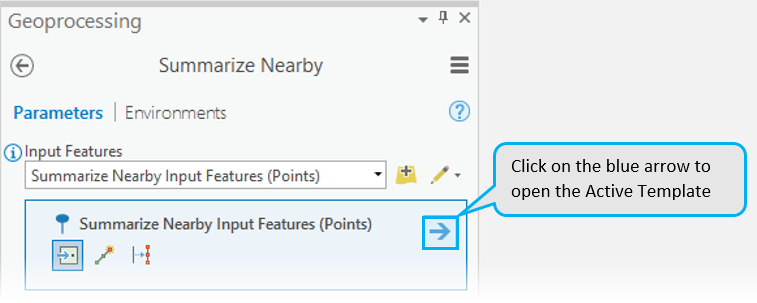
Using the point creation tools embedded in the geoprocessing tool you can create simple point features, a point at the end of a line, or points along a line. The default tool that creates a simple point feature is already selected, and it’s the right tool for the job. You could start drawing points on the map immediately, or click the blue arrow below the pencil to view and modify the active feature template. You can use the feature template to enter the attributes of each new feature.
Add attributes for the point you are about to create:
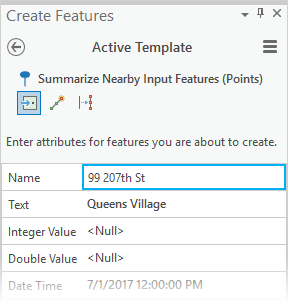
Click on the map to create a new point feature. Each point is the location of a new instance of graffiti. Before adding each new point, update the Active Template with the new address. Alternatively, you can add new points on the map, then enter their attributes using the layer’s attribute table. These edits are automatically saved to the feature class in your project geodatabase, and the layer is just like any other feature layer so it can be used in a variety of ways.
You can also add points interactively based on a geocoded address. For example, one location of graffiti only includes the store name “Hollis Deli”, not other information like an address or street intersection. Using the Locate pane, search for the name “Hollis Deli”. Then right-click the result “Hollis Deli Grocery, 206-02 Hollis Ave, Queens Village, NY, 11429, USA” and select Add To Feature Class. This address point is added to your new interactive layer, near the other new graffiti locations.
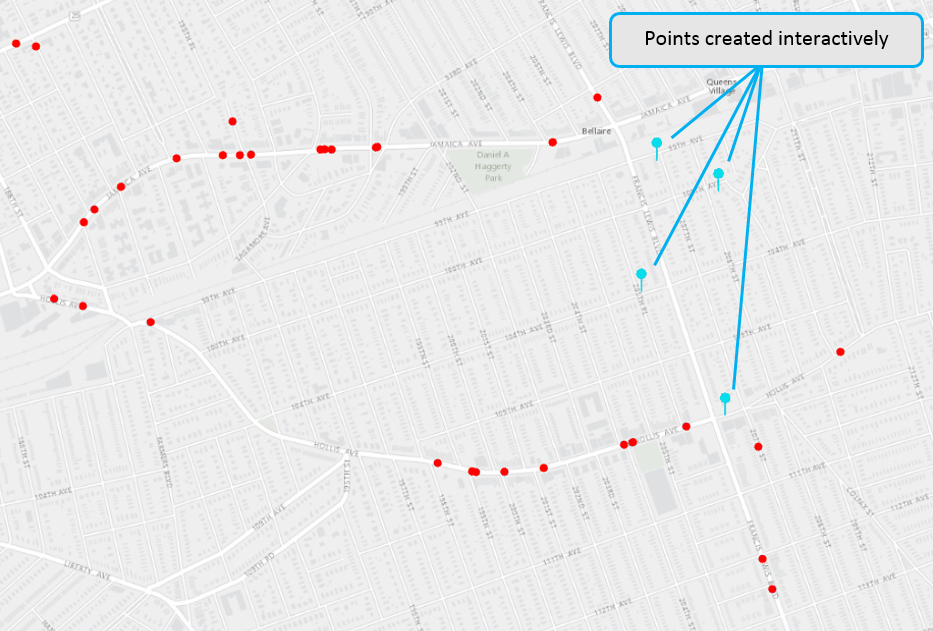
The last feature you draw in the map is selected by default, and since geoprocessing tools automatically use only selected features you should clear the selection after you’re finished adding points to the layer.
Now run the tool to find out how much graffiti is within a 1-mile buffer of the new points. If a lot of graffiti appears in this area, you may want to consider an alternative graffiti abatement approach. Why send out your crew to remove graffiti if it’s just going to reappear tomorrow?
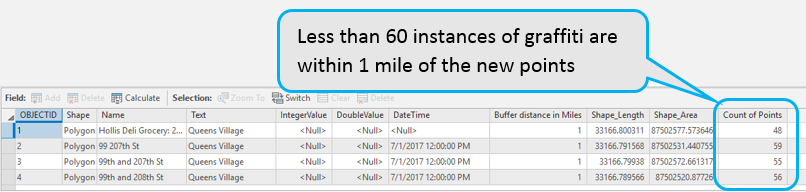
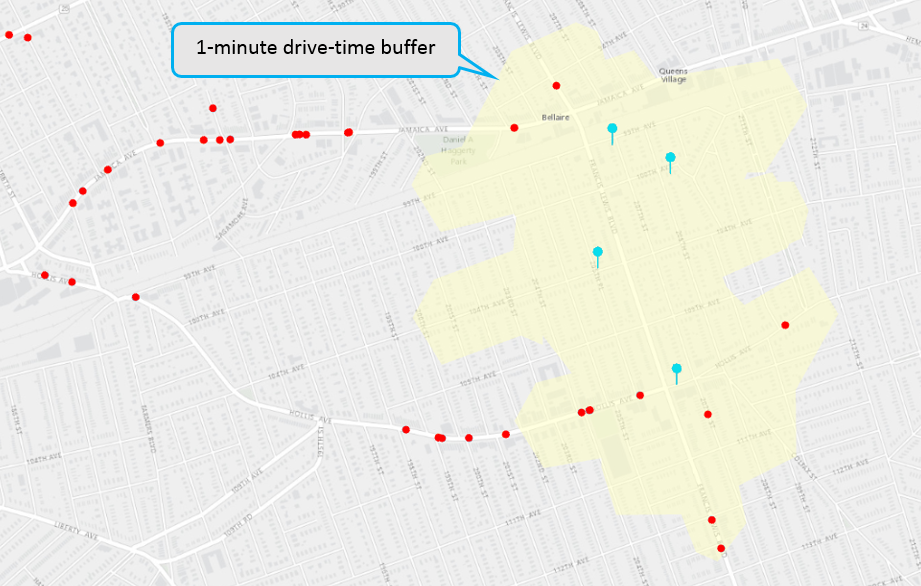
It looks like there isn’t much graffiti here relative to Queens’ dense population. Time to send out the crew. But first, let’s see if the crew can remove some additional vandalism while they’re out. Run the Summarize Nearby tool again with a 1-minute drive time to see where graffiti exists within a short drive of the new vandalism.
In total, there are 12 instances of graffiti within a 1-minute drive of the new points. (Some points overlap in the map below.) 6 of the 12 instances have yet to be resolved, so you can send your crew to go check them out.
Now you know how to simplify your geoprocessing workflows with interactive feature inputs. For more information, explore the help documentation here. And see a recent blog post “Using interactive features with Spatial Analyst tools” to review more workflows that leverage interactive input. The possibilities are endless.

Article Discussion: