The ArcGIS API for Python, or Python API, as it’s also known, has now incorporated the latest version of ArcGIS StoryMaps. Using version 2.0.1 of the Python API, you can leverage classes and methods to create, edit, and update your ArcGIS stories. Let’s explore an example of how to use this module in a Notebook to make edits to a story.
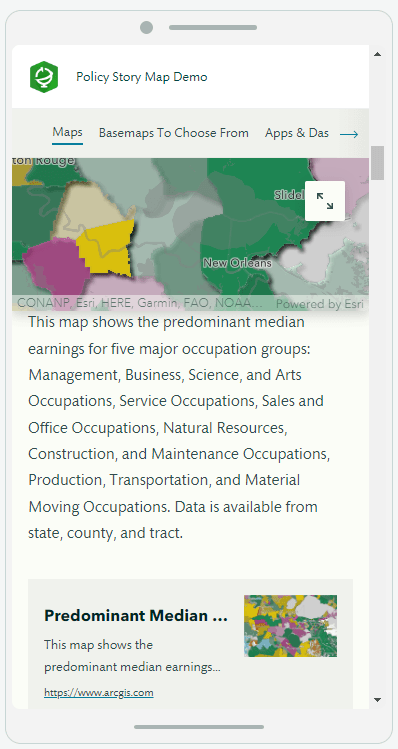
In this example, a pre-existing story contains multiple components, or nodes. One of these nodes is a sidecar where each slide has a different map along with text and a link to each of the map items in the portal. This story is primarily seen on mobile devices and these maps are not shown in an optimal way. Since a link is provided for each map, the user would like to switch out the displayed web maps for images of the maps. Viewers can navigate to the maps through the link and have an optimal viewing experience of the story.
If you are familiar with the StoryMaps builder, you know this can be done directly in the editor and using the portal. However, this requires multiple actions that will have to be repeated for each map. The user will have to navigate to each map, find the extent they want to capture, and take a screenshot, or find another way to turn the map into an image. With these new map images, they will go back to the sidecar, remove the maps from each slide one by one, and then add the images one by one. There is not yet an option in the StoryMaps builder to switch out different media types in slides. You can only replace an image with an image or a map with a map. Replacing a map with an image requires deleting each map and replacing it with the chosen image.
This is doable but time consuming. Instead, let’s explore how these steps can be achieved through the Python API using ArcGIS Notebooks. The repeatable process means we can use loop logic to go through each slide and make similar edits each time.
The first step is to import the necessary libraries into our Notebook and connect to our Web GIS. We connect using a profile, which in this case is our ArcGIS Online profile where our story resides. The StoryMaps module can be accessed by importing arcgis.apps.storymap and importing the components we will be working with. In this case we will need to create a StoryMap and Images so we import these two components.
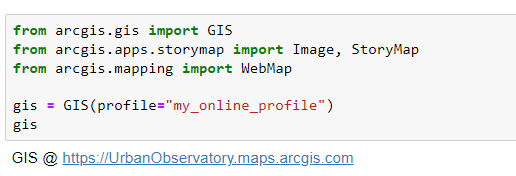
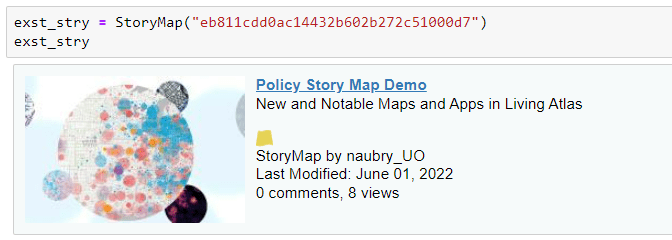
Next, we can initialize an instance of StoryMap with our existing story simply by passing in the StoryMap’s ID which is the same as it’s item ID, found in the URL.
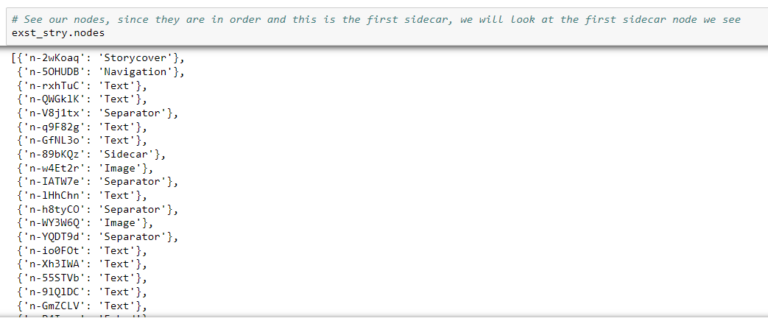
The Python API StoryMap module treats each component of a story as a separate class instance, except for separator, and these are called nodes. This allows the components to be manipulated individually and their properties extracted through the API. As seen in the image below, this story is dense in content so it contains many nodes.
Since we are familiar with the structure of our story, we know we are searching for the first instance of sidecar. By looking at the list of nodes, we see that the ID associated with our sidecar is ‘n-89bKQz’. This unique identifier will allow us to get the sidecar component and manipulate it further.
By using the get method in the StoryMap class, we can get an individual component of a story by type or ID. If we do it by type, a list of nodes that correspond to this type is returned. We already know the ID of the node we want to edit, so we will get it using this ID.
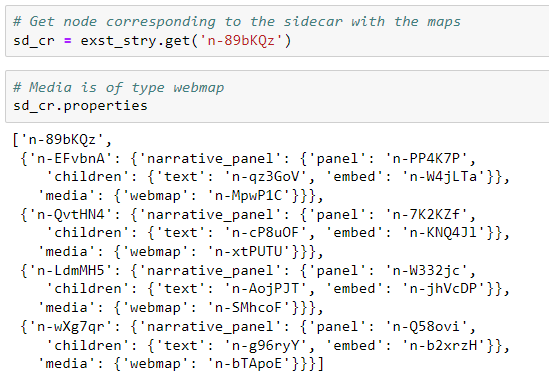
We assign the result of the get method to a variable, ‘sc’, and this becomes our instance of sidecar. To view the sidecar properties, we can call the properties property on our instance. This will return the structure of the sidecar, depicting each slide and its contents along with the unique ID associated with the contents.
We can see that each slide contains a ‘webmap’ as media. These are the maps we will be focusing on changing into images.
Here we arrive at the core algorithm we are creating to avoid all the steps that would be required if the user were to make the changes through the editor.
There are three things to take into account to construct this algorithm:
- All of the media in the sidecar are web maps. We saw this in the properties and we know we will be extracting web maps in each case.
- Our goal is to replace each map with a screenshot of the map at a specific, pre-defined extent.
- The web map’s resource node in the story is always stored under the same form of “r-<map item id>”, so we can slice the string to extract the map’s item ID and get the WebMap Item.
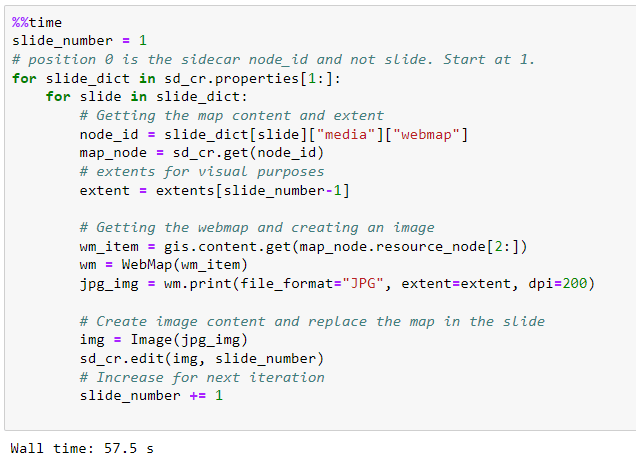
We create two for loops to access the map’s ID. The first for loop allows us to get the slide’s dictionary and the second for loop allows us to get the media’s dictionary. In the media dictionary, we have the WebMap key, and the value is the node ID for each map.
Using this node ID, we can get the Map component and get it’s properties dictionary, which is where the reference ID is found. One of the three things we know ahead of time is the structure of the reference ID, which allows us to slice the string and get the WebMap Item’s ID.
The Python API can be used to manipulate existing web map items, and we demonstrate this here by using the WebMap class along with the WebMap Item’s ID that we found. By calling the WebMap class and passing in the item ID, we create an instance of the web map we can manipulate and work with. This allows us to use the print method found in the WebMap class. The method will take a picture of the map at a specified extent and return the path to the image.
We create an instance of an Image component for our story and use the edit method on our sidecar instance to edit the desired slide. This is where the magic of changing the web map to an image occurs for each slide. We then increase the slide number and start over for the next slide.

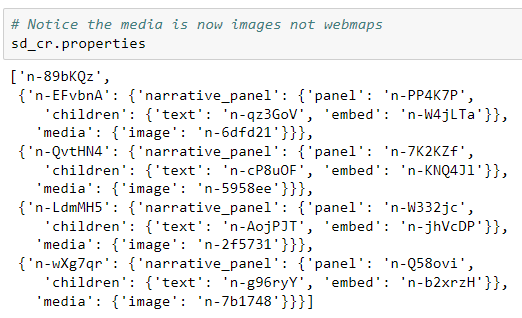
Once the process is complete we can see the sidecar properties again and we notice that the algorithm was successful, since the media dictionary now holds ‘image’ rather than ‘webmap’.
The final step is to save our story so that the changes are reflected in the preview. If you do not call the save method after the changes, the story will not change in your Web GIS.
We will assign it a new name as well to reflect that this is the story with the updates.
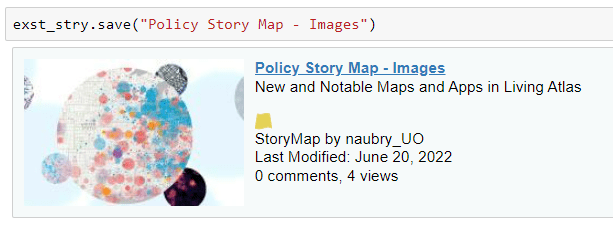
Now when we look at our story preview we see that the maps have been changed to images, and this allows for a better user experience when scrolling through the story on a mobile device.
We have now edited and updated our story using the Python API. The code required examining our story structure and understanding the properties of various components. Once we understood what was needed, we built our notebook, and we can now reapply this to various stories by changing the story ID and the sidecar node IDin the get method.
Having this module integrated in the Python API allows you to create scripts that can be applied to various stories and reused for common edit use cases. The team can’t wait to see what you do!
Article Discussion: