This blog post was contributed by Artemis Fili, a Technical Lead (SDK Team) in Technical Support Services at the Esri Redlands, CA office.
Esri Technical Support likes to use Web AppBuilder for ArcGIS to create powerful web applications. Web AppBuilder Developer Edition v2.4 supports a Report class that enables you to print a file with a map, tables, and other supporting elements.
I’d like to share how you can extend the Report class to create your own custom widget that can be used in Web AppBuilder Developer Edition. This blog will present the basic steps of this workflow.
Note: To develop a custom widget for Web AppBuilder, sufficient knowledge and experience using JavaScript and HTML is recommended, as well as a level of familiarity with the ArcGIS API for JavaScript and the Esri samples. To get more information about customizing Web AppBuilder please review the Web AppBuilder Developer Edition Guide. The Customization Resource List is another great resource.
Enabling a custom widget:
To create a new custom widget with the Report class, the easiest way to get started is to use the Demo widget which can be found in the clientstemappwidgetssamplewidgets subfolder of the Web AppBuilder Developer Edition install directory. Let’s go through the detailed steps:
- Copy the Demo folder that can be found in the clientstemappwidgetssamplewidgets subfolder of the Web AppBuilder directory as shown below:
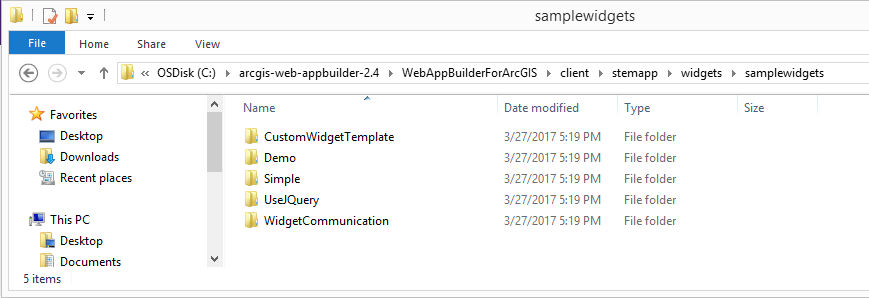
- Paste it in clientstemappwidgets and rename it to something like “Report”.
- Go to the Report widget folder, open the manifest.json file and change the following:
- Change the name property to “Report”.
- Change any other properties as you wish (e.g. author, description).
- The featureActions array can be removed, as we will not be using it in this example.
- Add the properties attribute and include the “hasConfig”:false. (For the purposes of this blog, we will not make the widget configurable in order to keep it simple).
- Save the manifest.json file.
It should look like this:

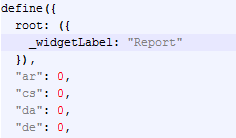
- Next go to the nls subfolder and open the strings.js file.
- Change the _widgetLabel to “Report”. Making this change will enable the widget to have this name when we select it in the Builder environment. Then remove the rest of the attributes in the root object and save the file.
Your code should look like this:
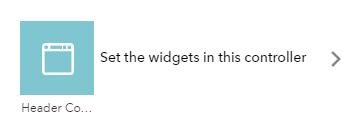
Once the changes above are applied, the widget will be deployed in the Builder environment and we should be able to choose it from the list of widgets. In order to test, we can create a new app in Web AppBuilder. Our widget is an in-panel widget, so on the Widget tab, we’ll need to select it within the Header Controller widget to select it as shown below:
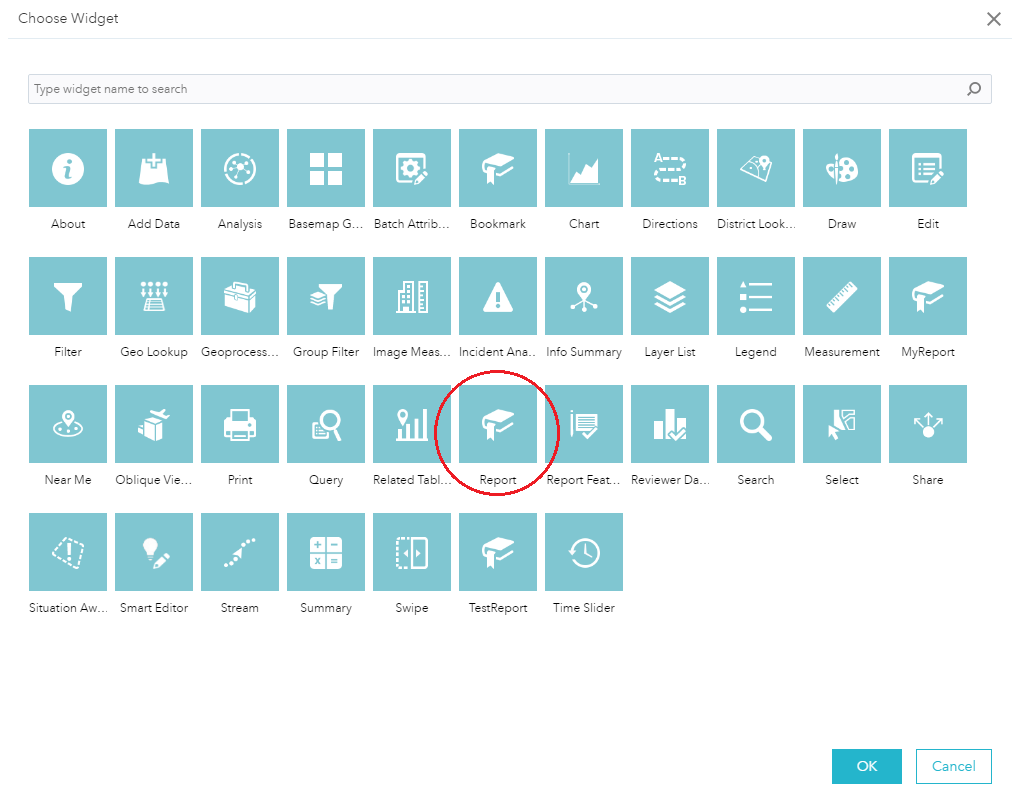
When we try to add a new widget, we’ll see a list of widgets to choose from. This list includes our new Report widget:
The widget will be deployed to our app once we select it and click OK. Just don’t forget to save the app!
Adding code for the custom widget:
Now that we’ve gone through the steps of deploying a new widget with a custom name, the next step is to change its underlying code to incorporate the functionality for the Report class.
Let’s return to our Web AppBuilder Developer Edition install folder. Since the widget is already deployed in the app, we can continue working on the app’s folder directly so that we don’t have to re-deploy the widget every time we want to test our changes. In order to find the widget in the app folder, navigate to serverappsIDwidgets and you will see a subfolder with the name “Report”.
- Open the widget.js file in this subfolder. Change the baseClass property in order to match our folder’s name, so it will be baseClass: ‘jimu-widget-report’.
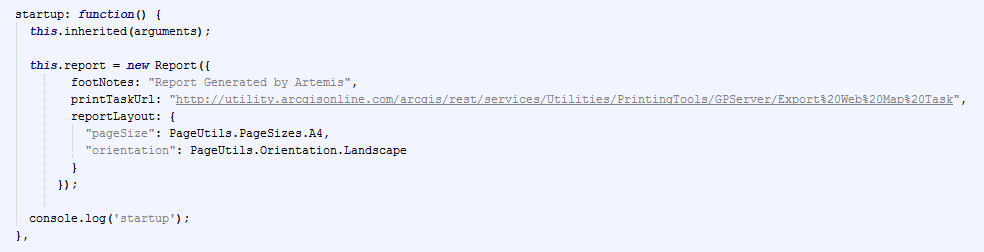
- Next, we need to include the Report and PageUtils modules in the require statement. Our define statement should look as follows:

- Now examine the code. There are a set of standard widget event handlers defined here that you can start plugging code into, to see how things work. We will use the startup function in order to initialize our report. Delete the existing code and add the following code:
- At this point we have used the Report class to create a new Report, but we are missing the UI for the widget. Our widget needs to have a button that the end user will click in order to generate the report. Let’s go to the widget.html file to see how we can add it. Delete all the content in this file and then simply add the following code:

- The above code will create a button with name btnPrint. When this button is clicked, the _onBtnPrintClicked function will be called. What? Are we missing something? That’s right, we need to go back to the widget.js file and define this function. The code for that looks like this:
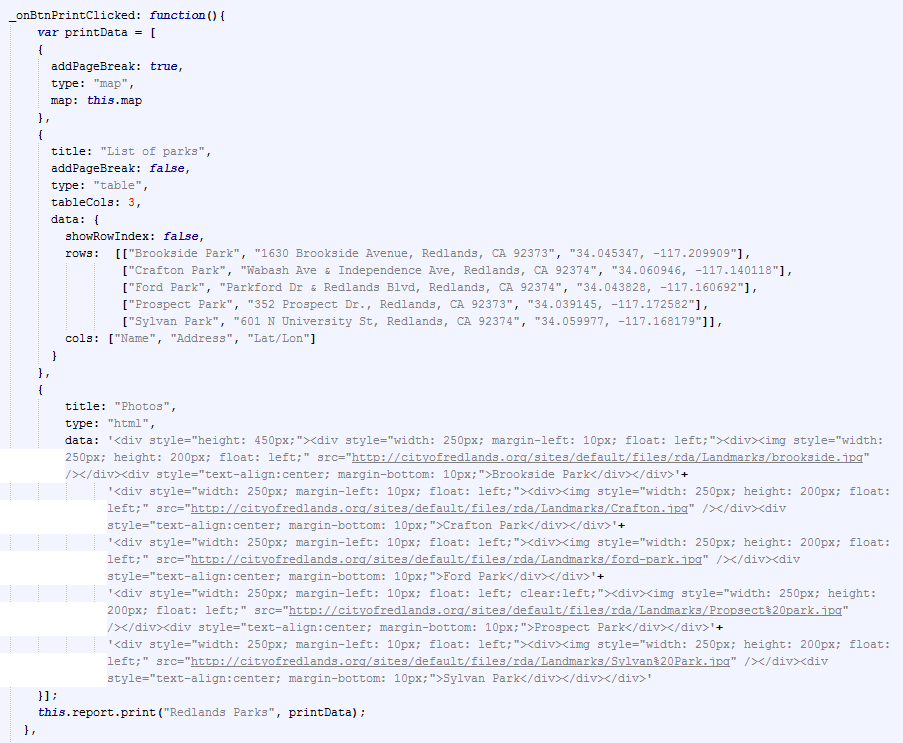
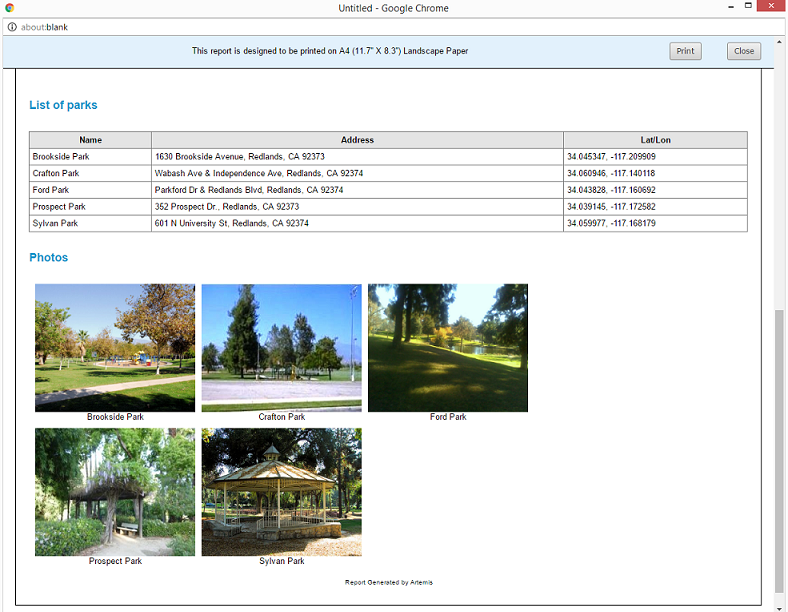
Let’s take a step back to explain how this code works. This code will create the data that we want to view in the report. It consists of three parts: map, table, and HTML. The map part will inherit the same map that is used by the app. The table is basically a list of information that we want to show. In this case, I am showing a list of the parks in Redlands, CA. The last part will display some photos of these parks using HTML.
- Before we test our custom widget, let’s do one last thing. Currently the “Generate Report” button text is hard-coded in the widget.html. If we want to internationalize the UI, we should isolate this string in a separate language-specific resource file. By default, the strings.js in the nls folder is the file for the English language. Depending on the language of the localized string, we need to use the appropriate subfolder in the nls folder.

Once we update the string.js file, we can then change the widget.html in order to reference this string as shown below:

We should be good to go. Let’s run the app and use our cool new custom Report widget!
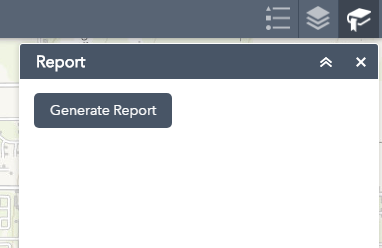
Once you click the button, you will see the report page. The figure below shows how the map appears in the report.
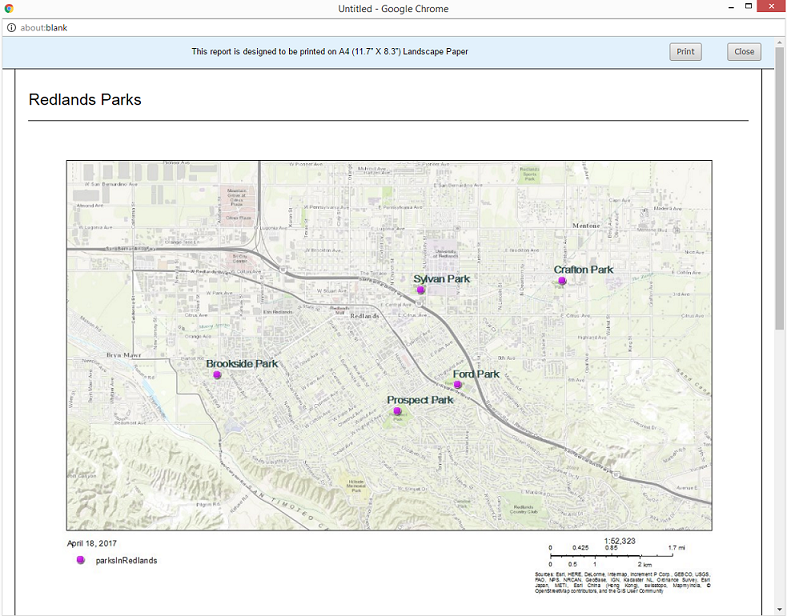
And once we scroll down, we see the table along with the HTML.
Now it’s time to create your own custom report. Happy coding!
Note2: A document containing all the code samples discussed in this blog is available here.

Commenting is not enabled for this article.