In many ArcGIS applications, you can measure distances and areas by sketching lines and polygons on a map. This kind of measurement is called interactive measurement. While most measurements take place on 2D maps, in ArcGIS Earth you can take 3D measurements that account for elevation and depth.
3D interactive measurements are useful for any workflow that deals with terrain. In this article, you’ll use 3D interactive measurement tools in ArcGIS Earth to sketch and plan a hiking path near Bright Angel Trail in Grand Canyon National Park. You’ll also create and share an elevation profile to visualize 3D terrain as a 2D profile.
This workflow requires ArcGIS Earth 1.8 or later (which you can download for free at the bottom of the ArcGIS Earth product page) and a Publisher or Administrator role in an ArcGIS organization (which you can get with a free 21-day ArcGIS trial).
This workflow was last tested on January 6, 2022, using ArcGIS Earth 1.14.
Step 1: Measure distance in 3D
First, you’ll measure the distance in 3D between the planned start and end-point of the hiking trail. Your measurements will be based on ArcGIS Earth’s default elevation surface.
1. Open ArcGIS Earth and sign in to your ArcGIS organizational account.
For a more realistic view of the terrain, you’ll change the basemap to Imagery. You’ll also confirm the default Terrain3D elevation service is enabled.
2. On the toolbar, click Basemap and Terrain.

3. If necessary, on the Basemap tab, choose Imagery.
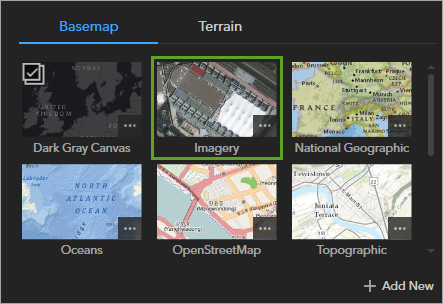
4. On the Terrain tab, confirm that Terrain3D is active.

5. Click the Search button.

6. Search for Bright Angel Trail Grand Canyon and choose the result Bright Angel Trail-Grand Canyon, Grand Canyon, AZ, 86023, USA.
The scene navigates to the trailhead, just south of the canyon.
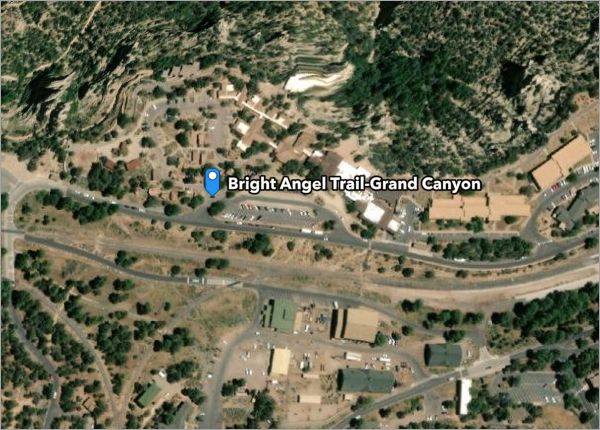
The planned trail will begin at the existing trailhead and travel into the Grand Canyon. You’ll save the trailhead marker as a layer in case you need to refer to it again.
7. Click the search result marker to select it. Right-click the marker and choose Save as.
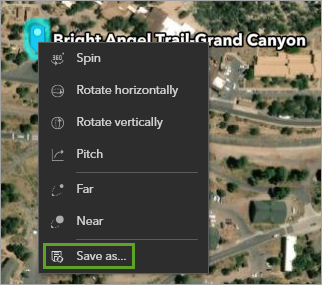
The layer is added to the table of contents. (You can open the table of contents by clicking the Expand Table of Contents button on the toolbar.) A pane also appears with options for the new layer’s name, coordinates, and appearance. The default parameters are fine.
8. Close the pane.
Next, you’ll make a rough measurement of the trail.
9. On the toolbar, click the Measure button. In the measuring pane, click the 3D measure button.
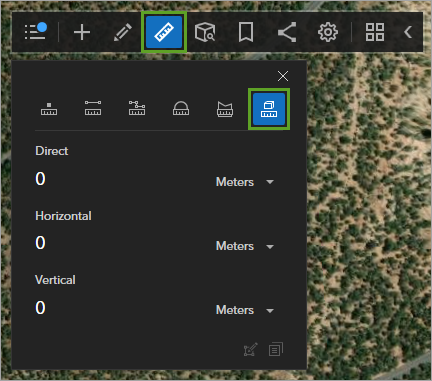
10. In the measuring pane, change the unit of measurement from Meters to Miles (or the unit of measurement with which you’re most familiar). If necessary, drag the measuring pane out of the way.
11. Click the trailhead to begin measuring.
12. Navigate to the base of the canyon (or wherever you think would be a good place for the trail to end). Drag the map to pan, hold the right mouse button to tilt, and scroll the wheel button to zoom in and out. Click the spot you would like to make the end of the trail.
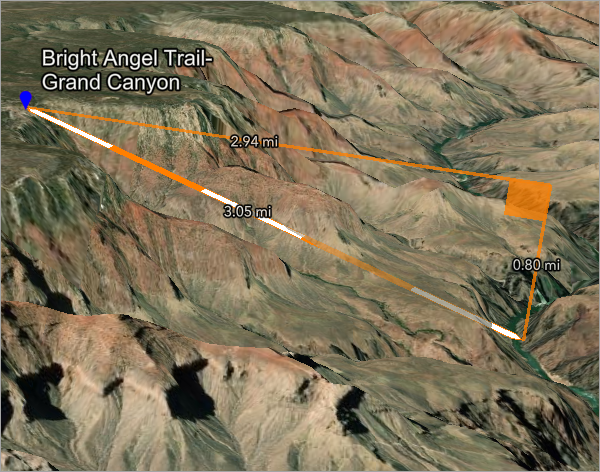
The measurement includes a horizontal, vertical, and direct measurement. The trail in the example image goes 2.94 miles horizontally and 0.80 miles vertically, for a direct distance of 3.05 miles. (The three measurements also appear in the measuring pane.)
13. Close the measuring pane.
Step 2: Create an elevation profile
While your 3D measurement gave a good idea of the distance from the trailhead to the trail’s end, it doesn’t account for the trail’s terrain. Elevation changes in the Grand Canyon are not uniform. Sometimes they are steep and sometimes almost flat. Additionally, the trail will likely wind left and right, rather than proceeding in a straight line.
To account for terrain, you’ll create an elevation profile. An elevation profile is a graph that shows elevation changes along a line. You’ll sketch a hiking trail and create the elevation profile based on your sketch.
1. On the toolbar, click Interactive analysis and choose Elevation Profile.
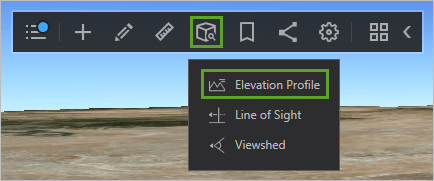
The Elevation Profile window appears and prompts you to click the scene to start your sketch.
2. If necessary, navigate back to the trailhead. Click the trailhead.
Unlike with the 3D measure tool, you can sketch a line with multiple nodes, instead of only a start and end point. You can make use of the functionality to draw a line that follows the contours of the canyon the way a real trail would.
3. Navigating as necessary, click the canyon at each point where you think the trail would change direction. When you reach the same endpoint you chose for your previous measurement, double-click to finish the sketch.

The Elevation Profile window populates with the elevation at every part of the trail.
4. Point to any location on the elevation profile to highlight it on the map and show its elevation and distance from the trailhead in meters. If you want to lock the highlighted area, press the spacebar.
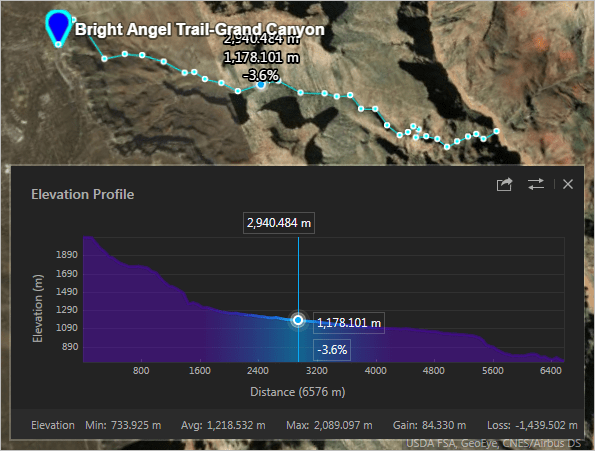
5. Double-click a point on the elevation profile to automatically navigate to the corresponding location on the trail.
The elevation profile provides not only the exact distance of your proposed trail, but also shows its steepness. Based on it, planners can determine the trail’s difficulty or adjust the route as needed.
You’ll export the elevation profile as an image so you can share it. When you save the elevation profile, the selected point will also be saved.
6. In the Elevation Profile window, click Export image.
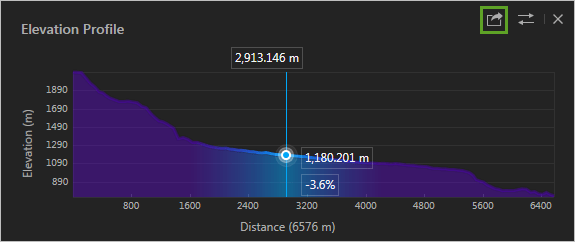
7. In the Save As window, save the image in a location of your choice with a name of your choice.
8. Close the Elevation Profile window.
The sketched line is removed from the map. You can also create elevation profiles from existing line features. For instance, you may want to create a permanent sketch of the proposed trail that you can edit after viewing the elevation profile.
9. On the toolbar, click Draw and choose Line.

The drawing pane appears.
10. Click the trailhead to start drawing. Draw a line that represents a trail similar to your previous sketch and double-click when finished.
11. In the drawing pane, for Name, type Hiking Trail. Close the drawing pane.
The new line is added to the table of contents.
12. If necessary, on the toolbar, click Expand Table of Contents. Right-click Hiking Trail and choose Elevation Profile.
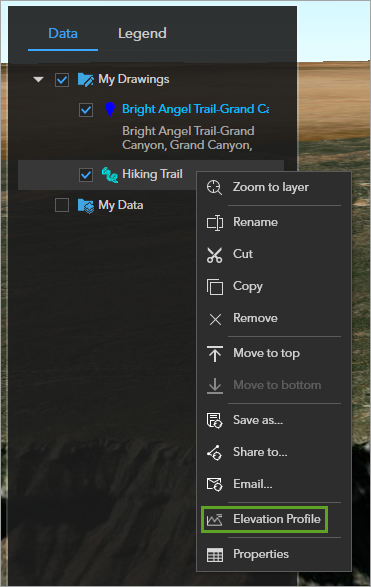
An elevation profile is created for the line. If you want to edit the line’s vertices, right-click the layer name in the table of contents and choose Properties. If you want to save the sketched line, right-click the layer name and choose Save as.
In this article, you learned how to measure 3D distances and determine elevation changes across a line. You can apply what you learned to any workflow involving terrain or elevation.
You can find more articles and lessons in the Learn ArcGIS Lesson Gallery.

Commenting is not enabled for this article.