ArcGIS Mission provides robust, integrated command and control capabilities for field operations. To help you fully leverage its powerful capabilities, we’ve compiled a set of best practices for configuring missions, dashboards, and mobile user participation. Proper configuration will ensure smooth and efficient operations in both command centers and the field.
These practices are based on real-world experiences and lessons learned from actual deployments of ArcGIS Mission. We believe implementing them will help maximize the effectiveness and the impact of its capabilities for any scenario.
Admin Settings
Before notifying your organization that ArcGIS Mission is ready, check these key Admin Settings in Mission Manager as the Portal Administrator.
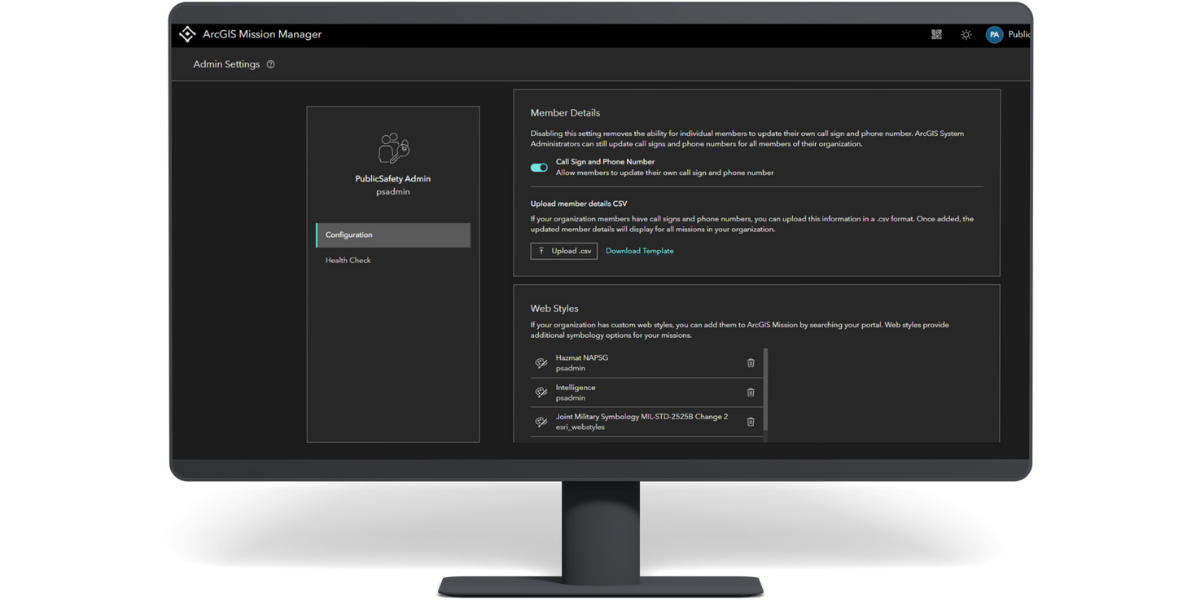
- Call Sign and Phone Number: Toggle on to allow mission members to update their own information in Mission Manager.
- Web Styles: Add any custom Web Styles your organization uses, like US Military or NAPSG symbology, for additional symbology options in your missions.
- Health Check: Execute the Perform Check and Test Connection functions. Repeat after upgrades or any other changes to the ArcGIS Enterprise environment, or during any troubleshooting which indicates connectivity issues between Mission Manager and other Mission components.
Mission Manager Best Practices
Mission Manager is the foundation for setting up a clear, effective operation environment.
- Watch Esri’s “Mission Shorts”: Get acquainted or refreshed on Mission Manager functions through these short video vignettes.
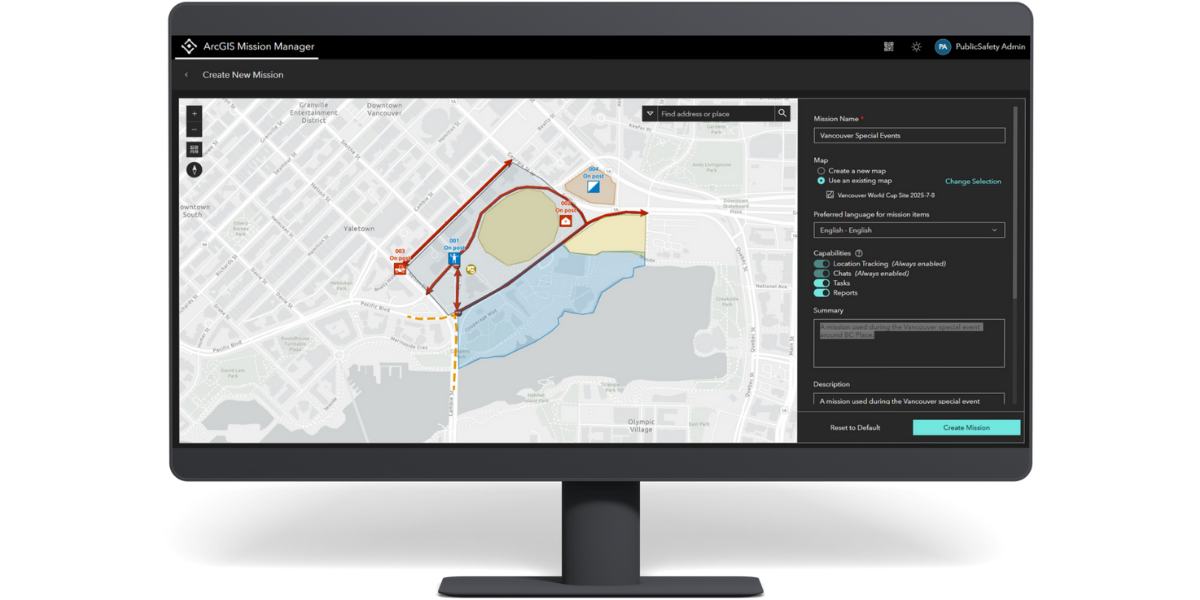
- Use a preconfigured web map when wanting to accelerate mission creation: Create new missions from a web map that already includes the basic information for your area of operations. Further, consider how Managing Event Safety with the Special Event Solution can accelerate mission creation.
- Keep missions lean: Add only necessary capabilities (Tasks and Reports), people, map layers, and non-spatial data to keep operations efficient.
- Ensure Mission layers are highest in the map drawing order: Keep mission member locations, chats, tasks, and reports unobscured.
- Turn off additional layers for map clarity: Simplify the default map view by turning off additional layers. This provides mission members with the option to toggle on additional rich GIS content relevant to the operation.
- Turn on Last Known Locations (LKL) labels: Display the callsign field, or another field with unique user text, above mission member LKL symbols. Consider adding a second label beneath the first label for the battery percentage field.
- Keep callsigns short to reduce clutter: Limit callsign text length as agency conventions permit.
- Save Bookmarks for key operational areas: Make it easy for mission members to locate specific geography relevant to your operational plan.
- Configure Task symbology to convey status, priority, or type: Visualize Task updates as they occur, if desired over the default static Task symbology.
- Use the Materials section: Upload critical non-spatial information for mission members to reference. Pictures, PDF files, and MS Office documents are supported.
- Integrate with other ArcGIS mobile apps: Add Survey123 forms or QuickCapture projects to the Materials section to provide all mission members with additional mobile capture capabilities.
- Set a distinctive thumbnail for each mission: Help users quickly identify which missions to access in the application.
- Create an “All Members” team: Enable a whole-mission group chat to supplement the one-way Broadcast capability.
- Cache stale chats, tasks, and reports: Keep the map clear and focused on current operations. Turn on the full mission history to find and cache older items.
- Apply the Mission Status setting to clarify the current operational phase: Mark a mission Draft when building the plan, Active to enable mission member participation, and Complete to cease participation and force all mission members to exit. This flexibility manages when users can interact with the mission and its data, enhancing privacy and control throughout the mission lifecycle.
- Save the organization time by sharing mission templates: Share mission and report templates with your organization. This enables all Mission Manager users to use these templates, streamlining the creation and management of similar field operations.
- Deploy sandbox missions for training: Create practice missions in advance then mark them complete so users start fresh in the real mission the day of the operation.
Mission Dashboard Best Practices
Tailor the Mission Dashboard to display key performance indicators relevant for the executives, managers, supervisors, or other command staff overseeing and monitoring the operation.
- Provide options for Responder visibility: Create a filter to show only connected Responders on the map and in the Last Known Locations (LKL) widget. Configure Responder symbology in a separate view of the mission’s LKL point layer to visualize Responders by unique attributes if desired.
- Highlight key performance indicators for the operation: Configure Report, Task, and feature symbology and associated widgets to reflect operational priorities.
- Use Arcade for smarter Mission widgets: Copy sample Arcade expressions in the blog Extend your Mission with ArcGIS Dashboards and Arcade into the Mission widgets for advanced functionality and visualization.
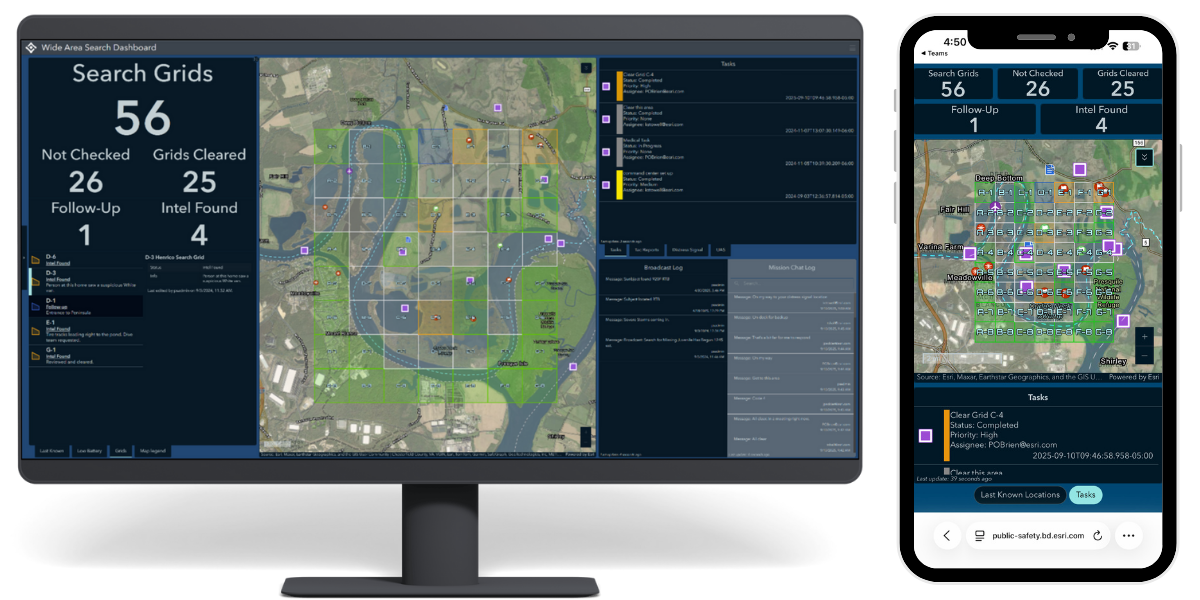
- Optimize mission dashboards for access on the go: Configure a mobile view of the Mission Dashboard. This enables leaders to maintain full operational oversight, whether they are in the field or on their mobile device
Consider the below demonstration examples with select key performance indicators highlighted and Task status symbolized with colored bars reflecting priority.
Mission Responder Best Practices
Field users should be comfortable with the Mission Responder mobile application.
- Train and prepare before the operation: Seek hands-on experience Signing In to the app and using it before the day of operation. Use a practice mission if available.
- Manually optimize battery life if desired: Increase the location reporting interval in the user profile’s Location Settings menu. Note, higher intervals result in fewer updates (location breadcrumbs) but potentially preserve battery life.
- Control notifications to minimize distractions: Minimize notification fatigue by disabling specific notifications in the user profile’s Notifications Settings menu.
See the below screenshots from the iOS edition of the ArcGIS Mission Responder app which display user profile’s options and associated menus.

Want help implementing these practices or examples of them? Have ideas to share?
Contact your Esri account manager, advisor, project manager, or the authors of this blog to discuss these best practices and see examples of them in action.


Article Discussion: