Your ArcGIS Online organization is the destination for organization members and the public to find and browse your organization’s web maps, layers, and apps. You may currently use the gallery page in your organization, to browse and display highlighted organization content and Esri curated content. With the April update of ArcGIS Online, we are excited to share the re-designed gallery page. The fresh new look and refined user experience will enable gallery visitors to browse your organization’s featured content.
When you first see the new design of the gallery page, you will notice some layout changes. The Gallery is no longer a tabbed experience featuring both organization content and Esri content (A). The focus of this page is focused solely on the organizations featured content. (Don’t worry, Esri content can now be found on the content tab under the living atlas or when using search).
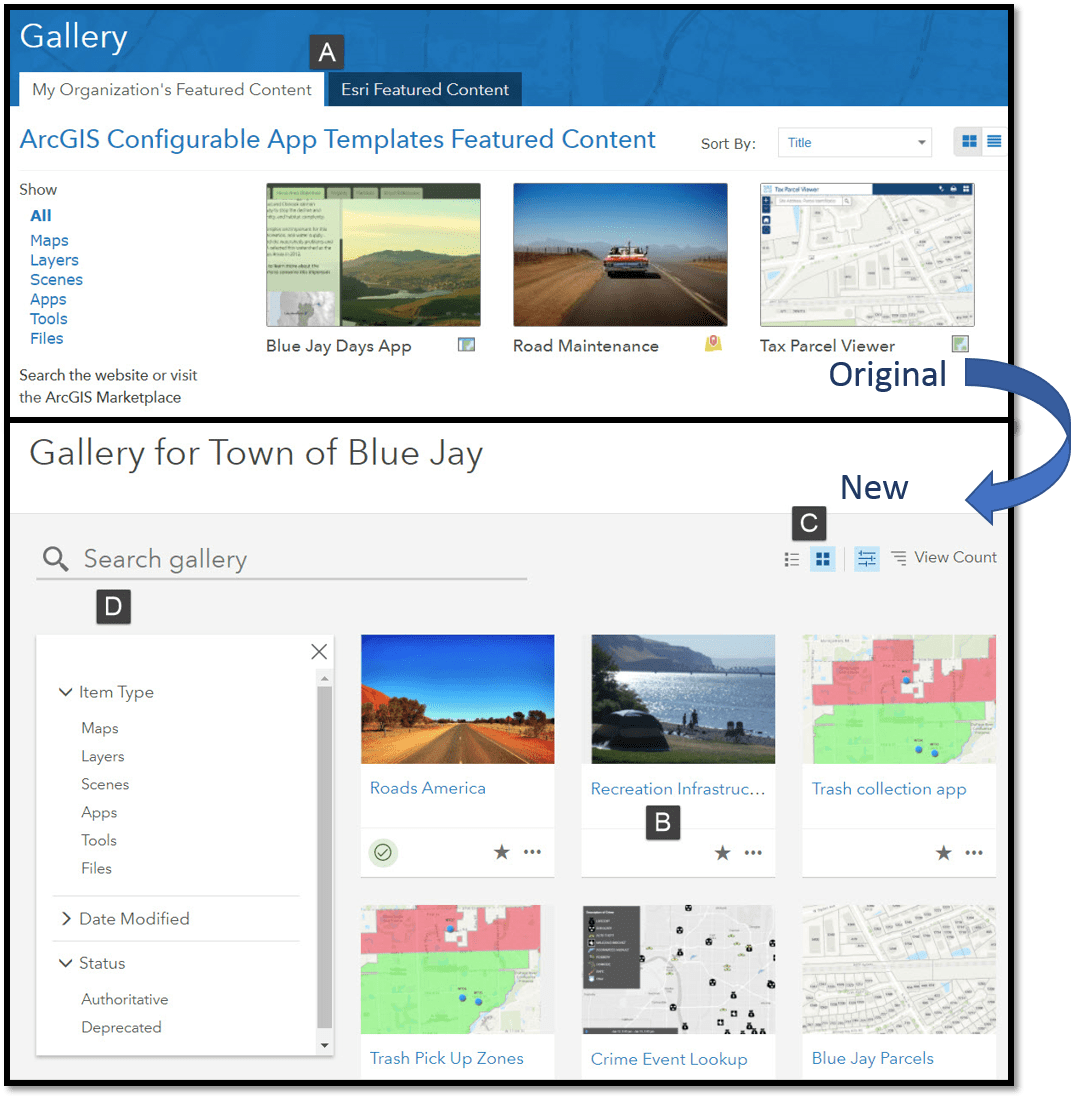
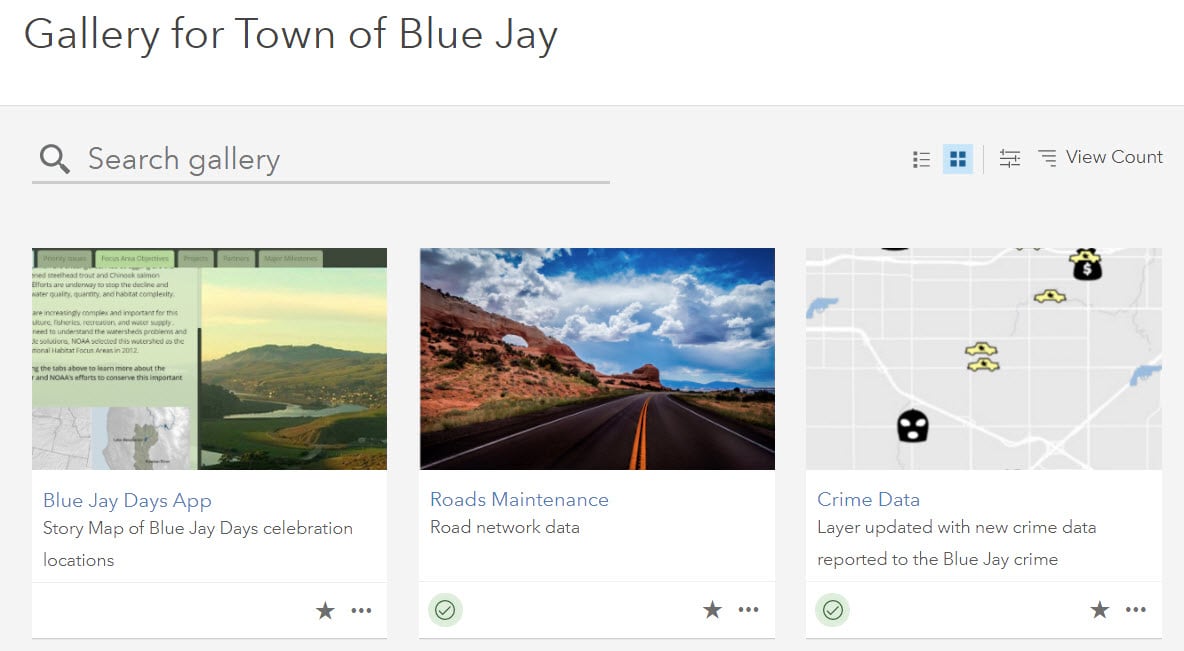
The new design of the item cards, provide gallery visitors with more initial information about items at the first glance (B). Using the grid view or list view (C), visitors can identify authoritative content using the visible badge, read the summary of an item or open the item in map viewer or details page as needed. Visitors can use a combination of a keyword search and/or filters to refine the content displayed in the gallery based on item type, date modified and authoritative status (D).
We are excited to see galleries of your content using this this new design. When designing your gallery, there are two ways to select the items for display in the gallery: letting the gallery list all content accessible to the visitor or creating a group that contains curated content for visitors. By default, organizations will display content that is accessible to the visitor: public content for public users; organization and group content for organization members who have signed in.
To create a gallery that features curated content, follow the 5 steps below:
5 Steps to create a curated gallery
- Determine the purpose of your gallery and potential visitors.
The gallery can be configured to meet many organizational needs. The gallery can be used in an organization as a location of highlighted datasets that all members need to browse and access regularly, or a mechanism of highlighting newly created information products. In this case, the intended visitors would be organization members, who would sign into the organization to view the gallery. The gallery could be used as a landing page for the public, highlighting key applications or layers that public visitors could interact with. Identifying the purpose and visitors will guide the method and settings in the next steps.
Tip: If your intended visitors are the public, ensure that the anonymous access setting is enabled on the organization. If your intended visitors are members of your organization, anonymous access can be disabled.
- Create a group to identify featured content
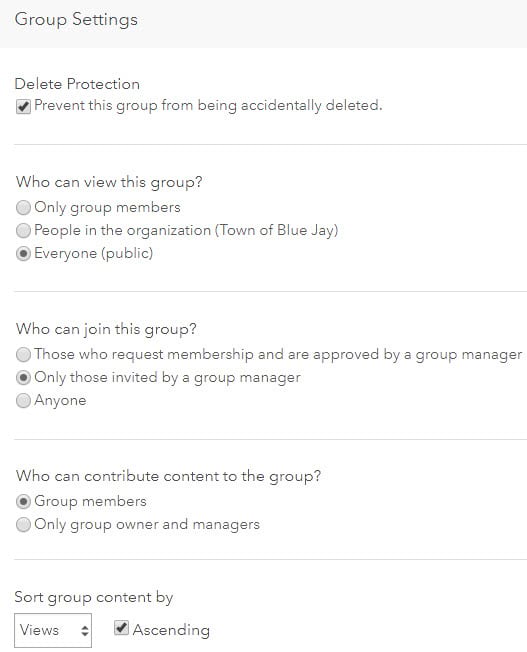
Once you have identified the purpose of your gallery, identify the types of content to display for visitors. Create a group with an identifying name, indicate the purpose of the group and any curation guidelines in the description. If your intended visitors are the public, ensure that the group can be viewed everyone. If your intended visitors are organization members, ensure the group can be viewed by the organization. Consider who will be responsible for identifying and contributing appropriate content. Invite the appropriate members to the group and allow them to contribute content. - Create easy-to-understand items with thumbnails and a summaryThe new card design highlights the summary and thumbnail of the item, providing more insight. Ensure that you add attractive, intuitive thumbnails that give visitors insight into the item they will be viewing. Include a summary about the item to provide additional context.
- Set appropriate sharing settings for each item
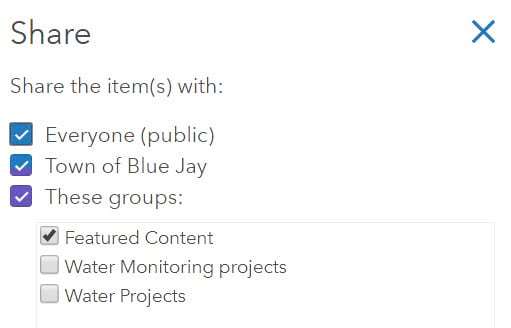
The featured content group will identify the content items to display in the gallery. Ensure that sharing settings enable the desired visitors access to the items. If sharing with the organization, you should share all content featured in the gallery with the organization and the featured content group. If the content is to be accessed by the public, content should be shared with everyone and the featured content group.Tip: If you only want your users to interact with web apps in the gallery, only share the web app with the gallery group and ensure that the layers and web maps can be accessed by the organization or everyone to establish the correct permissions.
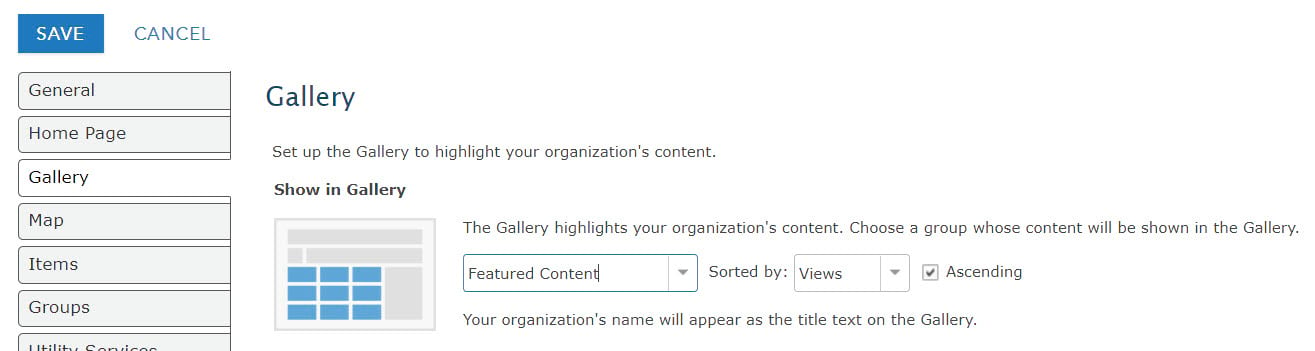
- Identify the gallery group in the organization settings page
When your group has been created and contains the correct content, go to the Gallery tab in the settings configuration (Administrator role required) and navigate to the featured content group.
Check your gallery page to see the featured content. After these steps have been completed, group contributors can add and remove items from the gallery by sharing or unsharing items from the featured content group. Keep an eye on the content of this group to keep it up to date, relevant, and popular with gallery visitors.
We look forward to seeing your content galleries, whether curated or not. Share your galleries on Geonet and let us know if you have any feedback
Help links:

Commenting is not enabled for this article.