With the addition of 35 hosted feature layer templates and redesign of ArcGIS Online’s feature layer template gallery, it is even easier to get started with ArcGIS. Using the feature layer templates, you can discover layer templates for your industry specific workflows, create a service, configure a map, and get started collecting data in a matter of minutes.
Getting Started
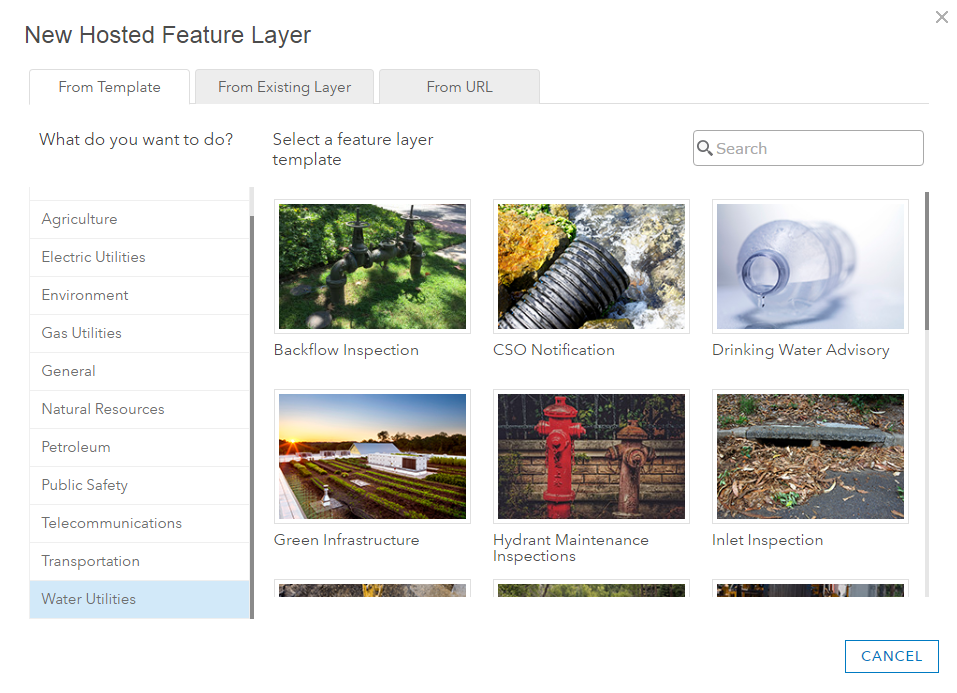
To get started, sign into your ArcGIS Online organizational account and browse to My Content. From this page, you will see the Create tab which allows you to create a new app, map, scene, tile layer, or – in this example – feature layer. When creating a new hosted feature service in ArcGIS Online, you have three options. To create a layer from an existing layer, from a URL, or from a template.

For those that have used the feature template gallery previously, you might notice that finding layers for your industry workflows has been streamlined with the latest release of ArcGIS Online by including industry categories. Along with the industry categories, the new feature layer templates included with the latest ArcGIS Online are designed to support utilities and telecommunications workflows. These new templates will be used to illustrate how to leverage the feature template gallery.
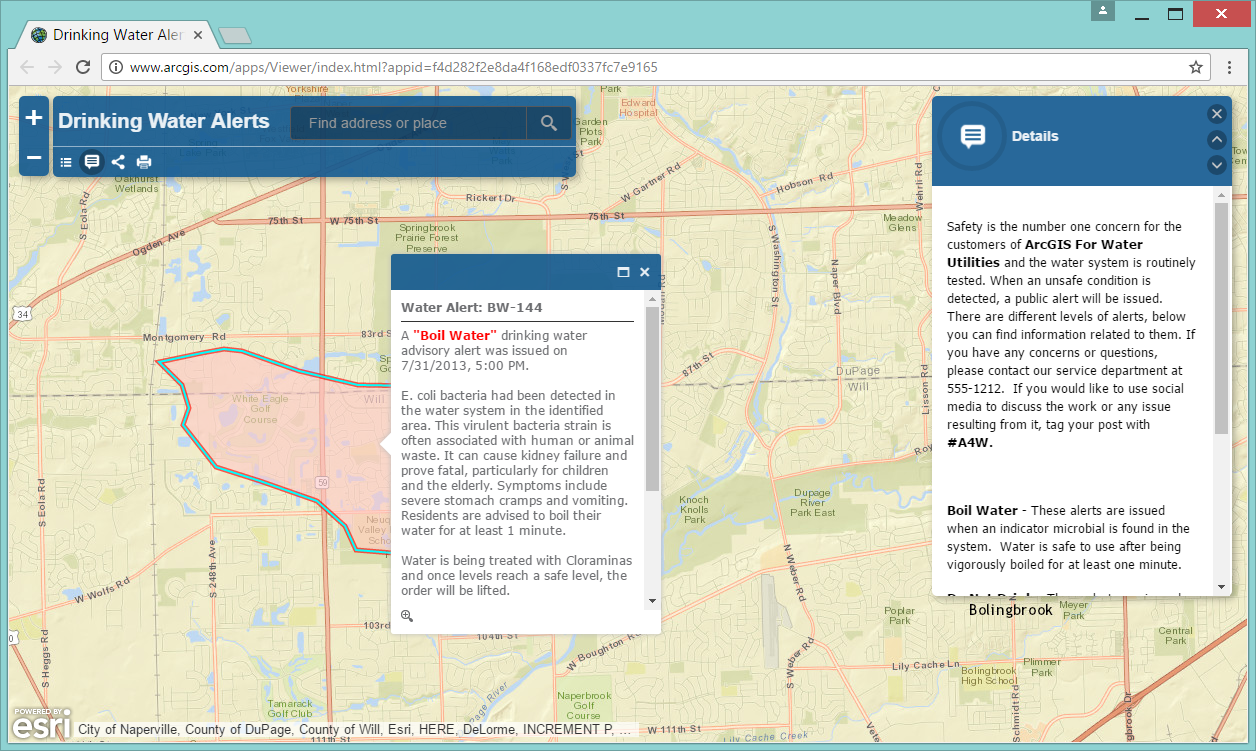
Take for example, a water utility. In the event of a drinking water alert or advisory, a utility is required to inform consumers about these alerts (such as boil order or do not use alerts). When sharing this information, what better way to show an affected area than a map?
From the feature layer template gallery, you can select the Drinking Water Advisory layer template, and then click Create. You can then select the layers to include. In this case, the only layer in the service is the Drinking Water Advisory layer. After clicking Next, you will be prompted to select the map extent of the new hosted layer. If you have set the default extent in your ArcGIS Online organization settings, this extent will be the default. If this is not configured for your organization or you need to change the extent of the layer, simply pan and zoom or enter the coordinates of the area. After the extent is set, add a title to the layer, update the tags and summary to meet your organization’s need, and click Done.
When complete, you will be brought to the item details page of your newly created hosted feature layer. From there you can update the properties of the item, such as a thumbnail image or editor tracking. Then, configure maps and apps with the service. For example, the ArcGIS Solution’s Drinking Water Advisory can be configured with the service to support sharing alters or advisories with the public.
Using your Data
With the addition of the new utilities and telecommunications feature layer templates, you may notice a number of layer templates that support asset inspections. For those that do not have their asset data in GIS, the workflow to get started with feature layer templates is the same as above. Rather than using the configurable application templates in ArcGIS Online (like the drinking water advisory example), configured maps can be used by field crews to collect asset and inspection data using an application such as Collector for ArcGIS.
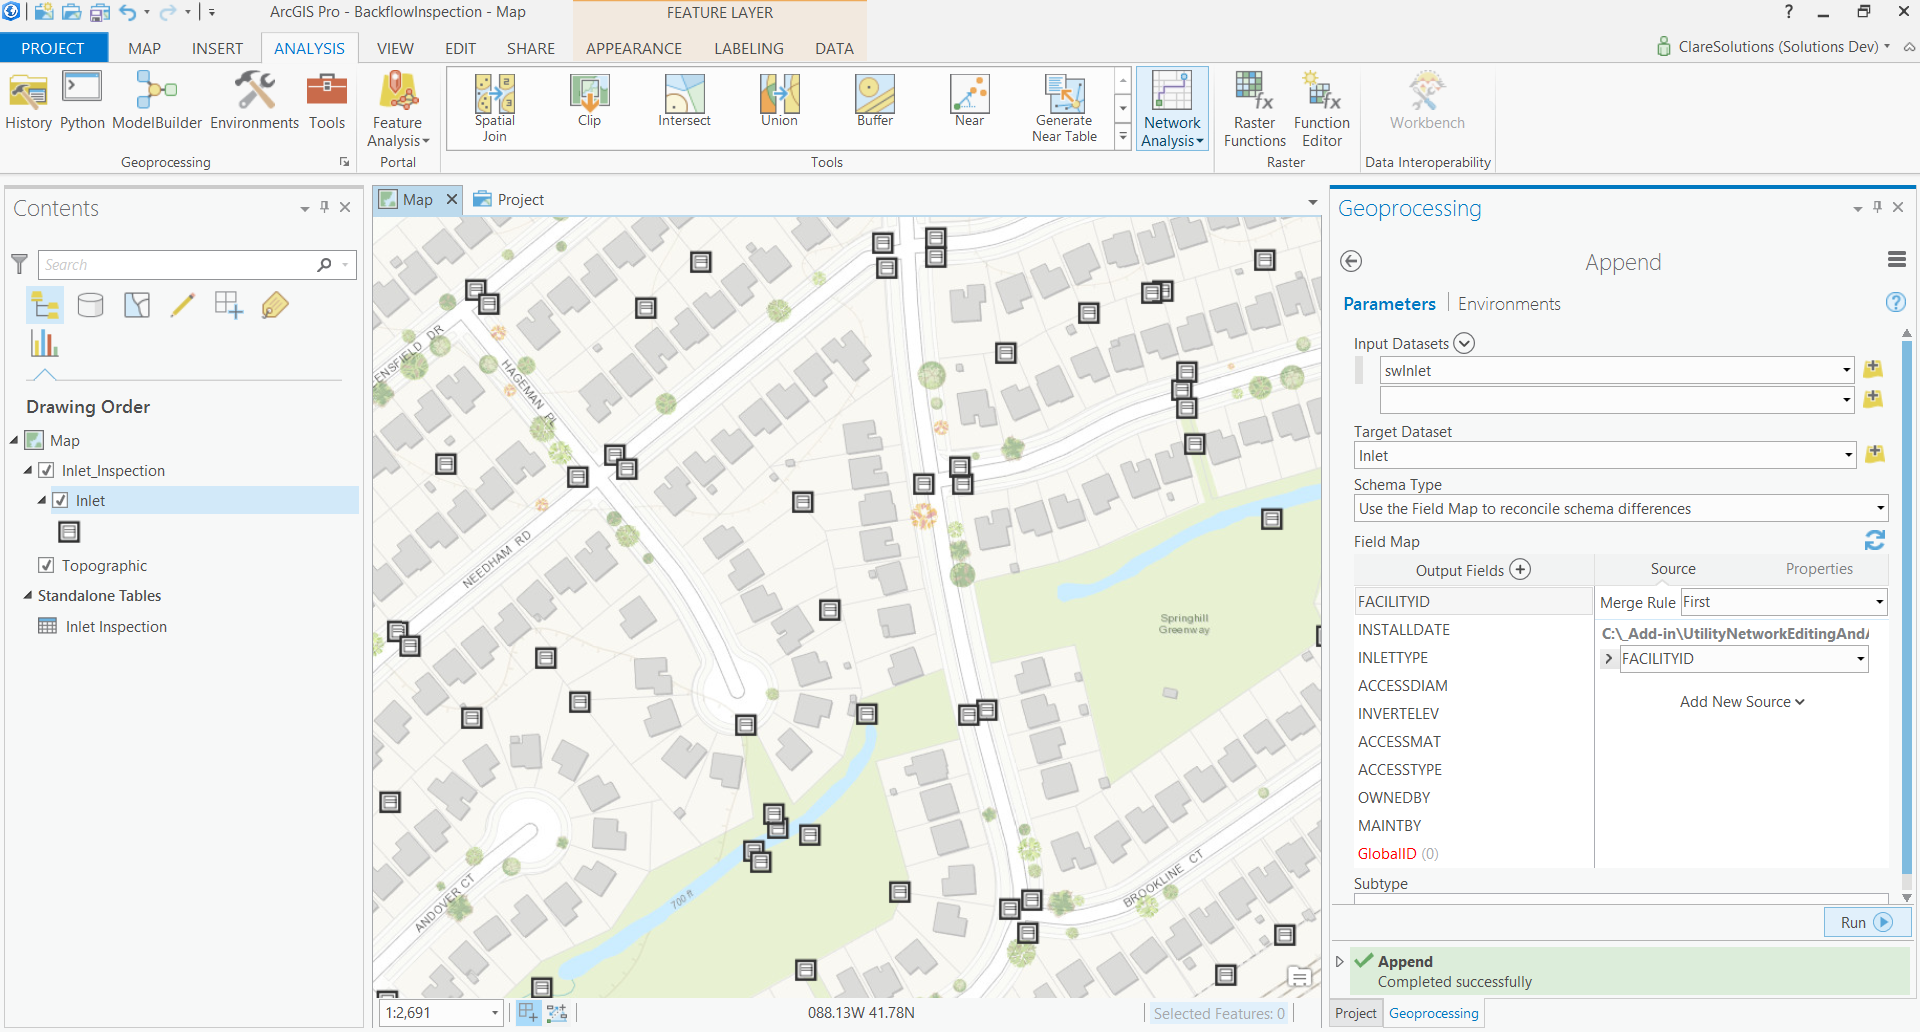
Those that have existing asset data can load their data into a hosted feature layer using ArcGIS Pro. To load data to a hosted feature layer, sign into ArcGIS Pro and create a new project. Create a map and add your hosted feature service to the map. Browse to the Analysis tab, and open the Tools. Browse through the toolboxes or search for the Append tool. Then append your asset data to the asset layer in your service.
For example, water utilities need to inspect their inlets. To support this workflow, you can use the hosted feature layer templates to create the Inlet Inspection service in your organization. Then, you would add the service to a map in ArcGIS Pro and append your inlet data to the inlet layer in the Inlet Inspection service.
While in ArcGIS Pro, you can also configure the service (add fields, update field aliases, and so on) to meet any additional requirements from your organization. Once you have configured the service and loaded data, share the service by overwriting the web layer. After the service is updated, the only step left is to create a web map that includes the inspection service. Once the map is created and shared with the appropriate groups or users in your organization, inspectors can access the map in Collector for ArcGIS to digitally record inspection information.
What’s Coming
With a deeper understanding of how hosted feature templates in ArcGIS Online can help quickly deploy solutions in your organization, you may be wondering what is next to come. For Portal for ArcGIS users, the gallery redesign and additional utilities and telecommunication templates will be available in the 10.5 release of Portal for ArcGIS. Additionally, new feature templates will continue to be added at future releases of ArcGIS Online to support other workflows.

Article Discussion: