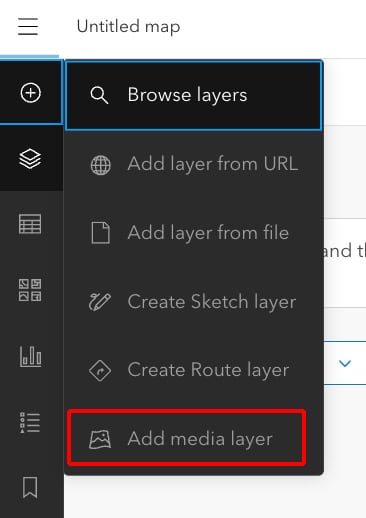
Media Layers are a new kind of layer in web maps that allow anyone to quickly overlay scanned paper maps or images so they visually line-up with other layers. Paper maps are everywhere and bringing them into our web maps can be tricky. Perhaps you have a great scanned 19th century survey of your hometown, or a cell phone photo of a cute tourist brochure map, and you want to use them as a layer in a web map. Use the new Add media layer workflow in Map Viewer to drag-n-drop the image and then resize, rotate, and skew the image to get a good visual match with the modern map layers. Unlike the much more powerful rubbersheeting and spatial transformations capabilities of ArcGIS Pro, Add media layer is meant for quick visual overlays. If you need centimeter-level precision and advanced mathematical transformations Pro will always be your best bet. But if you want to quickly overlay images in web maps then Add media layer is here for you.

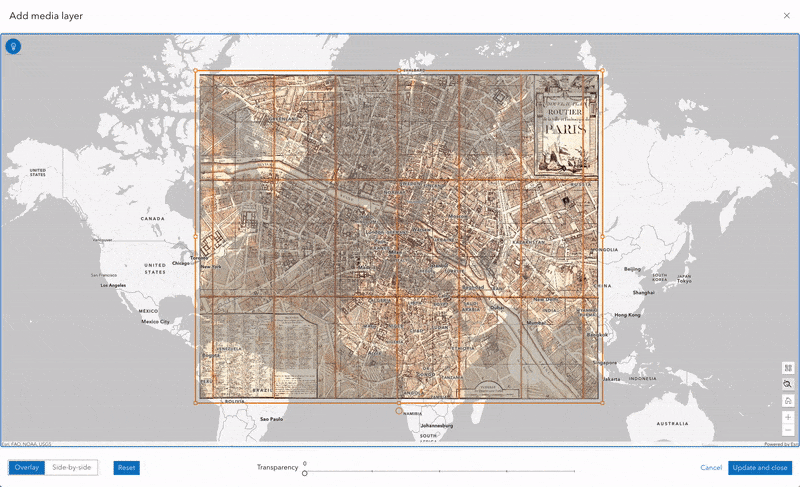
After a few adjustments this glorious 1780 Esnauts and Rapilly Case Map of Paris now sits comfortably on top of a modern Esri basemap. Despite centuries of change the bones of the city largely remain the same and famous landmarks haven’t moved.
In Map Viewer, clicking Add media layer will launch a full screen take-over experience for adding images. Initially we support JPG and PNG images less than 10MB in size, though we have plans to support more image types and even videos in the future. Drag-n-drop from your desktop or navigate your file directory.
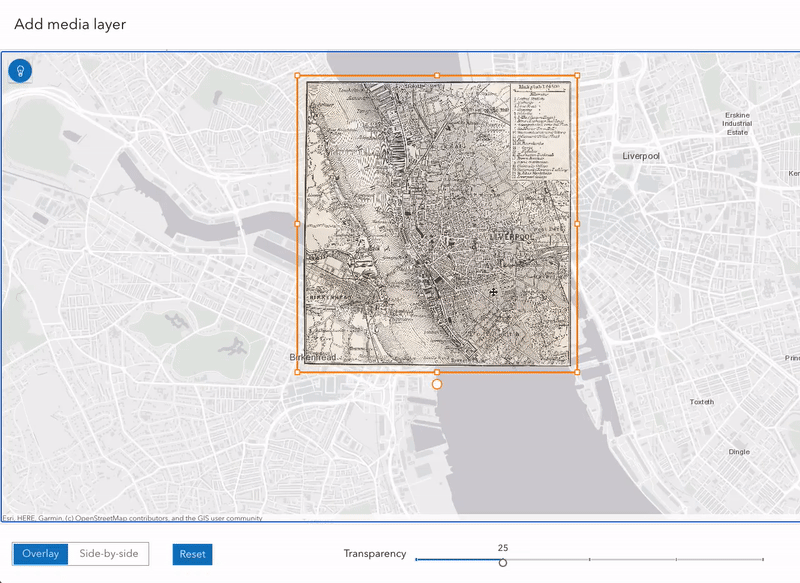
The image is placed in the middle of your map extent and is ready to scale and adjust. Use the orange handles to resize the images. Hold shift to maintain the aspect ratio of the image while resizing. To check your work as you’re going, adjust the transparency using the big slider. Use the circle icon at the bottom of the orange outline to rotate the image. Holding shift will rotate the image by 5 degree increments. No need to memorize these right now since you can find a very helpful cheat sheet of tips under the lightbulb icon:
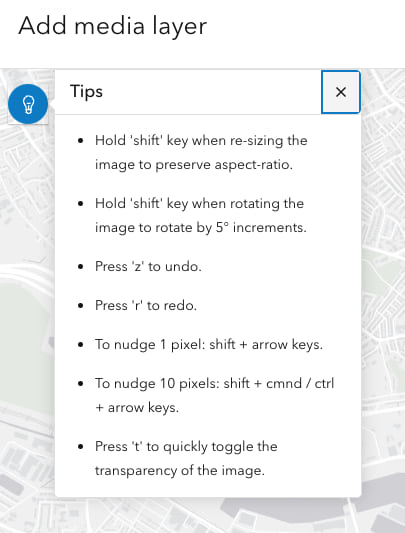
Perhaps the most useful of these tips is undo (press z on your keyboard) and redo (r on keyboard) since fitting an image requires some trial and error to get it right.
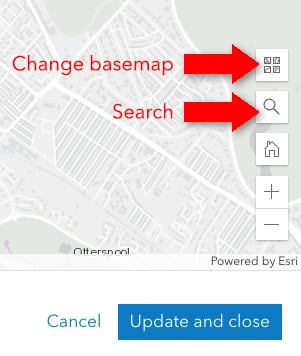
It may also be helpful to change the basemap since different basemaps contain different features, such as building footprints or highway networks. Changing a basemap here doesn’t affect your web map, it’s just while working here.
Reposition media here: A big time saver
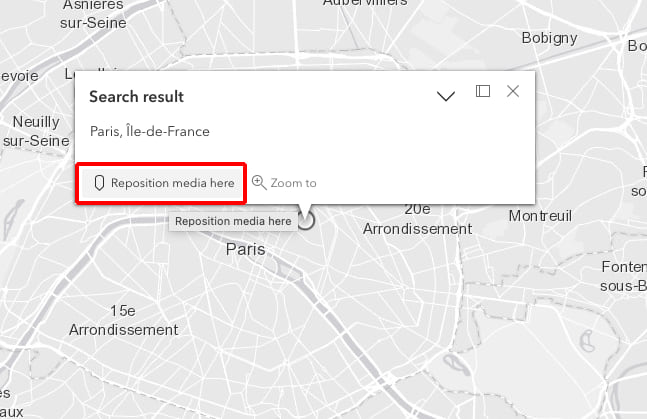
If your media loads at the wrong scale or the wrong part of the world you’re free to manually drag it and resize to get it to the right place. But a much easier way to do this is use search on the map and click Reposition media here in the search result pop-up. In one click your media will be placed at this new spatial extent, as seen in this video where my historic map of Paris was loaded at a global scale but I needed it repositioned over Paris.
Further refine your work: Side-by-Side Mode
For many maps, rotate and resize and change aspect ratio will probably be enough to get a good a fit. But if you need more control to really skew and stretch the image, use side-by-side mode. This step is entirely optional, but it gives a much finer degree of control and is especially useful when the source image is more distorted.
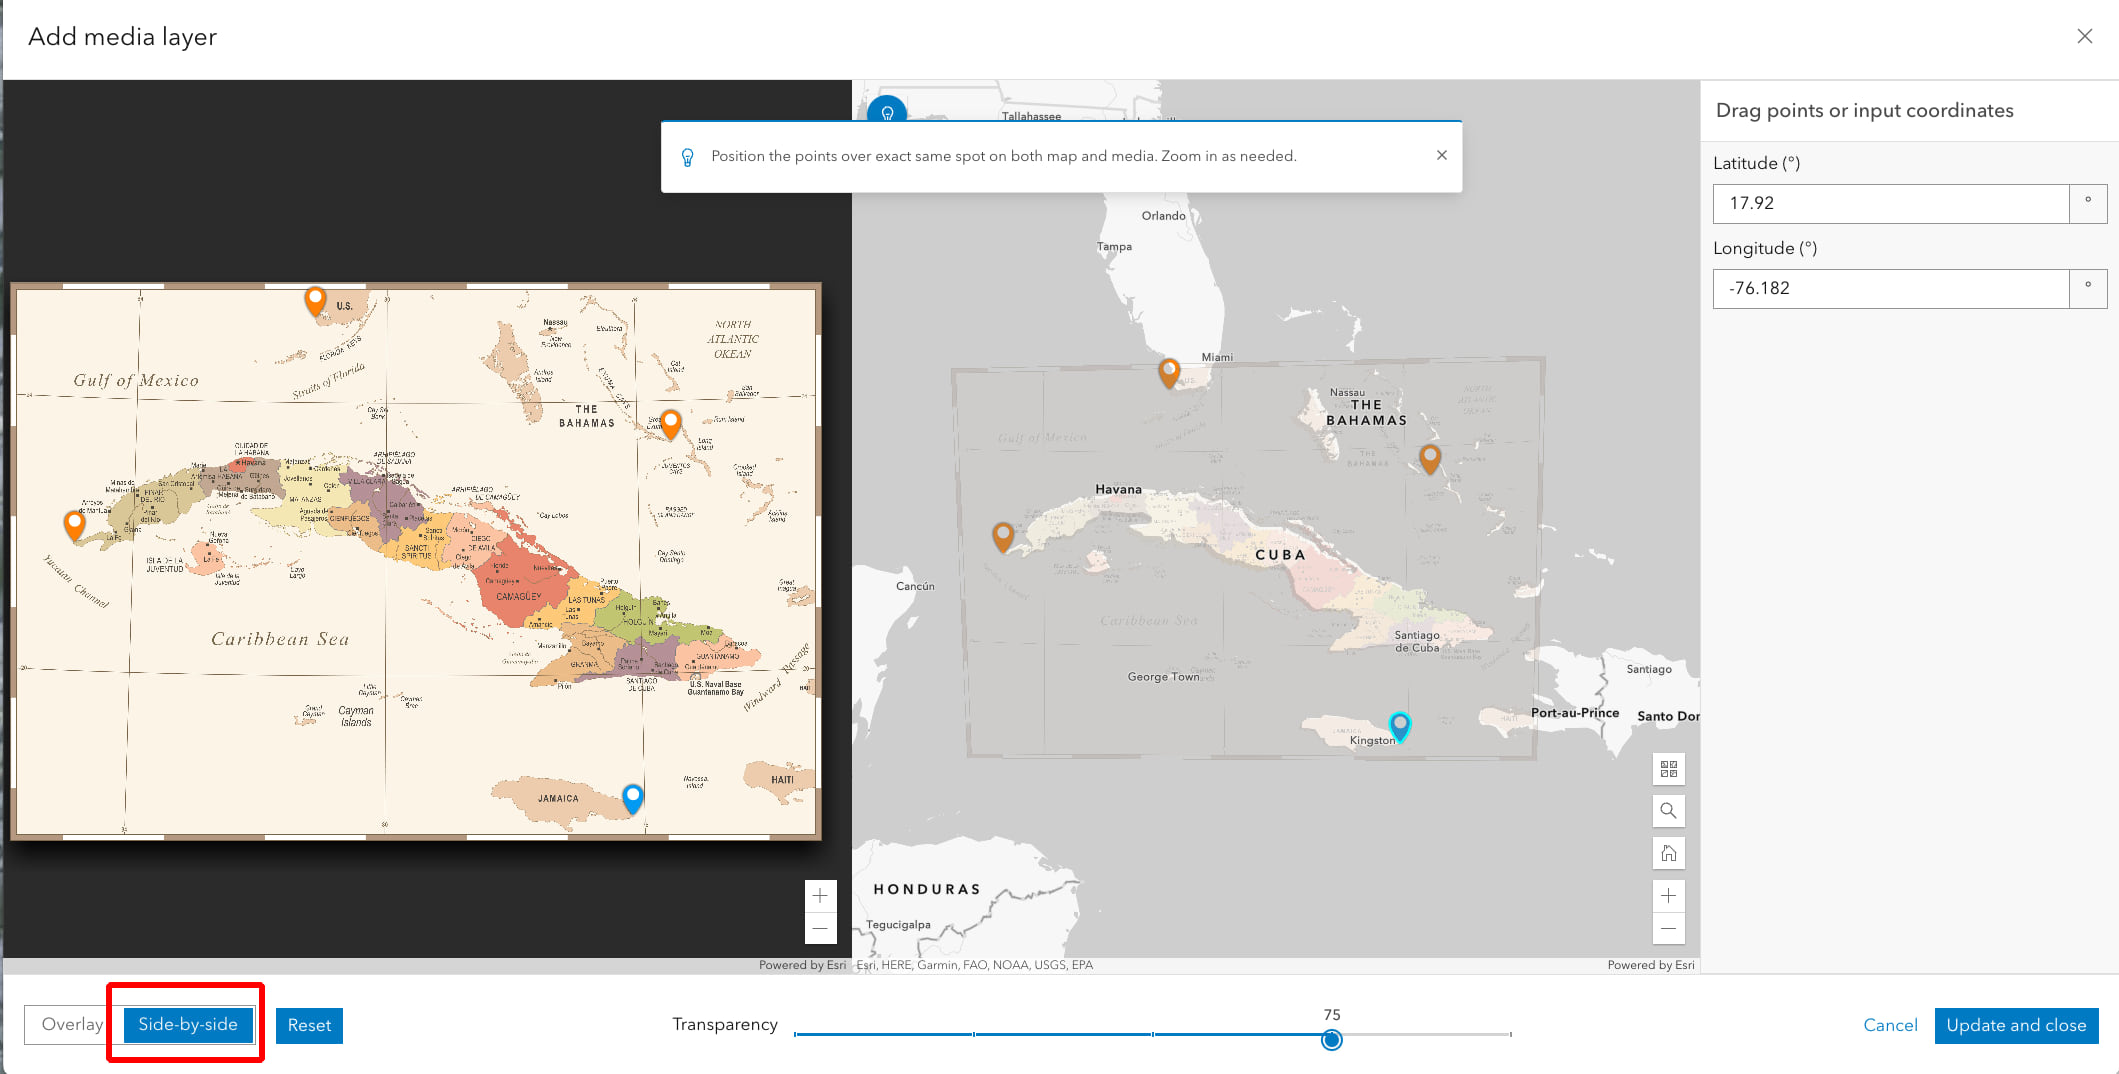
Here we show you four control points (the colored pins) and your job is to find four distinctive geographic features you can see in both the media and the basemap. Then manually move the pins to those locations on both sides. Control points are always paired; one over the image and one over the basemap. Depending on the scale of your map, look for things like the corner of a building, the summit of a mountain, where highways intersect, or where two lines of latitude and longitude intersect. These features don’t move around, which is especially important when dealing with vintage paper maps.
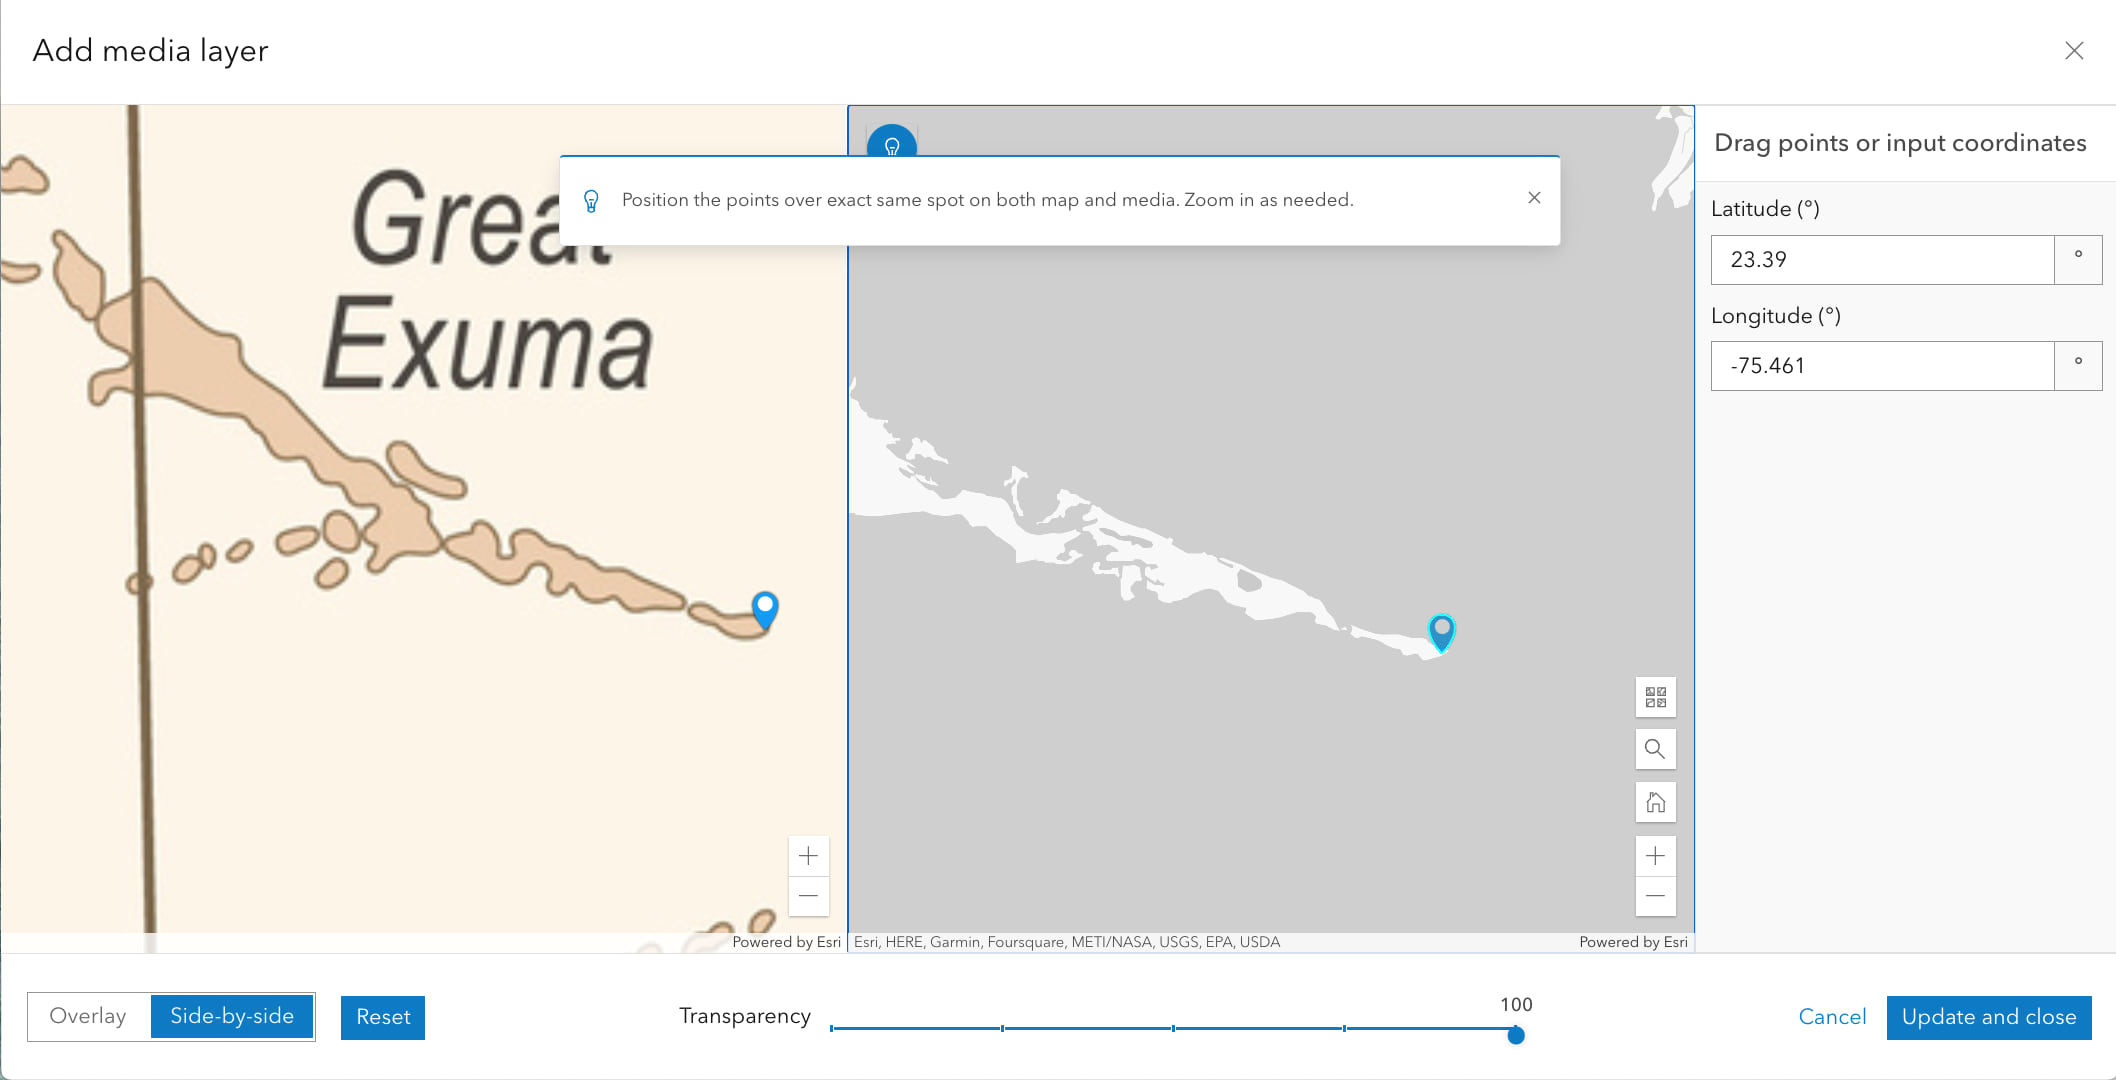
Zoom in as needed to really match things up. Want to check how it’s going? Use the transparency slider, or go back to Overlay mode.
A word of caution: With only 4 control points you aren’t going to fix really distorted or weirdly projected paper maps. Nor is this a tool for doing proper mathematical map re-projections. In those cases use the power and control of ArcGIS Pro. Unlike the Add Media workflow here, images added in Pro will have to be published and maintained as a separate tile layer, which makes the process more complicated.
Finishing Up
Once you’re happy with the fit, click Update and close button in the bottom corner and your web map now has a new Media layer in it! As you can see below, the layer name is the same as the image file name. Since you can have only one image per Media layer, if you need to add more images to you web map, add more Media layers.
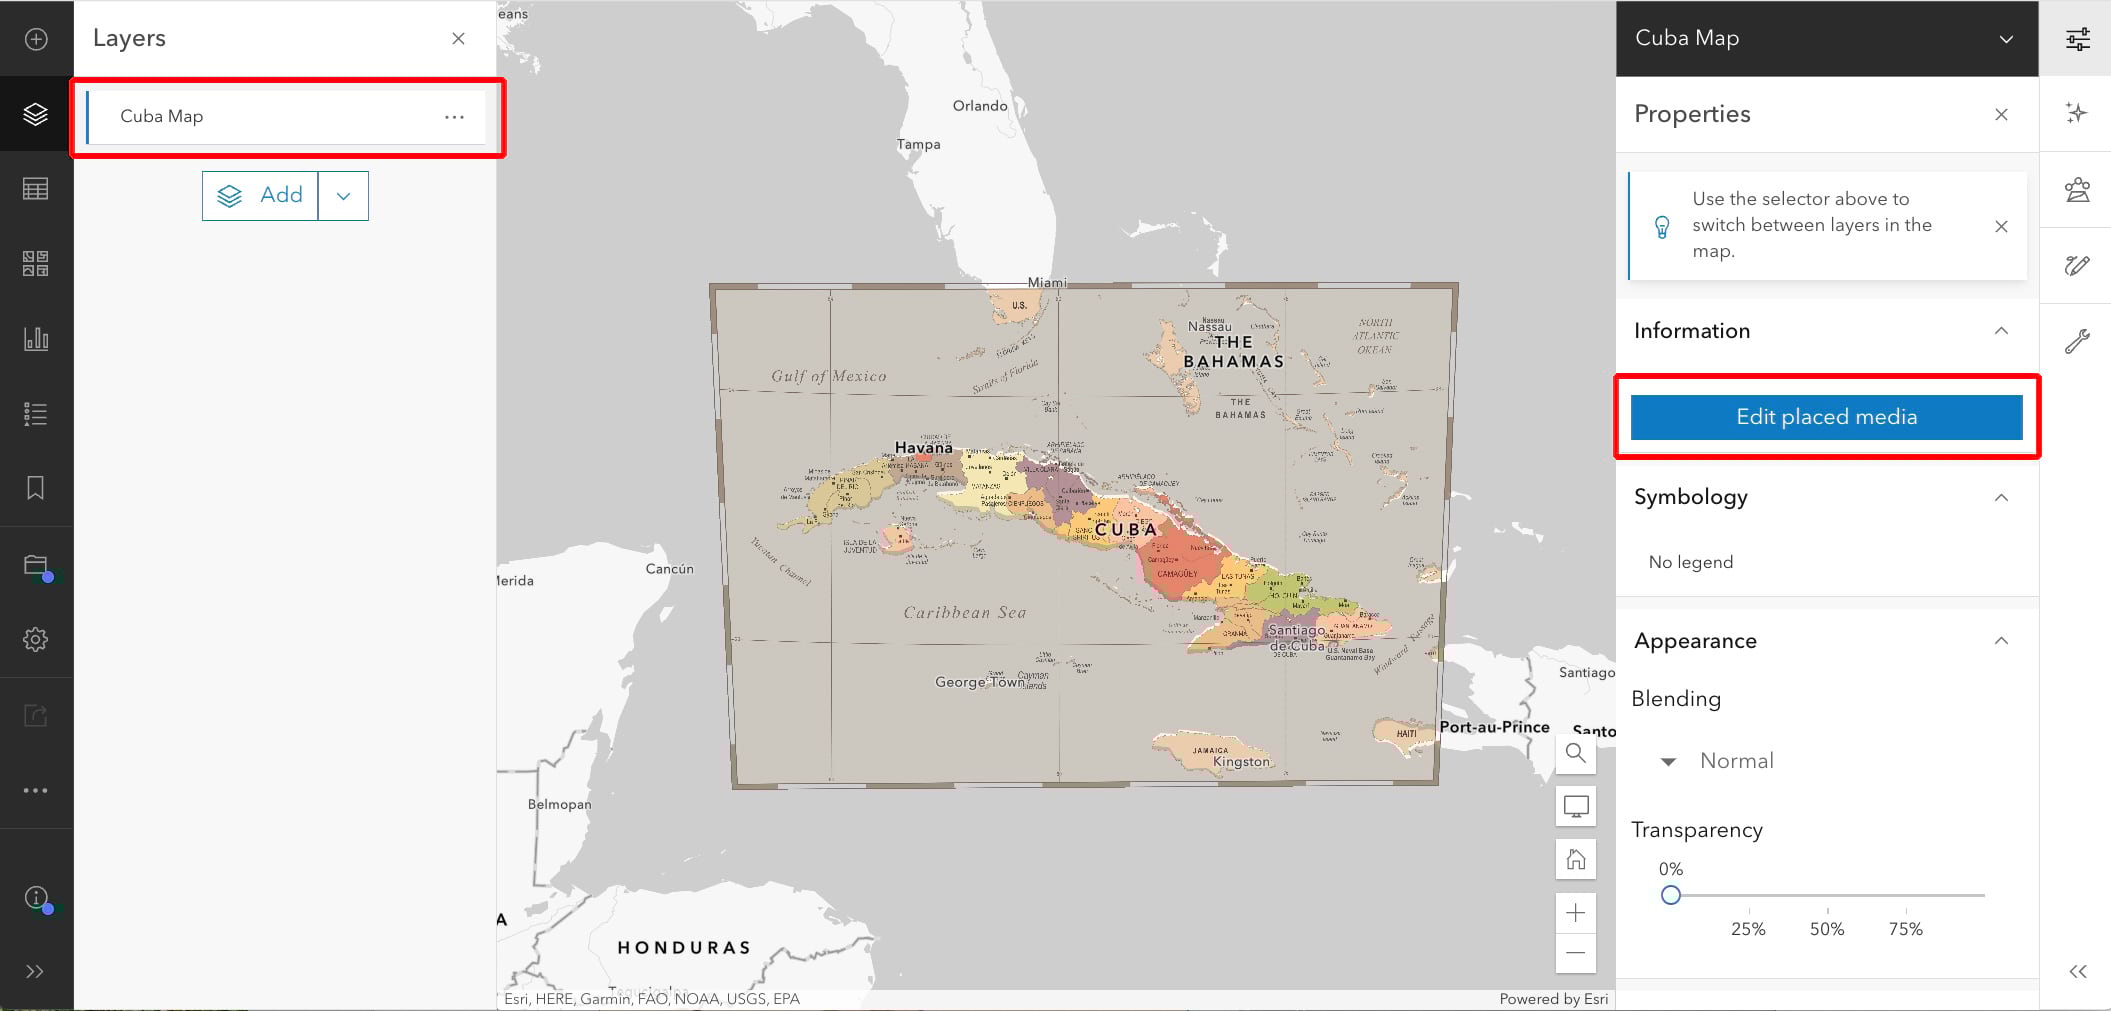
If you want to make further edits to a Media layer, just click Edit placed media button in the Properties panel and you’ll be dropped right back where you left off. Even better, if you select a different map projection later on, the media can handle this no problem and will be automatically reprojected along with the other layers in the map.
Since these images are saved as part of the web map itself, there is no need for you to manage or maintain linked image files in My Contents, which makes life easy. This means it also follows the same security and access as the web map.
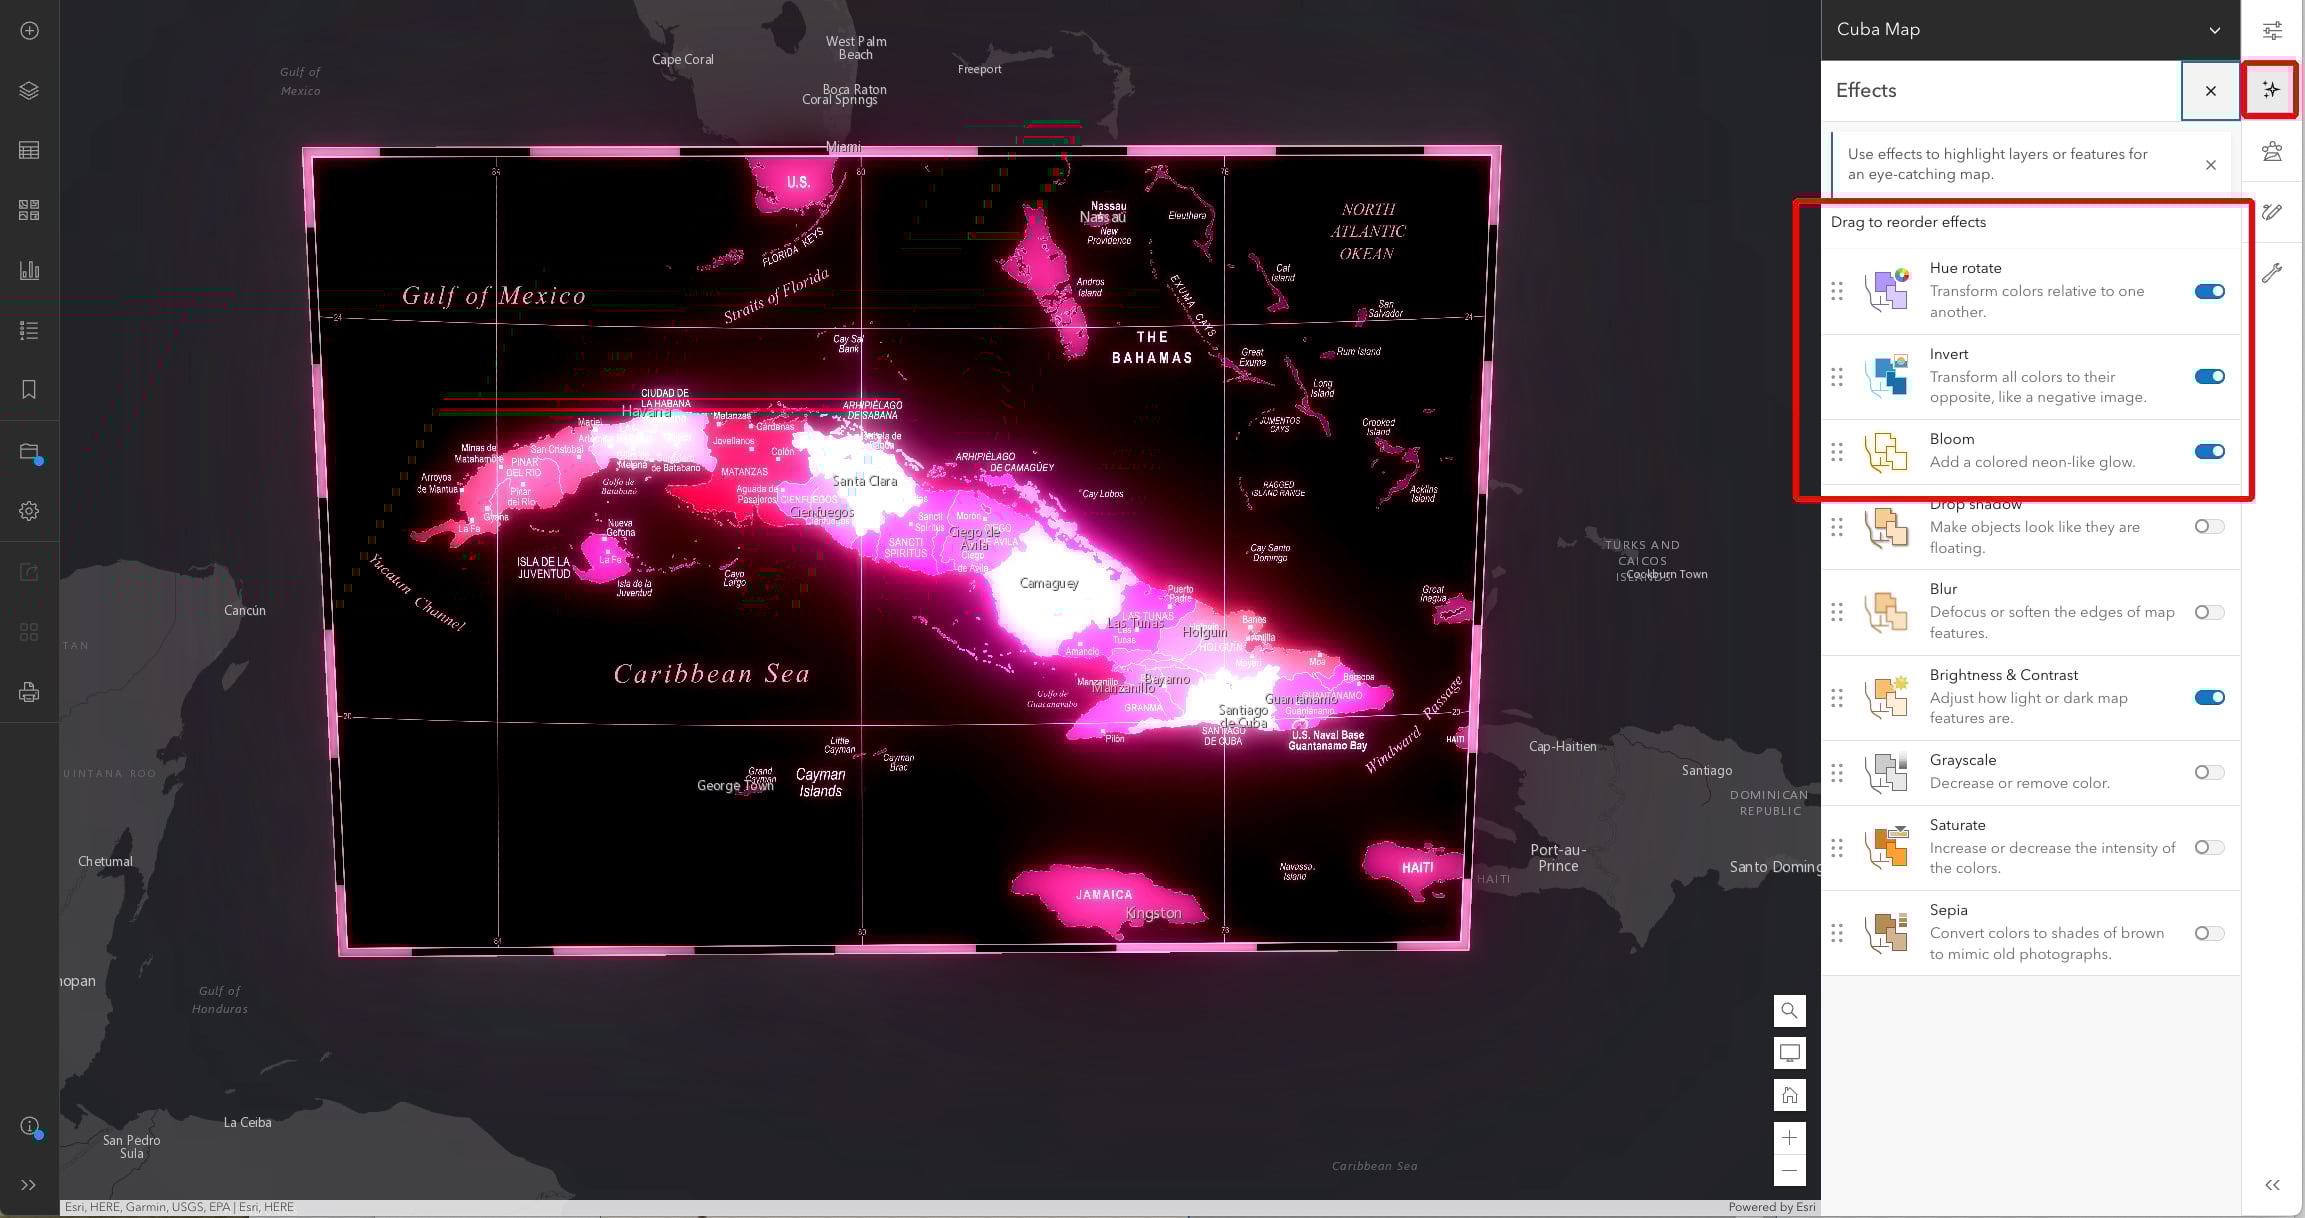
The best part: Because this is a layer in a web map we can control things like the visible range, blending, transparency, and so on. In the example above I did a few quick Photoshop-like effects to make the light-colored map dark, so it’d work better with the dark gray canvas map. There is no need to leave Map Viewer, now, to do this kind of image editing work!
Have fun bringing images into your web maps and say tuned for more enhancements as we continue to develop this capability further.
Happy Mapping!

Hi Mark. Will this awesome new feature be made available in scenes or usable in scenes as well in the future?
Hi Max – The folks working on Scenes have been thinking about this, it is in their backlog, but not a priority at the moment. Maybe submit to ArcGIS Ideas with your usecase in mind – that can help shape priorities.
Hi Max,
This is Jasmine and I am the Product Manager of Scene Viewer. Could you help share your use case to jdu@Esri Inc..com? It would be great to learn a little bit more of your workflows to help us prioritize. Thanks!
Best,
Jasmine
Hi! When we work in ArcGis Urban we sometimes want to add illustrative maps and draw sketches after. Right now we have to go through arcgis pro but we dont need the accuracy. This method seems much simpler and faster.
/Tommy
Will this be available in widget form for Experience Builder?
Christopher, we are working on ways to bring this to other apps, stay tuned!
Yes love this idea!
Hi Mark! Every time I try to add a media layer, I receive this error: “This file type is not supported.” This occurs with both JPG and PNG images in MapViewer. I’ve tried both Firefox and Chrome. Any suggestions?
That’s no good! If your files are less than 10MB they should be loading. Feel free to email me the files at mharrower@Esri Inc..com and I’ll see what I can do
Does this create a separate hosted layer or is the information only available in the map that you add it to?
Hi Henry – The image is saved with the web map, not as a stand alone file. We are exploring export options for the future so you can save the media as their own file.
Will Map Viewer support GIF image and image from URL to create a media layer?
Hi Puekthiwat – We are working on both of these, but not sure of the release date. Stay tuned!
Hi Mark, I cannot manually enter the coordinates of the corner points on my image. Has that feature been removed or am I missing something?
Hi Mark
I was trying to replicate this as custom widget in expereince builder app (V1.19) which uses JS API 4.33 however I am facing few issues
a. Rotation is not working on 2D
b. Interaction options(Transform) which has Drag/Resize stops working after one time although in medialayerview i am setting that properly.
c. There are no console errors and tool hangs. I need to clear that image and then upload another image but same issue exists
Any thoughts on this?