We’re always looking for ways to make editing in ArcGIS Online easier. With the February 2024 update, we’ve rolled out interactive tooltips to give you more precision when editing features on the web. Whether you’re a city planner, engineer, or data manager, having control over things like the length of a line can be essential to your workflows. That’s where tooltips come in, letting you define exact values for measurements like segment length, angles, and elevation. Keep reading to learn how to get started using interactive tooltips to tighten up your edits in ArcGIS Online.
Tooltips
Real-time Information
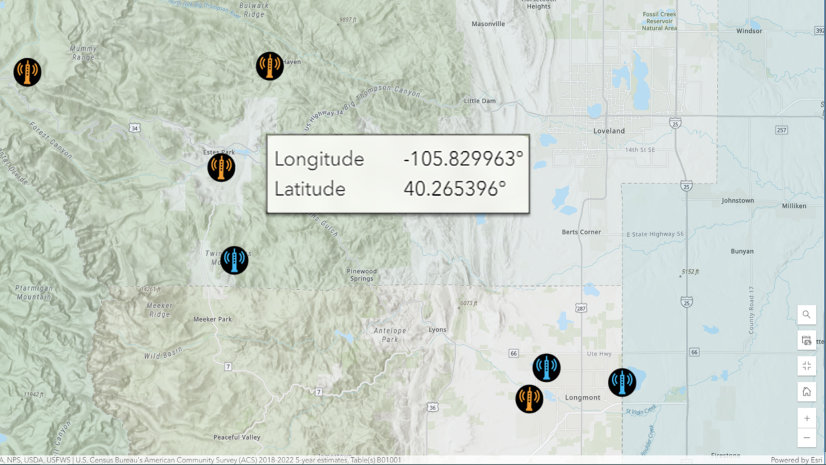
If you edit data in Map Viewer, you might already use different tools like snapping, or geometry guides when creating features. Tooltips give you real-time feedback while you create features. When enabled, they float on the map to the lower right of the cursor. The values you see update dynamically as you work, displaying measurements – like the length of a segment – while you draw the line on the map.

Fields
Tooltips may contain the following fields:
- Area: the overall area of a polygon.
- Direction: the angle of the segment being drawn, relative to North.
- Distance: the distance from the previous vertex.
- Total length: the overall length of a line.
- Deflection: the direction of the segment being drawn, relative to the previous vertex or segment.
When working with features with z-values, such as drawing 3D features in a scene, tooltips include an additional field:
- Elevation (z): elevation values can be absolute, relative to the ground, or relative to the scene.
Input mode
To make tooltips interactive so you can enter values in fields such as direction, deflection, or distance while you create features on the map, simply press the [Tab] key while editing.

Getting Started
First, you need a map with at least one editable layer. Optionally, you can use this map to follow along. Enable tooltips in the map following these steps:
- Open the map.
- Click Edit on the (light) toolbar on the right.
- Expand Settings.
- Toggle to Enable tooltips.

Next, draw a feature on the map.
- In the Create features section of the Editor pane, select a feature template.
- Click on the map to get started creating a feature.
- Note the tooltip floating near the cursor.
- Click [Tab] to enable input mode.
- Use [Tab] to navigate between input fields.
- Tab to the Distance field.
- Type a value.
- Click [Enter]. The next segment you create will be locked into the editing constraints you entered.
- Double click to complete the drawing.

Direction mode
Absolute- absolute direction (typically in degrees clockwise from North)
Deflection– direction relative to the previous segment or vertex
Using tooltips, an angle can be represented as either the absolute direction or deflection, depending on the Direction mode you choose. You can alternate between direction modes depending on your needs. To change the Direction mode, press [Tab] to navigate to the upper right corner of the tooltip, press [Enter] to open the menu, and choose a mode.

Summary
We’re constantly on the lookout for ways to improve the editing experience in ArcGIS Online. With the introduction of tooltips, we put the power to edit with more precision in your hands. Keep an eye out for more tools to come that will help make editing a breeze, and be sure to share your ideas, feedback, and experiences with us in ArcGIS Online on the Esri Community site.

Commenting is not enabled for this article.