You can now upload images through symbol styler to be used to style point symbols or used with sketch layer. Prior to this release you could publish your own symbol sets with web styles. Web Styles can contain point line and polygon symbols which can help deliver symbol galleries to your entire organization. You can use your published web styles along with Esri default symbols. These web styles also help expose vector symbols where you could customize symbol layers color, size, rotation, hatch separation and additional controls depend ending on the symbols being used. To learn more about how to publish and use web styles check out my other blogs.
Publish web styles to ArcGIS Online
Symbol Styler: Using complex symbols in Map Viewer
How do I upload images to use as symbols?
First to take a step back for those familiar with Map Viewer Classic there was a similar workflow where the you could reference images hosted on a server by URL. This workflow is dependent on the hosting server being available to drive the symbol along with it being properly configured to allow access to the image. We decided to approach this a different way where you can now just upload a symbol directly through Symbol Styler and it will then be stored in the app cache of the browser. Just like with the Map Viewer Classic workflow this means if you switch browsers, computers or account’s those symbols wont carry across. If you want symbols to carry across you will need to use web styles.
To upload you can do this 3 ways and the experience is the same because we use the Symbol Styler across these different sections of the app.
- Symbolize a point layer.
- Pick a polygon style that uses point style.
- Use Sketch layer and pick the point option.
Lets jump in and learn how we can upload images to symbolize features. The sample map being used is on of layer containing transit stops based off of transit type. This layer is using the Types style and I am going to be styling each point with an image file. The upload image will generate a simple picture marker symbol so the controls on changing properties are limited and if you want to have more control on your symbols I recommend checking out the above web style blogs.
First click on the symbol in the Types list you want to style.
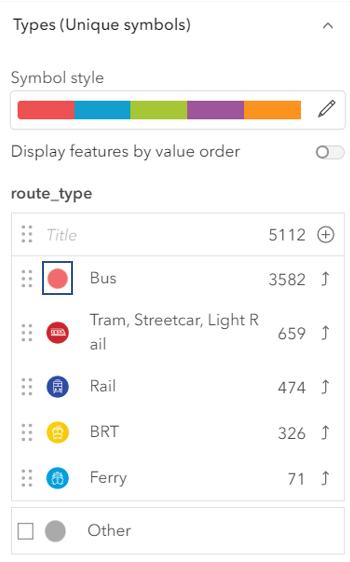
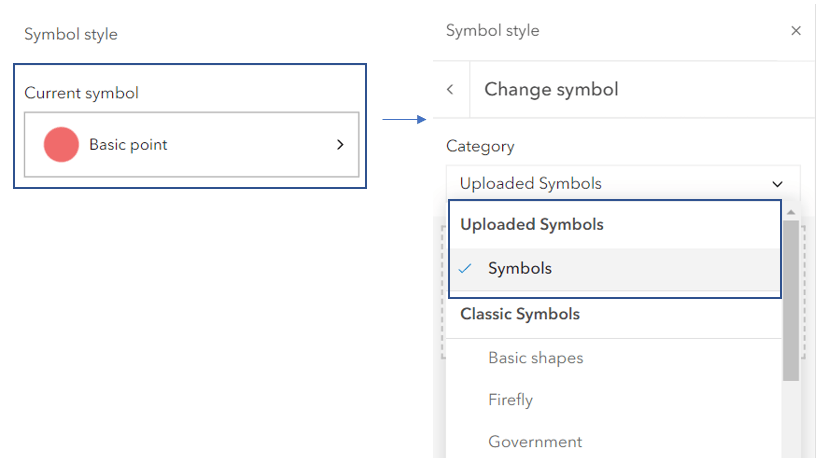
Next click on the Current Symbol button which opens the symbols gallery picker and click on the Uploaded Symbols.
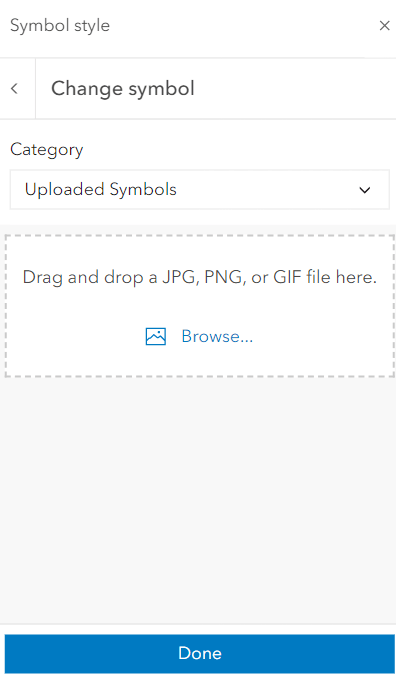
Now you have two options presented. You can drag and drop the image into Symbol Styler or you can use a File Explorer to pick your image and upload it.
I am a fan of the drag and drop and find it quick and easy to build out this uploaded symbol gallery. Just drag it into the drop area and it will be added.
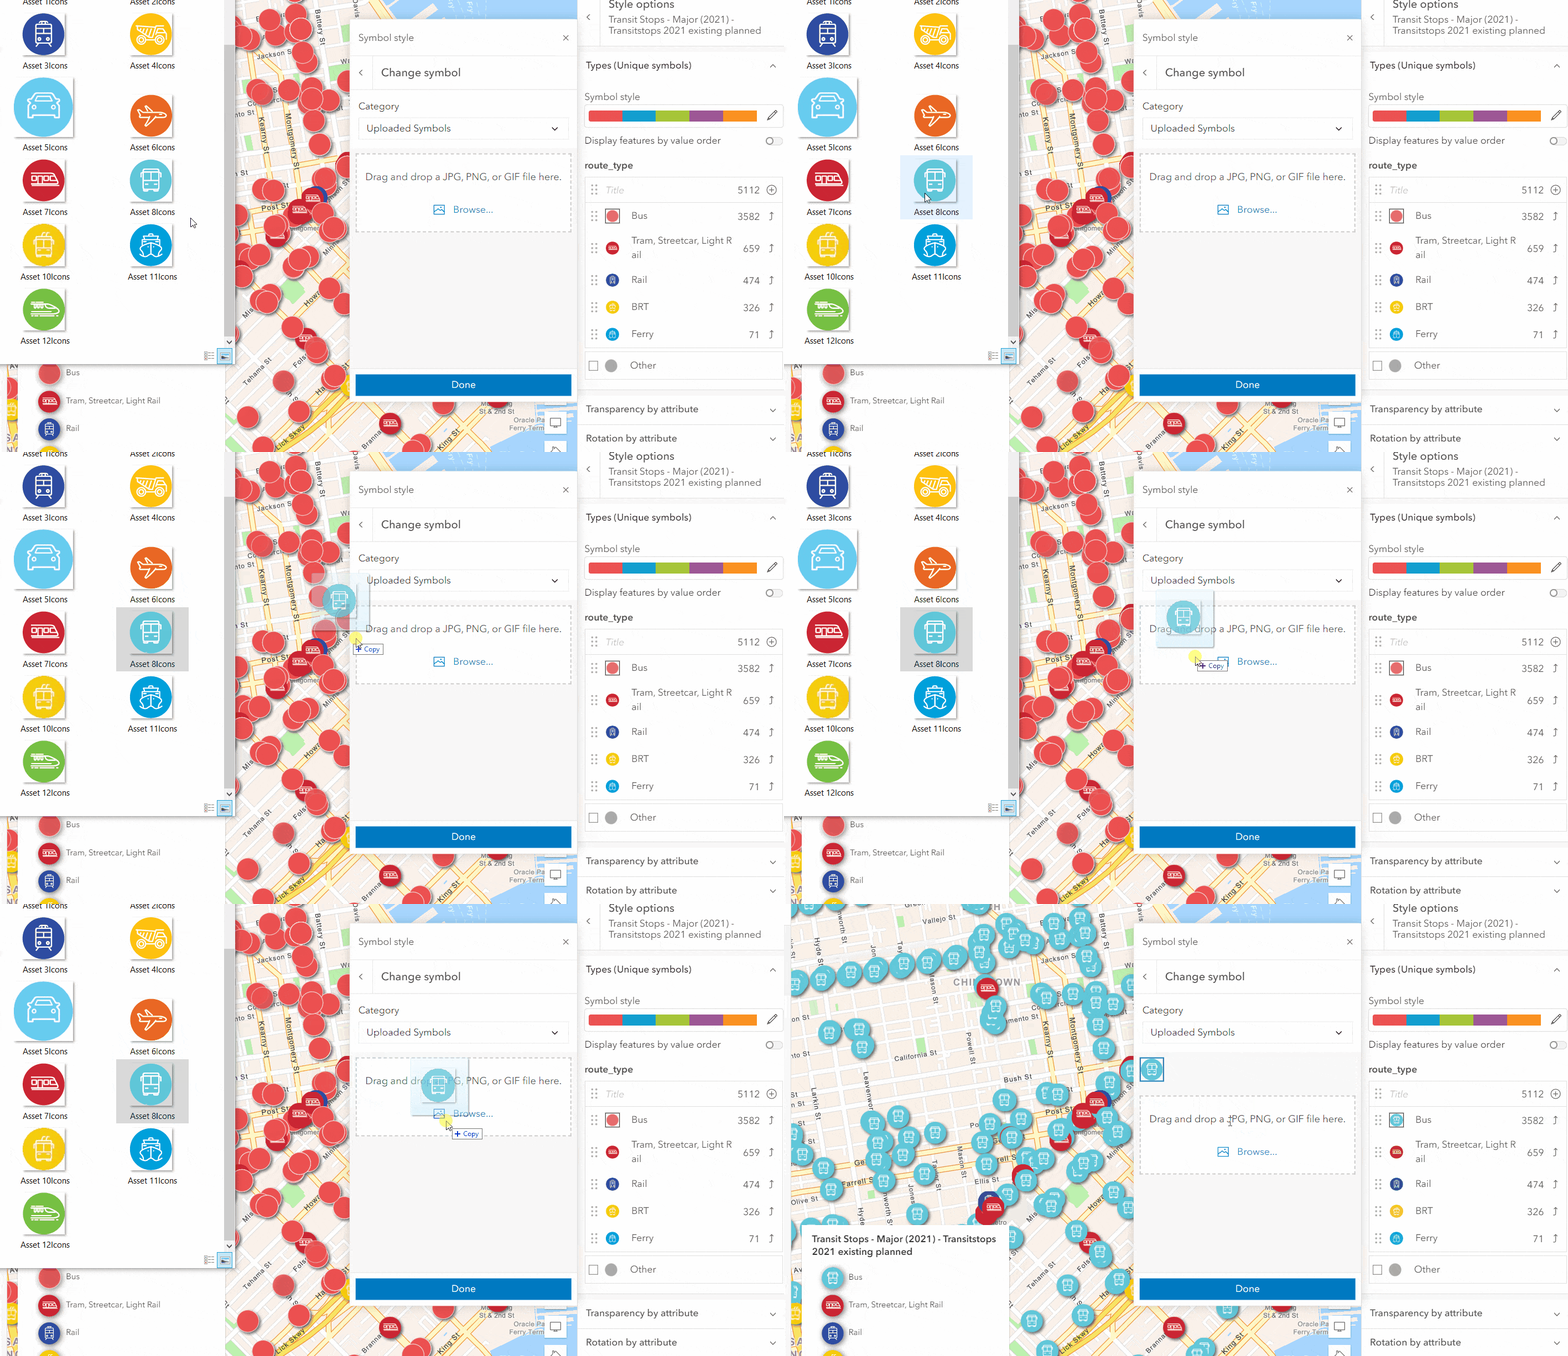
And that’s it! You just repeat the process for each of the type values you want to style. The workflow is the same across the other workflows mentioned above and now we can dig into managing your uploaded symbols.
Managing your uploads.
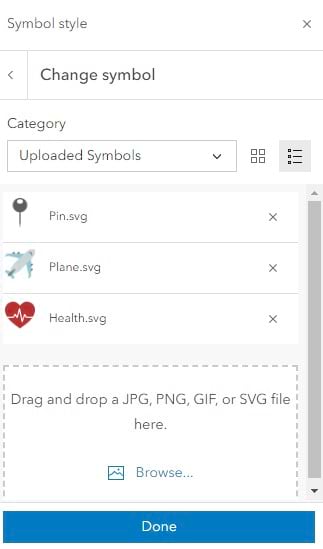
We’ve updated how you can manage your uploaded symbols with the October 2023 release of Map Viewer. The symbols are handled in the browser app cache and prior to this release you would have clear your browser cache to remove the symbols from your gallery. At this release you can now go and click on the new List view button inside the symbol styler and for uploaded symbols you will see an x next to the symbol. Clicking on the x will remove it and free up space for more symbols to be added. It is recommended you do stay under 200kb per symbol.
If you see this warning when uploading
- Uploaded image is too large, resize or use a smaller image.
This could mean 2 things
- The image you are uploading is to big
- The image you are uploading is causing the remaining storage to exceed the set limit and you will have to remove existing images to add it.

Article Discussion: