Forestry and the practice of actively managing natural resources has historically been one of the earliest adopters of GIS. The use of mapping to track forest assets, environmental compliance, and associated activities allows forest managers to effectively manage costs and communicate need.
Let’s go through a step-by-step workflow for creating a feature layer from the forest activity tracking template. In this example, we’ll create a feature layer for capturing harvest block locations along with the associated forest and stand maturity data in related tables. We will also create and track treatment activities including harvesting, thinning, and chemical applications.
Create a feature layer using a template
Step 1: Sign in to ArcGIS Online with your ArcGIS account and go to the Content page.
You’ll need privileges to publish hosted feature layers. If you don’t have these privileges, contact your administrator or join the Learn ArcGIS organization for a free 60-day membership.
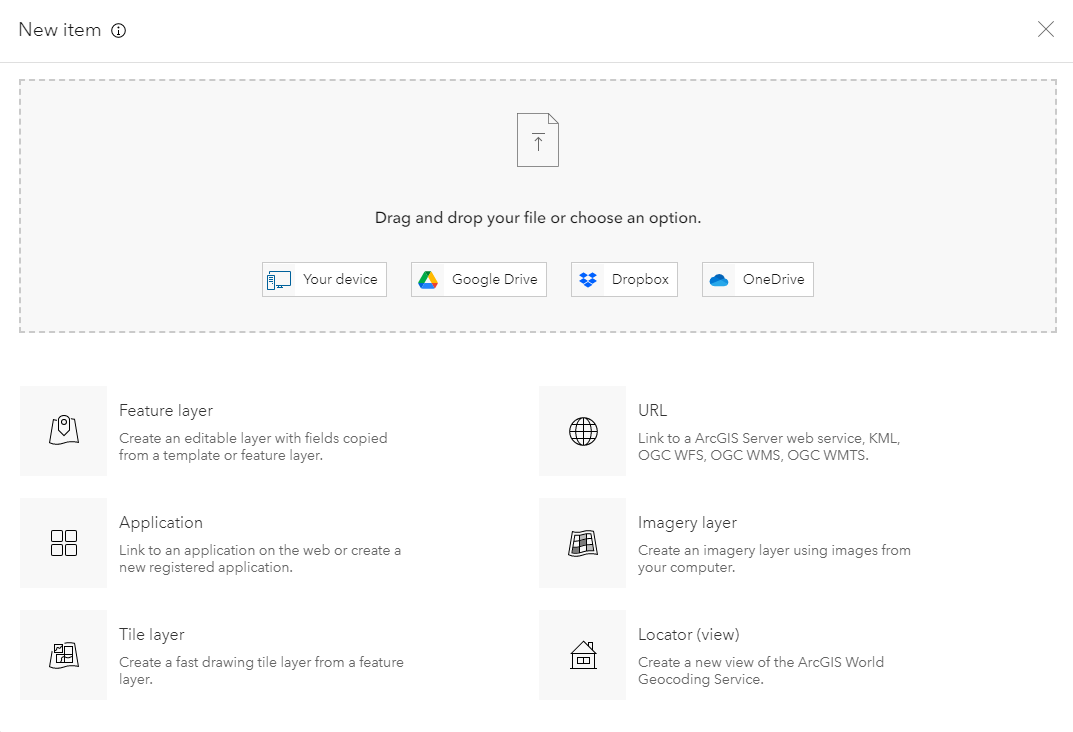
Step 2: From the My Content tab, click New item, and select Feature Layer.
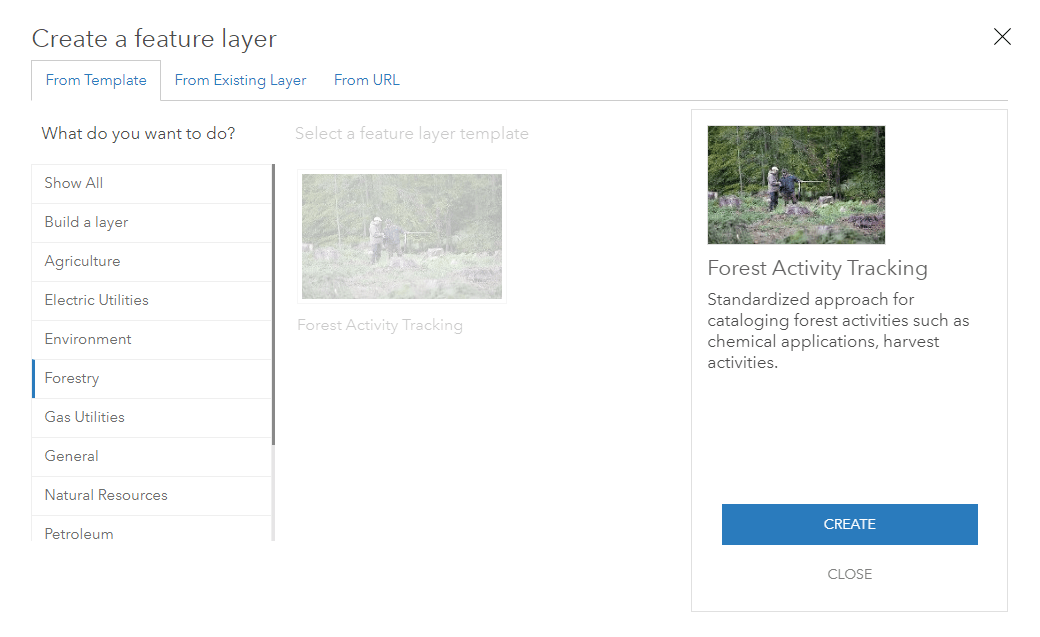
Step 3: Select Forestry from the list on the left, choose the Forest Activity Tracking template, and click Create.
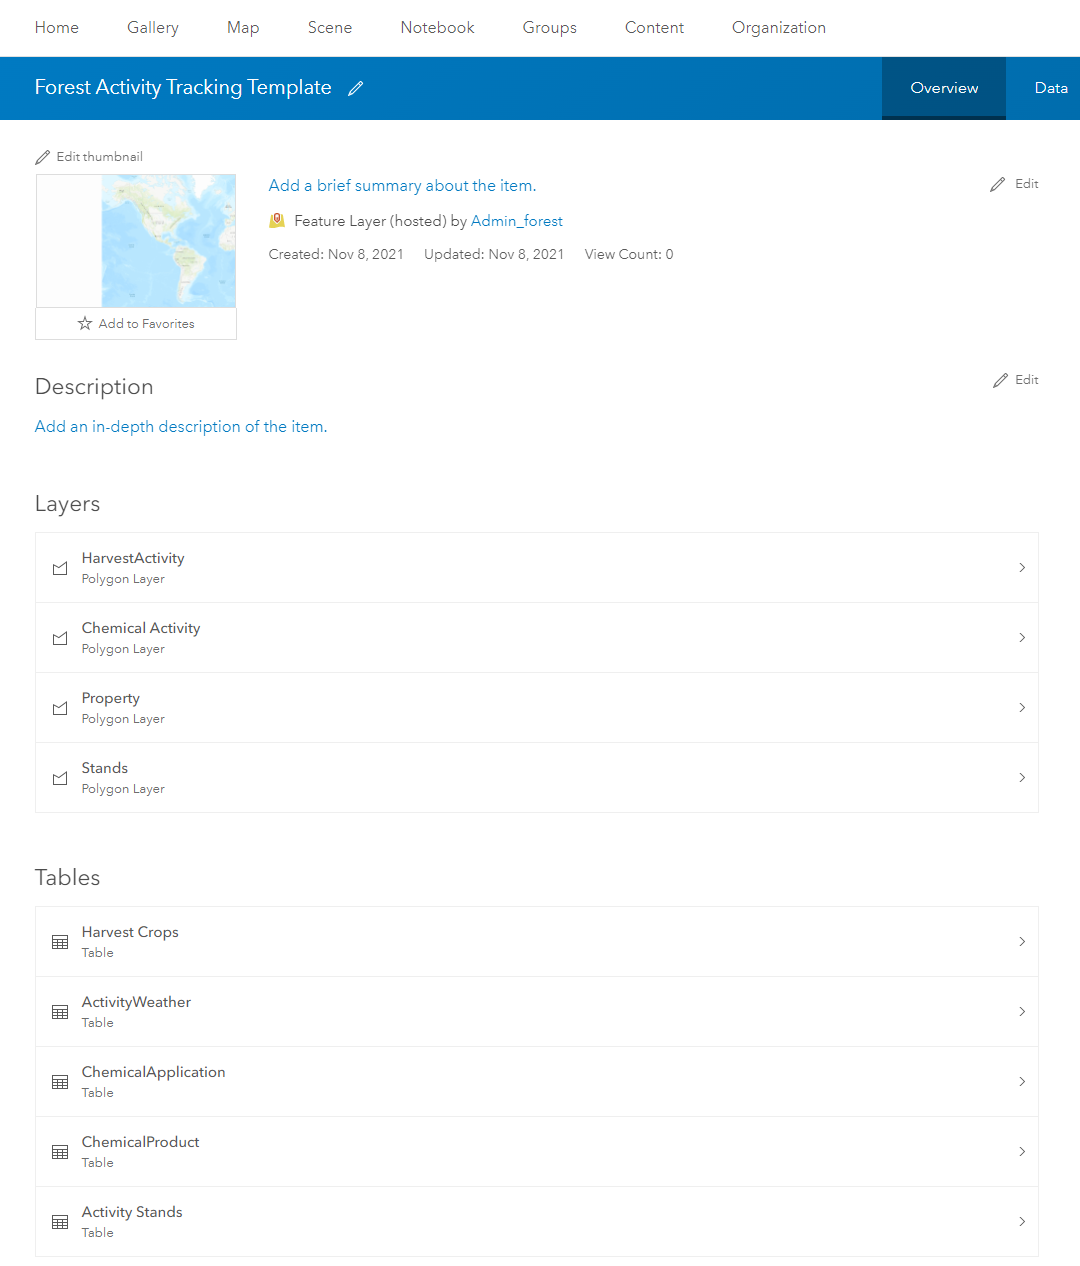
Step 4: The template includes several empty layers and related tables that make up the data model. Keep the default selection and click Next.

Step 5: Set the map extent to your area of interest by panning and zooming or typing in the exact coordinates.

Step 6: Set the item properties of the feature layer including a title and tags. By choosing meaningful tags, your feature layer will be more discoverable to other users in your organization. A summary, though optional, can provide additional context. Click Done to publish your layer.

Your new feature layer is now published with all of the appropriate layers and tables for collecting and managing forest activities.
Before you can start collecting data in the field, you’ll first set a few editing properties on the layer and add it to a web map.
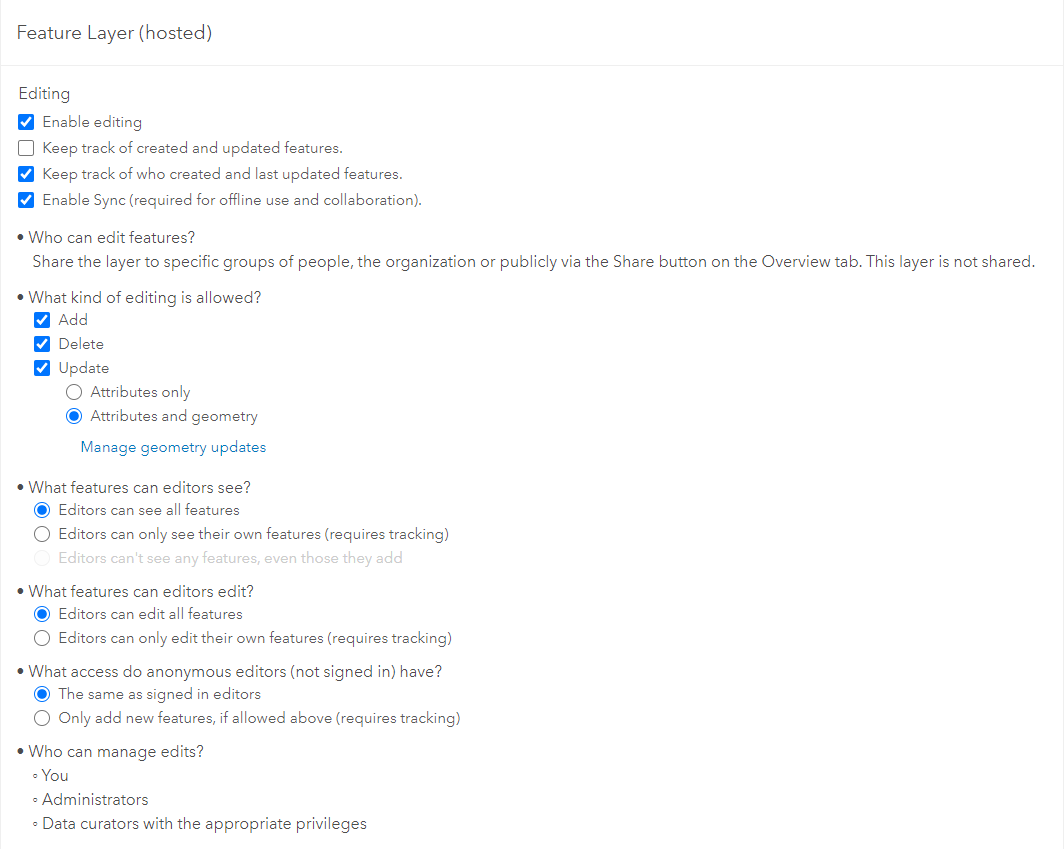
Step 7: In the item details under Settings, ensure your new feature layer is editable by selecting the appropriate options for field data collection. You should have Enable editing and Enable Sync selected by default. You can choose to enable editor tracking and configure additional editing details.
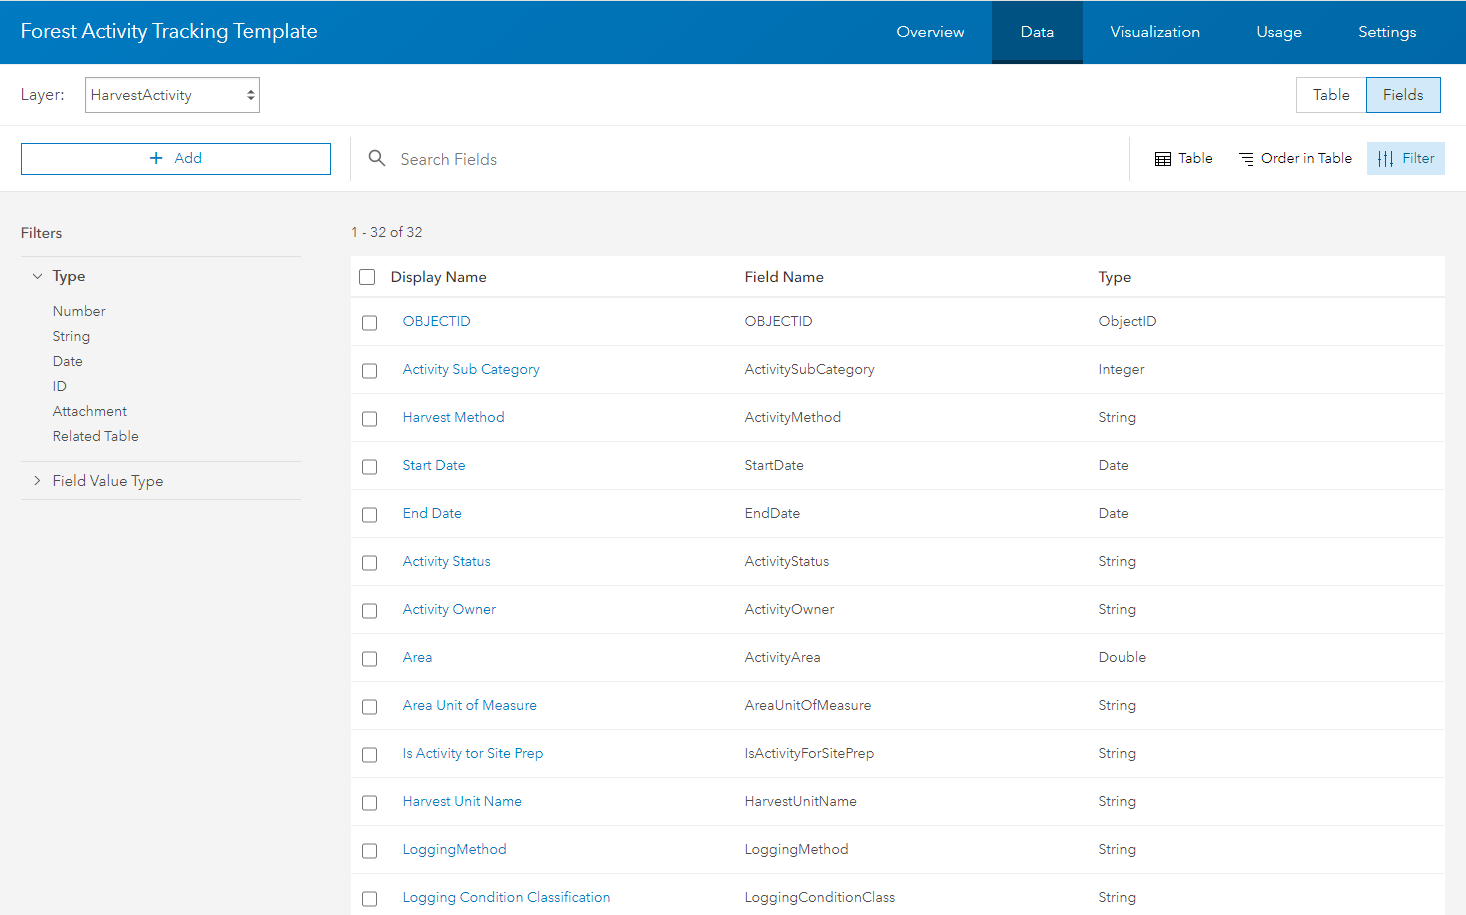
Every organization has their own set of requirements for determining what information needs to be captured. You may need to make an adjustment to the schema of the feature layer to accommodate your business requirements – for instance adding or removing a field. To view the schema, select the Data tab and specify a layer in the dropdown. The table view displays all of the fields included in the template, along with any features. It is empty by default.
Step 8 (optional): To modify your layer, toggle the view from Table to Fields. Here you see a list of all the fields with their field name and data type. To add a field, click + Add.
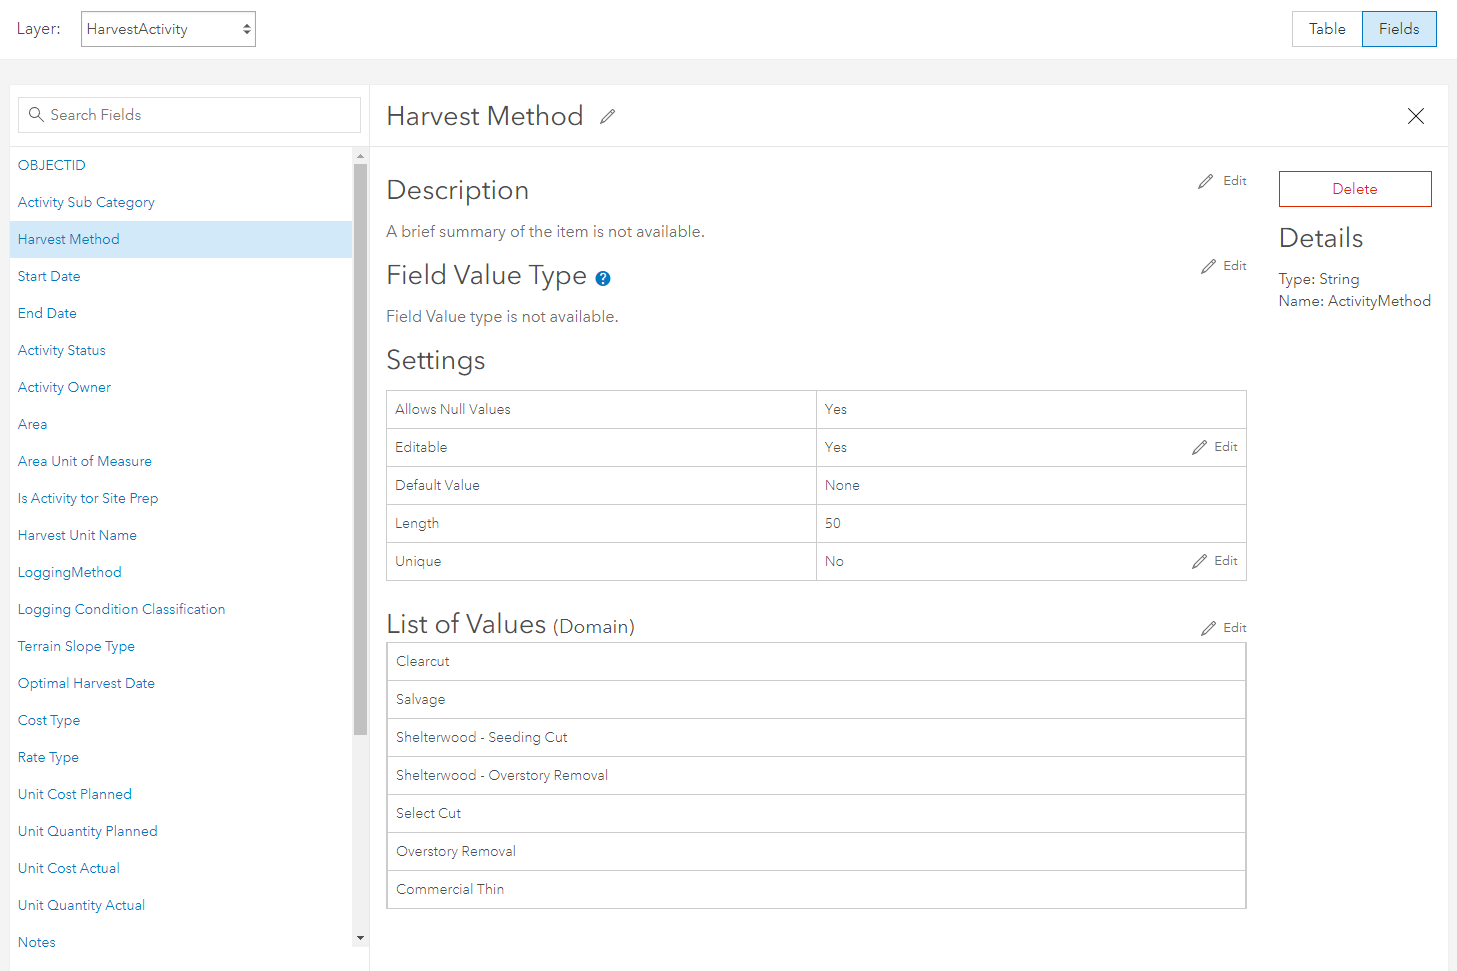
Click on a field name to open up the field details. Here you can manage the settings of the field and control how values are entered and stored. Some fields include pre-populated domains that help ensure data integrity during field collection. In some cases, you may want to change the values, enter in your own, or remove them altogether.
Step 9 (optional): To edit the domain list, click the Edit icon above the domain table. Each domain value has a label (how it appears in the table) and a code (the actual value stored in the table). Make changes as required. Click Save to finish.
Our forest activity tracking template is ready for use. Existing data about your timber tracts and stands may be loaded into the template for reference. Now you are ready to take the template into the field with Esri mobile apps to start collecting data about harvest activities, chemical treatments, and their associated details.
Create a map to use with Field Maps
ArcGIS Field Maps is a native mobile app that supports map centric data collection and visualization in the field. Foresters can use Field Maps to view information about the forest and seamlessly collect and manage information in your new activity tracking layer. Before any data collection can begin, the forest activity tracking layer must be added to a map and configured for used with Field Maps. Here’s how:
Step 1: From My Content , click View item details for your new feature layer.
Step 2: From the overview tab, click Open in Map Viewer and choose Add to New Map. All of the layers and tables are added to the map.
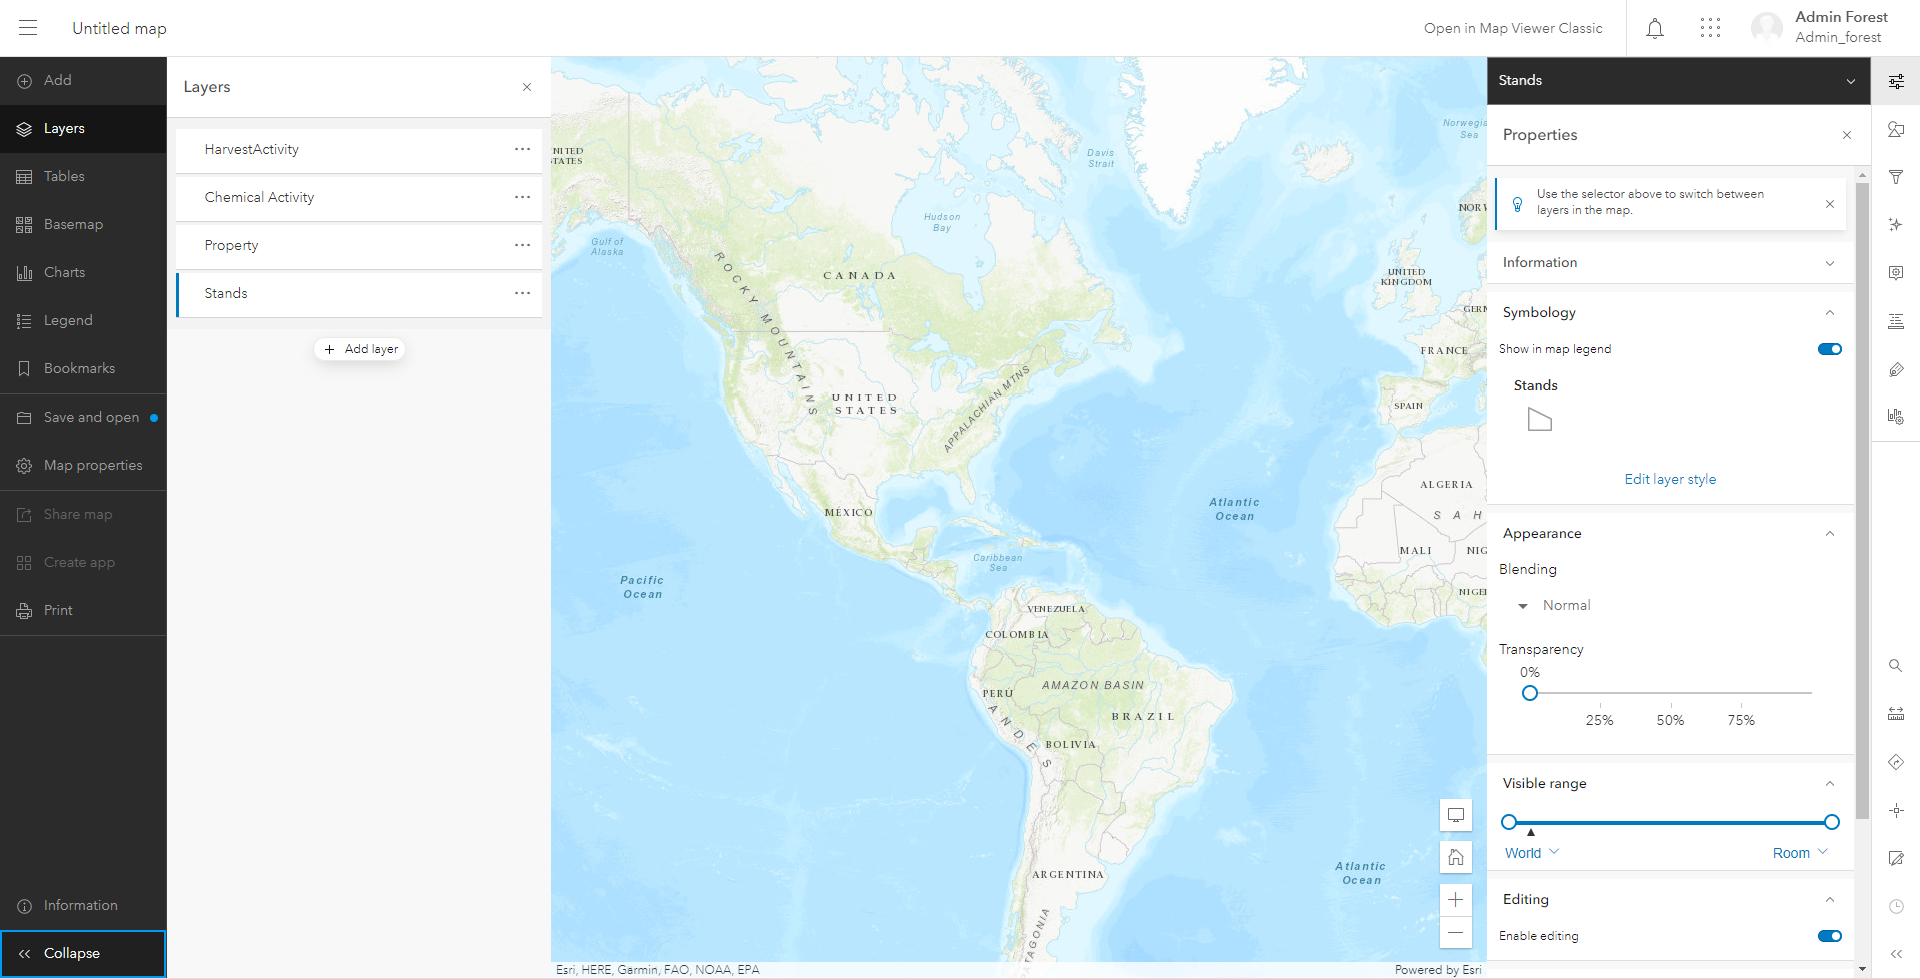
Step 3: Explore your map. Configure any additional settings and adjust symbology, labels, popups, visibility ranges and more as desired.
Step 4: Click Save when finished.
Step 5: Select Map properties and click Item details to open the map details page.
Step 6: On the overview tab, select Open in Field Maps.
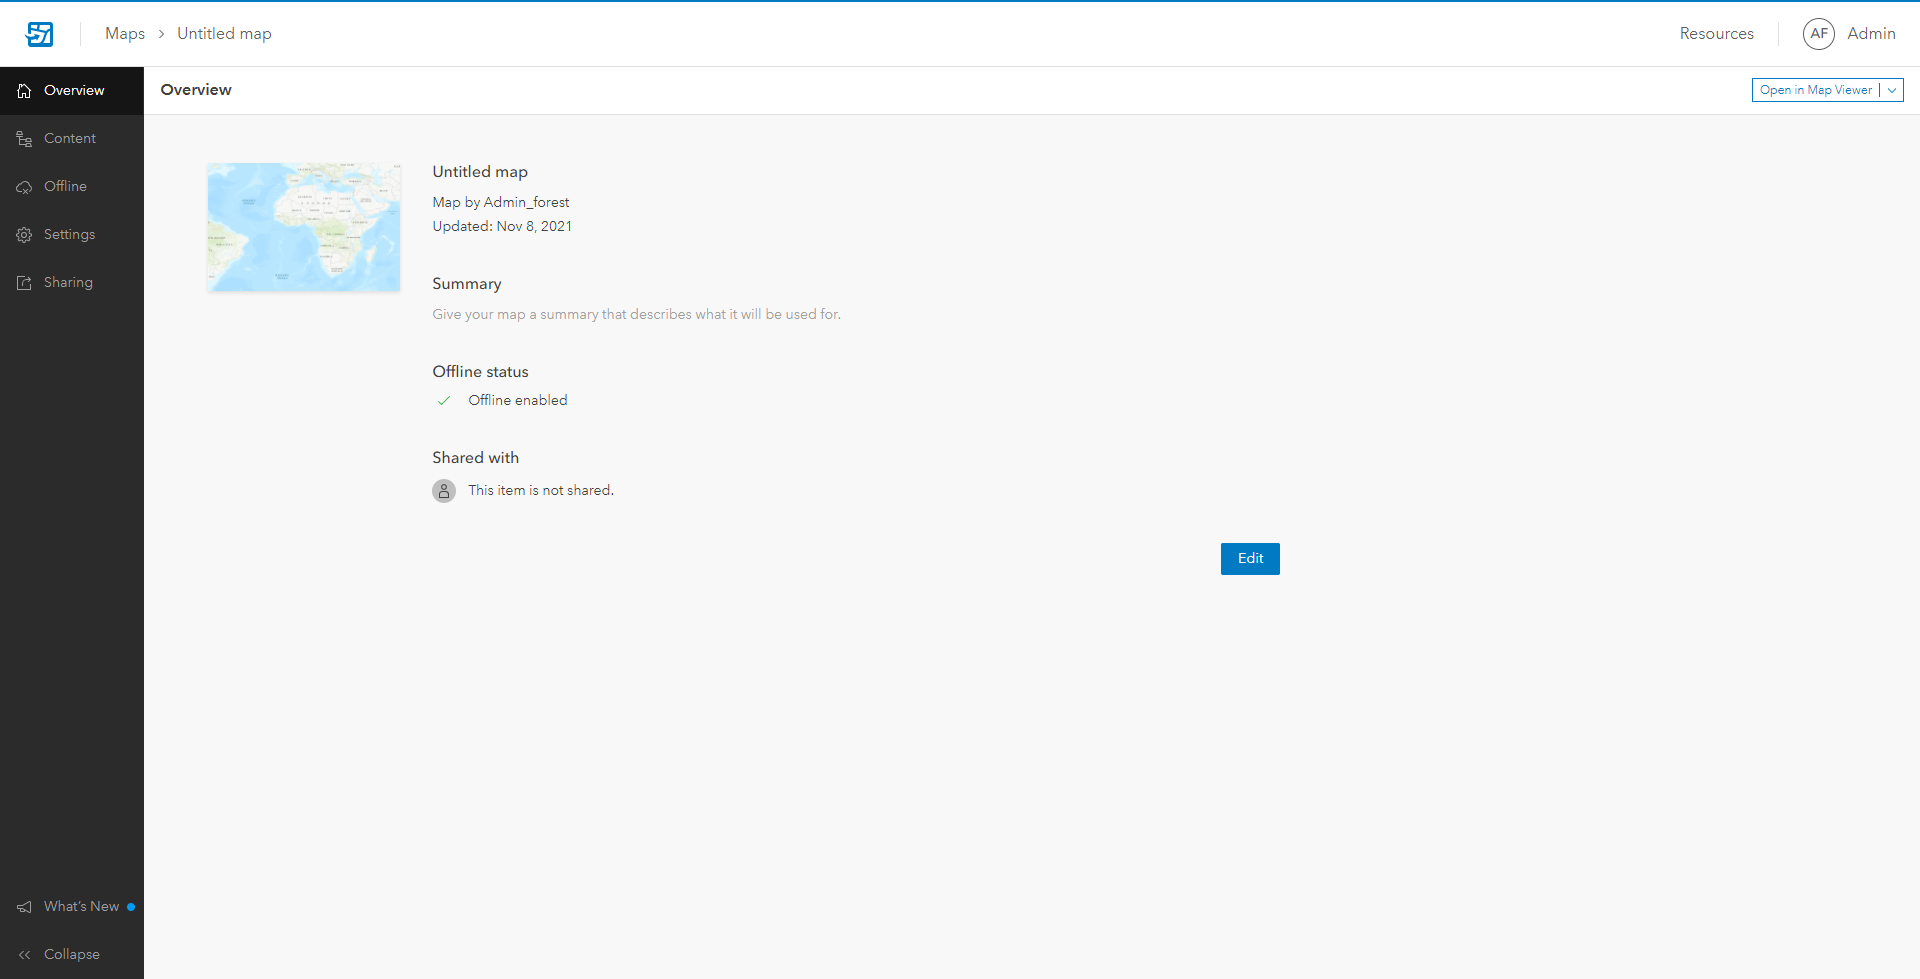
This launches the Field Maps web app. Field Maps includes two components – a web app and a mobile app. The web app is used by map authors to configure various aspects of the map for use in the mobile app.
The overview tab shows the details of the web map along with the offline status and how it is shared. For the purpose of this exercise, we will not go into details around map configuration. Reference this documentation for more information.
Step 7: To share your map with other users in your organization, click the Sharing tab and select Set sharing level.
Your map is now ready to be used in the Field Maps mobile app.
Use Field Maps to collect data
Field Maps can be downloaded for use on Android and iOS devices. Access to Field Maps is provided through the ArcGIS Online identity model, meaning any member with a named user account can log in and seamlessly access content in your organization.
Step 1: Sign in with your Named User account to which the map has been shared with.
Step 2: Search for the map created in the previous section.
Step 3: Launch the map and begin working with the data layers.
See Use Maps for more information on getting started with Field Maps.
Examples
Field Maps can support a variety of visualization, data collection, and location tracking workflows. Below are a few examples of how you can use your forest activity tracking template in conjunction with Field Maps to better manage your field activities.
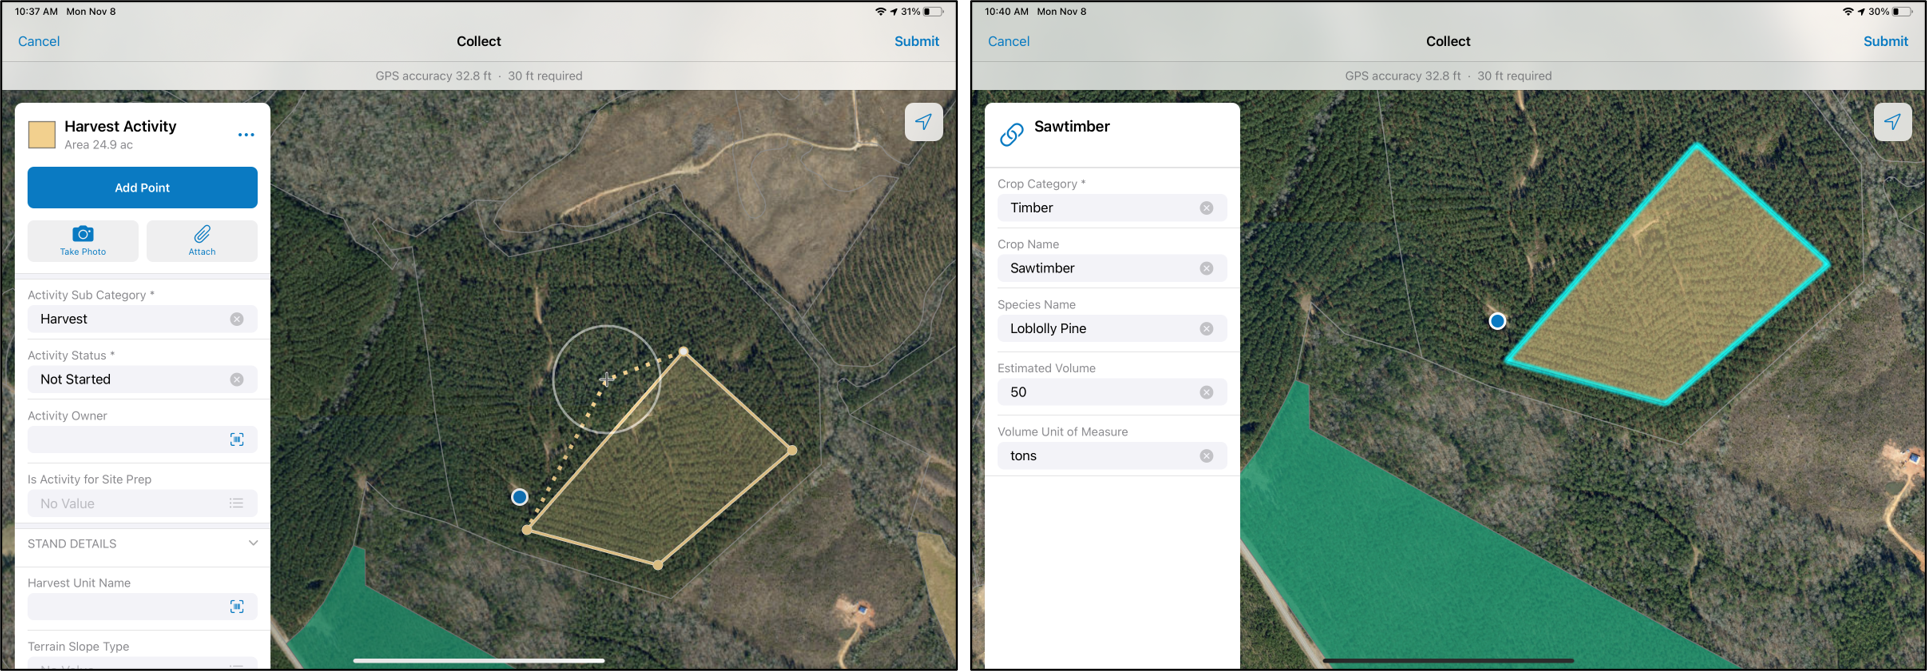
Map a new harvest activity and capture information about the crop harvested.
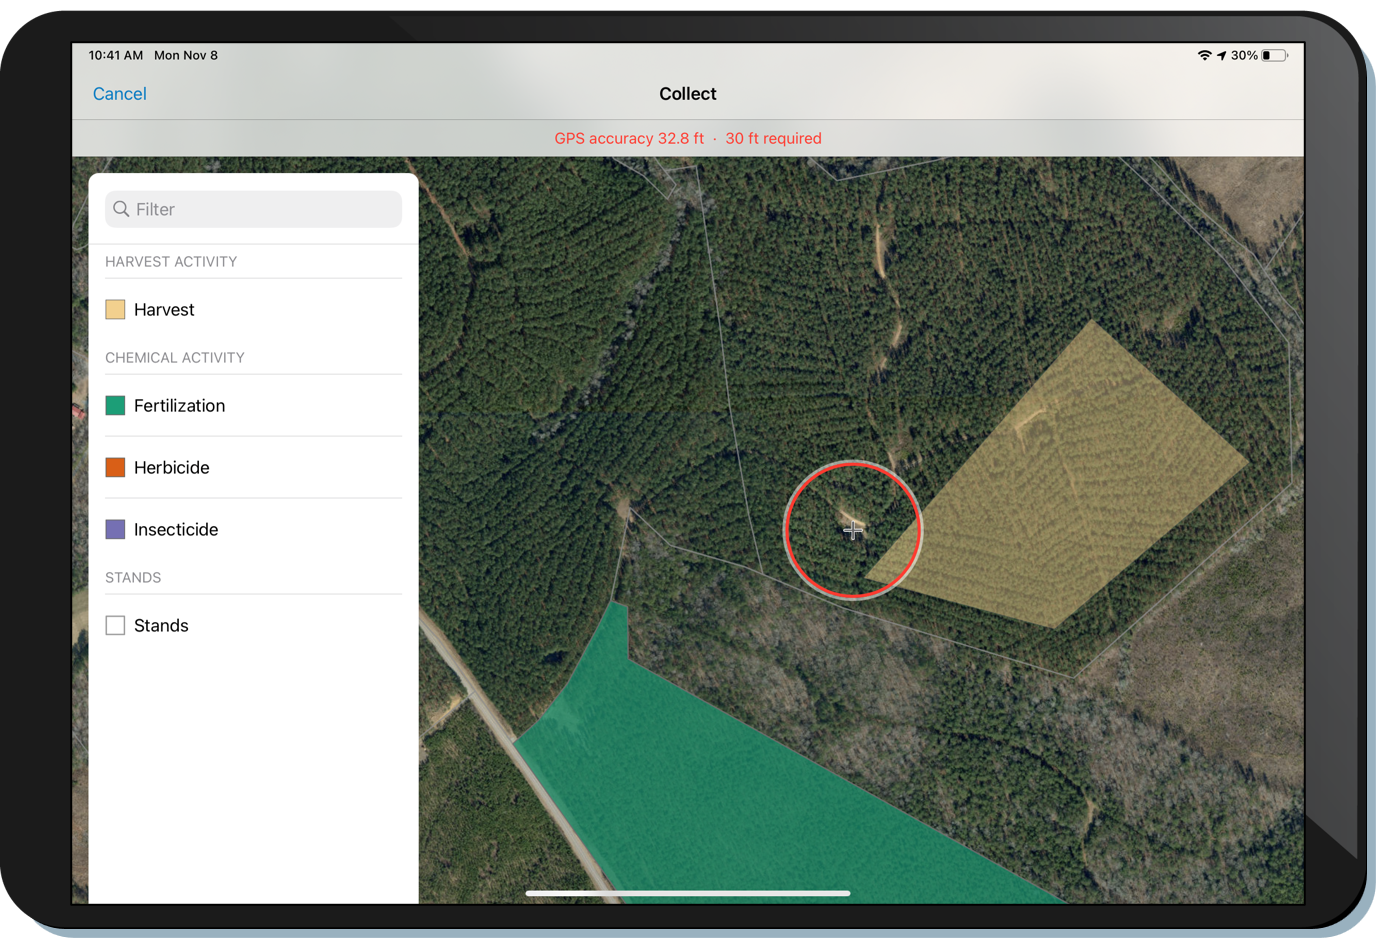
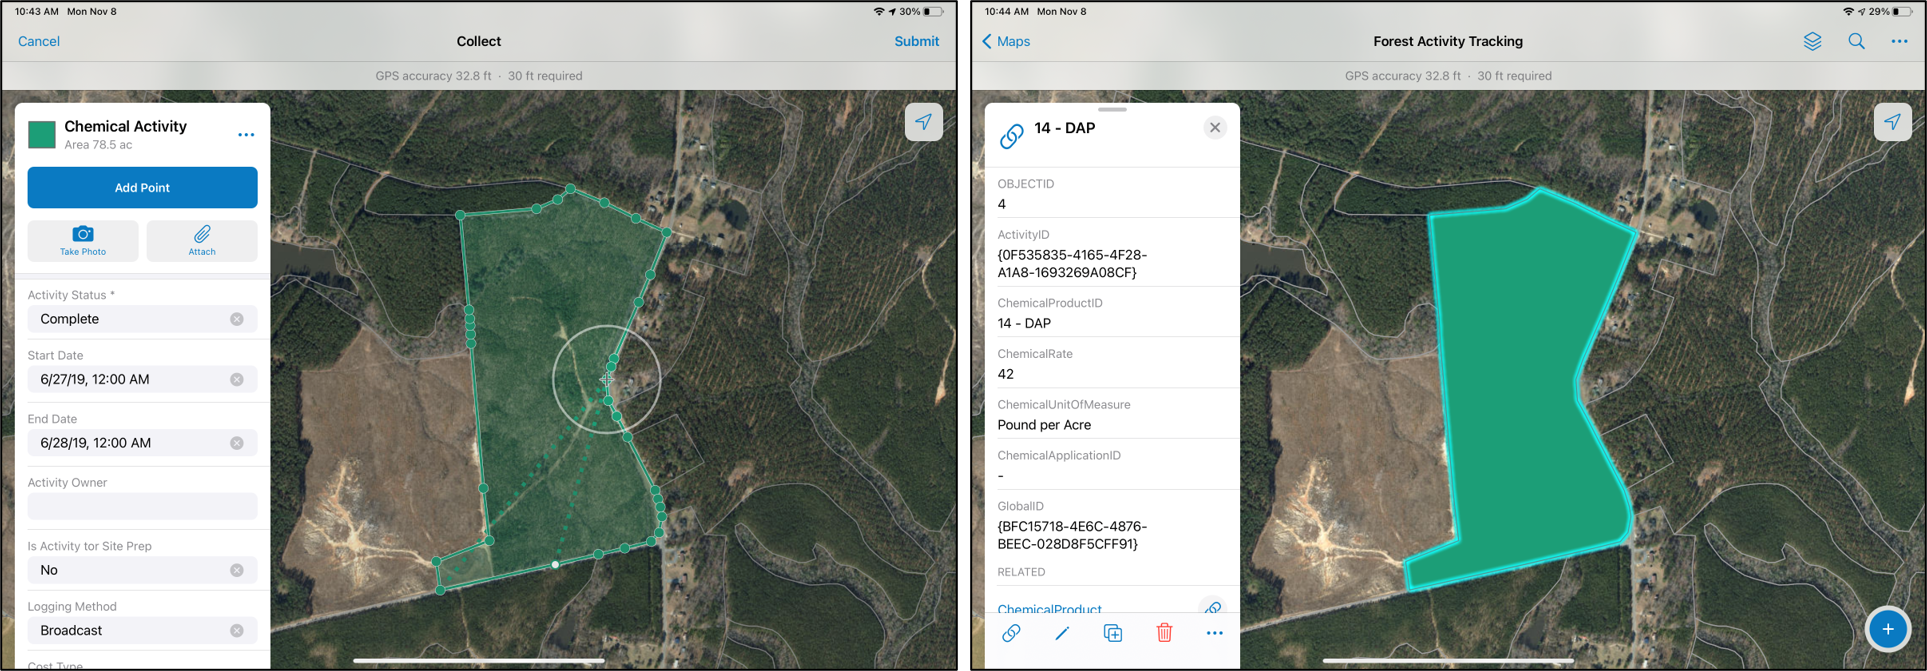
Map a new chemical treatment and capture information about the type and amount of chemical applied.
Measure distances and areas, get directions, and markup the map.

The same template and web map created here can be plugged into other ArcGIS applications. It can be added to a configurable app like Operations Dashboard and used to monitor the status of activities in real-time. Or it could be added to a map within ArcGIS Pro for more complex analysis and data management. The flexibility of templates allows you to deliver meaningful information products that add value to your everyday workflows.

Feature layer templates provide new and traditional GIS users with the tools and means to collect new data or edit existing data while maintaining data integrity. With the Forest Activity Tracking template, you can map new and existing stands or blocks, monitor harvest activities, evaluate chemical applications and treatment activities, and plan better forest management. Get started today!

Commenting is not enabled for this article.