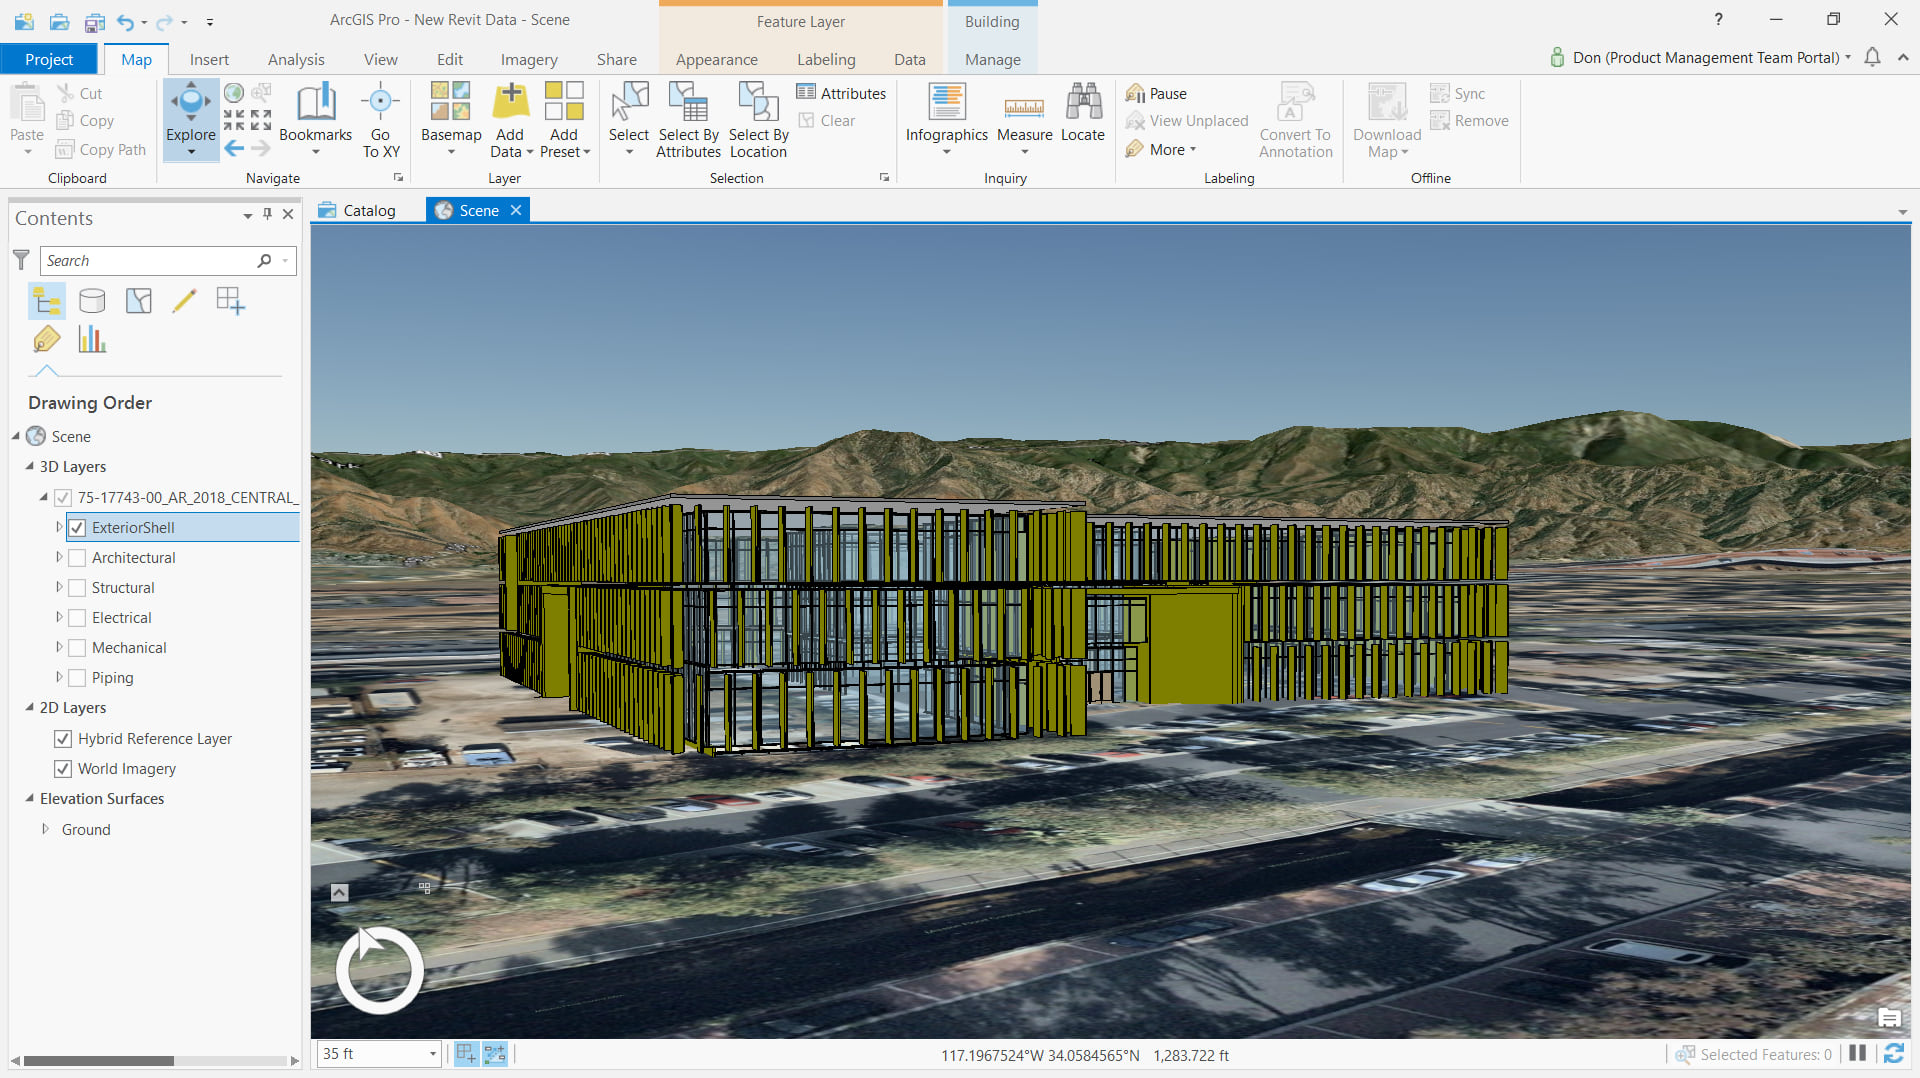
Why does my Revit model display in ArcGIS Pro in the middle of the Pacific Ocean, or off the coast of Africa three times taller than it should be. Or, why does it span the entire European or African continent? Or, how did my Revit model show up on the map in the correct position?! The short answer to all these questions is that my Revit model needs to be geolocated or georeferenced to be positioned correctly in an ArcGIS map or scene.
This article outlines the method I use to specify the coordinate information in a Revit file using Revit. In a future article I will address what I can do if I don’t have access to Revit software, but still need to re-position my Revit model in ArcGIS Pro, a process we call georeferencing.
Positioning BIM Data In Revit for use in ArcGIS
As an ArcGIS user , who is also a Revit user I know that I can directly read Revit files in ArcGIS Pro 2.2. I want my Revit-sourced data to be positioned correctly in an ArcGIS scene the first time it is opened up in ArcGIS. To do this I will establish coordinates in the Revit model that represent real world coordinates. And I will properly record the coordinate system I used by including an esri .PRJ coordinate system definition file. My work includes two major steps:
- In order to establish the necessary information in Revit, I need the Revit Project Base Point’s coordinates and angle to true north to represent numbers in some real real world coordinate system.
- Because ArcGIS needs to know what real world coordinate system was used to establish the Project Base Point, I “tell” ArcGIS the coordinate system I am using by including a .PRJ file that contains the coordinate system definition. A .PRJ file is an ASCII file that contains the definition of the coordinate system used by a companion data file. The file name should be the same as the CAD or Revit model, but should have a .PRJ file extension.
How do I actually do the work in Revit? I can use the tools of Revit to establish the coordinates for my Revit model using a combination of various techniques for manipulating the clipped and un-clipped states of Revit Project Base Point and Survey Point. A description of all the options to manipulate these points are beyond the scope of this post. That said, I can use any technique where the Revit Project Base Point reflects the X,Y,Z position and angle to true north where those coordinate values are based on an Esri-supported coordinate system. I also need to notify ArcGIS which coordinate system I used, by obtaining a properly named .PRJ file.
WARNING: Modifying the coordinates of a Revit file should only be done when you understand the full implications that that change will have on collaboration and the BIM processes in your organization. Although not required by ArcGIS, the Revit Survey Point might have some significant meaning in your Revit model or it may not. To keep the Survey Point and Project Base Points properly related to the my Revit Model I will take care to update them together as described below. If I don’t want to change the coordinates of my Revit data, or I don’t have access to Revit, I can accomplish the re-positioning of Revit models without modifying the coordinates of my Revit Models using the georeferencing capability of ArcGIS Pro instead.
That said, as a Revit user who wants to modify the coordinates of my Revit file so that it will be properly positioned in ArcGIS, I find the following is the easiest method in Revit to accomplish my task:
- I un-clip the Survey Point and then use the SPECIFY COORDINATES AT POINT command on the Coordinates pull down menu of the Revit Manage Ribbon tab. Using this tool, I enter the real-world coordinates with the proper elevation, and angle to true north for some known point in my Revit Model (any known point). The coordinates of the point and angle I enter should be some known place in the Revit model and its position on the earth according to the coordinate system I am referencing. If I chose to leave the Survey Point “clipped” I accomplish the same thing but my Revit Survey Point will retain its old less-meaningful coordinates relative to my new global coordinates. When I want the Survey Point and Project Base Point to end up in the same relative position to one another and the model I will un-clip the Survey Point before using the SPECIFY COORDINATES AT POINT command.
- I must know in advance what that coordinates should be, by surveying the point in the real world, or by some other means known to me. The coordinate system values and .PRJ file you use must match the display units of your Revit model. Because of this you will never be using a global coordinate system of Lat/Long since Revit models are never created using Lat/Long or decimal degrees as the drawing units. (Note: This is why your model might by default cover all of Africa without georeferencing or when you fail to provide a valid .PRJ file, because the default coordinates system of a global projection definition for a global scene has units of Lat/Long but your Revit model never will).
Note: If I want to update the coordinates of multiple Revit models that I have linked to this Revit model, I can use the PUBLISH COORDINATES tool in Revit to push the changes I make to my coordinates in this Model to all my linked models. If I want the Survey Point in those models to update relative to the changes to the Project Base Point and the model, I would want to have those linked models saved with their Survey Point Un-clipped as well. Otherwise the position of the Survey Point in those models will retain their less meaningful original coordinate values… like 0,0,0 etc… - After updating the model and being careful to note the coordinate system of the point I entered, I can include a .PRJ file or I can select that coordinate system definition in ArcGIS after loading my Revit model in ArcGIS Pro. If I choose to define the coordinate projection definition in ArcGIS Pro my Revit model will load correctly into place only …after running the ArcGIS Pro DEFINE PROJECTION tool from the Manage tab of the ArcGIS Pro Building Ribbon menu. …Or, I can obtain a copy of an Esri .PRJ file containing the coordinate file definition and include it in the same file directory with the same filename as my Revit file, with the .PRJ extension. Note: If all my Revit models in a file folder will be using the same .PRJ file definition I can alternately include just a single .PRJ file, named “ESRI_CAD.prj” that contains my coordinate file definition. By providing the properly named “.PRJ” file I can skip the DEFINE PROJECTION tool when adding Revit files to ArcGIS Pro because it is read by ArcGIS Pro automatically if it exists in the same file folder as the Revit file.
In this video I show how I define coordinates in Revit to ensure proper positioning in ArcGIS Pro.
In a future Post I will outline the process for performing the task of georeferencing this same data using just ArcGIS Pro when I don’t have access to Revit software to update the coordinates of the model. I instead will create an ArcGIS 3D world file to define the offset and rotation of the model in my chosen coordinate system using the georeferencing workflow included in ArcGIS Pro.


Commenting is not enabled for this article.