Approximate Read Time: 6 minutes
All geoprocessing tools have required and optional parameters. Parameters define the values and conditions a tool uses to run an operation.
Many optional parameters are preset with commonly used default values. In ArcGIS Pro 3.3, we introduced parameter overrides for geoprocessing tools. Using the Pro.settingsConfig file, you can set parameters (and optionally lock them) with default values that match your preferences.
Learn more about tool parameter overrides
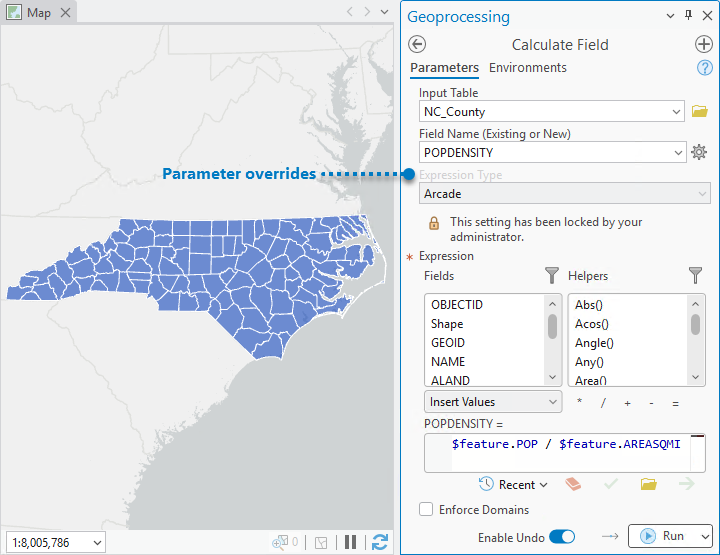
But what if you want to standardize settings for all tools across all your projects?
That’s where geoprocessing environment settings come in handy. And, new in ArcGIS Pro 3.7, you can use the Pro.settingsConfig file to set consistent environment settings for all new and existing projects, ensuring all tools and models run with consistent settings.
Geoprocessing Environment settings
Environments are optional settings that control the environment in which a tool processes data. They’re commonly used to set the default workspace, processing extent, output coordinate system, and cell size for raster datasets. Think of environments as global parameters because they can be set once and used by all tools run in a project.
To set environments at the project-level:
- Activate the Analysis ribbon tab
- Click the Environments button in the Geoprocessing group
This opens the Environments dialog box, where you can set environments once for all tools and ModelBuilder models.
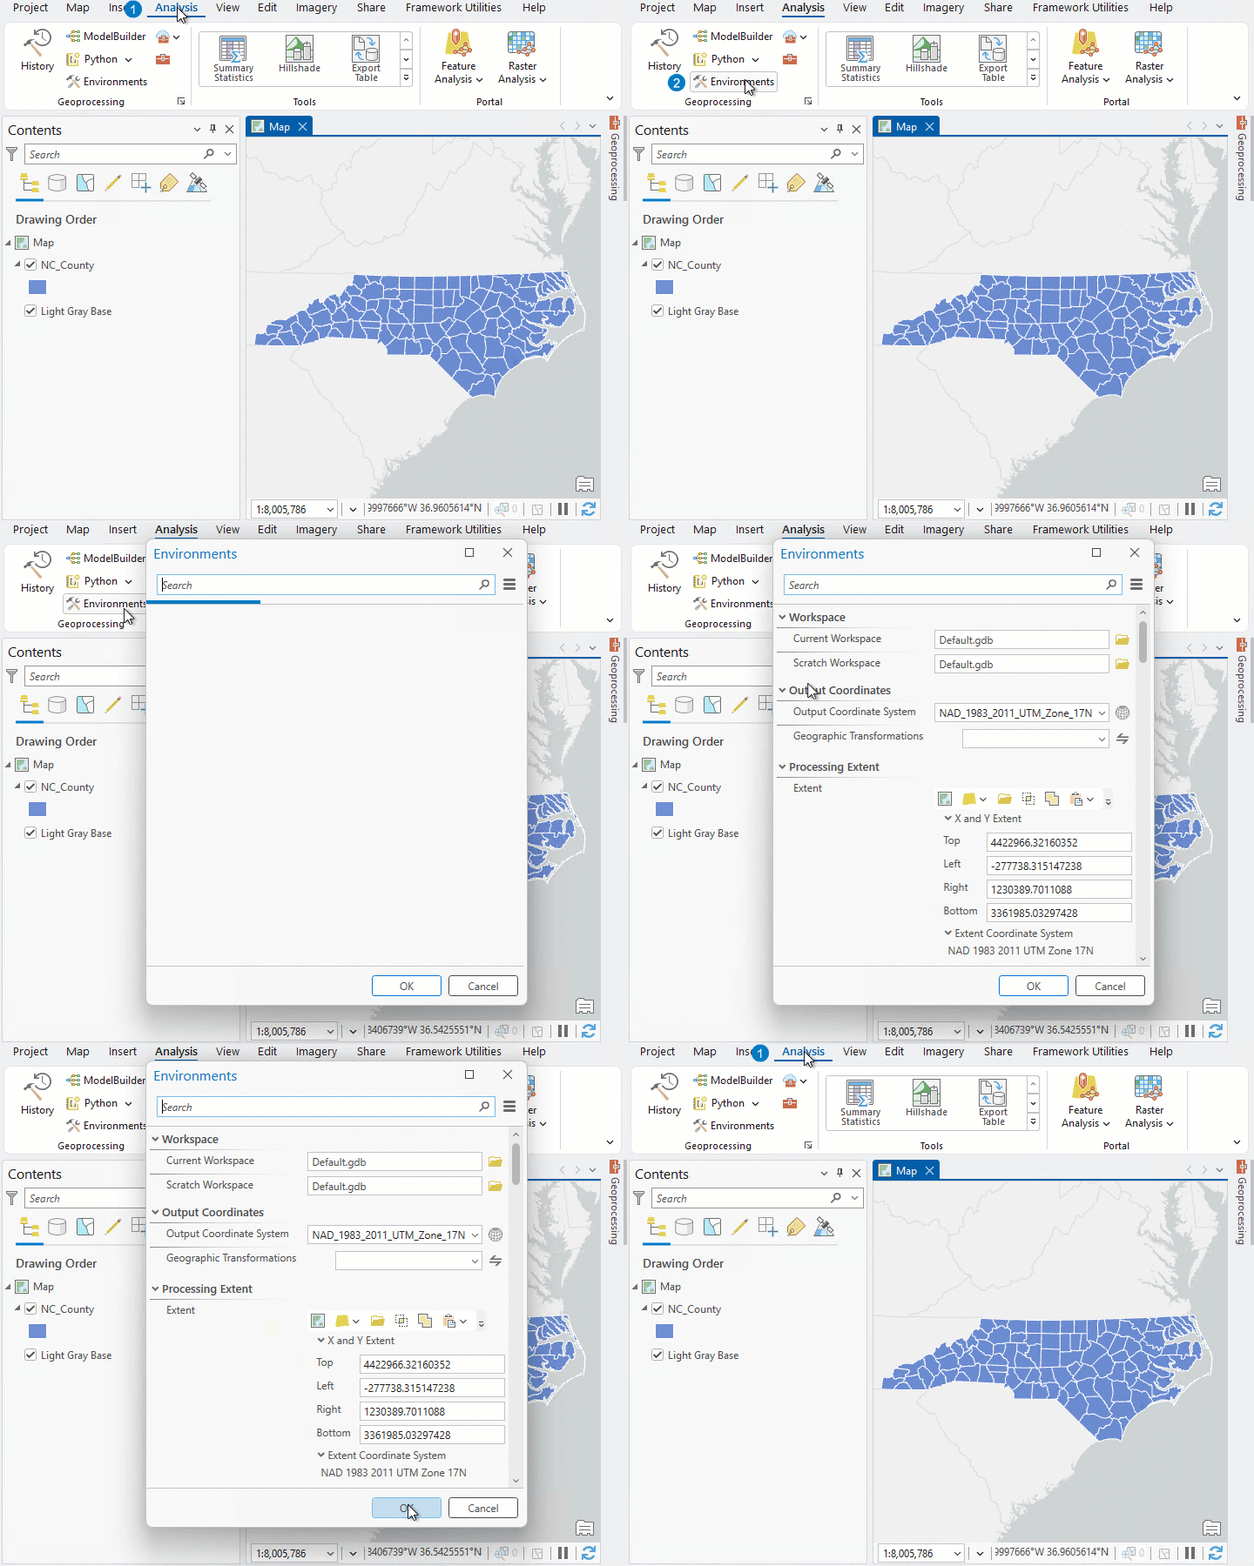
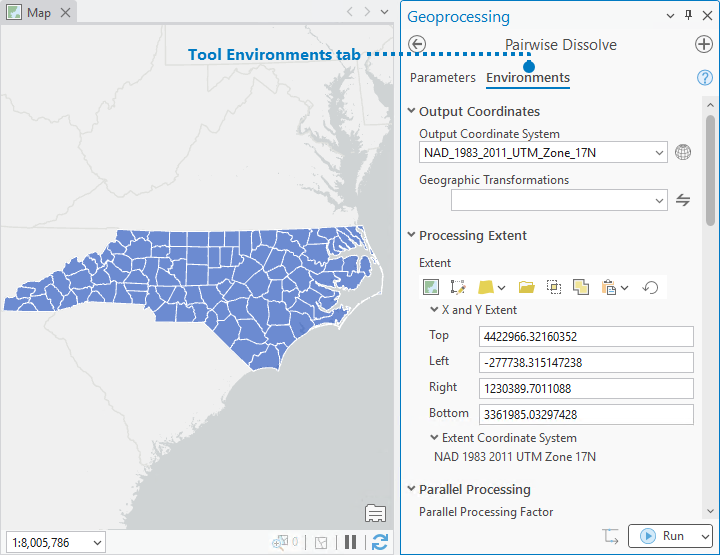
Or set environments for a single tool run using a tool’s Environments tab, which loads its defaults from the project environments.
Note: Not all tools honor all environments. Check the tool’s reference page to see which environment settings it uses.
Save Environment settings
Project-level environment settings are saved with your project. Whereas tool environments are logged in the geoprocessing history after you run a tool. You can also include environments in custom project templates for re-use. This way, you can share your preferred geoprocessing settings with others in your organization (or even outside your organization) to provide a consistent starting point for new projects.
Override Environment Settings using the Pro.settingsConfig file
In ArcGIS Pro 3.7, you can use the Pro.settingsConfig file to override default environment settings for all new and existing projects.
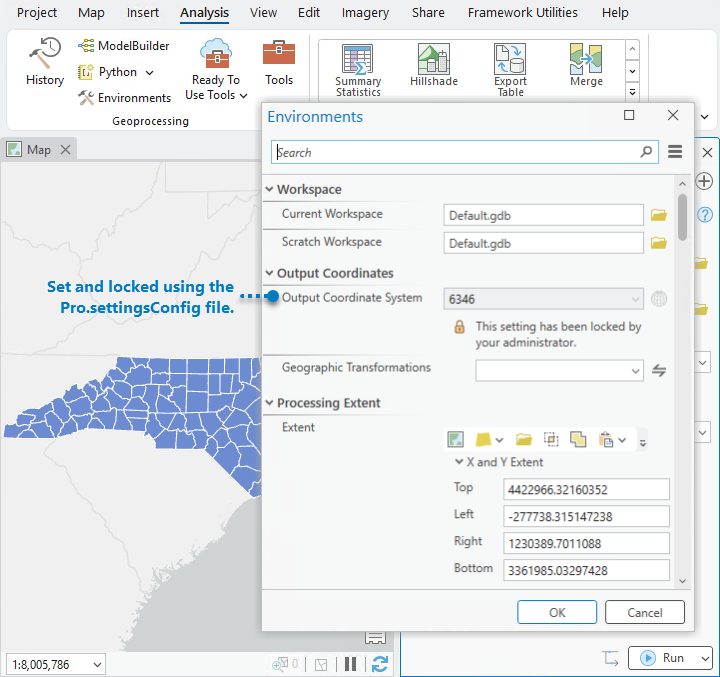
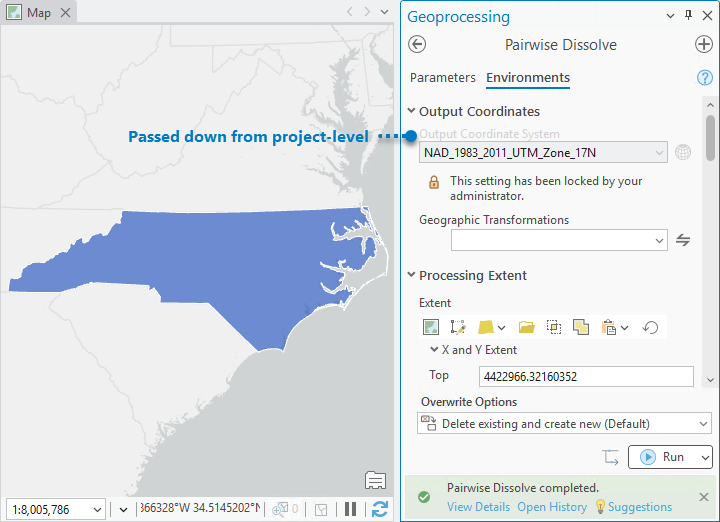
The Pro.settingsConfig file overrides environments at the project-level, and passes these settings to all tools and models that honor the environment. It replaces any environment settings previously saved in the project with those specified in the Pro.settingsConfig file. As a result, you will see the same environment set and (optionally) locked in the Environments dialog box, a tool’s Environments tab, and in ModelBuilder.
Note: Environment overrides do not apply to tools run using Python commands in ArcGIS Notebooks, the Python window, or outside of ArcGIS Pro. These tools get their environments from the arcpy.env class.
Steps: Set environments in the Pro.settingsConfig file
For example, create and edit the Pro.settingsConfig file to set and lock the Output Coordinate System environment to NAD 1983 (2011) UTM zone 17N, which has the WKID 6346.
To create the Pro.settingsConfig file, close ArcGIS Pro and follow the instructions below:
- Open Windows Notepad or the text file editor of your choice.
- Save the file with the name and extension
Pro.settingsConfig.
Note: If you want all projects used by all members of your organization to use the same environment settings, save the file in a location accessible to all. - Configure ArcGIS Pro to use the file by modifying the settings in the
HKEY_LOCAL_MACHINEregistry in the Windows Registry Editor or during a silent installation of ArcGIS Pro. - Edit the
Pro.settingsConfigfile using theXMLscript below.
To configure environment settings in the Pro.settingsConfig file, specify the Geoprocessing and Environments elements. The Environments element may contain one or multiple Environment elements, which must contain the following:
nameattribute–Use the name of the environment setting specified in the ArcPy.Env classisLockedproperty–Set tofalseto allow users to edit the environment, or totrueto lock the environment in the ArcGIS Pro interface.- The value of the environment, which in this example is the coordinate system
4326
All tools and models that honor the Output Coordinate System environment will inherit this setting and lock, ensuring they generate outputs in the same coordinate system.
Summary
In ArcGIS Pro 3.7, organization administrators and individuals can use use the Pro.SettingsConfig file to override geoprocessing environments to standardize their settings. In the file, use the new Environments elements to set and, optionally, lock one or multiple geoprocessing environments with a specific value. This file applies to all new and existing project and the tools and models that honor those environments. As a result, you achieve greater consistency across your projects and enhanced productivity.


Commenting is not enabled for this article.