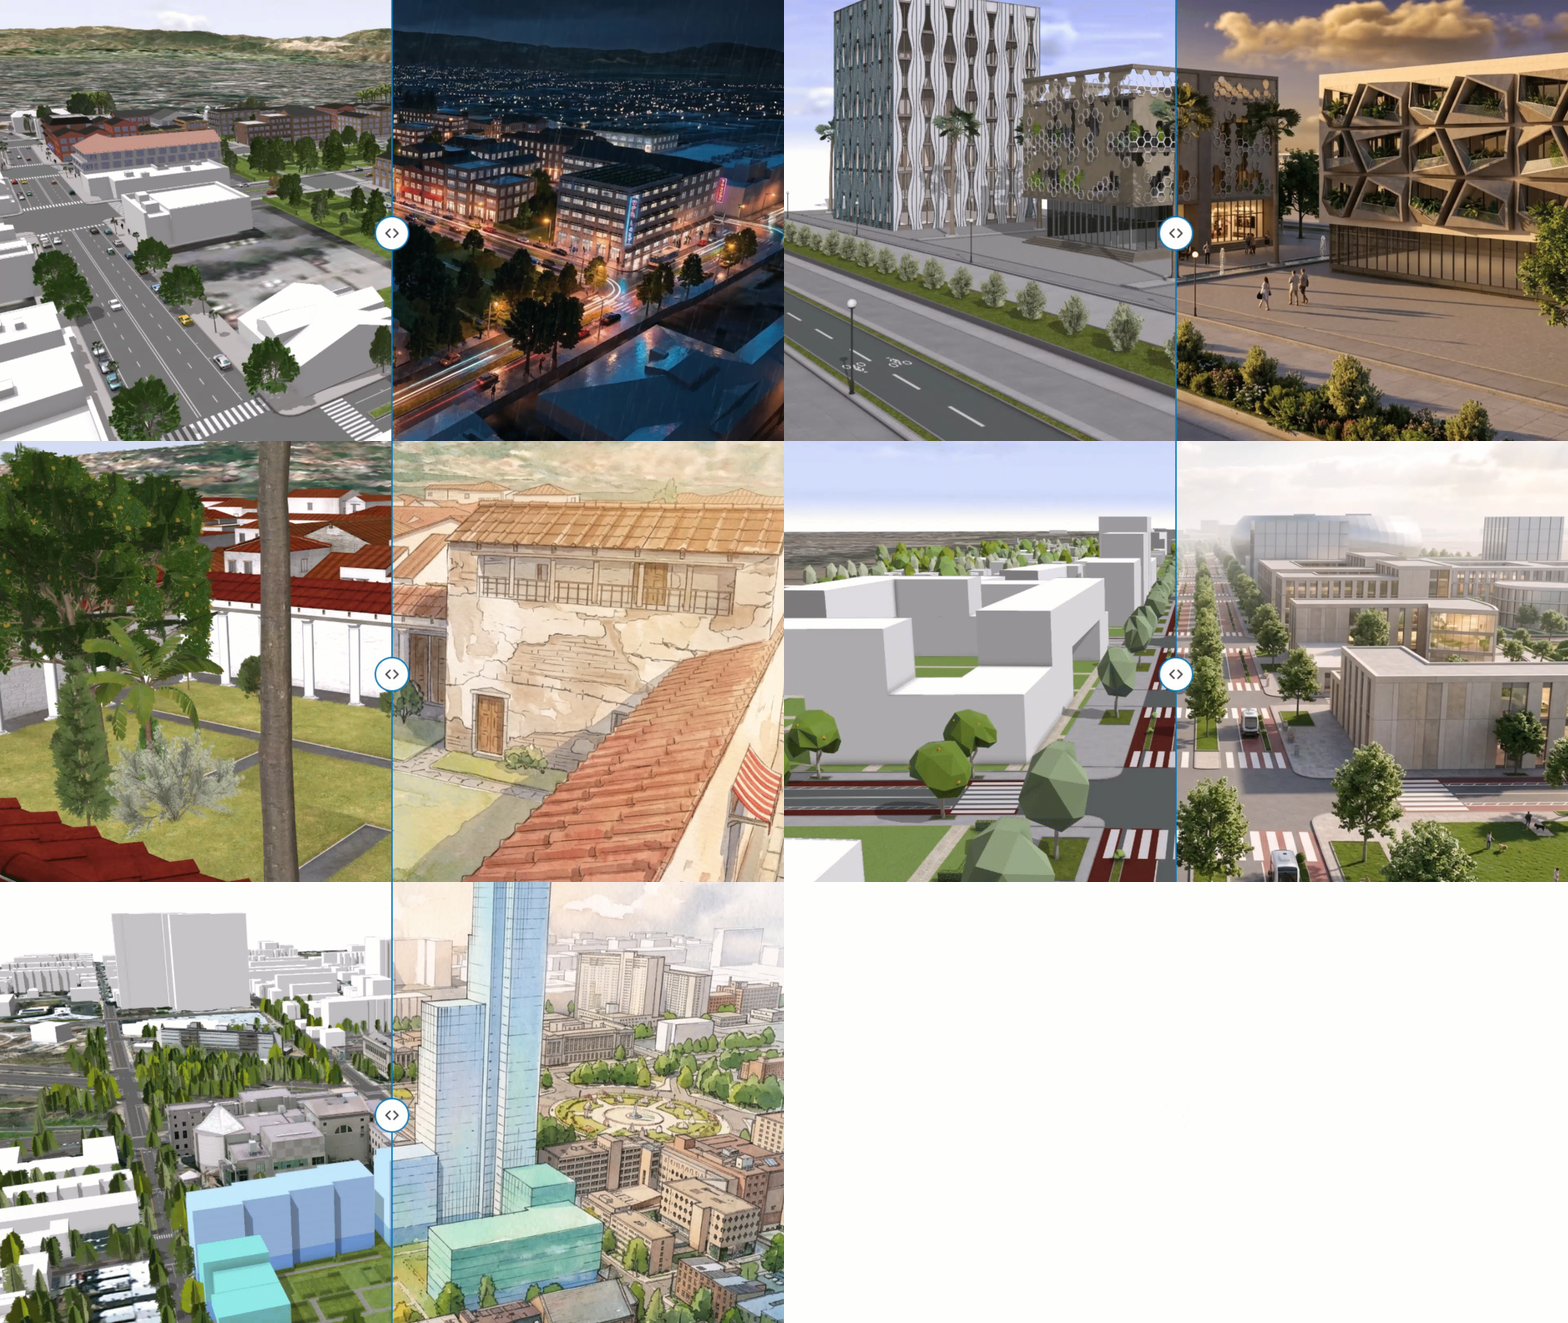
Artificial Intelligence (AI) is changing how urban designers visualize ideas. With the CityEngine Python API, it becomes possible to turn a CityEngine scene into stylized perspective that conveys materiality, atmosphere, and design intent much earlier in the process.
Architectural visualization helps transform abstract urban massings into imagery that can be evaluated at a human scale. This is especially valuable early in the design process, when key planning and urban design decisions are often made before the architecture is fully defined.
Established visualization workflows remain important, but they can also be time-intensive, making them harder to use in rapid day-to-day iteration.
The Stylizer app is a practical example of how CityEngine Python scripts can evolve into small, purpose-built tools. It uses CityEngine and Python together with generative AI to quickly explore visual ideas and it shows how a focused UI and a few supporting libraries can turn automation into a reusable workflow tool.
This post builds on the broader ideas discussed in Urban Design Visualization with CityEngine and Generative AI.
Using the Stylizer App
Open the app and get ready
Before starting the workflow, make sure CityEngine 2026.0 is open.
To run the Stylizer app, first download the example project that contains the code through Help -> Download Tutorials and Examples -> Example_Python_02_Custom_UI. Then open scripts/main.py in CityEngine and run it with Python -> Run script or F9.
The Stylizer app opens in its own window, separate from the main CityEngine view. To stylize CityEngine screenshots, set up a Gemini API key with billing enabled, then enter it in the Stylizer app. With that you are ready to get started with the fun part.
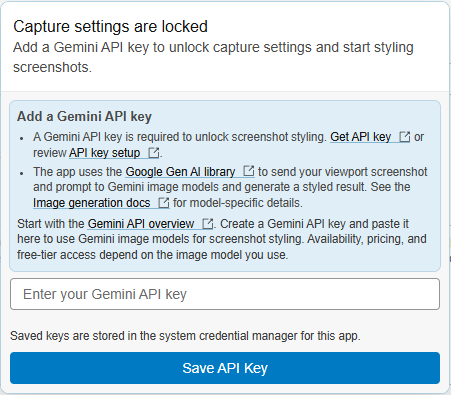
Note: If you want to explore your options first, the Stylizer app also lets you browse the Compare and History views immediately, even before setting up an API key.
Stylize a scene screenshot
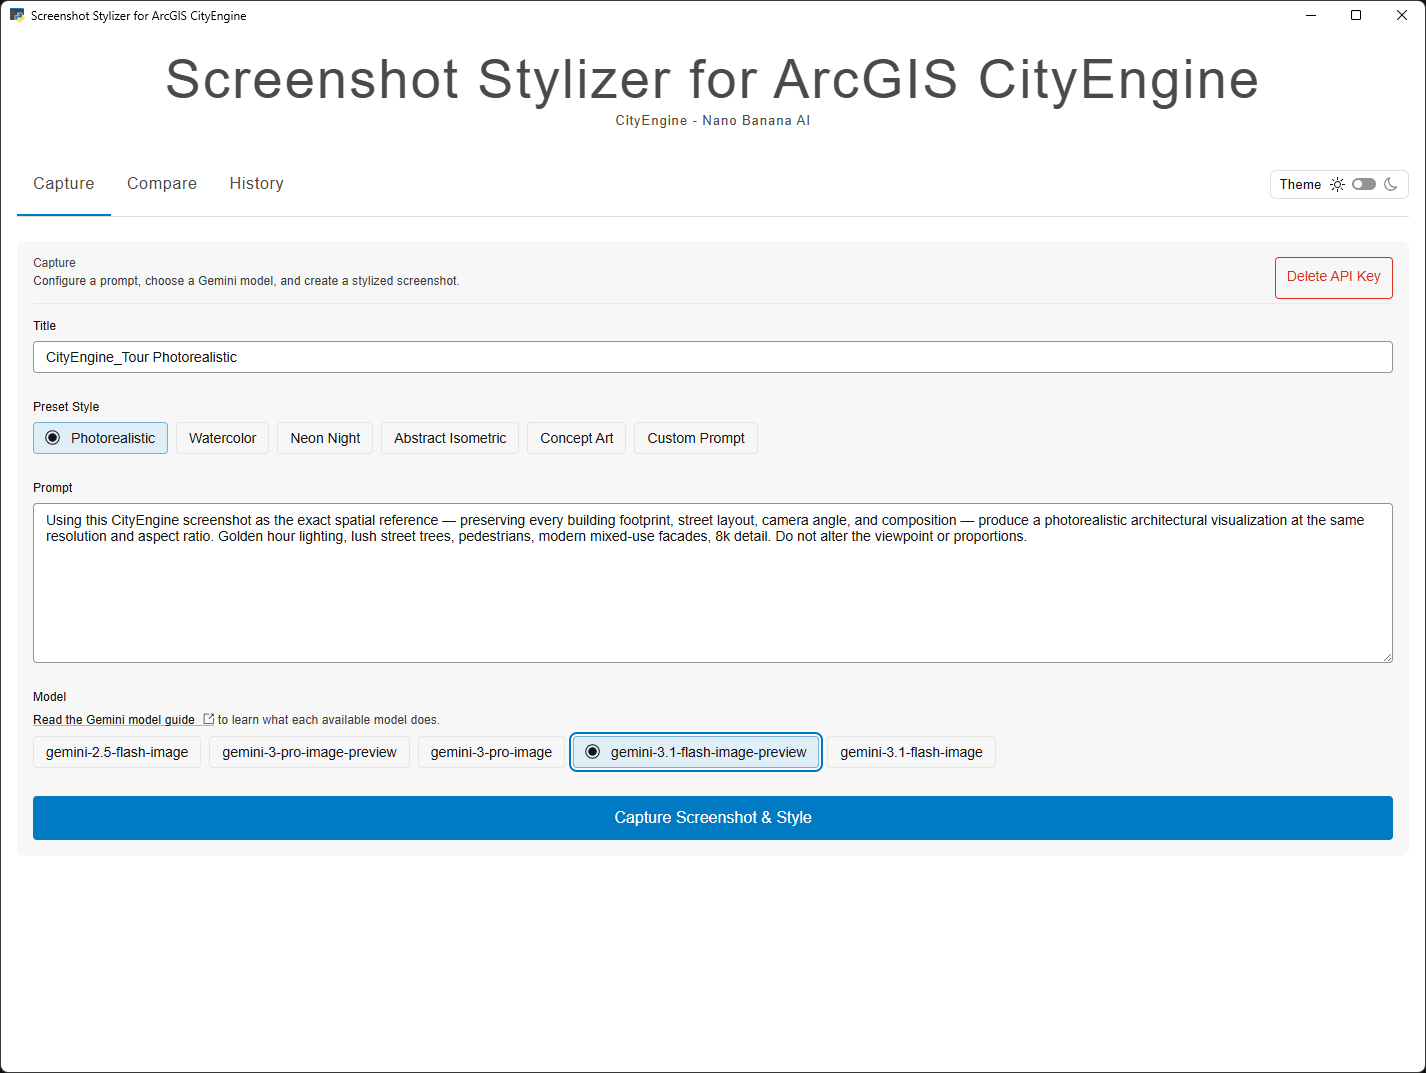
The stylization workflow starts in the Capture view. There, you can capture the current CityEngine viewport and turn it into a stylized image by describing the look you want in plain text.
Preset style prompts are already set up for you. You can use them as-is or refine them further.
For best results, ask the model to preserve the original camera position and aspect ratio so the composition stays as close to the original screenshot as possible.
The model list shows the models currently available in the app through the Gemini API.
- Open a CityEngine scene and position the camera.
- Enter a title for the capture.
- Choose a preset style prompt, or write your own.
- Select one of the available models.
- Click
Capture Screenshot & Style.
Inspect the result
When the stylized image is ready, it opens in the Compare view. The original screenshot and the generated image are shown side by side. Use the slider to compare them. To inspect the result more closely, click the Expand Viewer icon in the top right. The generated image will not always match the source perfectly. The result depends heavily on the prompt, so some experimentation is usually needed.
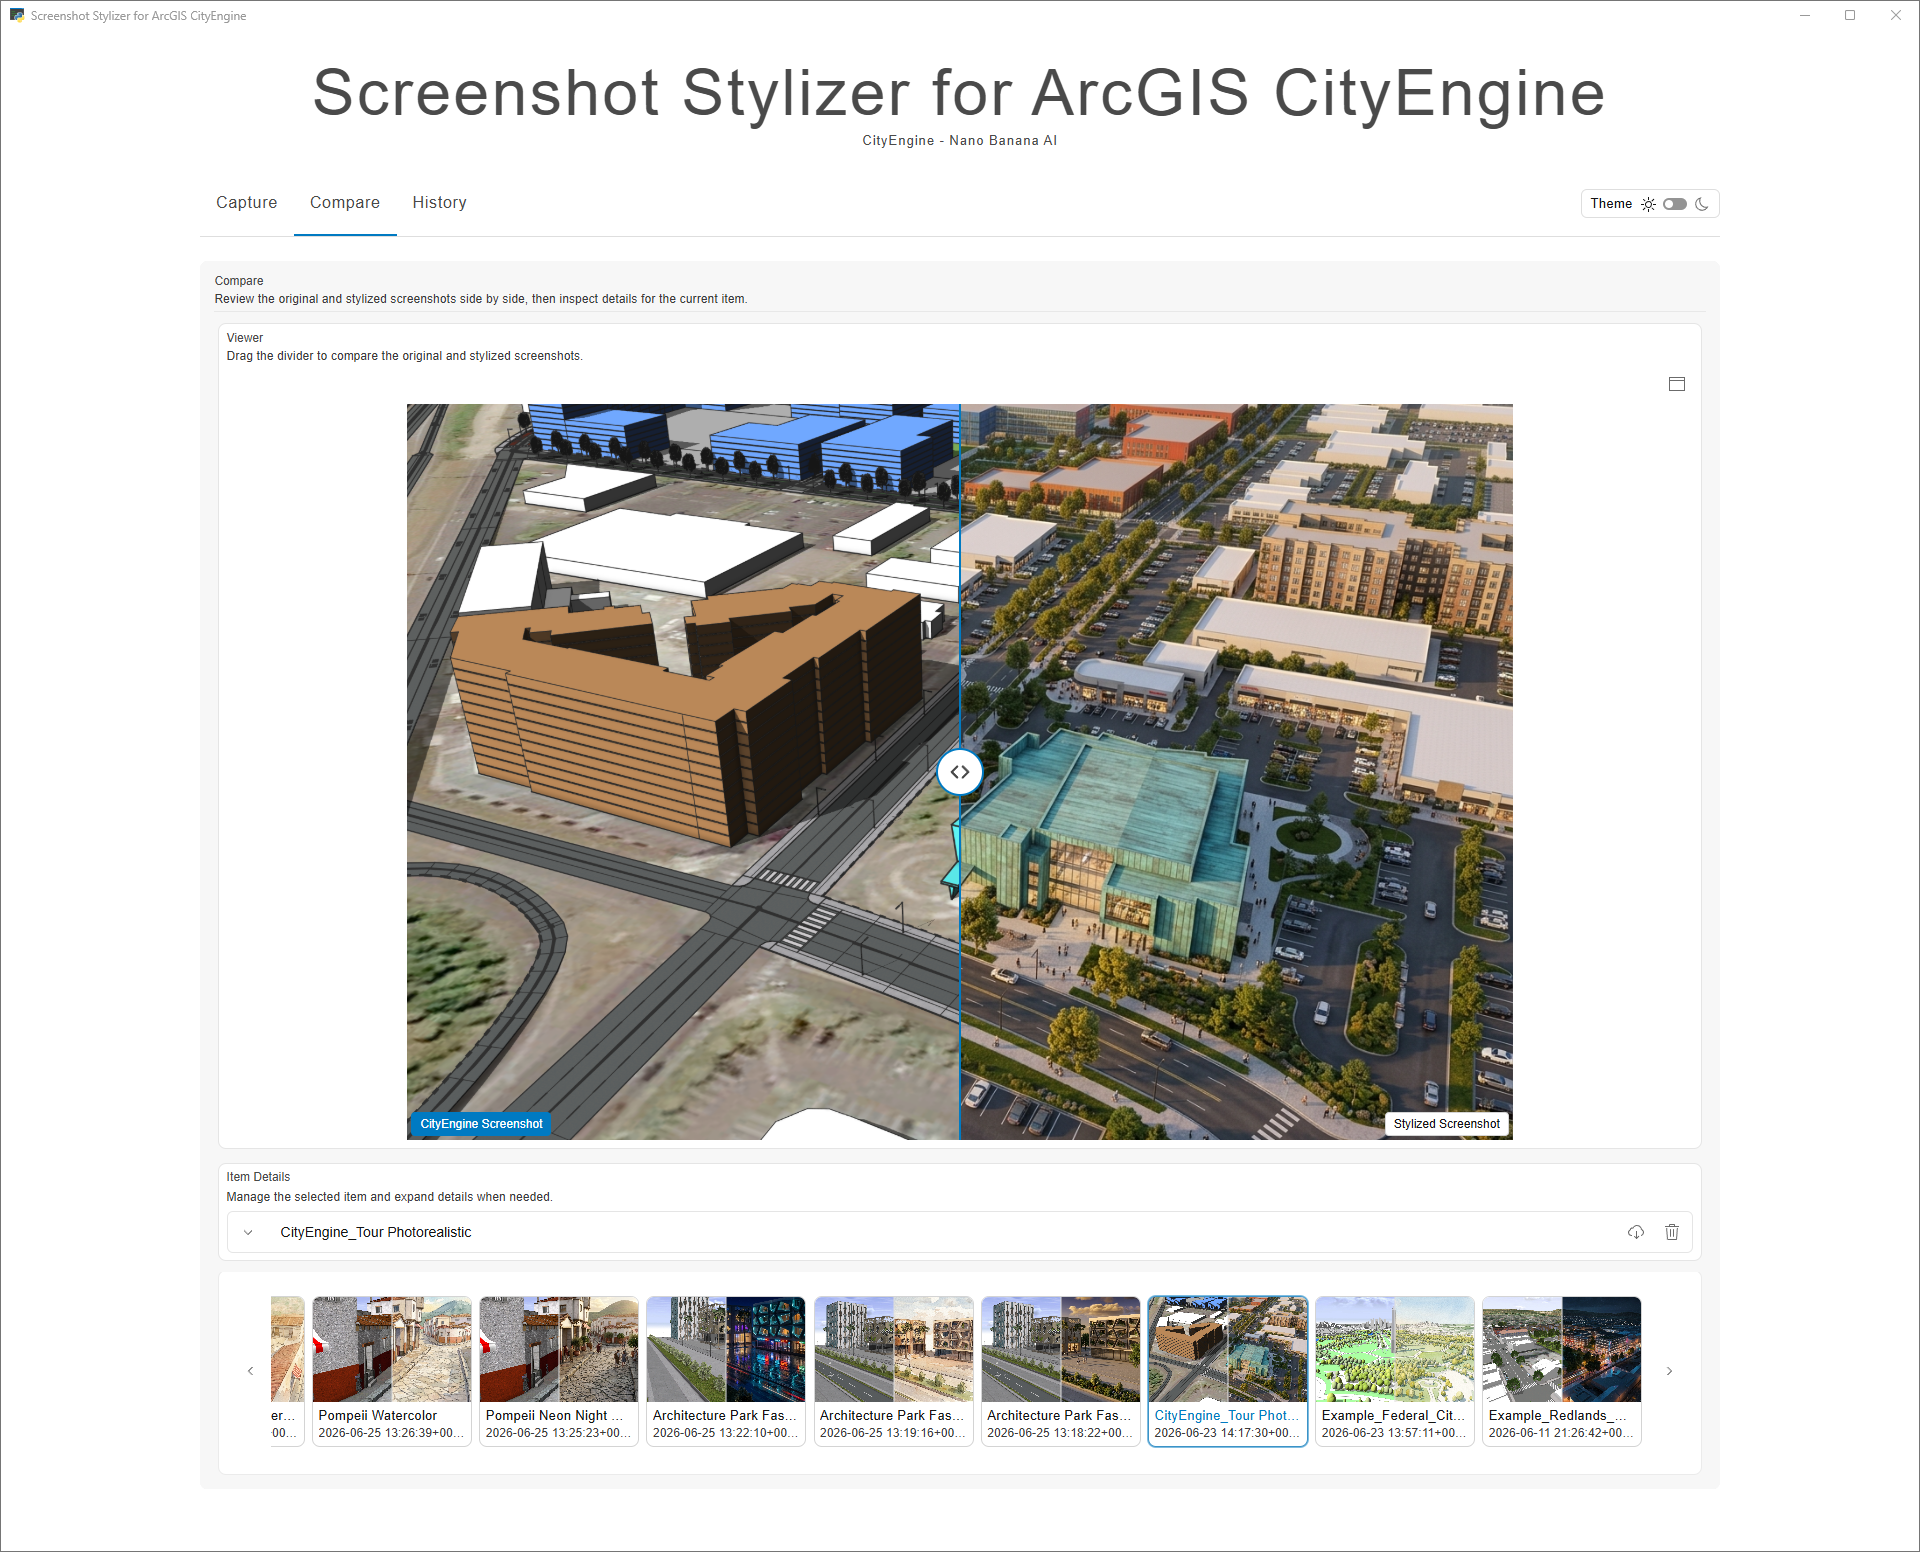
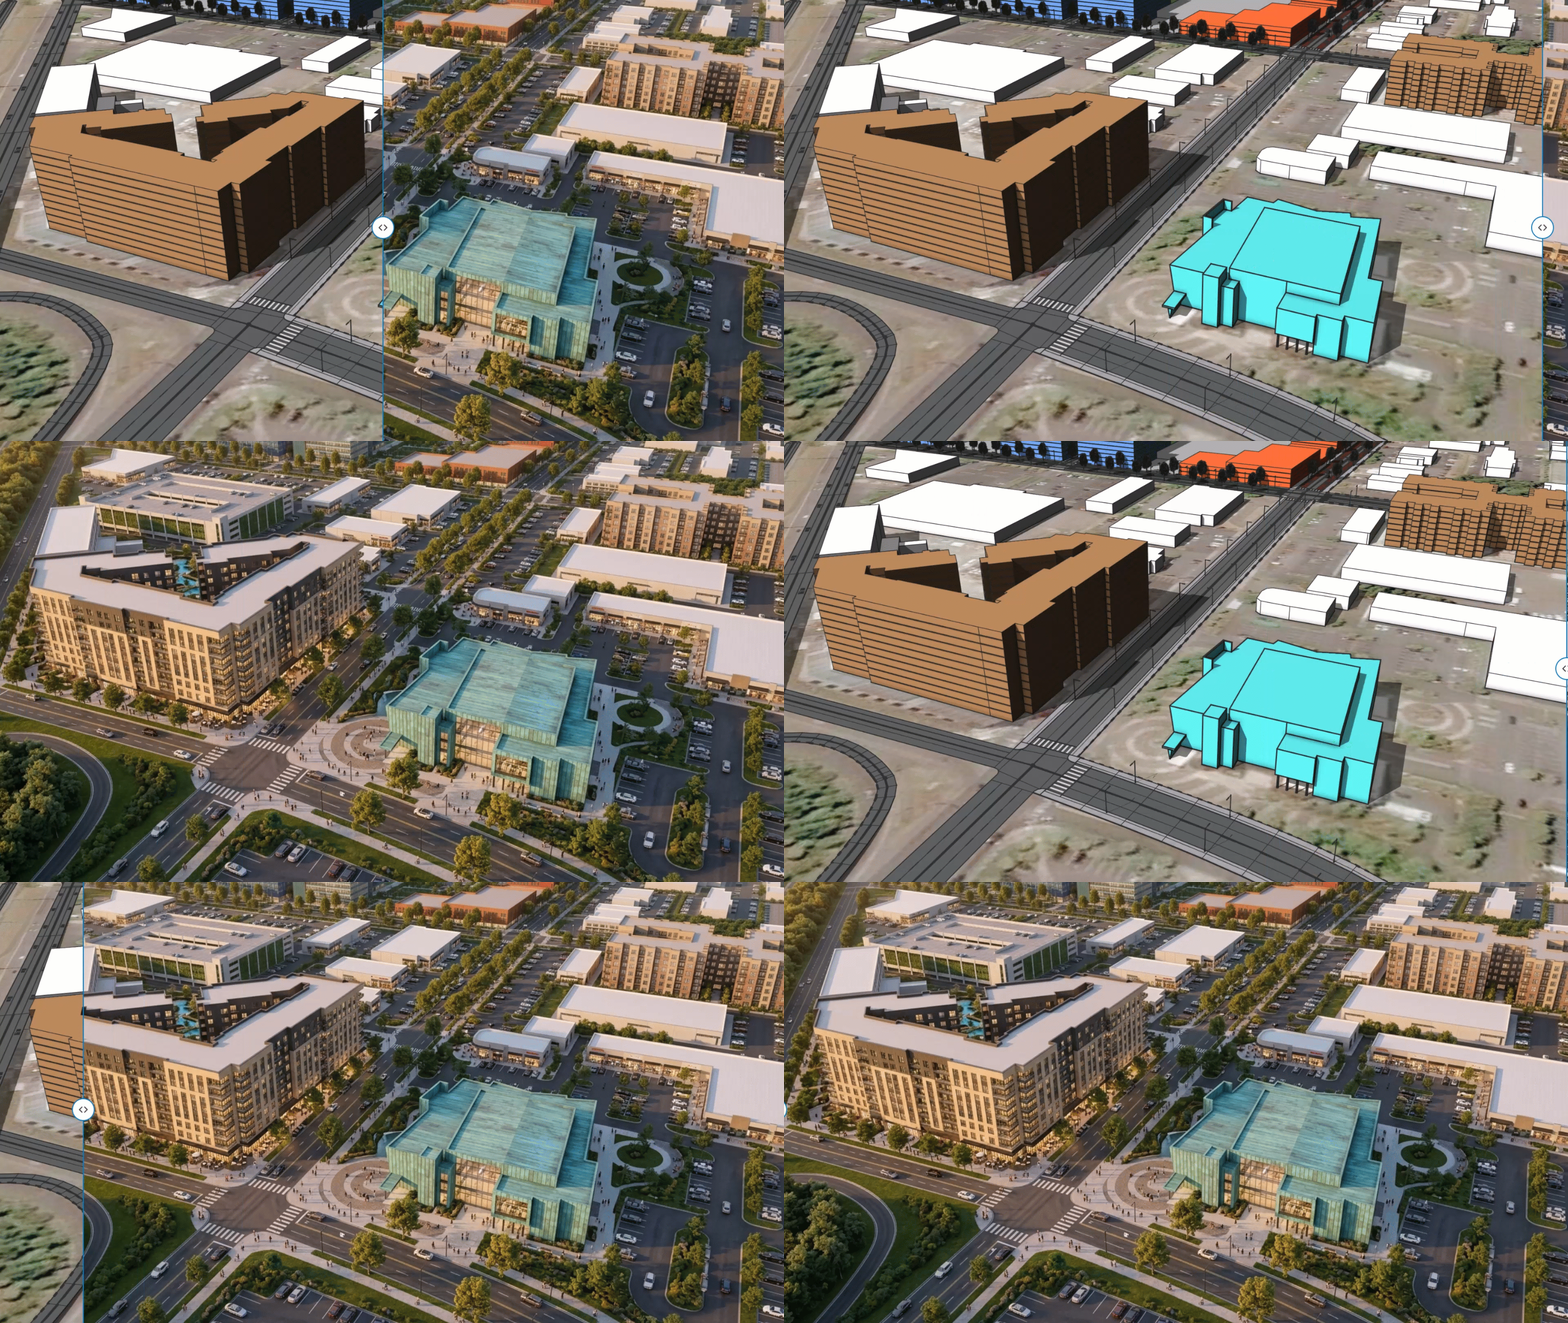
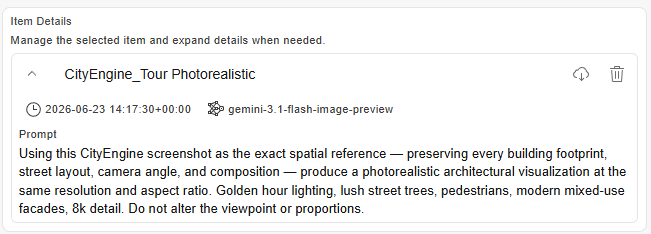
Below the comparison view, a details section shows the capture metadata. The title is visible at a glance. Open the panel next to it to see the model and prompt used for generation. The title can be edited later. You can also delete the capture or download the result.
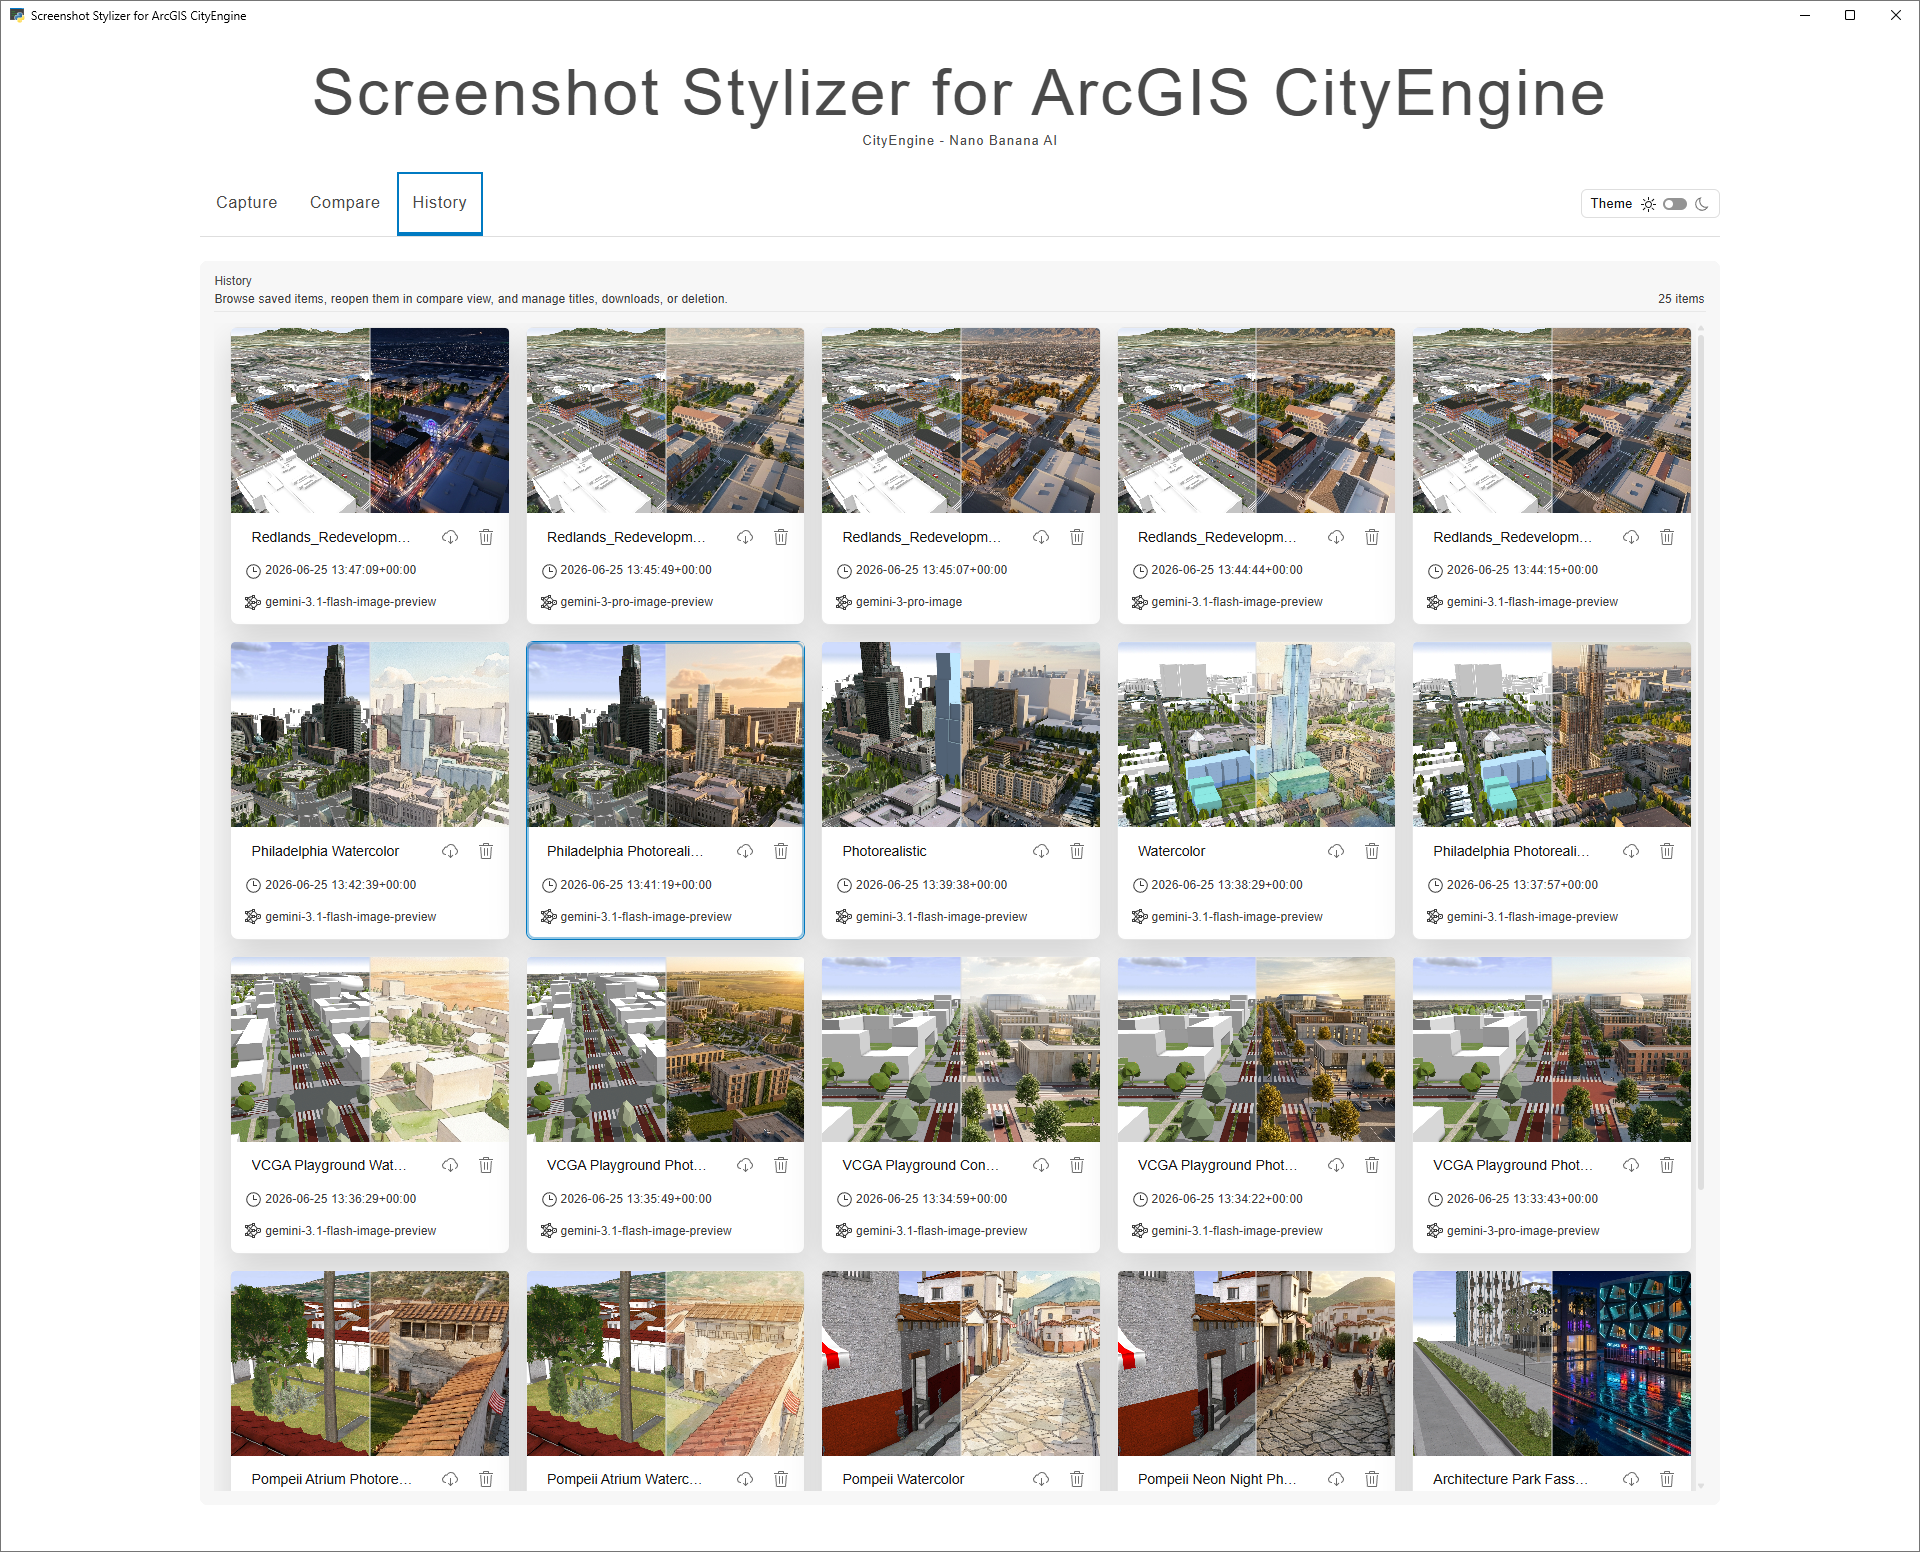
Previous visualizations remain available in the filmstrip and in the History tab, so you can return to earlier results at any time.
What happens behind the scenes
Behind the scenes, Python starts a local FastAPI server and opens the interface in its own pywebview window:
The API key itself is not written into the project files. The app uses Python’s keyring library, which stores the key in the operating system’s credential store.
When you click Capture Screenshot & Style, the app calls the CityEngine Python API directly. It waits until the UI is idle, reads the available 3D views with ce.get3DViews(), and captures the active viewport as an image by using the View3D snapshot API. That image becomes the reference for the stylization step.
The stylization step uses the Google Gen AI SDK for Python. In the app, the client is created from the saved API key. If the request succeeds, the generated image is stored together with the original screenshot and the capture metadata.
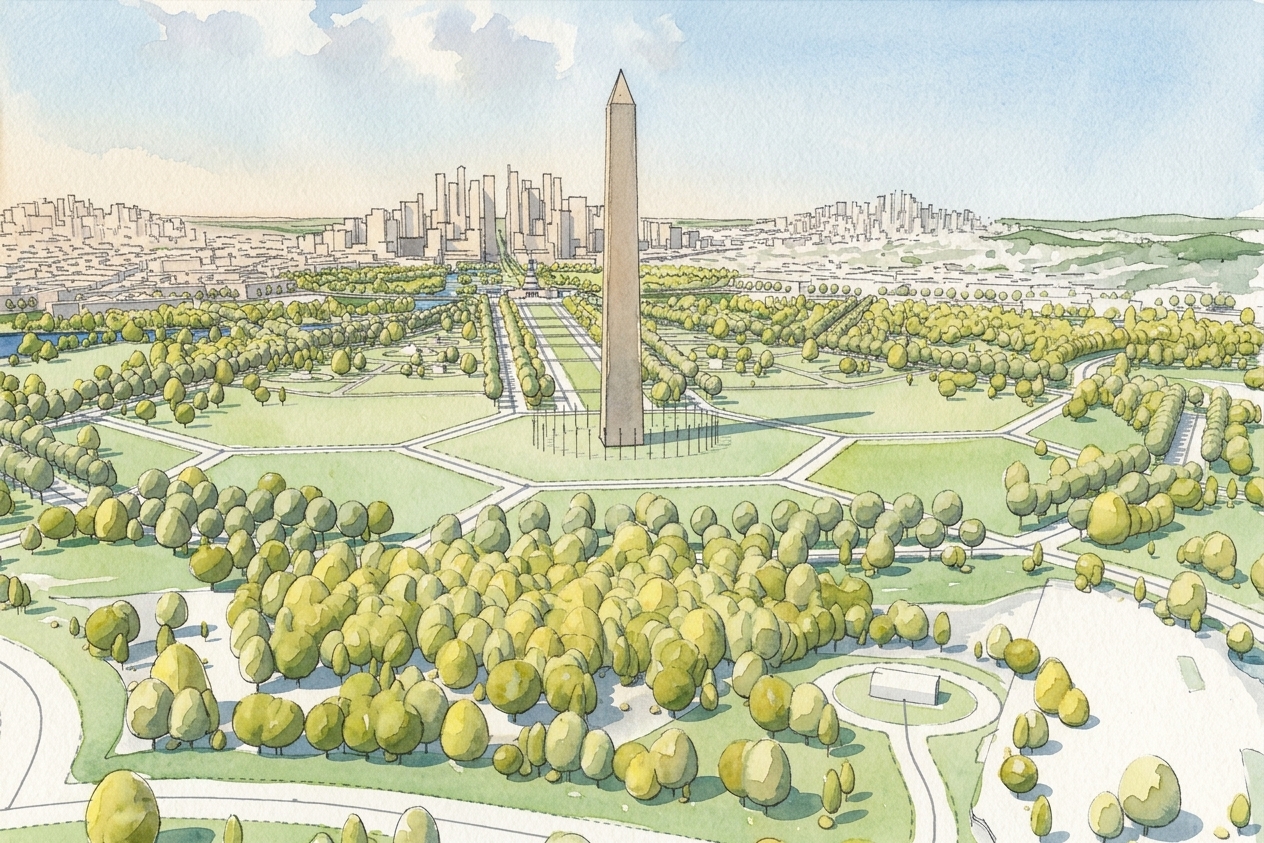
Federal City Example, Screenshot Stylizer Results
Before:
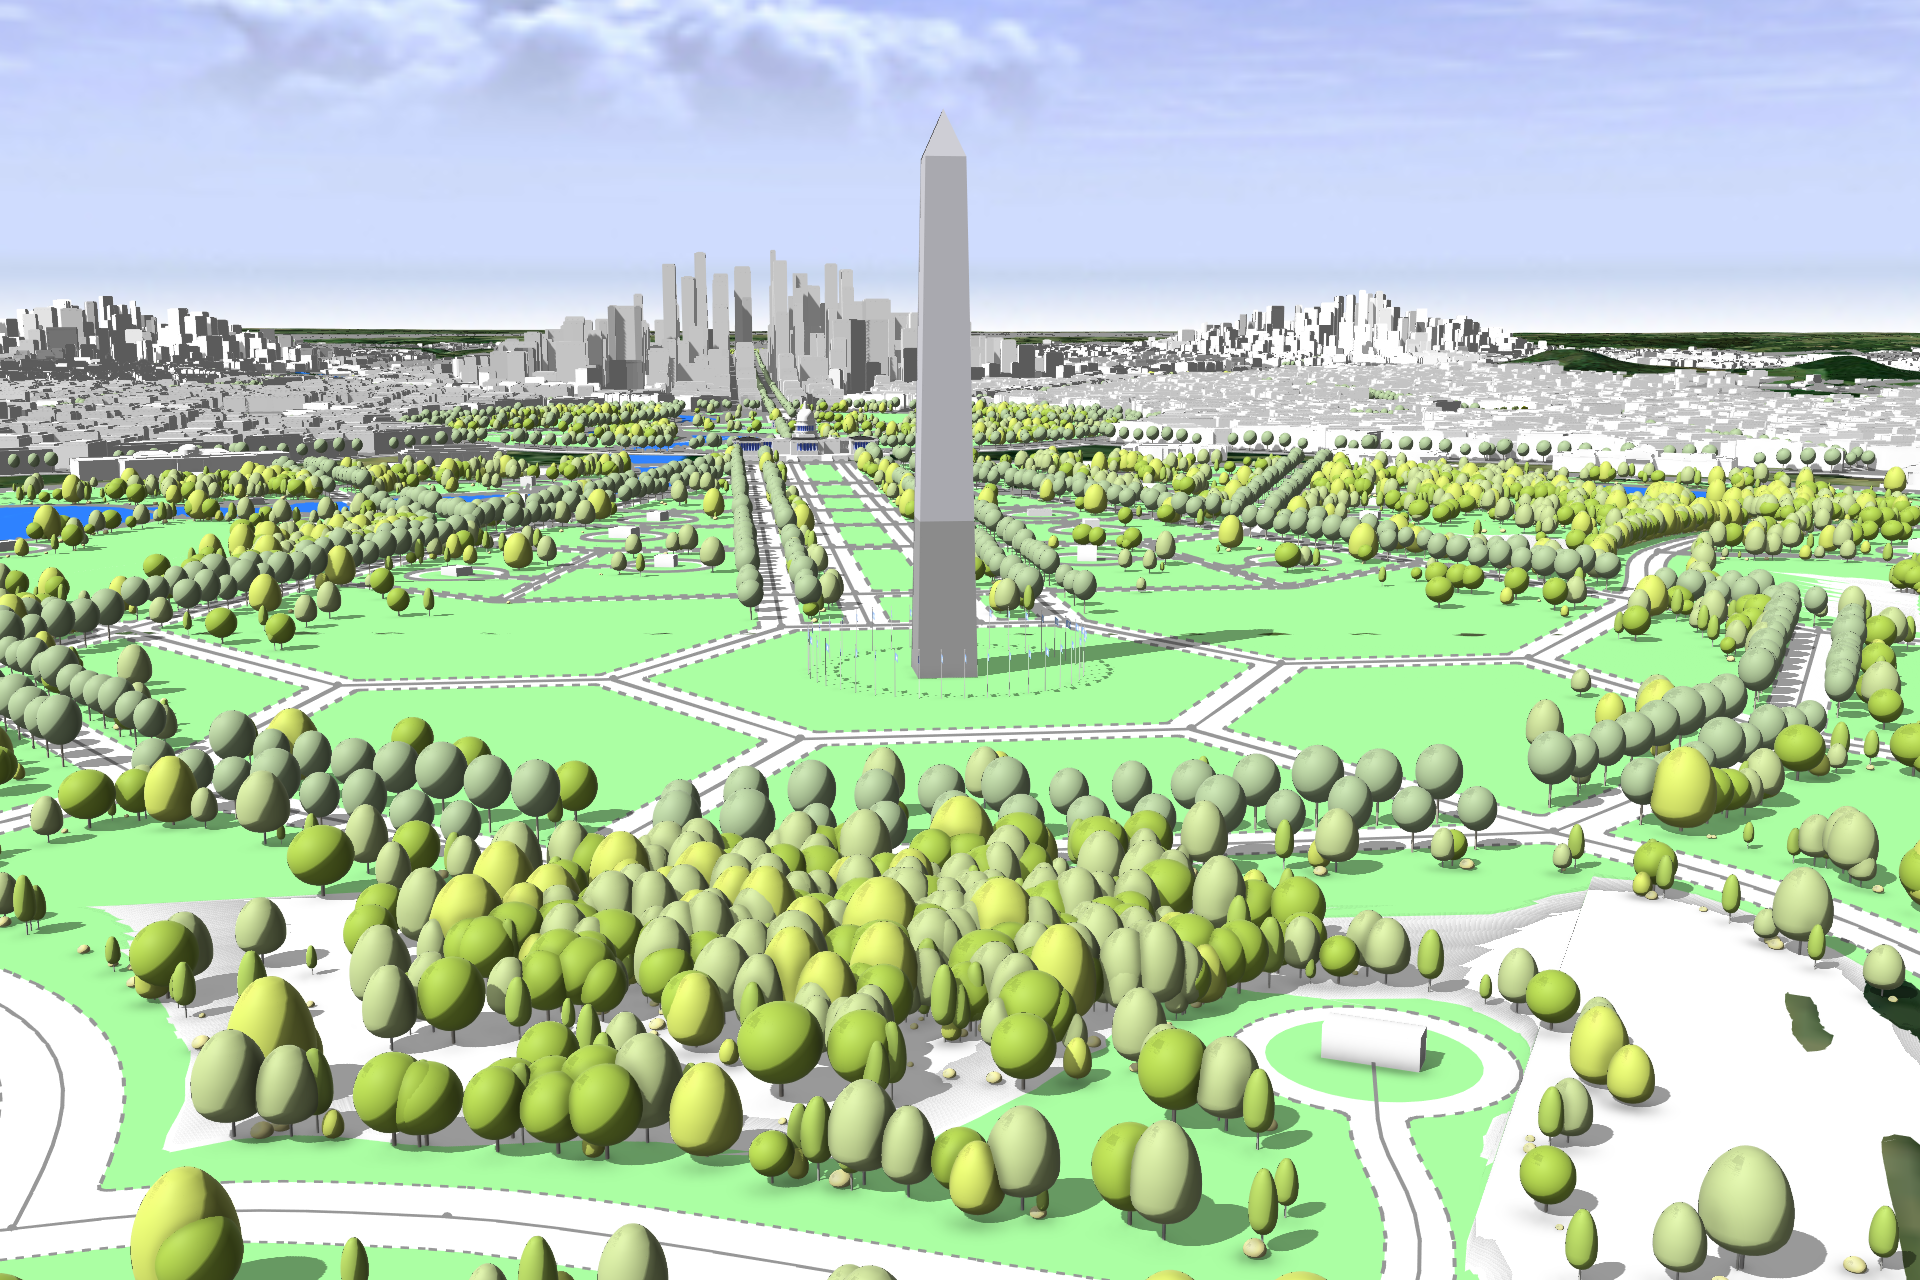
After:
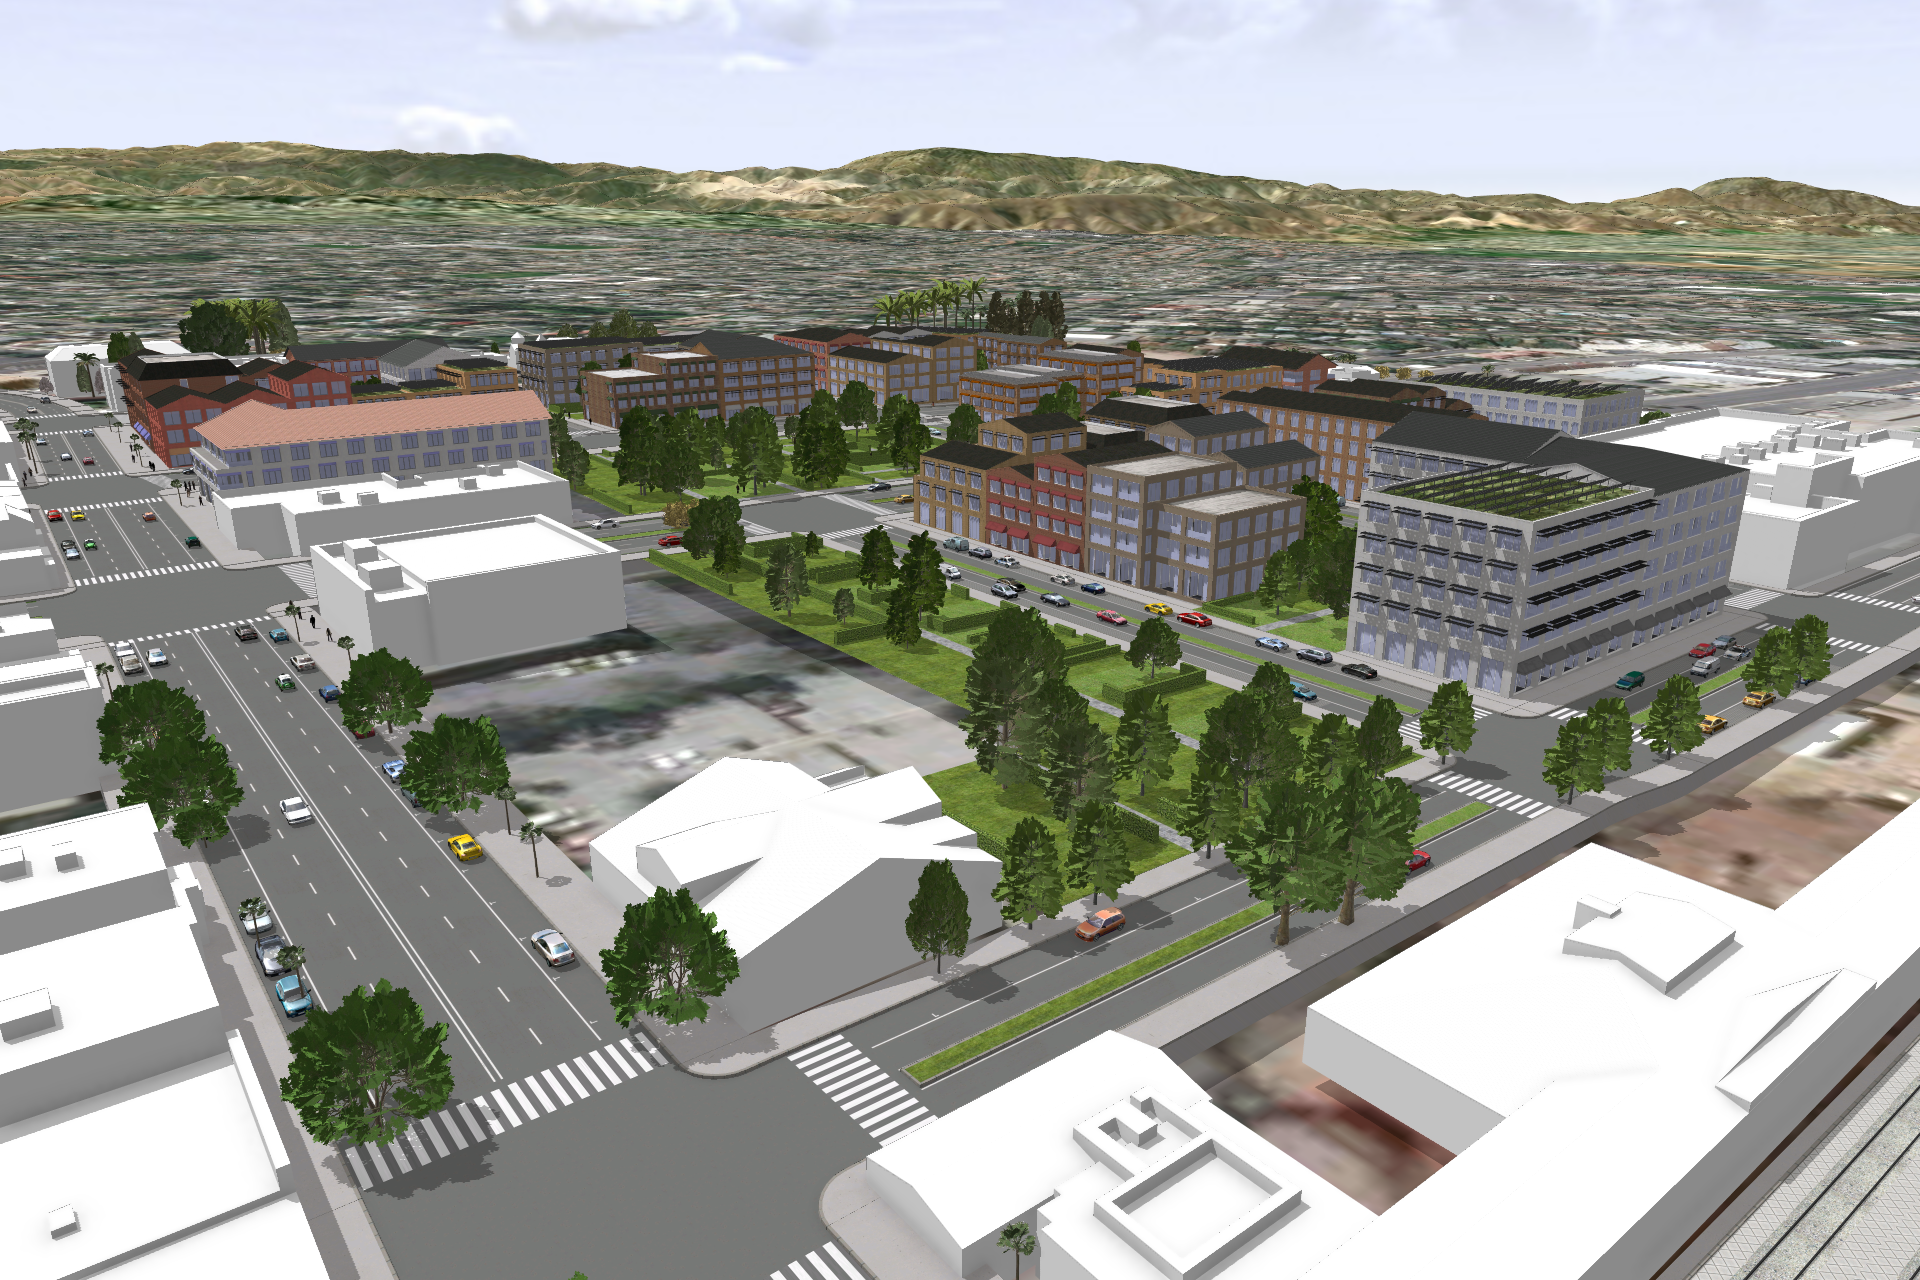
Redlands Redevelopment Example, Screenshot Stylizer Results
Before:
After:
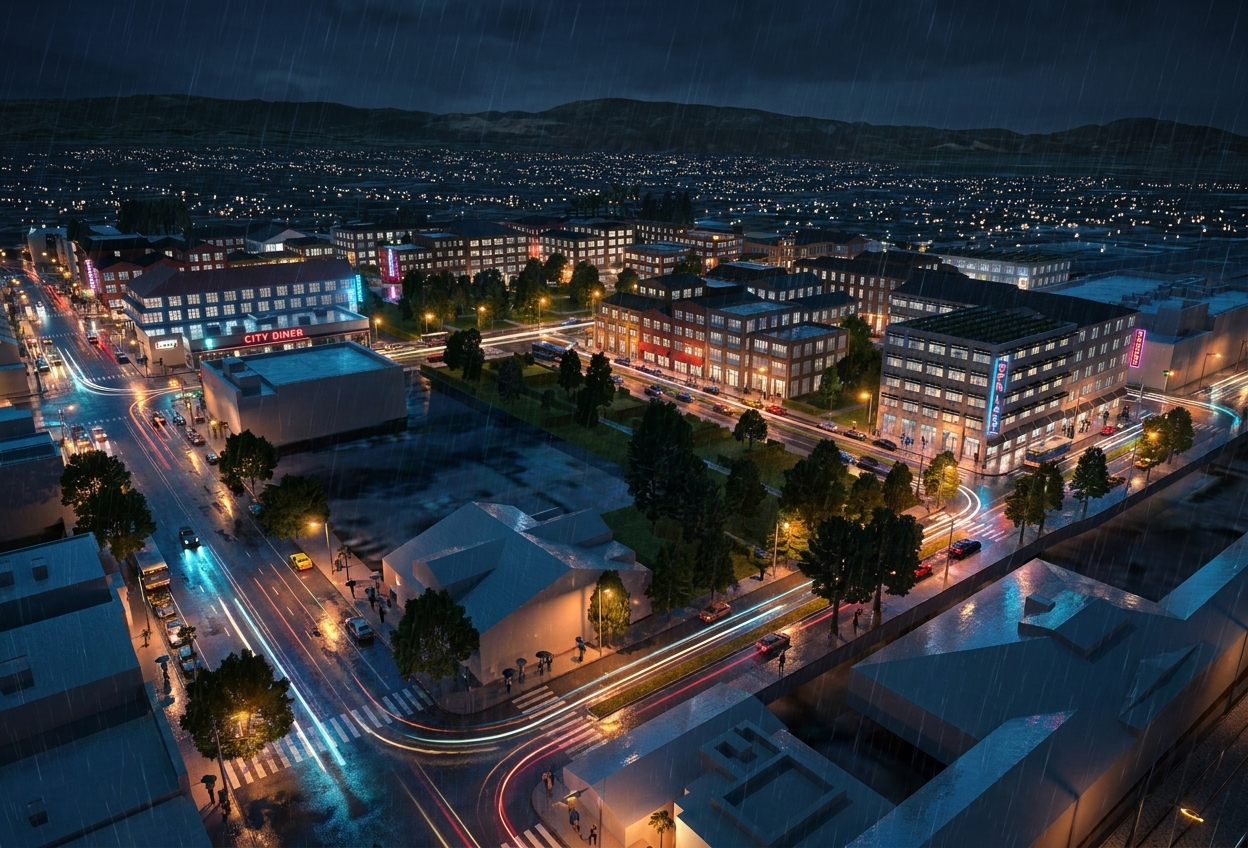
Note: If you wish to access the example projects, open ArcGIS CityEngine and click Help > Download Tutorials and Examples in the main menu. After choosing an example, the project is automatically downloaded and added to your CityEngine workspace. The corresponding scenes are inside the scenes folder within the downloaded example project. However, you can use the Screenshot Stylizer with any developed scene you create!


Commenting is not enabled for this article.