Map layers may contain temporal data—an attribute field containing the date and time that something happened. These temporal events can occur in the same place, or can occur in different places, over the course of time. For example, the recorded stream flow at a gauging station does not change location, but the stream flow gauge values do. Earthquakes, fires, and crime incidents occur at different locations over time.
In the web map, temporal data can be visualized using a time slider. The time slider provides controls to explore temporal data interactively and is available at the bottom of any map that contains enabled temporal layers.
Time Aware is a configurable app template that enables users to visualize time-enabled layers. It enhances the temporal capabilities of the web map, and can be configured to display time-enabled web maps in different ways.
Here’s how to use Time Aware, beginning with adding data and authoring the map that will be used. If you already have a time-enabled map, skip to Configuring Time Aware.
Timely data
In this example, earthquakes events exceeding 5.5 in magnitude for the year to date were downloaded in CSV format from the USGS Earthquake Archives. Inspecting the CSV we can see the date and time of the quake are stored in the Time field (and that the file includes lat/long).
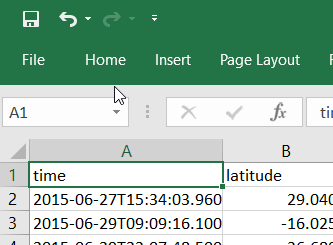
The CSV file used in this example can be downloaded here.
Create a time-enabled layer
To make a time-enabled layer that will be used in the map and the Time Aware app, follow these steps.
1. In My Content, add the CSV file by clicking Add Item, then choosing From my computer.

2. Click Choose File to browse for the file.
3. Add a title and tags.
4. Publish the file as a hosted layer. Note that this requires publisher privileges, you can skip this step and start with the layer.
5. Click Add Item.

6. After adding the item, click Time Settings in the Layers section on the Item Pages.

7. In Time Settings, check Enable Time.
8. Choose the time field to use (in this case it is time).
9. Click OK.
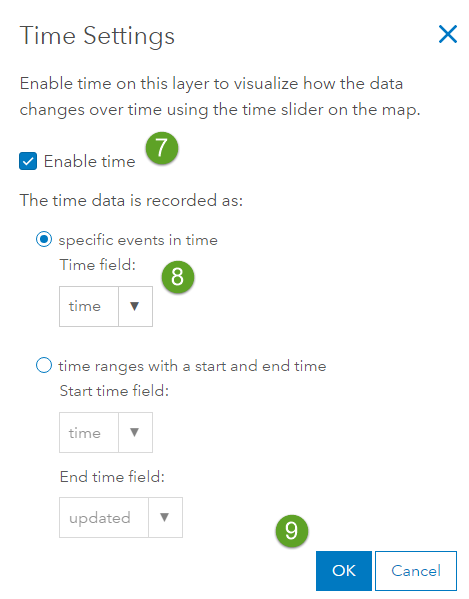
Save the changes you’ve made to the itme. You’ve now created a time-enabled layer.
Author a time-enabled web map
Using the layer configured above, or a similarly configured time-enabled layer, add the layer to a web map. You can enable or disable time animation in the layer properties. Click more options:

And look for Enable/Disable Time Animation.
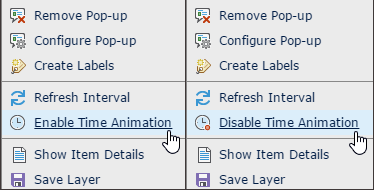
For use in Time Aware, the web map must have a time-enabled layer. When a time-enabled layer is present, a time slider will display at the bottom of the web map, including configuration options.

While you may want to configure the time settings in the web map, this step isn’t necessary for use with the Time Aware app, and won’t be covered here. Save the map when you’ve finished, and share it as desired.
Create the Time Aware app
From your web map, click Share, then click Create A Web App.
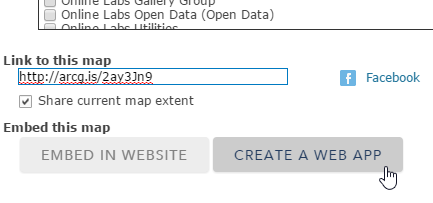
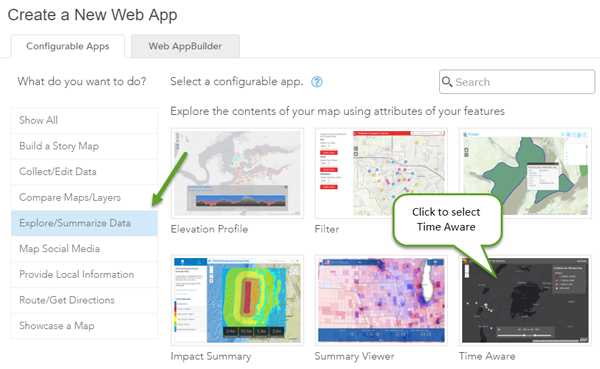
In the Create a New Web App gallery, choose Explore/Summarize Data, and select the Time Aware app.
Click Create Web App
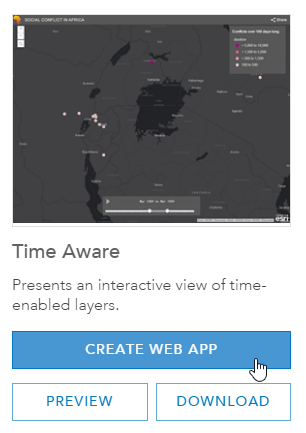
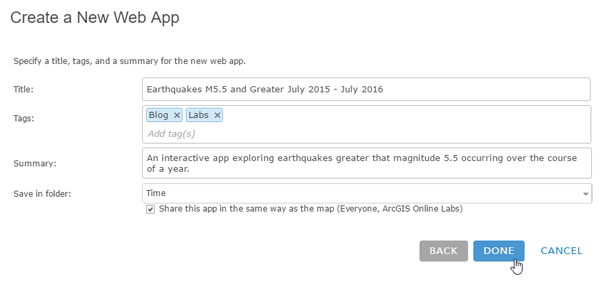
Then specify the title, tags, and summary for the Time Aware web app, when finished click Done.
Configure Time Aware
After completing the steps above, the Time Aware configuration panel opens. Tabs along the left reveal properties that can be changed as desired.
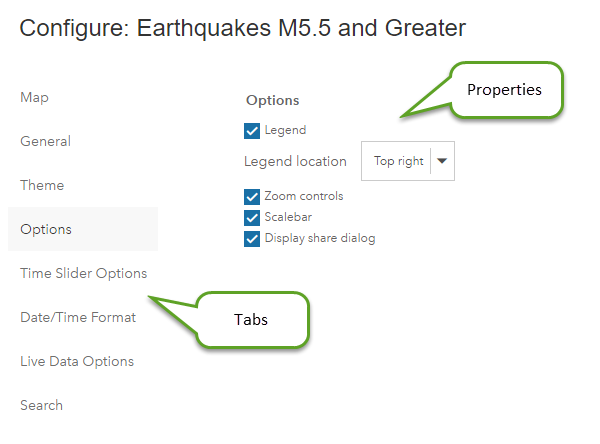
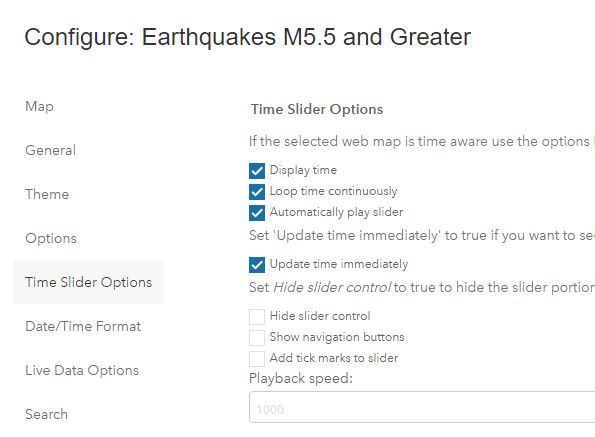
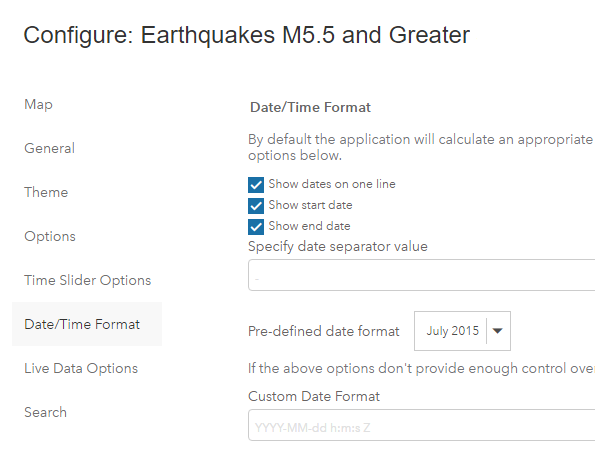
The tabs that control time properties are Time Slider Options and Date/Time Format. Though there are many options to choose from, for this example we wanted to display the time as monthly intervals, automatically start the time animation, and continuously loop the animation, as the app is opened.
The following are the properties set in Time Slider Options:
The following are the properties set in Date/Time Format:
View the Time Aware app configured using the property settings above.
Tip: You can Save and View to see how the properties changes you’ve made affect the app, and experiment by adjusting other properties until you achieve the desired viewer experience. When finished, click Save and complete the details in the Item Pages.
For more information
For more information, see the following:

Article Discussion: