Hey its Renia!
Before jumping into the cool stuff, a quick introduction: I work for Esri’s Smart Cities group – a 3D GIS geek by day, and a passionate urban designer by night. Below you can read my first blog on a proposed workflow for designing masterplans faster than ever before!
As many of you designers and planners know, creating your site’s 3D context, developing initial massing studies and program distribution diagrams, and applying block typologies to your urban intervention, requires A LOT of work.
So, let’s take a deep dive into an approach that can emancipate you from tracing, and make some design tasks easier and faster. Forget about Ctrl C, Ctrl V! The workflow presented here uses CityEngine and a new addition to the Esri family: ArcGIS Urban.
ArcGIS Urban is a 3D web tool that links regulatory changes (such as zoning), with spatial transformations at a massing level. It offers the ability to parametrically develop and test different massing and program distribution scenarios, using schematic building types and existing, or proposed, zoning codes. It uses variables such as FAR, or max height to generate what the mass of a building type would look like on any given block or parcel.
The tool can be used in conjunction with CityEngine for advancing schematic masterplans, or projects that require the complete development of an area – sites for example where the urban fabric is discontinuous such as brownfields or new city territories.

Define Grid & Blocks
When you think of urban design and planning in sites like the ones mentioned above, often, the first thing you will look at are street grids. Grids lay the foundation for a site’s spatial organization and circulation – they are therefore the starting point for any project that needs to “stitch the urban fabric”.
So, here is how you can begin to develop a series of different scenarios for a masterplan that requires redesigning, or improving street grids:
Once you set up an ArcGIS Urban model for your project and define a Plan area (a site of intervention), you can go into the Plan and develop one (or many) scenarios. Due to the site’s existing conditions however, scenarios will only have a few – if any – predefined blocks or parcels.
All scenarios of a Plan, and their associated layers (zoning, parcels, overlays), can be brought into a CityEngine scene, where you can configure the street network and create new blocks and parcels for the site.

Once your ArcGIS Urban Plan and its scenarios are loaded in a CityEngine scene, in the Scene pane switch to the scenario you want to begin editing streets and defining blocks.

To quickly add the existing street network of the site and its immediate surrounding areas, using CityEngine’s Get Map Data function.
Now that both the scenarios and the context are in place, make edits or additions to the street grid using CityEngine’s street network Graph tools. The street network graph is what will define the new blocks for the active scenario.

To analyze and access the “connectivity” of a proposed grid before creating your blocks, use CityEngine’s Graph Analysis. For example, you can visualize how well integrated your streets are – meaning, the sum of shortest paths to all other street segments for each street.

The resulting blocks of a proposed street grid can be generated by enabling the Shape Creation in the Inspector pane for any closed perimeter that is defined by the street network graph.
At this step, you can set the scale of your future massing studies at the block or parcel level, by optionally subdividing each block into parcels. When choosing the subdivision type, you can even begin to think of the footprint of different block typologies (courtyard, plinth, towers, etc.). Don’t sweat it though, further parcel edits can also be done in ArcGIS Urban using the Editing tools.

Once the parcel creation is complete, “bake” the parcel geometry into shapes. Just select all the parcels, go to the Graph tab in the top left of your CityEngine interface, and click on Convert to Static Shapes.

Now that your parcels have been converted to static shapes, make sure to copy the shapes into your Parcels layer with the right scenario turned on (!).

Lastly, to “send” the new parcels back into ArcGIS Urban, go to the ArcGIS Urban tab at the top left of your CityEngine interface, and click on Synchronize All Scenarios.
Once parcels are synced, go back into your ArcGIS Urban instance and refresh the page. You should now be able to see and use the new blocks/parcels, when you are in the edit mode of your Plan with the relevant scenario turned on.

Develop Massing Scenarios
Massing studies in ArcGIS Urban are driven by two main components: the existing, or proposed zoning regulations of a scenario, and the massing types – or building types – applied to the scenario’s parcels, or blocks.
Here is how you can begin to test different scenarios of densities and program distribution patterns for your site at a schematic massing level (for tutorials visit the ArcGIS Urban YouTube Channel):
Once the CityEngine created parcels are imported into a scenario of your ArcGIS Urban Plan, with the Develop tab open under Development, select and further refine the parcels for each block using the split, merge, or draw editing tools of ArcGIS Urban.

The second thing to configure in this ArcGIS Urban scenario, is the underlying zoning categories and their polygons that define where each category is applied.
With the Zoning tab turned on, the polygons for each zoning category can be configured using the editing tools to split, merge, or delete larger existing zoning polygons, and draw new ones.
Next, select the polygons for which you want to change the zoning code and click on Modify. You can choose to apply to the selected polygons any zoning category from the list, or even propose a new zoning category using the “+” button at the top right of the list. For each proposed zoning you can configure a series of variables such as lot coverage, FAR, maximum height, and the number of tiers building in that zoning area will have, as well as their associated setbacks.
These zoning configurations are what will drive the overall shape of applied building types at a block or parcel level in the next steps.

With both parcels and zoning set-up for each scenario, begin to apply default, or even customized, building types to each block or parcel. Building types represent different densities (such as high-rise, mid-rise, low-rise) and programs (such as office, retail, residential) and their massing is determined by the underlying zoning regulations.
Open the Develop tab under Development, select one or more parcels on which you want to apply the same building type and click on Modify.
You can choose to apply to the selected parcels any building type from the list of or propose a new one using the “+” button at the top right of the list. For any proposed building type, you can define its space uses, the number of floors each space use will occupy, and whether the massing will prioritize vertical, or horizontal growth within a given parcel (of course in agreement with the underlying zoning regulations).

The outputs of different scenarios that you develop – such as number of jobs, required parking spots, and energy use – can be compared and evaluated using the Capacity tab in ArcGIS Urban. Capacity indicators can also be exported in an excel table for more advanced metrics.


Advance the Massing Models
The massing studies generated in ArcGIS Urban can be further advanced and detailed in CityEngine, using out of the box CGA rules for building envelop components (windows, facades, roofs), and street scape and landscape elements – to give a better sense of the human scale in the masterplan.
To prepare your Urban plan and its associated scenarios in CityEngine for further advancement:
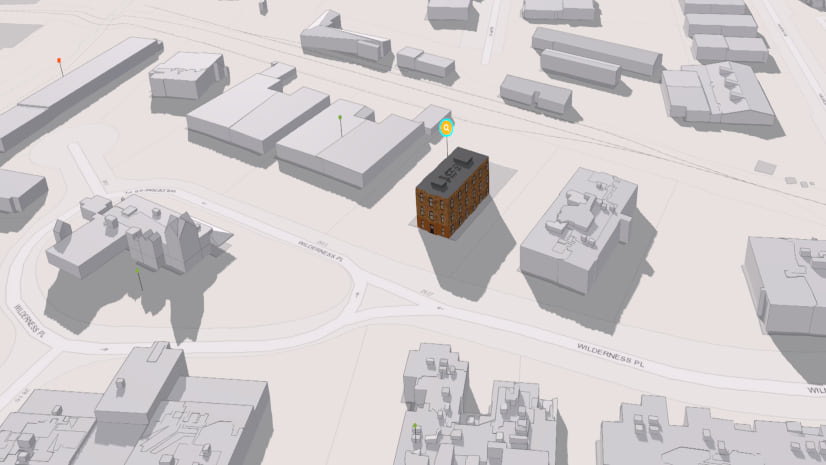
First, import again into a new CityEngine scene the ArcGIS Urban Plan and its associated scenarios (Fig. 1: Import to CityEngine an ArcGIS Urban plan), especially if you made further changes to the parcels in ArcGIS Urban.
Second, bring into the new CityEngine scene the street network you edited previously to create your scenario’s blocks and parcels. Because this street network was edited in different CityEngine scene, you will have to import the street layer from that scene:
Turn on the appropriate scenario in CityEngine and highlight your new CityEngine scene in the Navigator pane. Go to File > Import, to open the CityEngine Scene Import wizard and browse to the scene with the street network (unselect all other layers but the street graph). Make sure to align the street network to the terrain if it needs adjustment.

With parcels, zoning and overlays, existing 3D building context, terrain, and the street network all in one CityEngine scene the last missing piece is the ArcGIS Urban massing.
Hide all scene layers besides parcels, select all the parcels, and drop on them the “Urban.rpk” rule package from the Esri Library found in the Navigator pane. The massing study from ArcGIS Urban for this scenario should now appear in the CityEgine scene.

Next, you need to transform the ArcGISUrban massing into solid shapes, on which you can later apply CGA rules for building envelope components:
Select all the parcels in your scene, go to the Shape tab in the top left of your CityEngine interface, and click on Convert Models to Shapes.

Now your massing shapes are ready for some procedural advancement using out of the box CGA rules:
Out of the box CGA rules for elements such as façades, plans, and streetscape features, can be found in the Esri Library, in the Navigator pane.
More advanced CGA rules for building envelopes, can provide a larger set of variables that can be controlled and tweaked. You can use more advanced CGA rules form the Example and Tutorial projects or download a project and its rules.
A good set of CGA rules for Urban Design and Planning are the “Site Design Rules”. The CityEngine project for the “Site Design Rules can” be downloaded here.
To import into your CityEngine workspace the project and use the Site Design Rules, right click inside your Navigator pane, and open the Import wizard to choose an Existing Project into Workspace.

With the Site Design Rules available now in the workspace, select any massing and drag and drop onto it the Building_on_Mass.cga rule. This rule can be found in the Navigator pane under the BuildingsBeta project rules folder. The pattern and elements of the building envelop can be changed from the Inspector pane. You can also choose between a realistic (textured) representation or a more schematic style (detailed solid white).

Public spaces, courtyards, and streetscapes can also be detailed using out of the box or custom CGA rules. You can find a good set of existing Street and Landscape CGA rules under the Example_Planning_5_Urban_Design CityEngine project.

Export Masterplan
Once you have edited and detailed your initial schematic massing study into a more advanced masterplan, you can:
-
- Export the masterplan model as an Esri Scene Layer Package, that you can upload to ArcGIS Online and visualize in ArcGIS Urban, or use Unity or Unreal Engine to render your proposal (even create a VR experience of the different scenarios).

-
- Alternatively, export the masterplan model as OBJ or COLLADA to any other design software for further development or to generate diagrams, visuals and 2D drawings.
Thanks for following along!
Want to see this workflow live? Schedule a demo.


Article Discussion: