This blog demonstrates how to integrate RESTful services, such as the Places Service, with the Native Maps SDKs by making HTTPS requests using native development frameworks.
Introduction
The places service has recently been added to the rich set of ArcGIS location services for Developers. This new service facilitates a better awareness of location in a given area by letting you search for places, or points of interest. While there is a plan to build an API for the places service in a future version of the ArcGIS Maps SDKs for Native Apps (Native Maps SDKs), the service follows a REST architectural style and can therefore be integrated with Native Maps SDKs apps today by making HTTPS requests directly.
To improve my understanding of how the places service could be integrated with the Native Maps SDKs, I decided to expand the spatial awareness capabilities of an internal test app built using the ArcGIS Maps SDK for .NET (.NET Maps SDK). To do this, I implemented the logic for constructing URLs and making HTTPS requests to the places service. The result was significant improvements to the spatial awareness capabilities of the app. To help other Native SDK users add these capabilities to their apps, I have summarized the key learnings from this process.
In this blog, I will:
- Outline how to construct a URL suitable for making a request to the places service.
- Give an overview of sending HTTPS requests.
- Outline how responses from the places service can be processed and displayed on a map.
- Describe how to request additional information for a place.
- Discuss how the places service can be integrated with existing Native SDK geocoding tools (i.e., SearchView toolkit component).
Where applicable, I’ve provided C# code snippets to help support the descriptions in the text. You can also see the places service being used in an ArcGIS Maps SDK for Java desktop application on my colleague’s GitHub repository.
Before we jump into the technical details, let’s first take a look at the terminology I’ll be using throughout this blog, place and places service.
What is a place?
A place, also known as a point of interest, is a geographical location that is relevant to a user’s current interest or requirements. The relevance of a given place is dependent on the time, context, and user requirements. For example, the location of a bar is likely to be relevant later in the day (time) for someone who is not working (context) and is looking for a place to socialize (user requirements).
What is the places service?
The places service is a vast collection of global spatial data (over 50 million places and growing) that can be queried in order to identify places in a given area. The data includes detailed information about each place, such as street address, website, opening hours, and user rating. Data are categorized using over 1000 categories, including restaurants, stores, parks, parking, and zoos. As such, queries can be made using a combination of a search string and category ID, and can therefore be as vague (e.g., food) or as detailed (e.g., Bonnie Burrito in the Burrito Restaurant category) as required.
The service is managed and curated by Esri and follows a REST architectural style (a.k.a. RESTful), so is simple and easy to use. Requests are made using HTTPS calls to the open-api spec compliant REST API. Each request must be authenticated, either using an API key or an ArcGIS Identity, and is charged in accordance with the ArcGIS location services pricing structure, which includes a free tier.

Now we’ve established the definitions of a place and the places service, we can dive into the practicalities of using the service with the Native Maps SDKs!
Prerequisites?
Before starting to use the places service, I needed to setup the following:
- A free ArcGIS Developer account (sign-up) (note: ArcGIS Online accounts do not have the necessary permissions to use the places service).
- Note: Each account is allocated a number of free requests (free tier), with additional requests being charged in accordance with the ArcGIS location services pricing structure.
- One of the following authentication methods (used as the token to authenticate the places service request):
- An ArcGIS Identity, which is a short-lived token generated via OAuth 2.0.
- An API key, which can be created using the Developer Dashboard with an ArcGIS Developer account or by making REST requests. The API key must have the places service scope enabled (see API key scopes).
Overview of process for making a request
With a developer account and an authentication method setup, I started to learn how to make HTTPS request to the RESTful places service. I’ve provided a high-level overview of the process below:
- Create a URL containing the search parameters to look for nearby places.
- Send the request to the places service and await the response.
- Deserialize the result from JSON format into user-defined classes. If there is more than one “page” of results (i.e., results are paginated):
- Send additional requests.
- Deserialize the responses.
- Append the places to the list of results.
- Display the results on a map.
- If desired, send a request for additional information about a specific place.
I’ll discuss each of these steps in more detail in the next sections.
Creating a URL
Calls to the places service are made by sending HTTPS requests. Each URL used to make a call to the places service requires the following elements:
- Service URL, comprising:
- Scheme: https://
- Domain name: places-api.arcgis.com/
- Path: arcgis/rest/services/places-service/v1/
- Request Type: The type of request (e.g., places/near-point/ or category/{categoryId}). See the Requests section of the places documentation for a list of all request types.
- Parameter List (a.k.a. query string): A string, the start of which is denoted using the ? character, which contains a list of key-value pairs, each denoted using an & character.
- Included in the parameter list must be a token for authentication (see prerequisites section for more information).
I’ve written an example of manually constructing a URL from each of the elements outlined above in the C# snippet below (all code snippets in this blog are in C# and can be used with the .NET Maps SDK. However, similar workflows can be followed for other Native Maps SDKs products).
string _scheme = "https://";
string _domainName = "places-api.arcgis.com/";
string _path = "arcgis/rest/services/places-service/v1/";
string _requestType = "places/near-point";
string _parameterList = "?searchText=bakery&x=-3.19551&y=55.94417&radius=100&f=pjson&token=<ACCESS_TOKEN>";

Console.WriteLine(_scheme + _domainName + _path + _requestType + _parameterList);

// Prints: https://places-api.arcgis.com/arcgis/rest/services/places-service/v1/places/near-point?searchText=bakery&x=-3.19551&y=55.94417&radius=100&f=pjson&token=<ACCESS_TOKEN>
Note: copying the URL in the snippet above into a browser will enable you to make a request and see the response. To do this, you will need to replace the <ACCESS_TOKEN> statement with a valid token.
This request is a “nearby” search, meaning we are requesting places within a certain radius of a given location (note: the radius parameter is optional and has a default value of 1000m). The key-value pairs (identified by & character) in the parameter list (starts after the ? character), describe a request for any place associated with the word “bakery” and within 100m of the location with a latitude of 55.94417 and a longitude of -3.19551 (Esri’s Edinburgh R&D Office). The results are to be returned in pretty JSON format (f=pjson) and the request should be authenticated using the specified token. A request such as this helps us developers find the location of the nearest cruffin!
There are more examples of requests being made to the places service on the esridevs Postman places service page.
Sending a request
Many development frameworks provide helper classes, or there are freely available libraries that can be used to make HTTPS requests with a given URL. In this blog, I’ve assumed you have access to relevant helper classes or a suitable library. To help you identify these, here’s a few suggestions for some of the Native SDK development frameworks (Java, Swift, Qt, and .NET):
| Development Framework | Helper classes/libraries |
|---|---|
| .NET | HttpClient, UriBuilder, and HttpUtility |
| Qt | QNetworkRequest, QUrl, and QUrlQuery |
| Swift | URLSession and swift-http-types library |
| Java | HttpClient, HttpRequest, URI, and HttpURLConnection |
There’s also an example of making an HTTPS request using the HttpClient, UriBuilder, HttpUtility, and HttpResponseMessage helper classes from the .NET framework in the code snippet below.
async Task<string> MakeRequest()
{
    HttpClient _httpClient = new(); // Instantiate one HttpClient in an application.
    string _response = "";

    try
    {
        System.Net.Http.HttpResponseMessage _httpResponse = await _httpClient.GetAsync(ConstructURLUsingBuilder());
        if (!_httpResponse.IsSuccessStatusCode)
            throw new Exception("Response status code: " + _httpResponse.StatusCode);
        _response = await _httpResponse.Content.ReadAsStringAsync();
    }
    catch (HttpRequestException e)
    {
        Console.WriteLine("Message: {0} ", e.Message);
    }
    return _response;
}

Uri ConstructURLUsingBuilder()
{
    UriBuilder _uriBuilder = new("places-api.arcgis.com");

    string _path = "/arcgis/rest/services/places-service/v1/";
    string _requestType = "places/near-point";

    _uriBuilder.Path = _path + _requestType;

    NameValueCollection _urlParameters = HttpUtili-ty.ParseQueryString(_uriBuilder.Query);

    _urlParameters["searchText"] = "bakery";
    _urlParameters["x"] = "-3.19551";
    _urlParameters["y"] = "55.94417";
    _urlParameters["radius"] = "100";
    _urlParameters["f"] = "pjson";
    _urlParameters["token"] = "<ACCESS_TOKEN>";

    _uriBuilder.Query = _urlParameters.ToString();

    return _uriBuilder.Uri;
}
Process the response
So, we now know how to send an HTTPS request to the RESTful places service! Next, we’ll look at the response from the service and understand how we can process it.
Response format
Requests made to the places service return information in JSON format (or Pretty JSON format). The example request shown above returns the following response:
{
  "results": [
    {
      "placeId": "b36eaff62de292c31c99a7ed4e47c2d2",
      "location": {
        "x": -3.194024,
        "y": 55.943964
      },
      "categories": [
        {
          "categoryId": "13002",
          "label": "Bakery"
        },
        {
          "categoryId": "13065",
          "label": "Restaurant"
        }
      ],
      "name": "Soderberg Pavillon",
      "distance": 95.3
    }
  ]
}
In the example shown above, the response comprises an array called results that contains places meeting the search criteria. In this case, the array contains one place. Each place has a placeId, location, array of categories (a place can be associated with multiple categories), and a name. Additionally, because the type of the request is near-point, each result has a distance attribute.
You can find more detailed information about the content of the response for each request type in the places service documentation (e.g. near-point Response details).
Deserialization
With the json response from the places service, we now need to parse the information. Many development frameworks include a JSON deserializer which can be used to convert a JSON string into user-defined objects, for example:
PlaceResult? placeResult = JsonConvert.DeserializeObject<PlaceResult>(searchResult);
To deserialize the response, I needed to define some custom C# classes, which I’ve shown in the snippet below. Note: These are objects that were created for the purposes of this blog and are not included with the Native Maps SDKs.
class PlaceResult
{
    public List<Place> results;
    public Pagination? pagination;
}

class Pagination
{
    public Uri previousUrl;
    public Uri nextUrl;
}

class Place
{
    public string placeId;
    public PlaceLocation location;
    public List<Category> categories;
    public string name;
}

class PlaceLocation
{
    public float x;
    public float y;
}

class Category
{
    public int categoryId;
    public string label;
}
Pagination
While processing results, I became aware of the concept of pagination. The total number of results returned by a request to the places service is limited to 200. However, a single response cannot return 200 results, so the results are paginated (i.e., split into pages). The default number of results returned in a single response (i.e., default page size) is 10, but you can decrease or increase this up to a maximum of 20 results by setting the pageSize parameter in the URL’s parameter string. If the number of results exceeds the page size, you will need to make more requests to retrieve additional pages of results. To help with this, the URL required to retrieve the next page of results is included in the response as a pagination object that has a nextUrl attribute. You can see examples of paging through results on the esridev postman places service page.
Displaying places on the map
With the list of places retrieved from the places service, I needed to display the results on a map. To do this, I decided to use two key elements:
- Point Symbol
- Label to display the place name.

To achieve this, I setup the following:
- A LabelDefinition object with expression and textSymbol properties defined.
- I used a SimpleLabelExpression object as the expression property. Be aware – the term used in the label expression (“Name” in the snippet below) needs to match the name of the attribute that you assign to the Graphic for each result.
private LabelDefinition _placesResultLabelDefinition = new LabelDefinition
(
    new SimpleLabelExpression("[Name]"),
    new Esri.ArcGISRuntime.Symbology.TextSymbol(
            "SearchResult",
            System.Drawing.Color.Black,
            15,
            Esri.ArcGISRuntime.Symbology.HorizontalAlignment.Left,
            Esri.ArcGISRuntime.Symbology.VerticalAlignment.Top
        )
);
- A GraphicsOverlay, ensuring this is in the Map‘s list of operational layers.
- The LabelsEnabled property should be set to true.
- The LabelDefinition created above should be added to the LabelDefinitions list.
_placesResultOverlay = new GraphicsOverlay { Id = "Places_Search_Result_Overlay" };
_placesResultOverlay.LabelDefinitions.Add(_placesResultLabelDefinition);
_placesResultOverlay.LabelsEnabled = true;
_mapView.GraphicsOverlays?.Add(_placesResultOverlay);
- A Symbol object to define how a place is displayed on the Map.
- Use the SimpleSymbolStyle class to create simple symbols (e.g., circles, squares, or crosses).
- More complex point symbols can be created using a MultiLayerPointSymbol.
- I decided to use the esri-pin-2 symbol to display the location of places. I’ve shown how to set this up below:
// Retrieve the Esri2DPointSymbolStyle collection of web symbol styles from default ArcGIS Online portal.
ArcGISPortal portal = await ArcGISPortal.CreateAsync();
SymbolStyle esri2DPointSymbolStyle = await SymbolStyle.OpenAsync("Esri2DPointSymbolsStyle", portal);

// Get desired esri-pin-2 symbol and change colour to Red.
MultilayerPointSymbol? pinSymbol = await esri2DPointSymbolStyle.GetSymbolAsync(new List<string> { "esri-pin-2" }) as MultilayerPointSymbol;
if (pinSymbol != null)
    pinSymbol.Color = System.Drawing.Color.Red;
Once I had a LabelDefinition assigned to the GraphicsOverlay and an appropriate Symbol, I could display the results returned from the places service by doing the following for each result:
- Creating a point geometry object (e.g., Point or MapPoint) using the latitude and longitude of the place.
- Creating a Graphic object using the point geometry. I used the geometry created in the previous step as well as the symbol object defined earlier.
- Adding two attributes to the Graphic, one for the name of the place and another for the placeId.
- Remember, you need to ensure that the term used to define the “Name” attribute matches the term you used in the LabelDefinition.expression that you defined previously.
- Adding the Graphic to the list of Graphics on the GraphicsOverlay.
foreach (Place place in placeResult.results)
{
    double x = place.location.x;
    double y = place.location.y;
    MapPoint resultPoint = new(x, y, SpatialReference.Create(4326));
    Graphic resultGraphic = new(resultPoint, _pinSymbol);
    resultGraphic.Attributes.Add("Name", place.name);
    resultGraphic.Attributes.Add("PlaceId", place.placeId);
    _resultOverlay.Graphics.Add(graphic);
}
Once I added the graphics for each result to the GraphicsOverlay, the results appeared in the map!
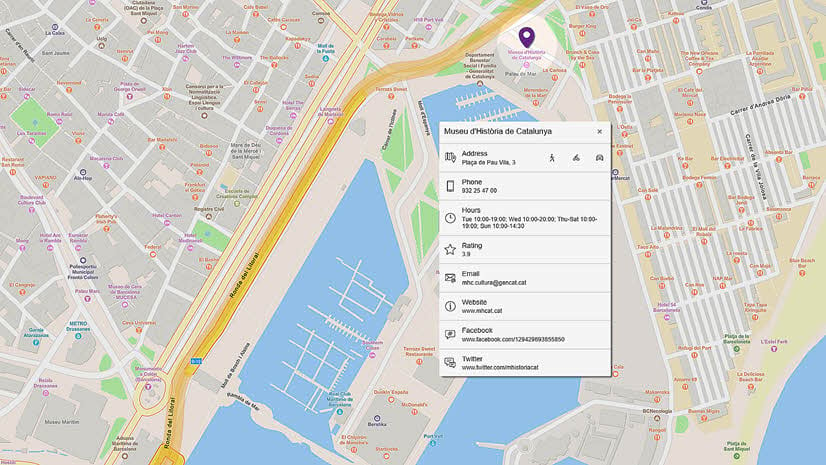
Sending requests for additional information
Using the near-point or within-extent request types, I was able to retrieve the location and name of places. However, what I wanted to be able to do was provide more information to an app user if they desired, such as street address, opening hours, telephone number, and website. To get this information I needed to perform another request to retrieve the additional information for a place.
Each place returned by a near-point or within-extent request includes a unique placeID. Using this placeID I could construct a URL suitable for making a request for place details. This follows the same process that is outlined above, but uses /places/<PLACE_ID> as the request type. You can specify the attributes you want by defining the requestedFields parameter in the parameter list (table of fields). Below, I’ve shown the URL that we used to retrieve the opening hours of the bakery closest to Esri’s Edinburgh R&D centre:
Which returns:
{
  "placeDetails": {
    "placeId": "b36eaff62de292c31c99a7ed4e47c2d2",
    "contactInfo": {
      "telephone": "0131 228 1905",
      "website": "https://www.soderberg.uk/pavilion",
      "fax": null,
      "email": null
    },
    "hours": {
      "openingText": "Mon-Fri 9:00 AM-10:00 PM; Sat-Sun 10:00 AM-10:00 PM"
    }
  }
}
As with a nearby or within extent search, to access the information in the response, I needed to parse the JSON into custom data types.
The two-stage process of searching for place names and locations in an area followed by requesting details for individual places meant I needed to make a design decision. Did I want to send requests for additional information about a place only when a user interacted with (e.g. clicked on) a place? Or, did I want to request additional information automatically for all places returned by a search and display this to the user?
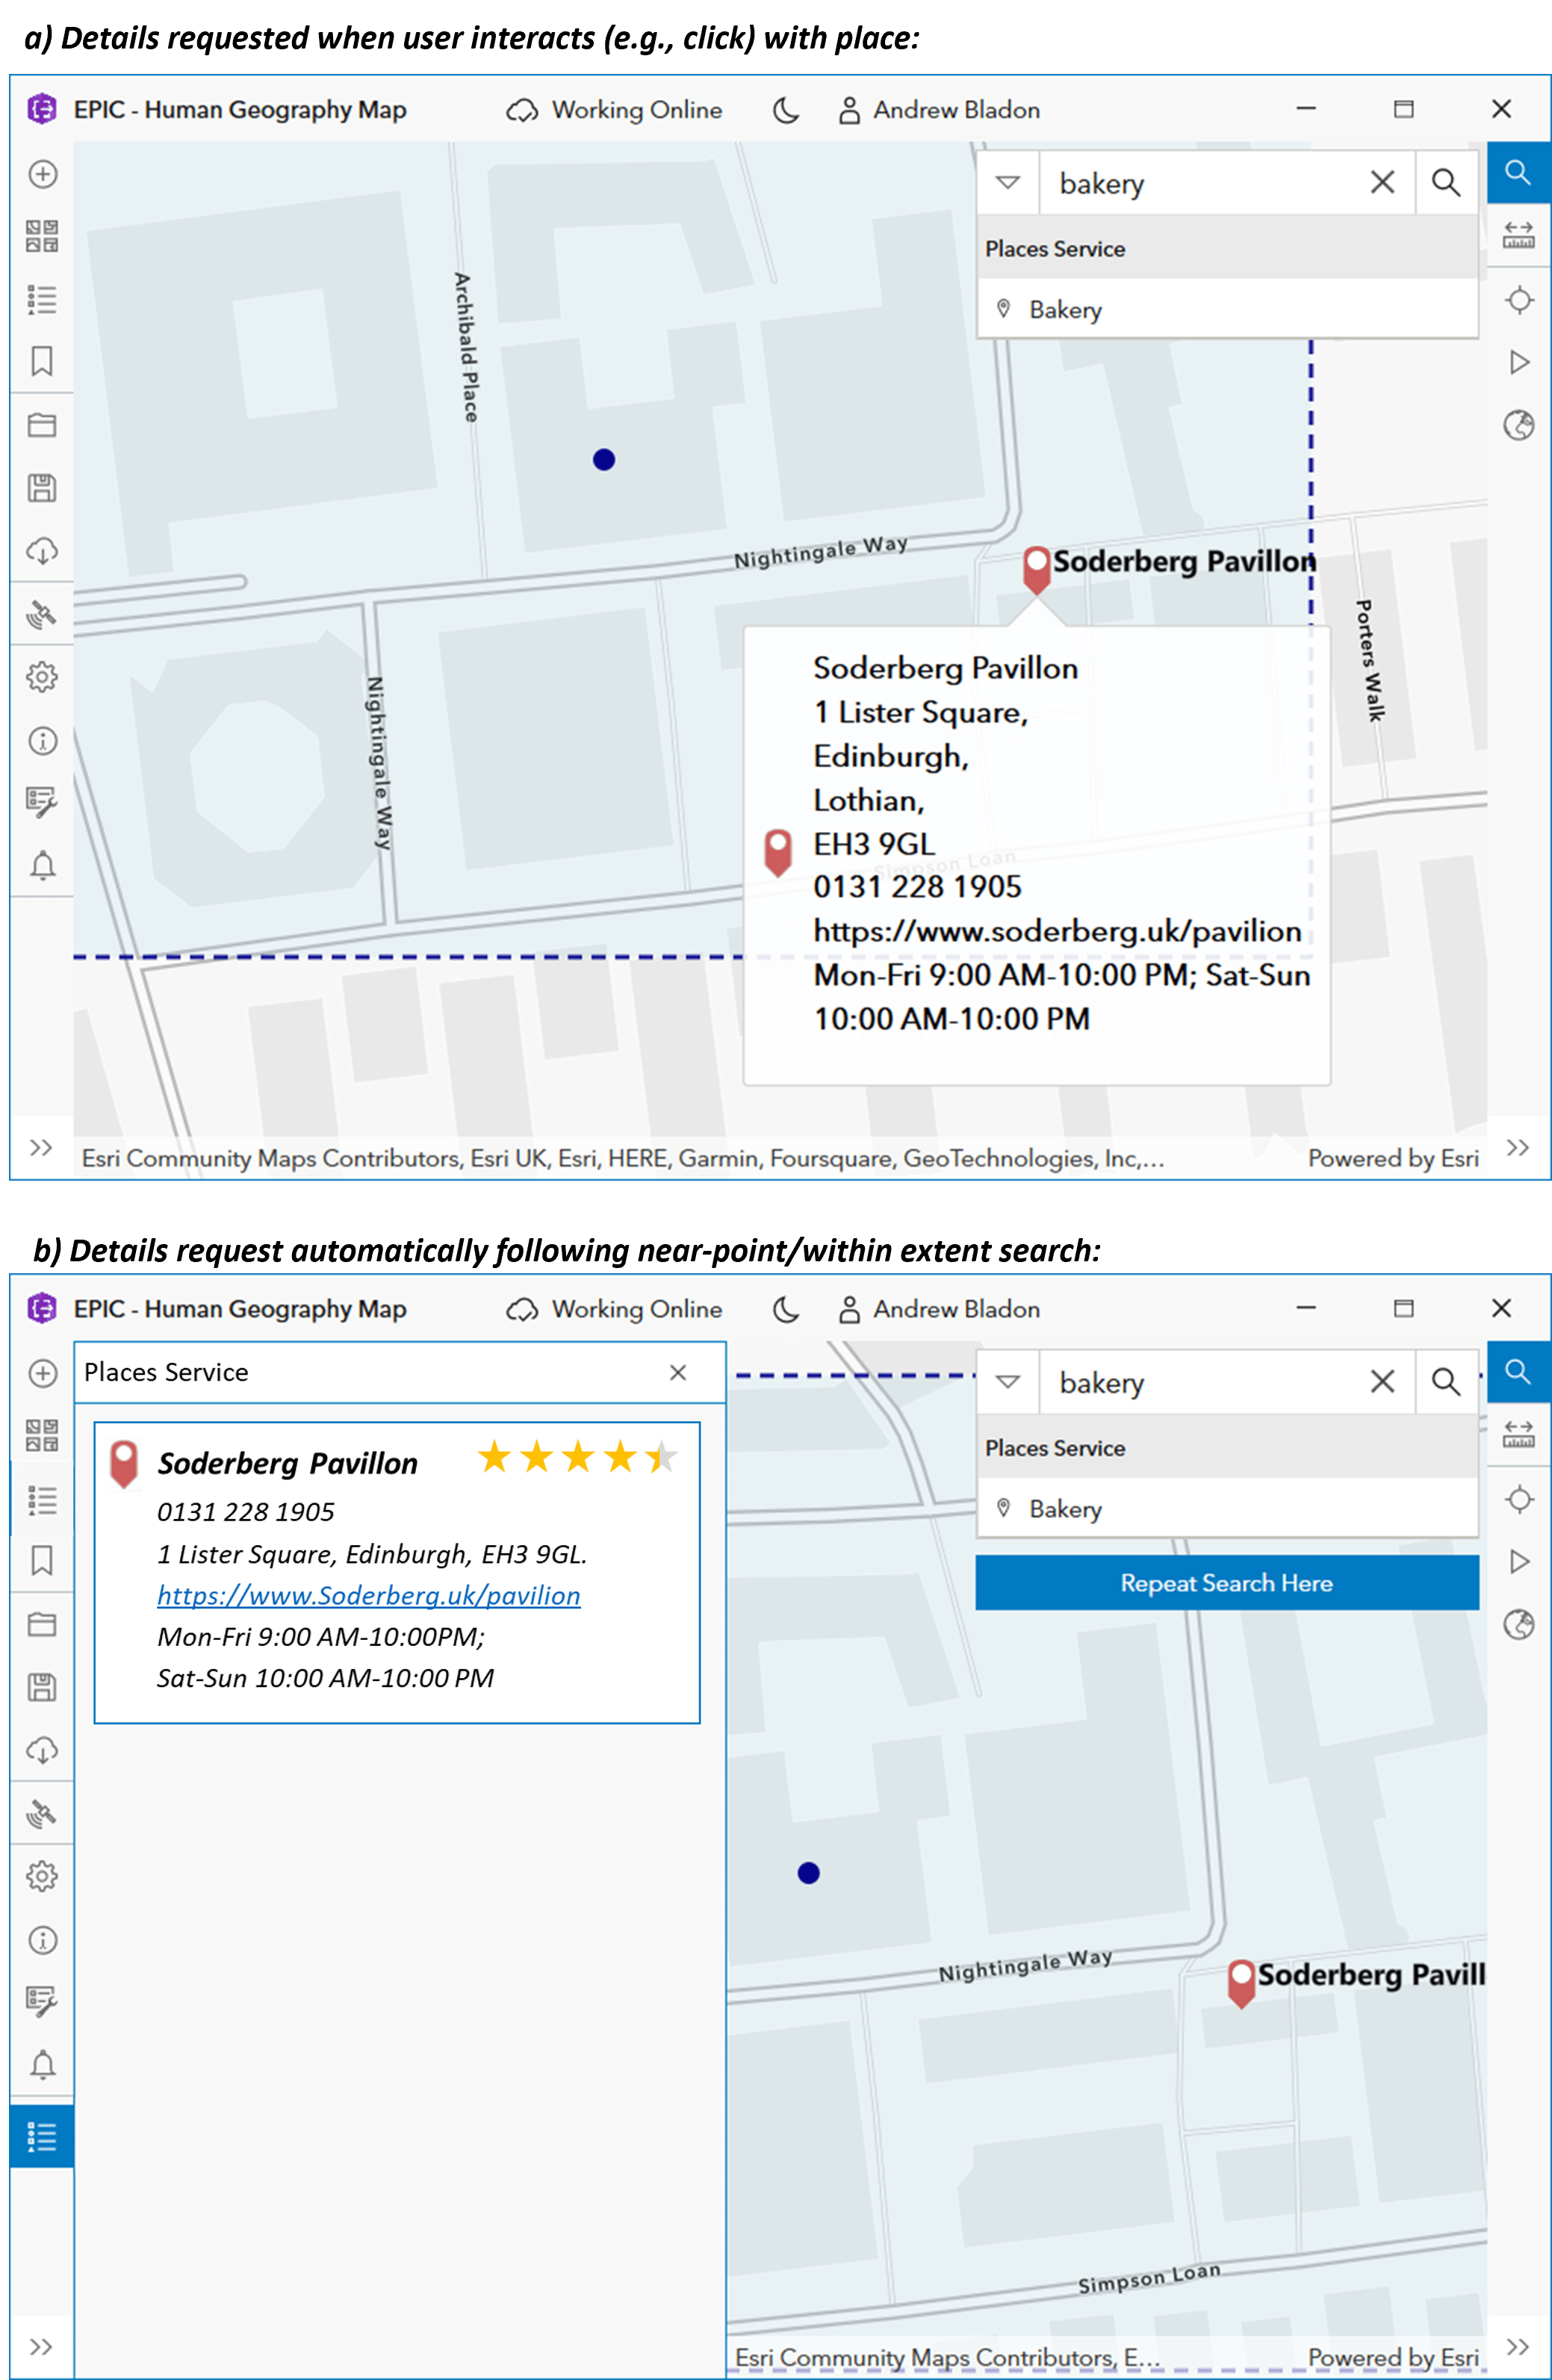
Each option results in different user experiences and varying numbers of requests being made to the places service (therefore different costs). For simplicity and to minimize the number of requests being made to the service, I decided to request details for a place only when a user interacted with a place.
Integration of places service requests with existing geocoding tools
In the initial implementation described in the sections above, the extent in which to find places of interest (using the places service) was defined using the map’s current viewpoint. This meant a user had to manually navigate to a location (e.g. using interactive panning) before performing a search for places of interest in the current view’s extent. After presenting this to colleagues, it was suggested that the user experience could be improved by allowing a user to include a search location in the request, for example using a textual description such as “Edinburgh” or “Redlands”. This could be achieved by integrating the logic used to make a request to the places service with other tools available to Native Maps SDK developers, for example the open-source Native Maps SDK toolkit components and the world geocoding service. To continue to improve my understanding of how the places service can be integrated with the Native Maps SDKs, I investigated this further.
To facilitate the integration, I used the SearchView toolkit component, which is available in most of the Native Maps SDK toolkits. The SearchView component enables searches to be conducted using different sources. A couple of search sources are provided with the component (e.g. Esri World Geocoder). However, additional search sources can be added using the extensibility interface, called ISearchSource in the .NET Maps SDK and SearchSourceInterface in the Qt Maps SDK. Using this interface, I was able to add the places service as a source in the SearchView toolkit component and use it efficiently to combine searches using multiple sources.
Customising the toolkit component further, the keyword “near” was configured in the app logic to trigger two sequential searches automatically. The first request being made to identify a geographic location (e.g. return the co-ordinates for “Edinburgh”) and a second request being made to find places of interest (e.g. “bakery”) near to the location returned by the first request. Importantly, the requests being made to each service did not change – the customisation simply automated the two sequential requests. As an example, searching for “bakery near Esri Edinburgh” resulted in the following two searches occurring sequentially:
- A world geocoding service search to identify the location of Esri Edinburgh.
- A places service search to identify bakeries near the location of Esri Edinburgh, which was identified by the world geocoding service.
The outcome of this was a significant improvement to the spatial awareness capabilities of the app, which is dynamic and responsive to a users’ requirements, as well as a streamlined user experience.
Conclusion
The newly released places service is a vast spatial dataset managed by Esri that can be interrogated for points of interest in a given area. To learn more about how a RESTful service, such as the places service, could be integrated with the Native Maps SDKs, I expanded the spatial awareness capabilities of an internal test app created using the .NET Maps SDK. The ability to interrogate an area for places of interest, the relevance of which are dependent on time, context, and user requirements, significantly improved the spatial awareness capabilities of the app. The process I followed to use the places service with the Native Maps SDKs has been outlined in this blog, and can be summarized as follows:
- Construct a URL.
- Make HTTPS requests to the RESTful places service and process the response using a native app development framework.
- Display the results on a map.
- Request additional information for a place.
I also discussed how the places service can be integrated with existing geocoding tools that are made available for use with the Native Maps SDKs.
Learn More
To find out more about the places service, ArcGIS location services, and to see how you can add spatial awareness capabilities to your applications built with the ArcGIS Maps SDKs for Native Apps, visit the ArcGIS location services page or search for ArcGIS blogs related to location services (e.g. Basemap Styles Blog). You can also see a places-service-java-demo on my colleague Rachael’s GitHub for an example of using the places service with a Native Maps SDKs app.
We’d love to know how you are using the places service in your native apps. Please leave your feedback and questions through the ArcGIS Maps SDKs for Native Apps Esri Community forums.
Each ArcGIS Maps SDK for Native Apps (.NET, Qt, Java, Kotlin, and Swift) provides a rich set of guide documentation, API references, tutorials, and samples to help you build great apps. If you’re new to working with these SDKs, visit the ArcGIS Developers site to get started.


Article Discussion: