In a previous post we shared some advice for assembling a great story maps production team that focused on skills and workflows. This post covers some specific recommendations on how to use ArcGIS Online and other technologies to support your team’s story map production work.
***
Media/file storage
Story maps often include photos, videos, and links to PDFs or other files. You may not want every story to use a different method and/or location for storing media and files, so your team should devise and socialize a strategy for resource storage.
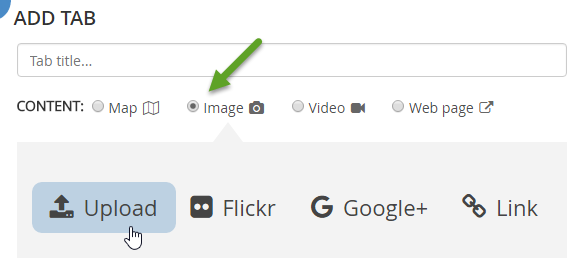
Story map apps include the ability to upload images in the builder. This stores the images in your ArcGIS account and eliminates the need to manage them separately. For example, if you share the story the images are also shared; if you delete the story the images are also deleted. For more information, see Add images from your local drives to your Story Maps.
Uploading to ArcGIS is the recommended way to store images, but you do have other options for storing images including:
- your own web server
- a cloud file storage service (Amazon S3, Box, etc.)
- a cloud photo sharing service (Flickr, Google+, etc.)
If you use a cloud service to host images, Flickr is recommended. Story map apps are built to request the best-sized image from Flickr to optimize their loading speed in stories. Any service will work as long as you can make your files accessible to anyone and can reference them with a permanent link (that is, a link that doesn’t contain an access token that expires).
One advantage of using a separate service or web server is that images stored this way can be used in multiple stories. This might be useful for a company logo, for example. However, you’ll need to ensure the images are not removed or unshared from the 3rd party service since they would no longer show up in your story.
***
Create a “Story Maps Reviewer” role
It’s often beneficial for a story map production team to use their expertise to provide help to others in the organization who create Story Maps. To facilitate this assistance, it’s recommended that members of your team have account privileges that allow them to easily help others.
Given this educational role of your team, you can make a case that some or all of your team members be in the Administrator role. If that is not feasible in your organization, you can ask an administrator to create a custom role called Story Maps Reviewer or Story Maps Manager. Base the role on the Publisher template and include at least the following additional permissions:
- See all content
- Transfer ownership
If creating a new role is not feasible, you can create a group for authors to share their unfinished story maps with your team, such as [My Org]’s Story Maps for Review.
***
Create an account for sharing stories to the public
When sharing stories with the public it’s good for there to be an official account that represents your organization. Your organization may already have one of these accounts.
Your team can choose to use that account when publishing stories to the public, or make a new one just for sharing story maps. Having a separate account lets you provide specific contact information for questions about story maps. Be sure the profile is complete and looks good. For more information see Show your best profile.
When a story is ready to be published, have an administrator (or someone with privileges to transfer items between accounts) move the story, and possibly its maps, scenes, and layers, to the sharing account.
***
Using groups for collaboration
Consider creating two groups for your team to use for their daily work:
- [My Organization]’s Stories: public group for all your finished story maps
- [My Organization]’s Story Map Team: private collaboration group for the components of your story maps
Unless you have a very small organization, it’s not recommended to pro-actively create a group for every team or division of your organization. In most cases, this will needlessly complicate your sharing workflows. When you finish a story, simply share the story and its components with your organization or publicly. This ensures easy access to your stories by the widest possible audience. In our experience working with many organizations we’ve found that most story maps are useful to people in many parts of your organization, and there’s rarely a reason to limit access to a small audience.
To prevent simultaneous edits on a story be sure to establish clear editorial roles and practice good communication among team members, and for more tips and advice on using groups to collaborate on story maps see Enable colleagues to update your maps and apps and More ways to collaborate on maps and apps.
***
Sharing stories with a small audience
If you do have stories that contain sensitive information you can set up a group for sharing that specific project and manage permissions more tightly.
For these situations where you need to provide access to a small audience, we recommend letting groups work in the background. To ensure your audience can access your full story you’ll need to share all layers, maps, and scenes in the story to the group. For this reason, a group can get crowded with items, so linking someone to the group page and asking them to find the app item is not the easiest way to provide access.
The best way to share an app with someone is to first provide them access to the app by sharing it with them (either via a group or by sharing to the organization/public), and then send them a link to the app (rather than a link to the group).
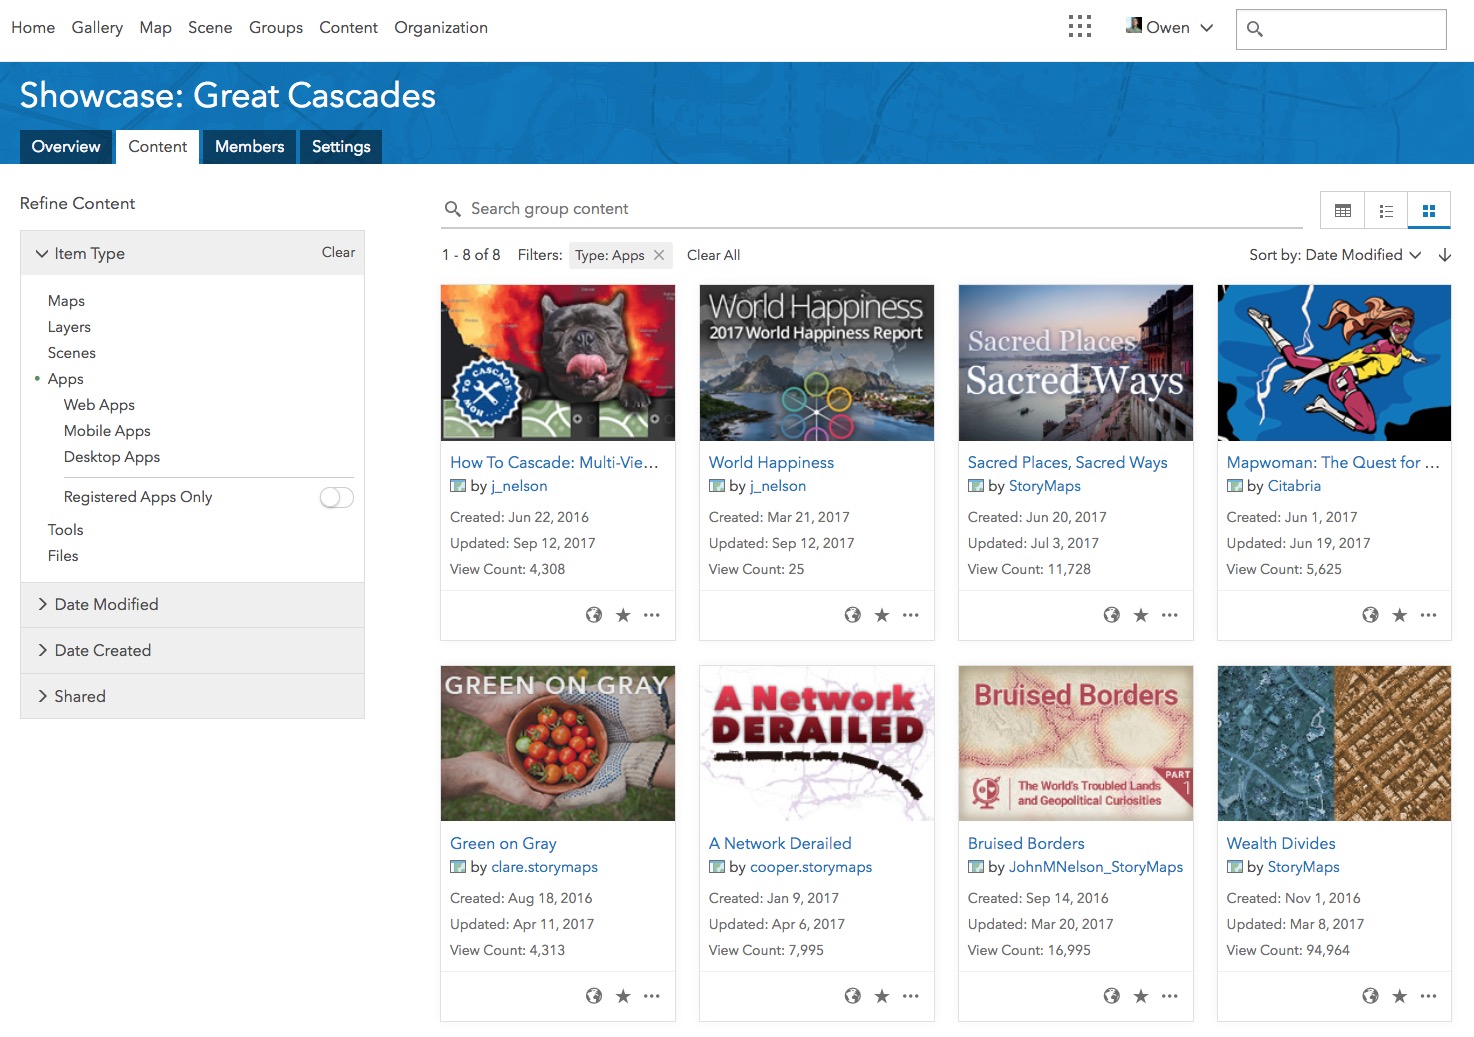
If you want to share several apps at once with a small audience, you can send a link to a group page filtered by apps. On the group’s Content tab click “Apps” in the left sidebar before copying the URL to the group. You can also share the private group as a gallery app by clicking Share > Create a web app and using one of the available gallery templates such as the Minimal Gallery app.
See Using groups effectively for more information.
***
Branding your story and customizing the apps
You can configure some simple branding in any story using the builder to set a logo and link to your website in the story header. You can also use the Shared Theme to set a standard logo and set of colors for all stories your organization builds (see Using your organization’s shared theme in Story Maps for more detail). But if your organization produces a lot of stories, you may want to invest some development time into deeper branding or customizing of the story map apps you use most frequently.
If you go down this road, or if you do any other significant customization of the story map apps, you’ll want to read our articles on Getting the most our of your customized Story Map app: part 1 and part 2.
***
Conclusion
One way to produce great quality story maps is to bring together technical GIS specialists and creative marketing or public affairs professionals. Traditionally, these groups may not interact within your organization, but story maps provide new opportunities for individuals with different and complementary skills to collaborate on a creative and rewarding project. Having a solid set of shared procedures and tools can help make collaborations between and among teams successful.


Commenting is not enabled for this article.