ArcGIS Online (and Location Platform) Organization administrators that have enabled Signed and/or Encrypted SAML Assertions in alignment with ArcGIS Online Best Practices for SAML Security must obtain the latest ArcGIS Online Service Provider metadata file + certificate and associate it with their Enterprise (SAML) Identity Provider (e.g. Entra ID Enterprise Applications) before September 19, 2025 to ensure continued (SAML) login operations with ArcGIS Online.
Administrators who have enabled the Best Practices for SAML Security feature: “Enable signed request” must complete Steps 1-2 below:
Step 1 – Download the updated metadata file from ArcGIS Online:
- Login to www.arcgis.com (or location.arcgis.com for Location Platform) with your administrative credentials,
- Click on “Organization” then “Settings” then “Security”,
- Scroll down to “Logins” > “SAML login”, then click the “Download service provider metadata” link (as shown below.) This action will download the metadata file (which contains the updated certificate) which will be uploaded to your SAML Identity Provider.

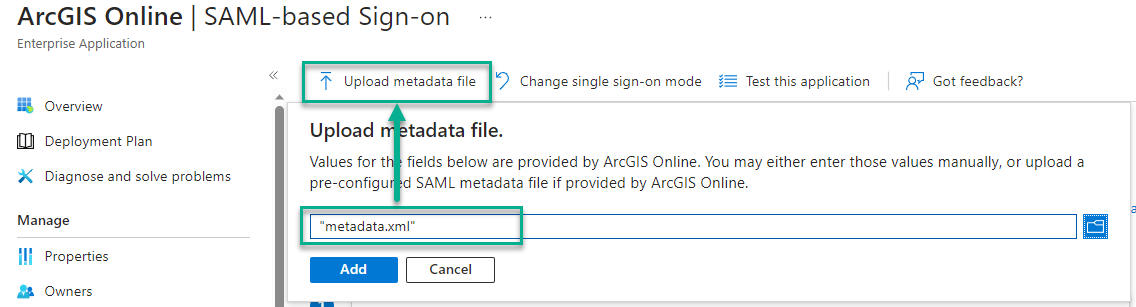
Step 2 – Upload the metadata file into your Enterprise Identity (SAML) Provider:
- Within your Enterprise (SAML) Identity Provider > Application configuration, locate the App entry for your ArcGIS Online Organization.
- Upload the updated metadata file downloaded from ArcGIS Online to your SAML Identity Provider. See ArcGIS Online’s Enterprise (SAML) Identity Provider guidance for IDP specific instructions on how to register the service provider metadata XML with your IDP.
This completes the SAML Certificate Rotation requirements for most organizations.
Administrators who have enabled the Best Practices for SAML Security feature: “Allow Encrypt Assertion” must also complete Steps 3-4 below:
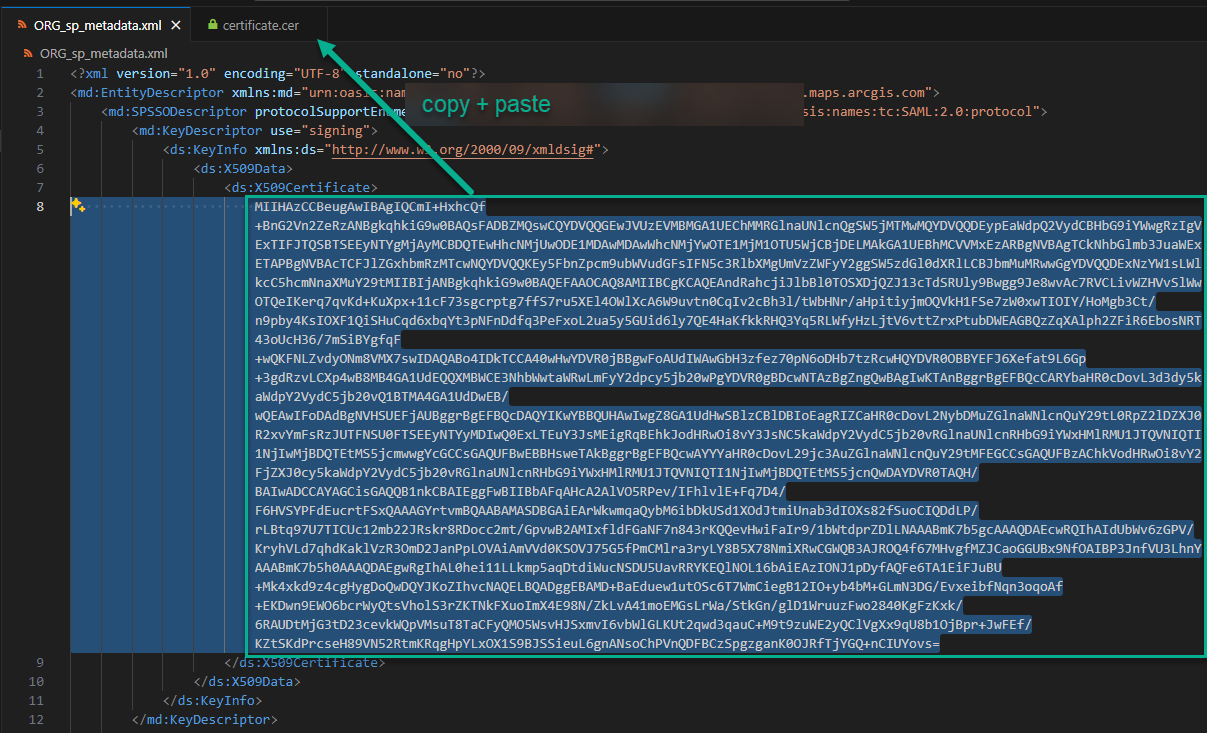
Step 3 – Extract the certificate from the ArcGIS Online metadata file:
- Extract and validate the certificate within the metadata.xml file by copying the characters between the <X509Certificate> and </X509Certificate> tags, pasting the data to an empty file and saving it with a .cer extension.
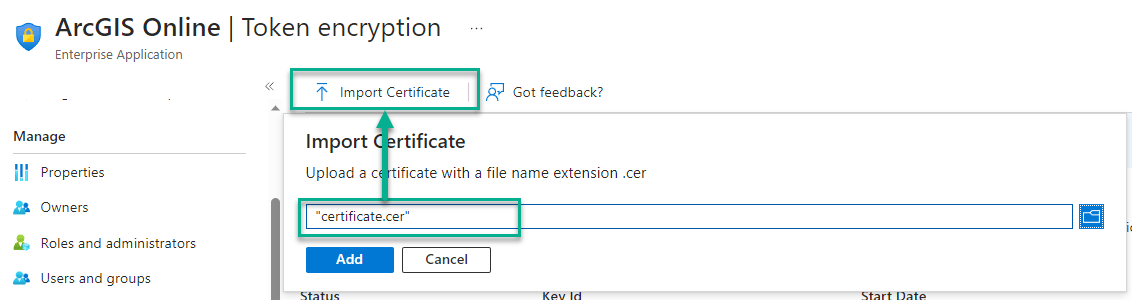
Step 4 – Update the Token Encryption certificate within the Enterprise (SAML) Identity Provider:
- Within your Enterprise (SAML) Identity Provider > Application configuration, locate the entry for your ArcGIS Online.
- Upload (and activate) the extracted certificate to the “Encryption” feature of the Enterprise (SAML) Identity Provider > ArcGIS Online App entry. Refer to your Enterprise Identity Provider’s documentation for specific instructions on this workflow.
This completes the SAML Certificate Rotation requirements for all organizations.
Troubleshooting
Upon signing in with a SAML Identity to ArcGIS Online, if you encounter one or more of the following errors, see the guidance below:
- “Signature validation for Authentication Request failed for the request of Issuer”
Root Cause: ArcGIS Online cannot verify SAML signature generated by the Enterprise Identity Provider.
Fix: Complete Steps 1-2 in the blog above.
- “There was an error”
Root Cause: ArcGIS Online Organization does not trust the Enterprise Identity Provider’s federation certificate.
Fix: Download the ArcGIS Online App specific Federation Metadata XML from your Enterprise Identity (SAML) Provider. This is typically found within the Enterprise Identity (SAML) Provider > ArcGIS Online App > Federation Metadata XML. Upload the Federation Metadata XML to ArcGIS Online > “Organization” > “Settings” > “Security” > “Logins” > “SAML Login” > “Configure Login”, click “File” > upload the Identity Provider SAML federation metadata, then “Save”.
- “Error validating encrypted Assertion Unwrapping failed”
Root Cause: The Enterprise Identity Provider is encrypting the SAML Assertion using an expired certificate, or a certificate ArcGIS Online does not recognize.
Fix: Complete Steps 3-4 in the blog above.
- I am locked out of my ArcGIS Online organization!
Fix: Contact Esri Technical Support to restore access to your ArcGIS Online organization.
Commenting is not enabled for this article.