ArcUser Online
This article as a PDF . The professionally designed map templates produced by the Esri cartography team can help you quickly improve you own map designs and become more productive with ArcGIS. For GIS professionals, mapmaking is an important—sometimes a daily task. Designing a great map that communicates effectively requires experience, skill, and time. The cartographic quality of your maps is important because maps that are well designed bring your organization's GIS information to life and communicate that information more effectively. Cartographers at Esri have created resources that not only provide immediate results but also, over time, help you learn how to be a better mapmaker. These are working examples of professional quality maps that capture best practices and present that information in an easily understood way that can be implemented by both new and experienced users. The map templates available online from the Esri Resource Center (resources.arcgis.com/content/maptemplates/about/) should not be confused with ArcMap template (MXT) format documents that define the look and feel of map layouts and were developed for sharing map standards and tools in an organization.
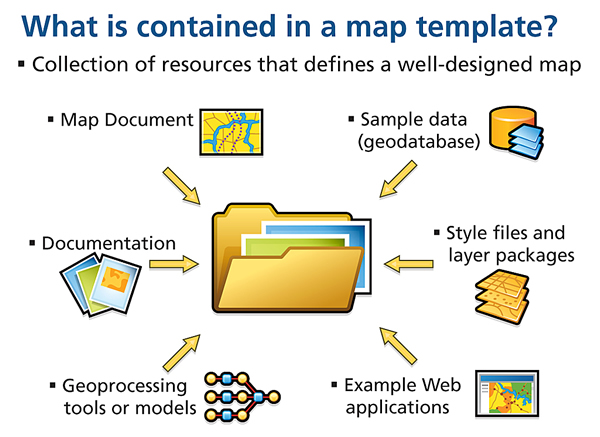
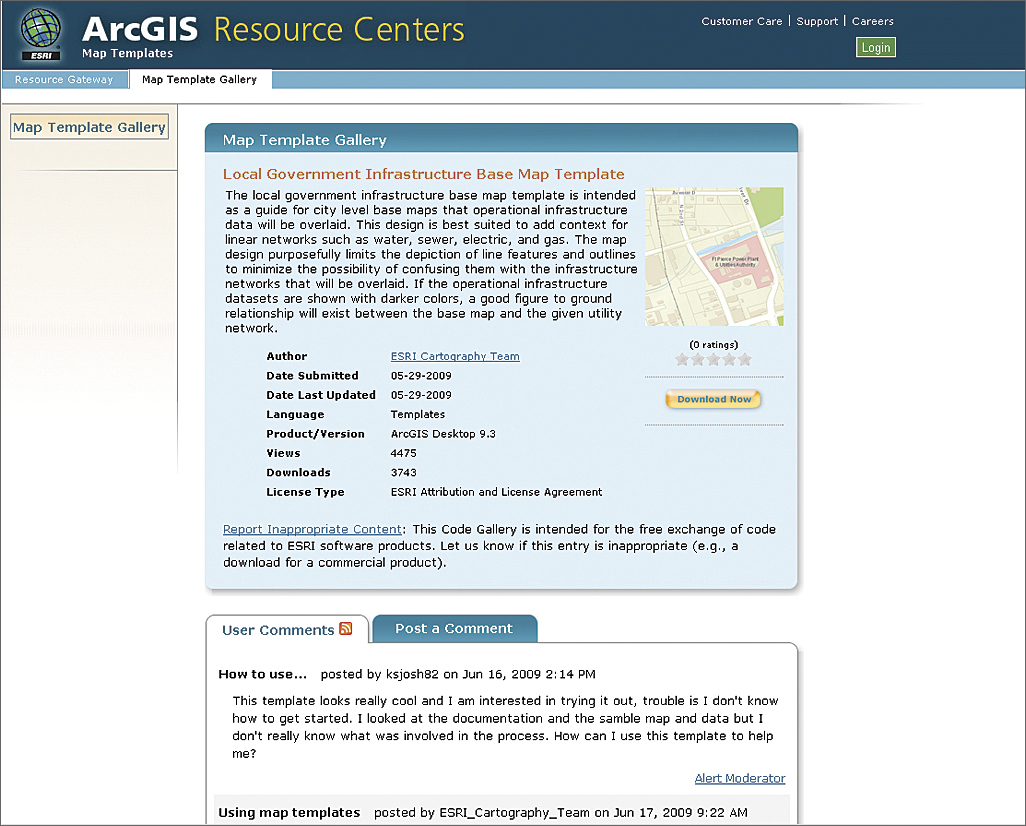
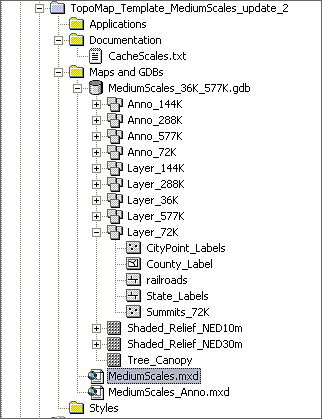
Map templates are a more complete resource. Each template contains map documents, sample data, style files, and documentation (and in some cases, tools, models, and applications) that help you quickly create maps. Various templates address the different ways you can publish maps: printed maps, maps for mobile devices, and maps for maps services published on ArcGIS Server. Steps for Using Map TemplatesOnce you have located a map template that meets your needs and downloaded and unzipped its archive, follow these steps to familiarize yourself with the contents so you can better apply it to your own data.
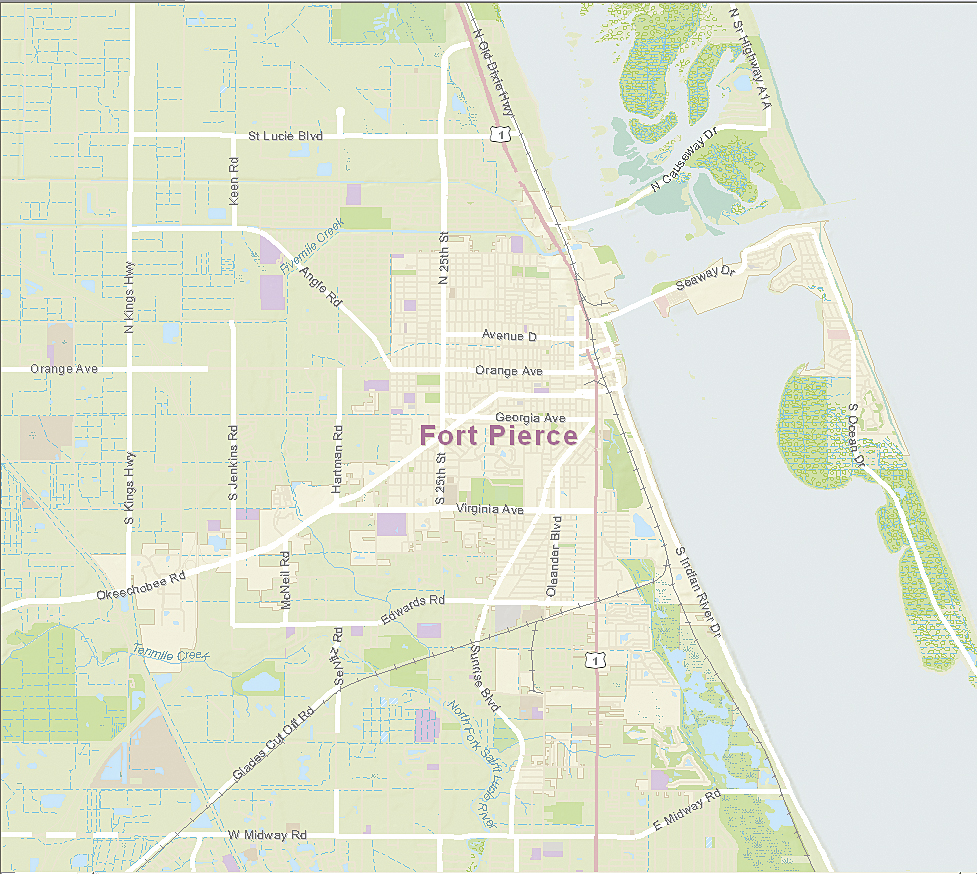
Some map templates are designed expressly for creating basemap services for ArcGIS Server. These map designs tend to use blues and greens and leave the darker and brighter colors for symbolizing the operational layers that will be placed on top. This is the same design used by ArcGIS online basemaps and facilitates the creation of mashups. Using these templates standardizes maps so they can be shared back to the GIS community on ArcGIS online. Making a Template Your OwnOnce you have become acquainted with the resources in the map template, you can start using it with your own data. Because map templates are quite versatile, what you do with them depends on the output you need (e.g., printed map, Web map, shared layers) and the data you have. While it is possible that you might be able to immediately begin working with your own data in the template, that will probably not be the case. From looking at the sample geodatabase, you can determine the similarities and differences between it and your data and the data schema used. You can decide how you might modify your data to better work with the map template. You might consider adding fields that mimic the template data structure as one way to accomplish this goal. However, this does not mean that you must completely redesign your data to conform to the sample geodatabase. When you are ready to start adding your data to a new map, let the map document in the map template be a guide to organizing your data into multiscale layers. Chances are that you will not need all the scale levels present in the map template, so just use those scales that make sense for your map. Set scale dependencies for those layers you do use. If you are publishing a map service, make sure those scales match your tiling scheme. Each of those scale levels will be used to create a map cache. With your data layers loaded and organized, the next step is to use the styles that came with the map template to quickly and correctly symbolize features. In ArcMap, choose Tools > Styles > Style References, click Add, and navigate to the Styles folder and choose the appropriate style for your layer. Now change the default symbolization provided by ArcMap using the Styles file just added to the document. This process involves nothing more than pointing and clicking to use the symbology that has already been developed and refined for this map.
Refer to the documentation for the map template for any additonal parameters, such as layer transparency, that need to be set and for information on techniques that can be employed, such as cartographic representation. Finally, apply the labels needed for your map. Click the Labels tab, click Label Styles, and scroll down to access the label styles that were included with the map template. Several map templates include both labeling and annotation versions of the map, so if annotation has already been created, it can be fine-tuned and used in the map. Refer to the map document that came with the template to note any strategies that were used to more clearly identify features such as using map classes. ConclusionYou can see that applying the resources in the map template can significantly reduce the time (and consequently, the money) required to produce an effective, professional-looking map. You started with data and a default map and transformed it into a well-organized, appropriately symbolized and labeled map. |
||||||||||||