The Community Maps Program is an Esri-led cooperative effort to build multiscale basemaps of the world using the best available data sources from the ArcGIS user community. Participating in this program can make your organization’s GIS content more accessible and provide access to more authoritative basemaps for GIS projects.
There have been many enhancements to Esri’s Community Maps over the last couple of years, most notably the Community Maps Data Prep Tools that let contributors quickly and easily prepare data for contribution. These tools were built using the geoprocessing tools in ModelBuilder.
Two toolboxes provided in the sample dataset—Run Me First and CM DataPrepTools v2—contain all the tools. The Run Me First toolbox only contains the Run Me First tool, which must be run first because it sets the stage for the other tools. The CM DataPrepTools v2 toolbox contains tools for every type of layer that can be contributed to Esri Community Maps and the Living Atlas of the World.
Getting Started
Download the sample dataset archive [ZIP] containing the Community Maps Data Prep Tools and sample data download and unzip it to a local machine. To complete this exercise, you will need ArcGIS for Desktop (any license level) at version 10.x or higher.
In this tutorial, you will run the Run Me First tool then the Parcels and LocalParks tools. The Run Me First tool sets the output geodatabase schema and defines the spatial reference for the output data. It also asks for some additional information that will be used for quality assurance purposes.
Although ArcGIS Online basemaps use the Web Mercator Auxiliary Sphere map projection, it is not necessary to reproject data to conform to this projection to use the Community Maps Data Prep Tools. In fact, using your established map projection and coordinate system is preferred. The ArcGIS Online Content team will reproject your data when it is received.
The Parcels tool is the quickest and easiest tool to run and provides a good introduction to the other tools. The LocalParks tool, while a bit more difficult, demonstrates the workflow of many of the tools used to prepare source data for contribution.
Explore the Scratch Folder
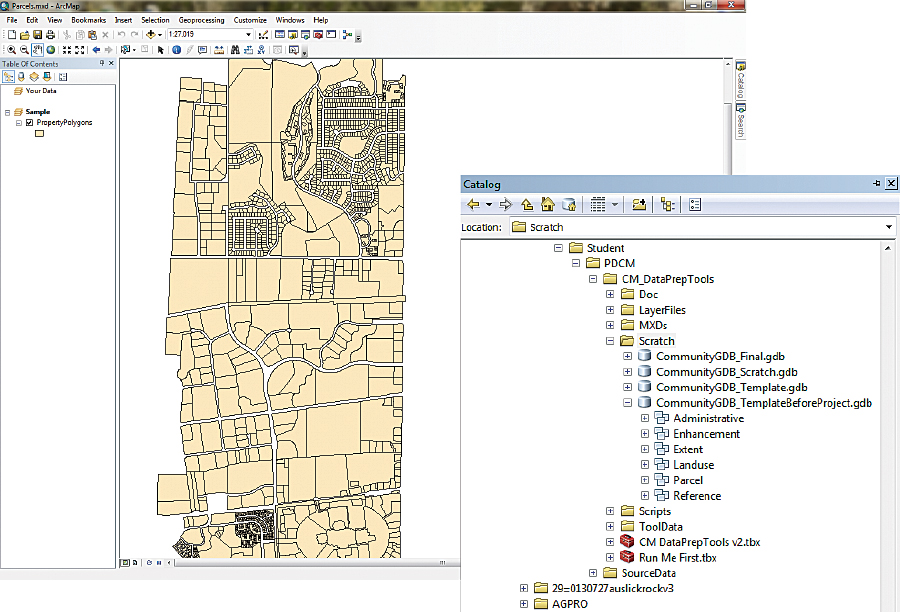
- To use the Run Me First Tool, navigate to the location where you unzipped the sample dataset and open the Student folder. In the Student folder, navigate to the …\PDCM\CM_DataPrepTools\MXDs folder and double-click the Parcels.mxd map document to open it.
- Notice that this map document has two data frames: Your Data, for data that will be contributed, and Sample, for the sample data that has been provided. The sample data lets you to run the tool to see how it works before trying it on your own data.
- In the Catalog window, navigate to …\PDCM\CM_DataPrepTools\Scratch and expand the CommunityGDB_TemplateBeforeProject geodatabase. The empty feature classes in this geodatabase serve as templates for the output feature classes that are created using the Community Maps Data Prep Tools.
- Expand the Parcel feature dataset and double-click the OwnerParcel feature class. Click the XY Coordinate System tab. Notice that the spatial reference of this feature class is Web Mercator Auxiliary Sphere. Although this is the map projection used by ArcGIS Online basemaps, it is probably not the projection typically used. Click OK to close the Parcels Feature Class Properties dialog.
- Click the CommunityGDB_Template geodatabase. Notice that this geodatabase does not contain any feature classes. After the Run Me First tool is run, it will be populated with empty feature classes that are copies of those in the CommunityGDB_TemplateBeforeProject geodatabase that use the spatial reference that has been defined.
- Expand the CommunityGDB_Scratch geodatabase. The CommunityGDB_Scratch geodatabase doesn’t contain any features, just a table. This geodatabase will be used for intermediate layers that will be created while the tools are running. The table will be populated when the Run Me First tool is run. You can ignore this geodatabase.
- Click the CommunityGDB_Final geodatabase. Notice that it is currently empty because no tools have been executed. This geodatabase will receive the output from the Community Maps Data Prep Tools.
Run the Run Me First Tool
- In the Catalog window,Av navigate to the Run Me First toolbox in the …\PDCM\CM_DataPrepTools folder. Expand the Run Me First toolbox and double-click the Run Me First tool to open it.
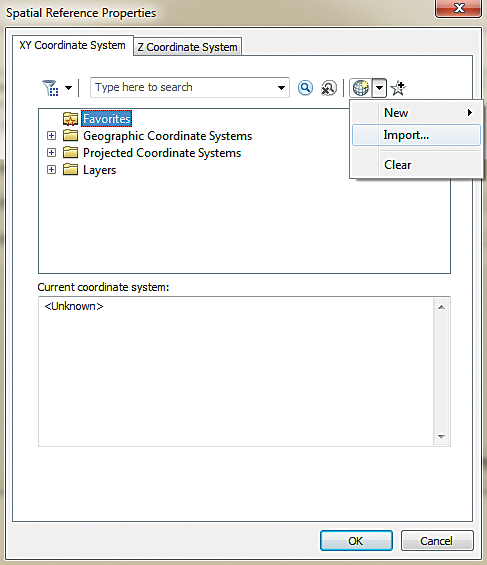
- Click the button next to the text box for Enter your source data coordinate system to invoke the Spatial Reference Properties dialog box. In the Spatial Reference Properties dialog box, click the Add Coordinate System button and then click Import.
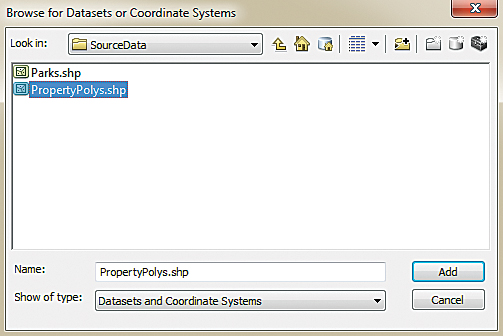
- Browse to the …\PDCM\SourceData folder and double-click the PropertyPolys shapefile to select it. Notice that the current coordinate system is now set to NAD_1983_HARN_StatePlane_Illinois_ East_FIPS_1201 (the spatial reference for the PropertyPolys shapefile). Click OK on the Spatial Reference Properties dialog box.
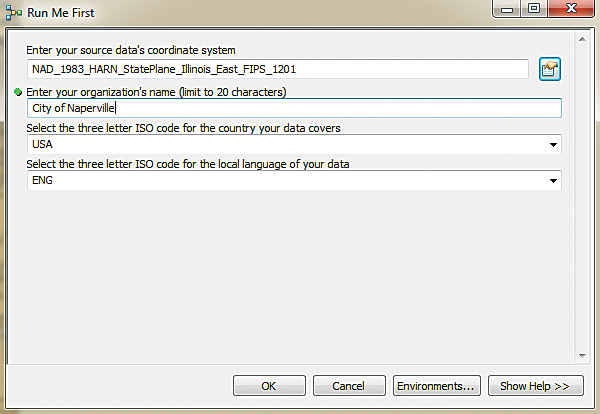
- Now, back in the Run Me First dialog box, type “City of Naperville” for the name of the organization. For the three-letter ISO code for the country covered by the sample data, accept the default of USA. For the three-letter ISO code for the local language of the sample data, accept the default of ENG. (These fields are important for quality assurance and quality control.) Click OK to run the Run Me First tool.
- When the tool has executed, click Close. Right-click the CommunityGDB_Template geodatabase in the Catalog window and click Refresh. Expand the CommunityGDB_Template geodatabase. Notice that the geodatabase now contains the same feature datasets and feature classes as the CommunityGDB_TemplateBeforeProject geodatabase.
- Expand the CommunityGDB_Scratch geodatabase. Drag the DataPrepTable into the Table of Contents. Right-click the DataPrepTable and choose Open. Notice that the DataPrepTable recorded the information that you placed in the Run Me First tool. You can close the DataPrepTable and remove it from the Table of Contents by right-clicking and choosing Remove.
- In the CommunityGDB_Template geodatabase, expand the Parcel feature dataset and double-click the OwnerParcel feature class. Click the XY Coordinate System tab. Notice that the current coordinate system is NAD_1983_HARN_StatePlane_Illinois_East_FIPS_1201, just as you defined in the Project tool. Click OK to close the Parcels Feature Class Properties dialog box.
Run the Parcels Tool
- In the Parcels map document, right-click the Your Data data frame in the Table of Contents and click Activate.
- Add the source data to the map. In the Catalog window, navigate to …\PDCM\SourceData. Drag the PropertyPolys shapefile from the Catalog window and drop it on the map.
- Right-click the PropertyPolys layer and click Open Attribute Table. Notice how many parcel polygons are in this shapefile. Note the number of input features. This will be helpful when reviewing the output data after a tool is run. Close the attribute table.
- In the Catalog window, navigate to and expand the …\PDCM\CM_DataPrepTools\CMDataPrepTools v2.tbx toolbox. Double-click the Parcels tool. This tool requires only a data source and an optional selection query. All parcels are displayed in the World Topographic Map with a uniform symbology, so no other classification queries are necessary.
- For the data source, click the down arrow and choose PropertyPolys. Since all the polygons in this shapefile are parcel features, there is no need to enter a selection query, so that field can be left blank. Click OK to run the tool.
- When the tool finishes, click Close. The Parcels tool created a new layer, OwnerParcel, and added it to the Table of Contents. It is symbolized with 40 percent transparency and is displayed with the World Topographic Map symbology. Close the map document without saving changes.
Run the LocalParks Tool
- Navigate to the …\PDCM\CM_DataPrepTools\MXDs folder and double-click the LocalParks.mxd file to open it. Activate the Your Data data frame.
- In the Catalog window, navigate to the …\PDCM\SourceData folder. Drag the Parks shapefile into the map. Open its attribute table. Note how many records (features) are in this table, then close it.
- In the Catalog window, navigate to and expand the …\PDCM\CM_DataPrepTools\CM DataPrepTools v2.tbx. Expand the Landuse toolset to expose all its tools. Unlike the Parcels tool, you can designate label fields with the LocalParks tool. Double-click the LocalParks tool to open it.
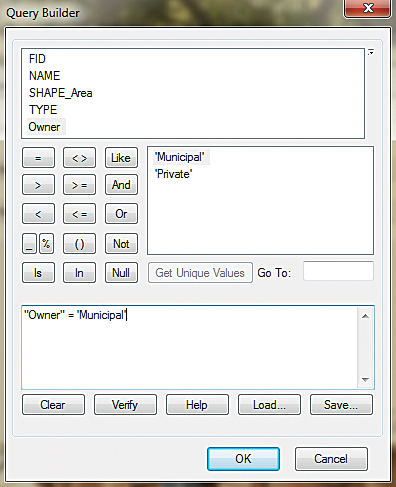
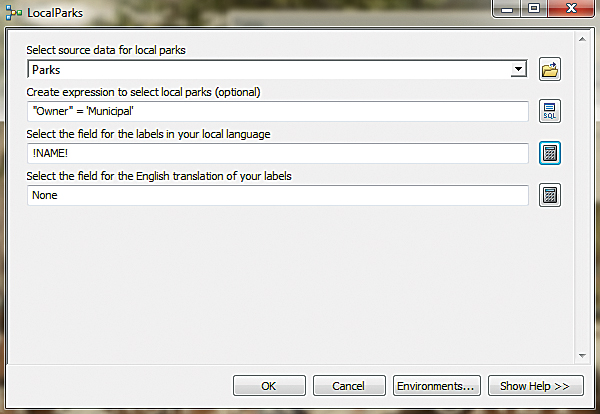
- For the LocalParks source data, click the down arrow and choose the Parks layer. The Parks shapefile contains two types of parks—municipal and private. You only want to include the municipal parks in your Community Maps contribution, so you will need to create a selection query. Click the SQL button to access the Query Builder. Use it to construct the following expression: “Owner” = ‘Municipal’. Click OK to close the Query Builder.
- Next click the Field Calculator button next to the Select the field for the labels in your local language text box. In the Field Calculator, choose NAME. Click OK to close the Field Calculator dialog box. For Select the field for the English translation of your labels, accept the default of None.
- Click OK to run the LocalParks tool. When the tool has finished running, click Close. Notice that a new LocalPark layer has been added to the Table of Contents.
- Open the LocalPark attribute table. This feature count is less than the feature count from the Parks shapefile because only municipal parks were migrated. Close the map without saving the changes.
Review Migrated Layers
Reviewing your output from the Community Maps Data Prep Tools is a necessary step in the data preparation process. If you used the tools to produce several layers, the easiest way to review them together is with the AllLayers map document included with the Community Maps Data Prep Tools download.
- Navigate to …\PDCM\CM_DataPrepTools\MXDs and double-click the AllLayers.mxd file to open it.
- Notice that the Table of Contents contains more than 50 layers. Most of them will have red exclamation points next to them indicating that they are not currently linked to a valid data source. Layers that do not have red exclamation points and have check boxes that are not grayed out are visible. These layers are pointing to the feature classes that were created by running the tools you ran in the previous steps.
- In the Catalog window, navigate to …\PDCM\CM_DataPrepTools\Scratch and expand the CommunityGDB_Final.gdb. Notice how the feature classes in the geodatabase are linked to the valid layers in the map document.
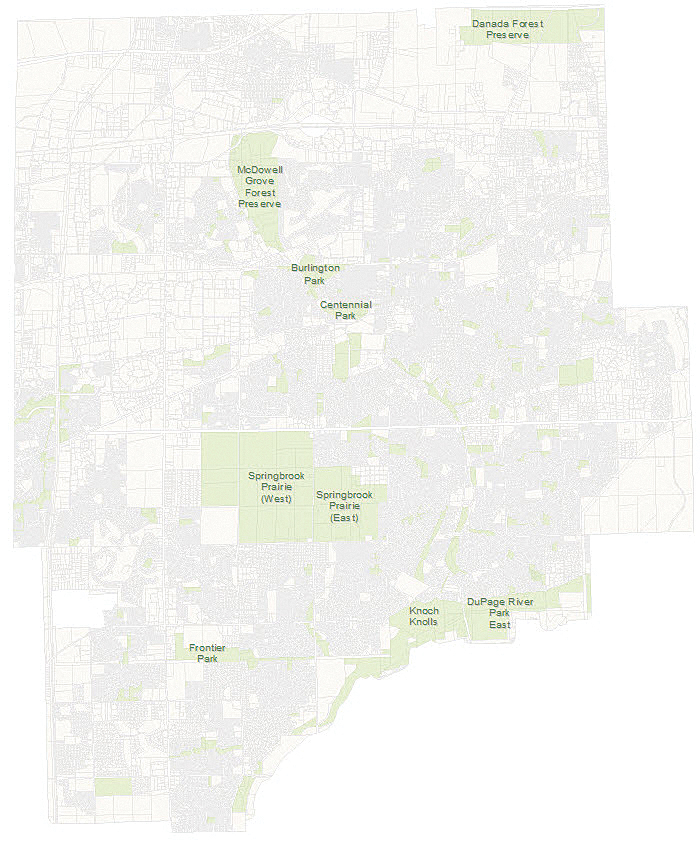
- If your map document is zoomed out too far to easily see all the layers, right-click on the LocalPark layer and choose Zoom To Layer. Now all migrated layers should be visible.
- Turn each layer on and off to get a good idea how they are displayed in the map. Though not an exact template of the World Topographic Map, the AllLayers.mxd file will give you an idea of how your layers will look together when they are published.
- When you are finished reviewing your layers, close the AllLayers.mxd file without saving your changes.
Conclusion
This exercise demonstrated how to use the Community Maps Data Prep Tools to prepare basemap source data for contribution to the Esri Community Maps Program. For more information about this program or to learn about contributing your content, contact the ArcGIS Online Content team at communitymaps@esri.com.
About the author