You can now customize geosearch (location search) and geocoding (obtaining x,y coordinates for addresses, postal codes, or populated places) to return only the results you want. Locator views help you perform searches more efficiently and eliminate the need to sort through results.
With a locator view, you configure a view of the Esri World Geocoding service that limits geosearch to specific types of locations or coordinates or limits geocoding results to the postal code level or a specified subcategory of addresses or populated places. For geosearch, searches can be limited to an area determined by an extent or a country. For geocoding, search can be limited by country.
You can share a locator view with your organization so it can be used by any apps that support geosearch, such as Map Viewer, configurable apps, and ArcGIS Explorer. It can also be used for batch geocoding.
Locator views were released as part of the ArcGIS Online update in September 2017 to improve the precision of results from address and coordinate searches and the reliability of results from point of interest (POI) searches.
The following example creates a locator view that constrains search by a specific POI (airports) and geographic extent (United States). The locator view generated will limit searches to airports—and only airports—in the United States.
Step 1
Create a Locator View
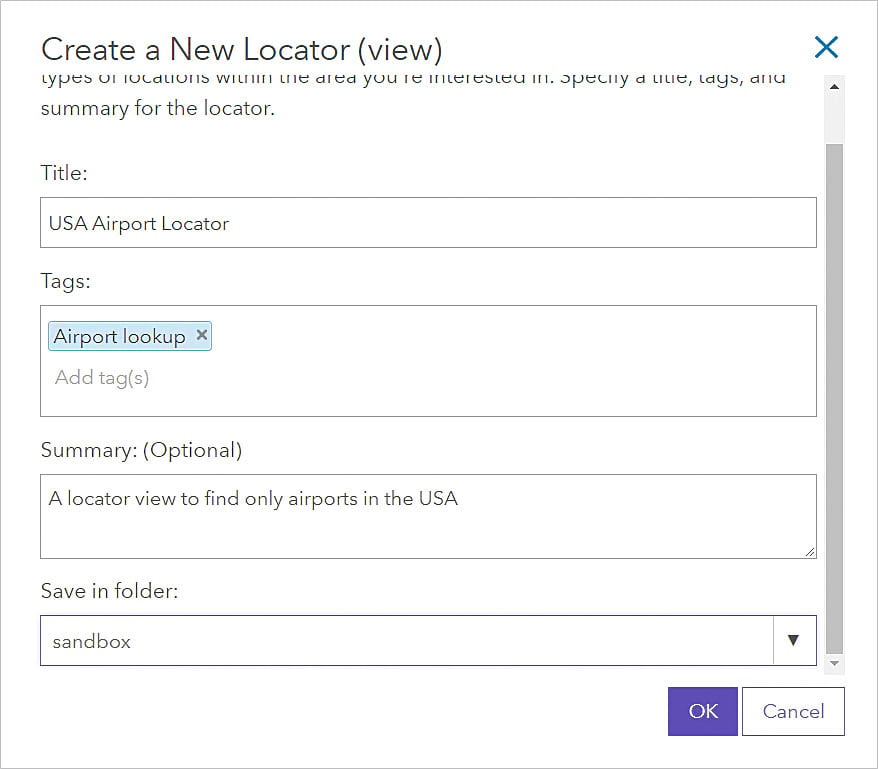
In ArcGIS Online, click Content, click the Content Tab, and click the Create drop-down. Choose Locator (view). Give the new locator view a title, tags, summary description, and folder location. Click OK.
Step 2
Define the Locator View
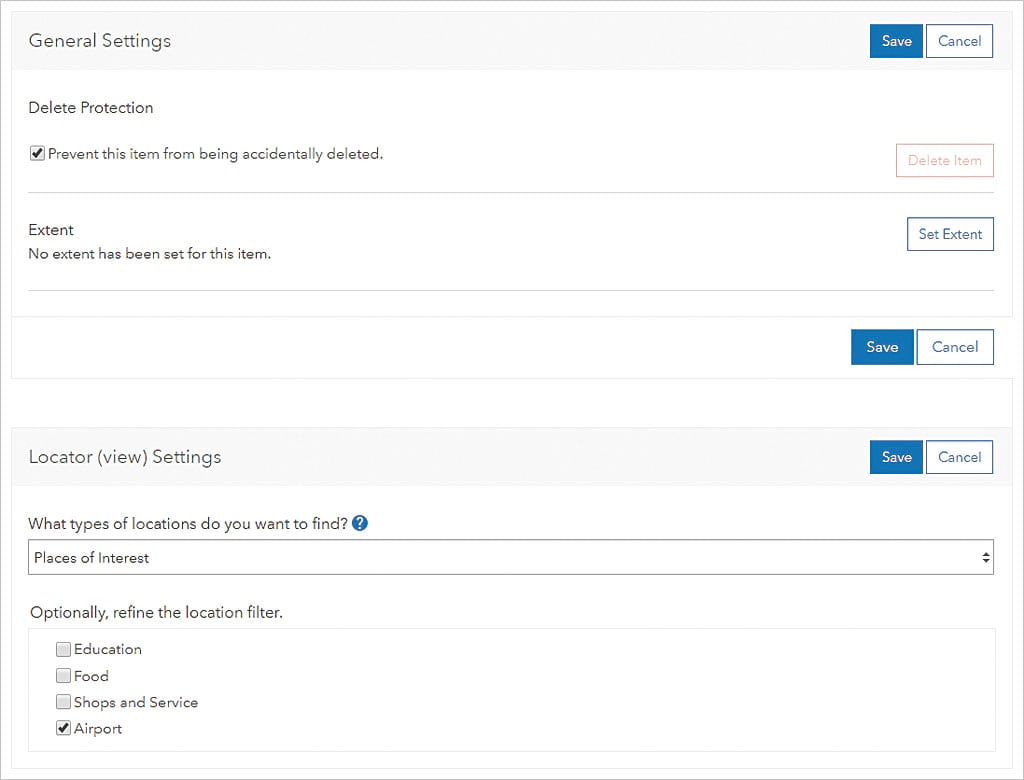
Use the settings page for the locator view item you just created to configure the locator view to search for only specific types of locations or geocode for address or coordinates and/or constrain the search within a specified area. Check Delete Protection to prevent accidental deletion.
To set the search extent interactively or by using coordinates, click Set Extent and either draw boundaries or type them in. For this scenario, skip this section.
Under What types of location do you want to find?, the drop-down lets you choose addresses, postal codes, or populated places; coordinates such as longitude, latitude; latitude, longitude; Military Grid Reference System (MGRS); United States National Grid (USNG); or places of interest (POI) with specific filters for education, food, shops and services, and airports. For this scenario, select Places of Interest and check only Airport. A complete listing of supported subcategories for addresses, postal codes, or populated places is listed in the ArcGIS Online Help.
Scroll down to Where do you want to search for locations? and choose In selected countries. Scroll through the country list to select the United States.
Make sure you click the Save button to update the locator view item with these settings.
Step 3
Share the Item with Your Organization
Click the Overview tab on the locator view item page. Click the Share button to share the locator view item you just created. Share it with your organization so coworkers can search more efficiently. If your organization shares apps with the public, only users who have access to your organization’s internal locators will be able to find places with apps that use location views.
Step 4
Configure the Item for Use
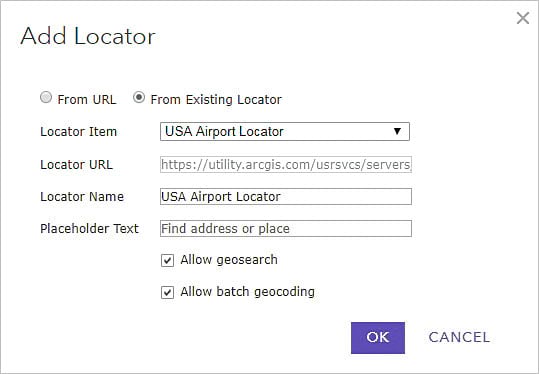
Once the locator view is shared, you (if you are an administrator for ArcGIS Online) or your administrator should to go to the Organization tab and select Edit Settings. Under the Utility Services menu, add the locator view that you created.
In this step, an administrator can also limit this locator for use in geosearches or configure it to allow both geosearch and batch geocoding. Geosearch does not consume any service credits. Because the batch geocoding operation consumes service credits, you or your administrator may want to limit the use of the locator view for batch geocoding. The same service credit rates apply to batch geocoding whether using locator views or the online World Geocoding service.
You can reorder locators in this section so that ArcGIS Online will use one or more locator views first. That way your search request will initially limit the search.
Step 5
Use the Locator View
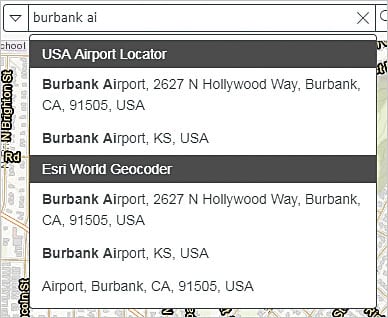
With the locator view set up, open Map Viewer in ArcGIS Online and select the drop-down button in the search pane to bring up the available locators you can search against. Select the newly created locator view, USA Airport Locator, to limit the search to airports in the United States.
Once a locator view is configured by you or your administrator in the utility service settings, the locator view can be used in any ArcGIS application that uses the organization’s locators configured in the utility services settings. This means, for example, that someone in your organization using ArcGIS Maps for Office will be able to geocode airport codes in Microsoft Excel against the locator view you’ve created.
To learn more about locator views, read the “Geocoding and geosearch” topic in the ArcGIS Online Help