Symbols can be rotated based on a numeric value. This is useful for showing which way a camera is pointing or a car is moving or the wind is blowing. To use rotation when displaying symbols, the data must have a field containing values that will be used for rotation.
Typically, those values are compass direction with clockwise values of zero at north, 90 at east, 180 at south, and 270 at west. Compass azimuths aren’t required for rotating symbols. You can use any value that makes sense for your needs. You can set the rotation angles to be measured clockwise or counterclockwise, depending on how values are stored.
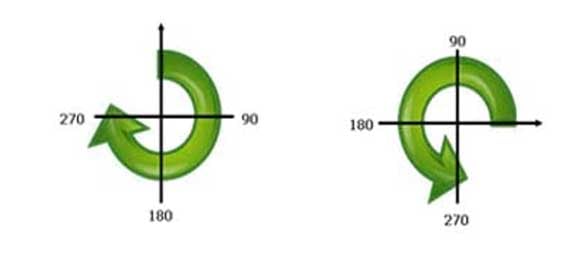
When rotating clockwise, angles are measured clockwise from the 12 o’clock position. When rotating counterclockwise, angles are measured counterclockwise from the 3 o’clock position.
Symbol Rotation Exercise
To follow along with this exercise, download the CSV file at https://bit.ly/2NZbEd2. It includes webcam locations (these are dummy locations, not actual locations) as well as the direction the camera is pointing expressed as clockwise compass azimuths.
Step 1: Inspect the data.
Open the file using Microsoft Excel, Notepad, or another text editor. Note that the file contains locations in latitude-longitude and a direction that will be used to rotate the symbol.
Step 2: Add the data to your map.
Add the CSV data to a new map. You can drag the file onto your map or choose Add > Add Layer from File.
Step 3: Change the style of the locations.
When you add the CSV file in the previous step, Change Style automatically opens. Choose Show location only, then click Options.
Step 4: Change the point symbols.
Click Options and then Symbols to change the point symbols. Choose an arrow symbol from the Arrows category. Since the rotation is stored as compass directions with zero pointing north (up), choose an arrow that points up. Change the symbol size as desired, then click OK.
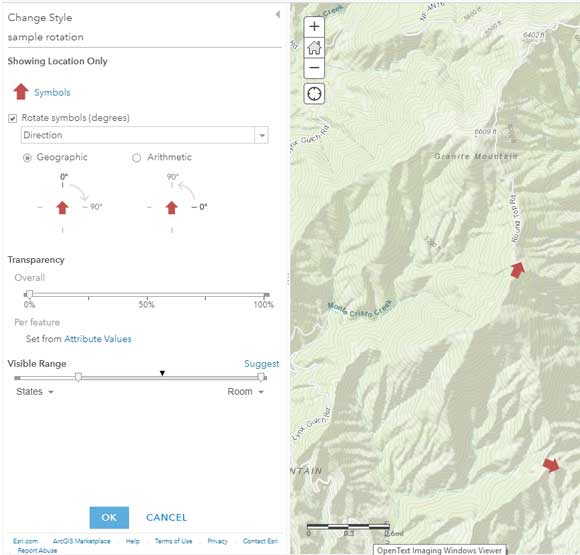
Step 5: Rotate the symbol.
Check the Rotate symbols (degrees) box. From the drop-down, choose the field containing the values used for rotation. In this case, the field is Direction. The values are already stored in the expected clockwise format described above, so Geographic (the default) is the correct rotation option. Save your style changes when finished.

Step 6: View the map.
The map now displays the camera locations with the arrow rotated to show the direction of each camera.
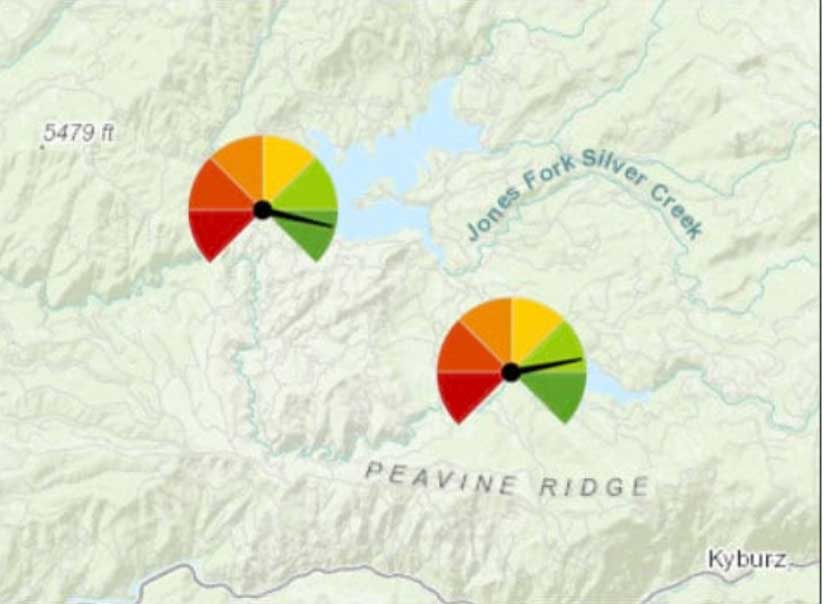
Other Examples
Rotation can be applied to any feature layer in your map. Symbols can be stacked to create a gauge with a dial. Symbol rotation is used to rotate the dial. For more information, see “Creating dials and gauges using stacked symbols and rotation.”
ArcGIS Arcade is an expression language built into ArcGIS Online that you can use to rotate symbols. For more information, see “Using Arcade to rotate symbols in web maps” (https://bit.ly/2Xacg3C) and the Arcade documentation.
For more information, see the “Change style” topic in the ArcGIS Online documentation.