
Geotagged photographs contain the stored location of where the image was taken. The latitude and longitude are stored in the image file’s Exchangeable Image Format (EXIF) data, while the metadata for the image can contain other details—the make and model of the camera, lens information, and more.
There are many ways to geotag photos. You can capture the location when you take the photo using a GPS-enabled camera, you can use the locator capabilities of your device, or you can use tools like those found in Flickr and other online services to geotag photos after they’ve been captured.
While you can’t drag or otherwise add geotagged photos directly to your web map in ArcGIS Online, here’s a great way to add geotagged photos, using a few simple intermediate steps.
Use a ZIP File
Geotagged photos can be added to a map by publishing them as a feature layer. To create the feature layer, send the photos to a compressed (ZIP) file and upload the file from your computer to ArcGIS Online. A point feature layer is created based on the location stored in each photo, with the photos themselves being stored as an attachment to the point. Points are not created for non-geotagged photos. The resultant feature layer can be added to any web map, and photo attachments can be viewed from the pop-up.
To publish a feature layer with geotagged photos, follow the steps below. You can start at step 2 by downloading this sample ZIP file.
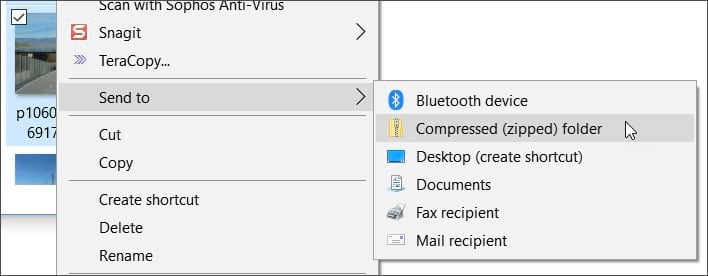
Step 1: Create a ZIP file to contain the geotagged photos. In Windows, select the photos, right-click, choose Send to, then choose Compressed (zipped) folder.
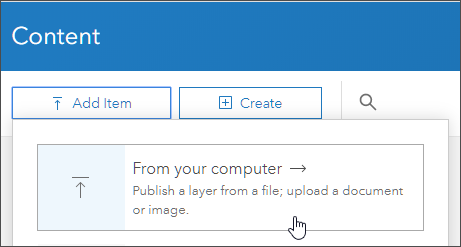
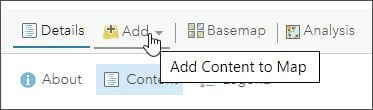
Step 2: In Content in ArcGIS Online, click Add Item, then choose From your computer.
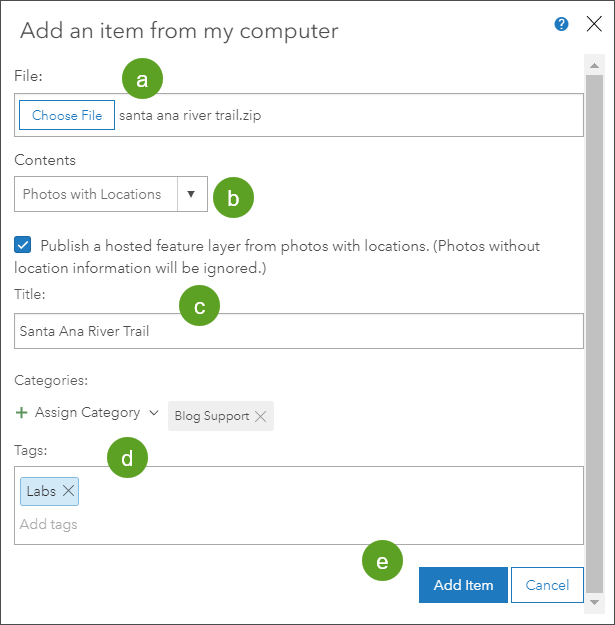
Step 3: Add the ZIP file as an item, then publish the feature layer.
- Choose the ZIP file.
- Click the drop-down menu, then choose Photos with Locations.
- Ensure that the box in front of Publish hosted feature layer from photos with locations is checked off. Then provide a title for the feature layer.
- Assign categories (optional) and add tags.
- Click Add Item when finished.
Step 4: Complete the item descriptions.
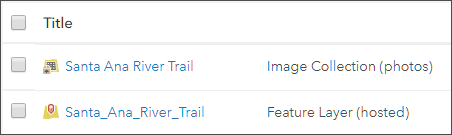
It’s a best practice to complete the item description. Update the thumbnail, summary, and details as needed. Note that there are two items that have been created: the hosted feature layer and the image collection (the uploaded ZIP file).
Step 5: Add the feature layer to a web map.
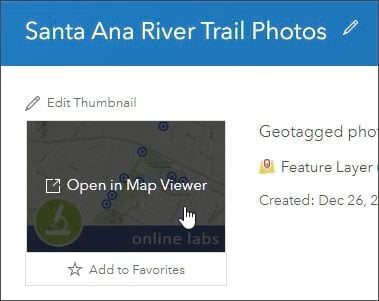
The feature layer created in step 4 can be added to a web map and configured as desired, just like any other layer. You can open the layer in a new map from the item pages.
Or add the layer to any map by clicking Add.
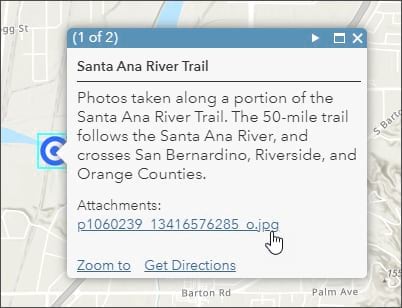
To view the photos, click the location to open the pop-up, then click the photo link under Attachments.
View the map to explore the photos.
Attachment Viewer is configurable app template, and it’s a good choice for viewing attachments. View the map using Attachment Viewer.