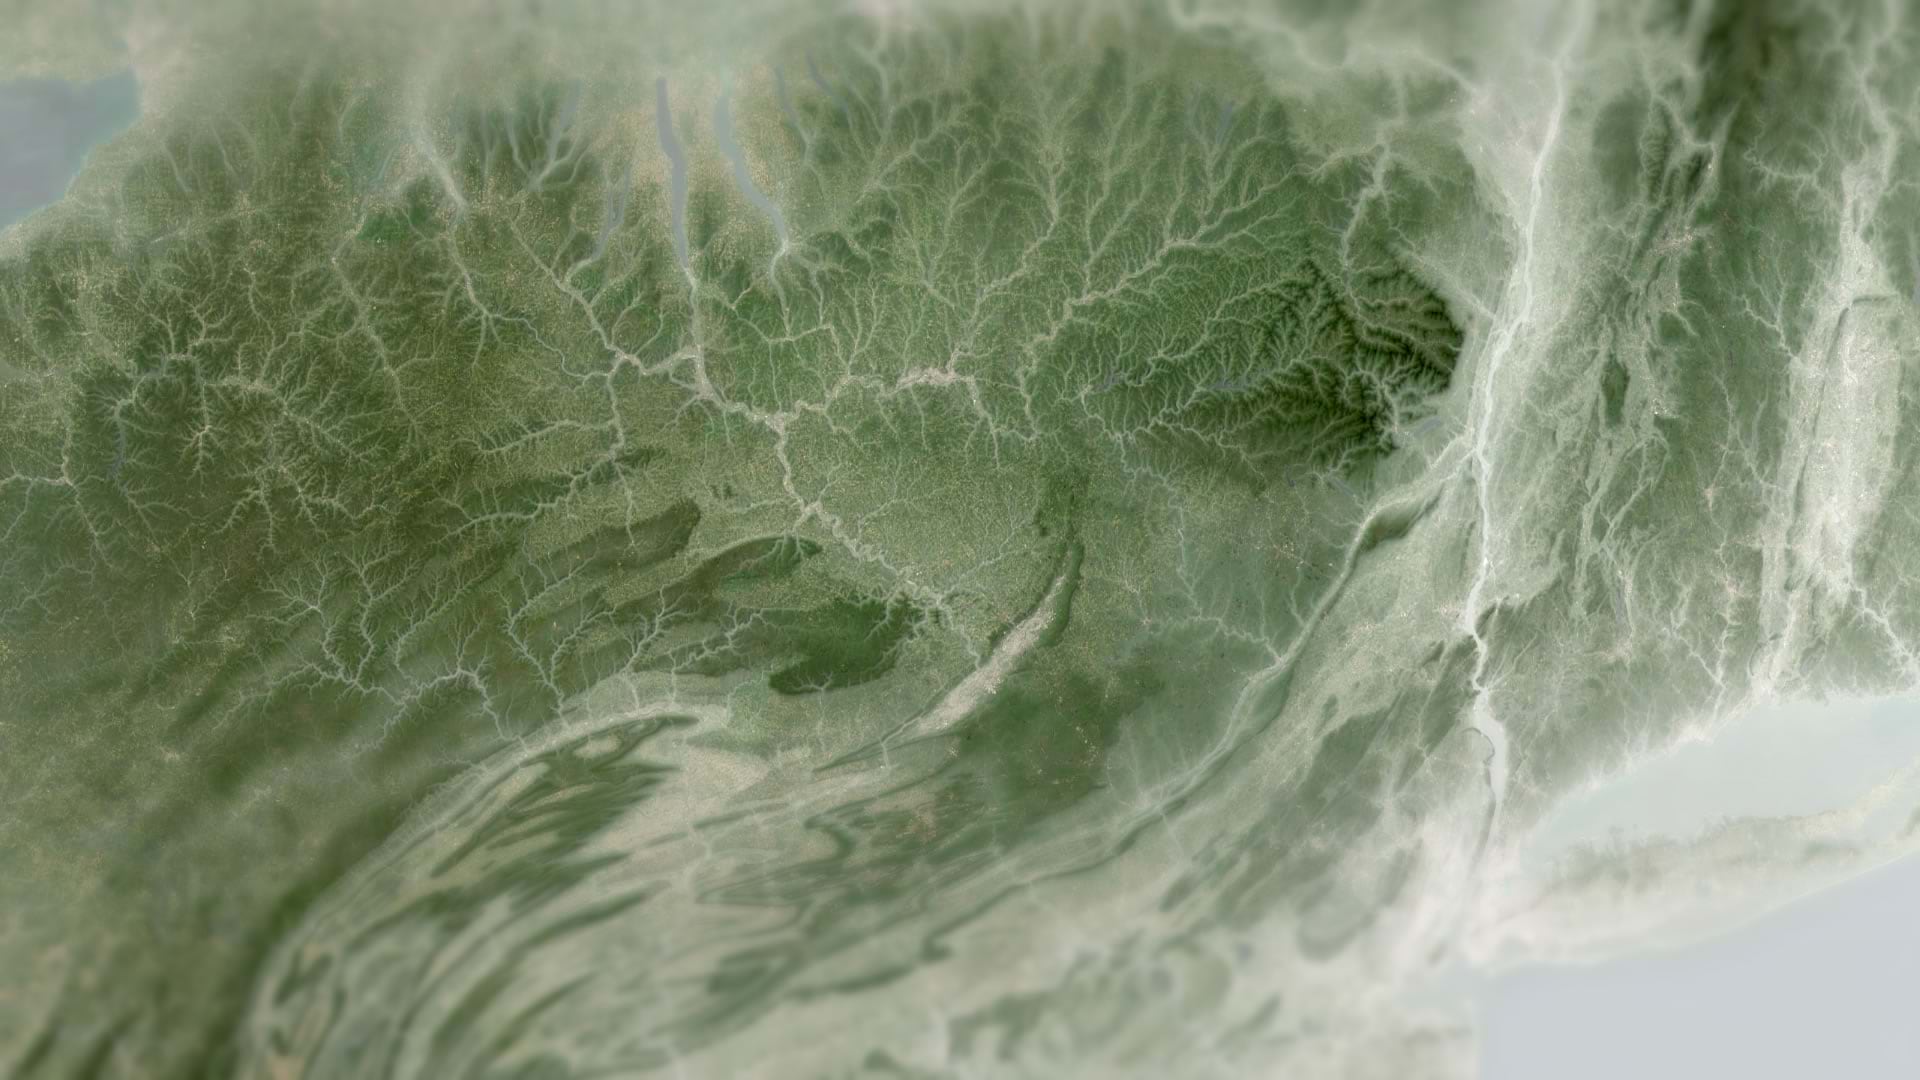
There are plenty of reasons to cloak your map in a layer of mist. Adding a mist layer displays an enormous amount of information about the terrain of a place. It gives an overall sense of the slope and elevation trends in your view, showcases regional textures, and highlights river valleys and mountaintops with clarity and realism. It also provides an emotional buzz than can make your maps more dynamic and engaging.
In this tip, learn to highlight elevation by wrapping your ArcGIS Online map in a layer of fog.
Highlight Elevation with a Mist Effect
Step 1: Sign in to your ArcGIS account and open Map Viewer.
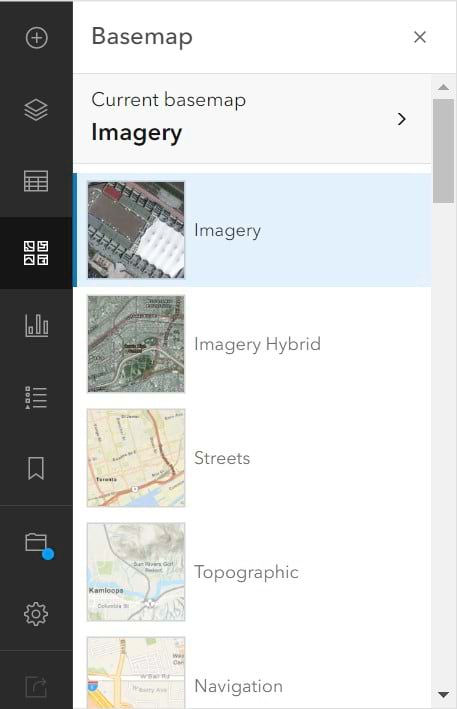
Step 2: In the Content (dark) toolbar, click Basemap. Select the Imagery basemap to get the best results from this effect.
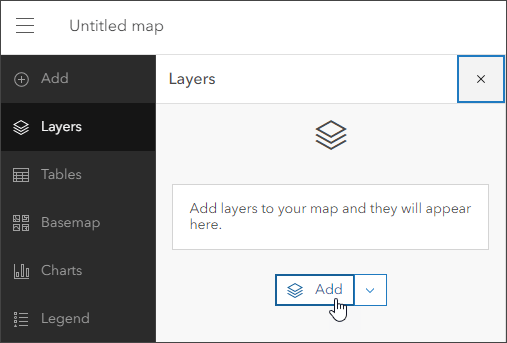
Step 3: Open the Layers pane and click Add to add a layer from the Content toolbar.
Step 4: Click My Content and choose Living Atlas from the drop-down menu.
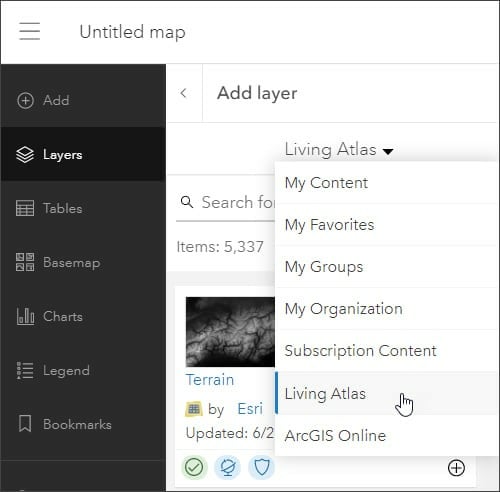
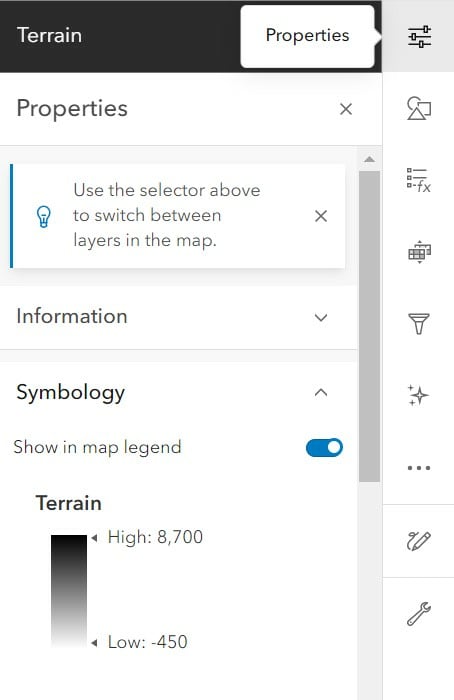
Step 5: Select the Terrain layer and click the Add button (+) to add it to the map.
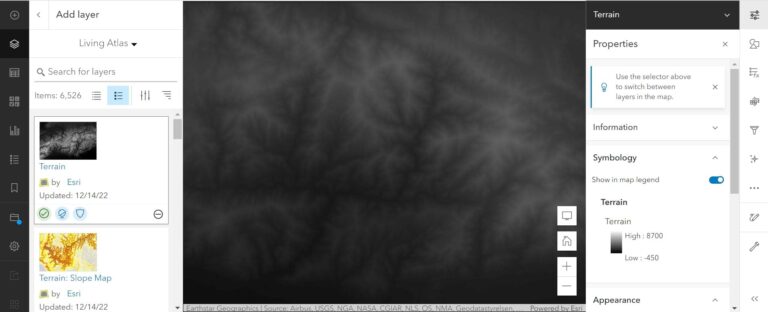
This is an image service from ArcGIS Living Atlas of the World. It’s a digital elevation model that covers the whole world at every scale. Darker areas are lower elevation, and lighter areas are higher elevation. But you aren’t stuck with this color scheme in ArcGIS Online.
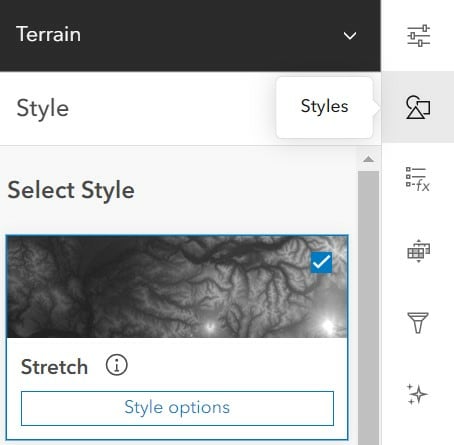
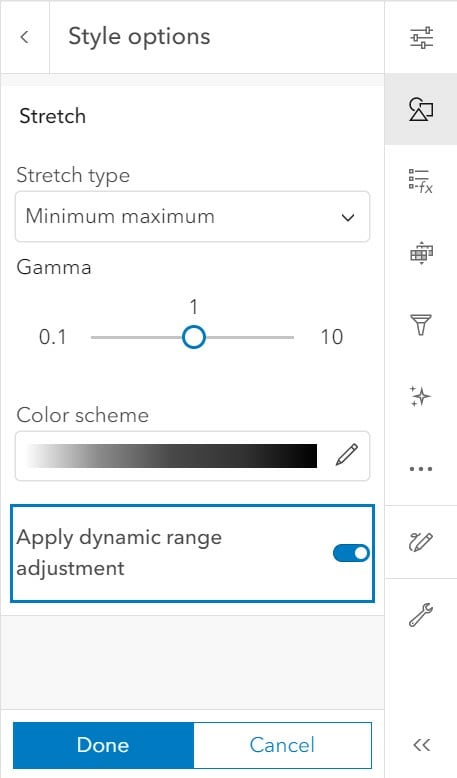
Step 6: Open the Styles tab on the righthand toolbar. Make sure the Stretch type is set to Minimum maximum. Under Stretch, click Style options.
Step 7: Toggle Apply dynamic range adjustment on. This means the layer style only considers the lowest and highest values within your view. It squeezes the color gradient, so you always force the full contrast of black to white.
Step 8: Under Color scheme, click the gradient bar. Click it again in the window that opens, and you’ll be able to edit the color scheme for the layer.
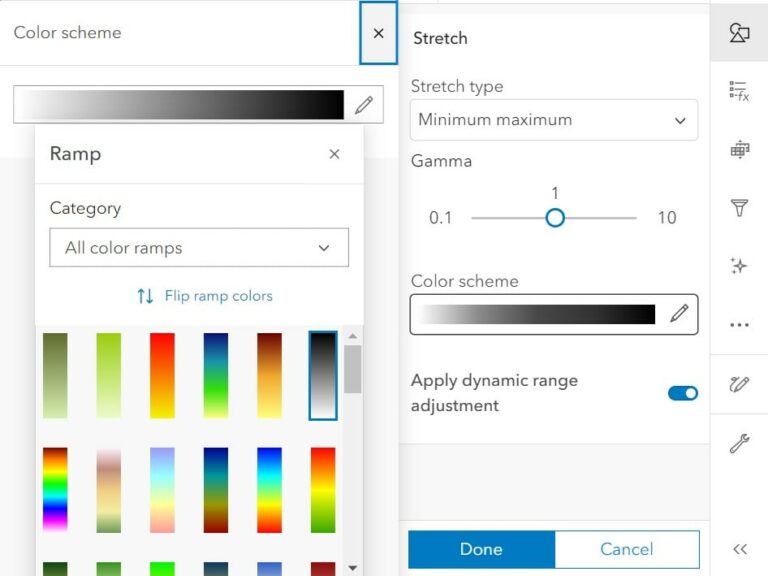
Step 9: Instead of changing the color scheme, click Flip ramp colors.
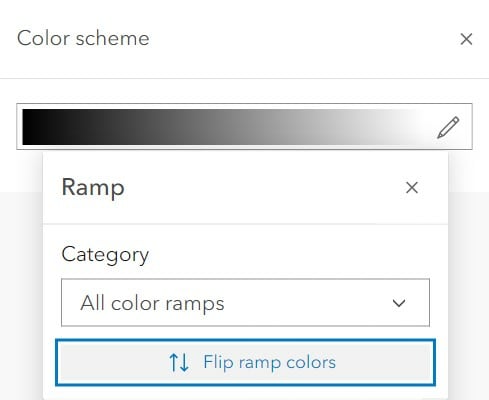
This means the lighter color is tied to lower elevations, where mist naturally occurs. But how can we see through to the higher elevations, which are now grays and blacks?
Step 10: Click the Properties tab in the righthand toolbar.
Step 11: Scroll down to Appearance. Under Blending, click Normal to pull up the blend mode drop-down menu.
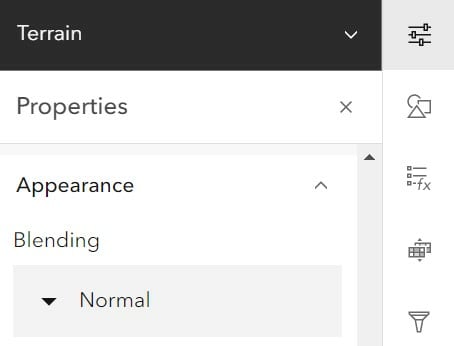
Step 12: Instead of a normal blend mode, select Screen. This only considers the lightness of pixels and ignores pixels that are darker.

Immediately you can see a layer of mist cloaking valleys, river channels, and other low elevation areas in your view.
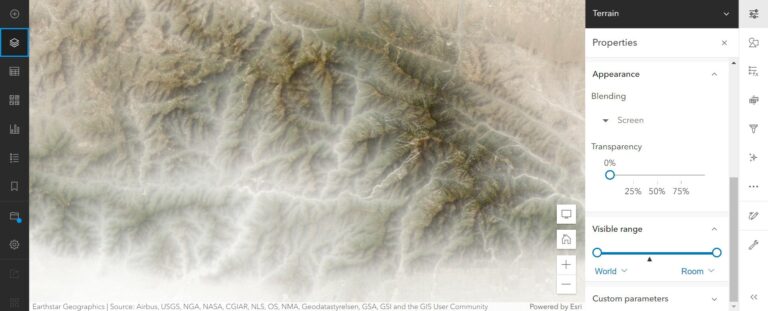
There are a few handles you can play with to tweak the mist. Transparency controls the strength of the effect. Go back to the Styles tab. You can adjust the gamma—the degree of contrast between the midlevel gray values of a raster dataset—to effectively raise and lower the mist effect. Raising the gamma lowers the mist, and lowering the gamma fills the map with higher and higher levels of mist.
Because the elevation layer is an image service from ArcGIS Living Atlas of the World, it will fetch the whole map view as a single image. Unlike the rapid fetching of tiles, this might take a moment to render. But if rapid rendering performance isn’t your goal, this tradeoff might be well worth it, giving you information about the regional textures and general slope of your terrain and helping river valleys and mountaintops stand out.
More information: