
Do you want to make sure that the symbols on your maps are consistent and speed up the process of symbolizing features?
You can use a drawing option in the ArcGIS for Desktop ArcMap application called Match to symbols in a style. This technique matches symbol names to attribute values to automate the process of assigning symbols to features.
In ArcMap, a collection of symbols is stored in a style—a special file that contains the specifications for different types of symbols. These can include marker symbols for point features, line symbols for line features, fill symbols for polygon features and symbols for text and map elements such as scale bars and north arrows. Styles make it easier to find and apply the symbols you want to use on your map. They also help standardize the look of maps since the symbols are preconfigured and simply need to be applied.
If there are symbols of the same name in a style, you can use Match to symbols in a style to update the symbols for all the points in a single step. Match to symbols in a style automatically assigns symbols in the style to features in a layer. Symbol names will match attribute values exactly. For example, the point features for a layer on a recreation map may have an attribute with values such as Campsite or Picnic Area.
If you use this method, make sure that the symbol names in the style are exactly the same as the attribute values for the features. Figure 1 below shows some of the possible mismatches that could occur between the values and names:

All symbol names are recognized as text strings, even if they are shown as numbers such as 1, 2, 3 or dates, such as 1980, 1990, 2000. The field holding the attribute values to be symbolized must also be a text field. If the field values are non-text, create a new field as a text field and use the Field Calculator to populate it with the values in the non-text field you want to use to symbolize. If you have symbols with numbers such as 1, 2, or 3 or dates such as 1980, 1990, or 2000, the symbol names will be identified as values in a text field when you try to match the symbols to the attribute values.
Once you’ve created a style with the same names as the values in the attribute table, the workflow is simple. First, reference the style in the ArcMap document and then use the Categories > Match to symbols in a style drawing option to show the features.
To illustrate, consider the features and symbols in figure 1. This tip explains how to finish making the recreation map shown in figure 2 using this speedy and consistent drawing option.

The Cultural Features layer, shown with maroon point symbols above, has an attribute called Type, with values such as Campsite and Shelter. The Recreation Map style has symbols for all the point features to be shown. After editing the attribute table and style to make sure they match, here is how you assign the symbology in the style to the features in the layer:
Step 1. Reference the style.
First, identify the style you want to use so that ArcMap knows where to find the symbols. This is called referencing a style.
- On the Main toolbar, click Customize > Style Manager.
- On the Style Manager dialog box, click Styles.
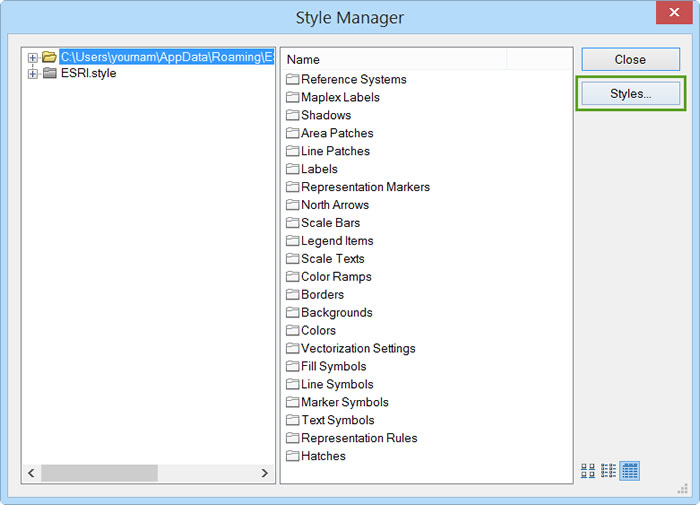
- On the Style References dialog box, click Add Style to List.

- Browse to the style file to select it and click OK. The style will be displayed in the left pane in the Style Manager.

Note that you will also see your personal style and the default Esri style. Any style you add will be shown at the bottom of the list.
- Close the Style Manager dialog box.
Step 2. Use the Categories > Match to symbols in a style option.
- In the Table of Contents, right-click the layer you want to symbolize and choose Properties.
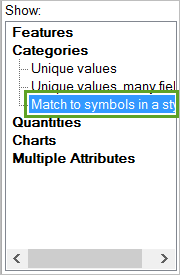
- On the Symbology tab under Show, click Categories > Match to symbols in a style.
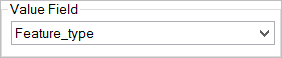
- Set Value Field to the field that contains the symbol names.
- Click the Browse button to browse to and select the style with the symbols you want to use.

- Click the Match Symbols button.

The symbols will be applied to the features.
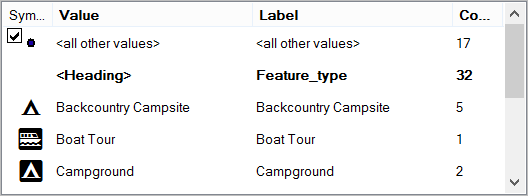
Any feature that does not have a corresponding symbol in the style will be displayed with the symbol used to show <all other values>.
- To check which features did not have a corresponding symbol in the style, click the Add Values button.

The values that can be added are displayed.
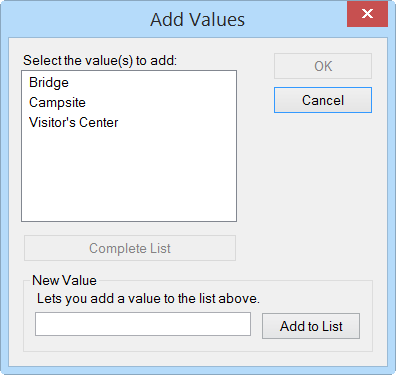
However, they will be assigned default symbology.
- Close the Add Values window.
- If desired, click the check box next to to turn off the display for these features.
- Click OK to keep your changes.

The features are symbolized quickly and correctly, assuring that you have used the proper symbols. Plus, you’ve likely shaved time off your work!
ArcGIS Pro Workflow
The Match to symbols in a style option is not currently available in the ArcGIS for Desktop ArcGIS Pro application, but for a simple workaround, follow the steps below:
-
- In ArcMap, assign the symbology to the layer as described above.
- Right-click the layer name and click Save As Layer File.
- Type the name of the new layer file.
- Save the layer as a file by right-clicking the layer in the Table of Contents and selecting Save As Layer File.
- Open ArcGIS Pro.
- Add the layer file to the map.
The layer will be symbolized the same as it would be in ArcMap.
To learn more about symbols and styles in ArcGIS Desktop, read this blog entry, which is still relevant for the latest version of the software. To learn about symbols in ArcGIS Pro, see the online help. To learn more about styles in ArcGIS Pro, see the online help.
