Want to use Flickr photos in your Map Tour story maps?
It’s easier than ever thanks to some recent updates to the Map Tour story map template available in ArcGIS Online. Here’s how to do it.
Step 1: Author and save a map
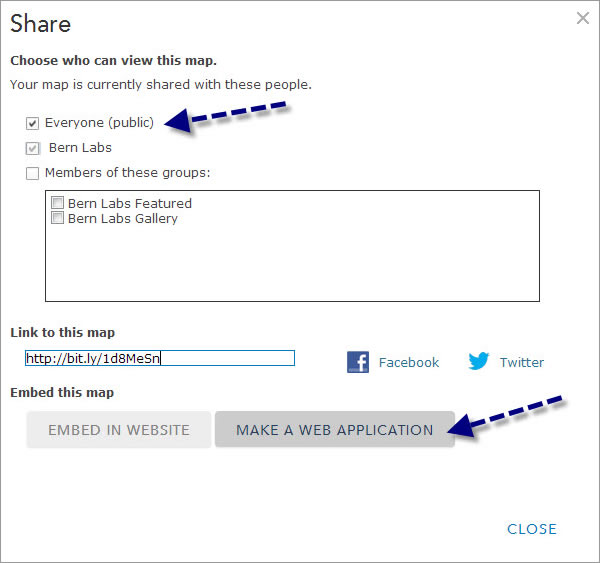
To create a map tour using Flickr photos, first author and save a new web map in ArcGIS Online. Click Share to make the map available to others in your organization or publicly, then click Make A Web Application.
Step 2: Choose the Map Tour template
You will currently find the Map Tour story map template on the second page of the Make A Web Application gallery. From the drop-down list under the template, choose Publish:
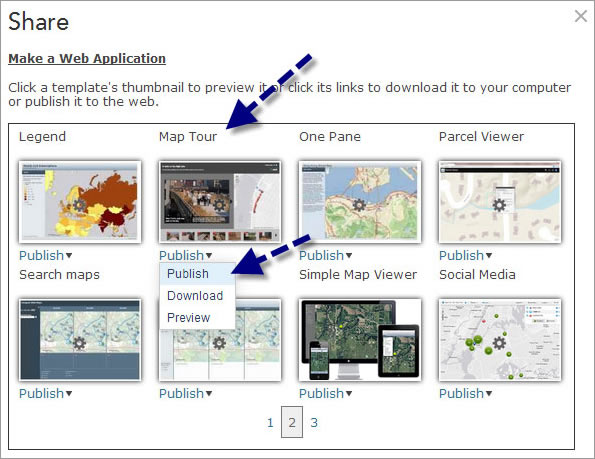
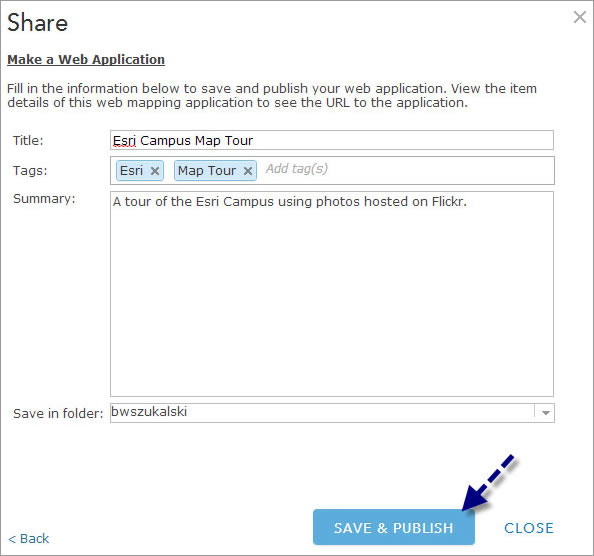
Next, add a title, tags, and summary and then click Save & Publish.
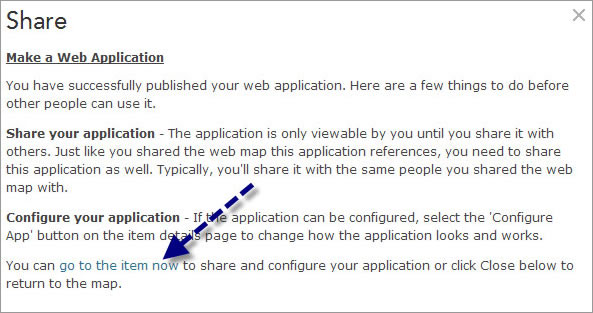
You have successfully published your web application. Now you can begin to configure your map tour.
Step 3: Start to configure your tour with Map Tour Builder
Your application is now an item in My Contents. You can go to the item now by clicking the link in the Share dialog box (which appears immediately after you click Save & Publish) as shown below:
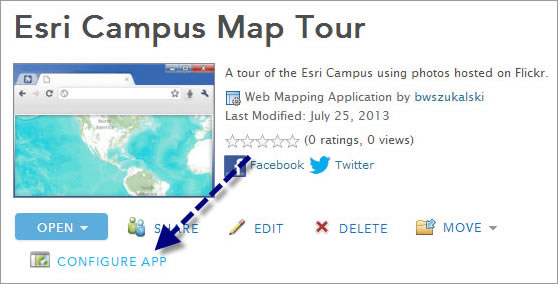
Or you can open the item later. When you are ready to add your Flickr photos, go to the item and click Configure App:
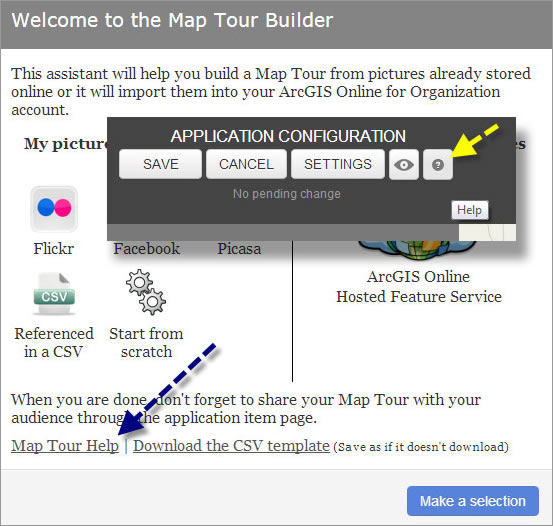
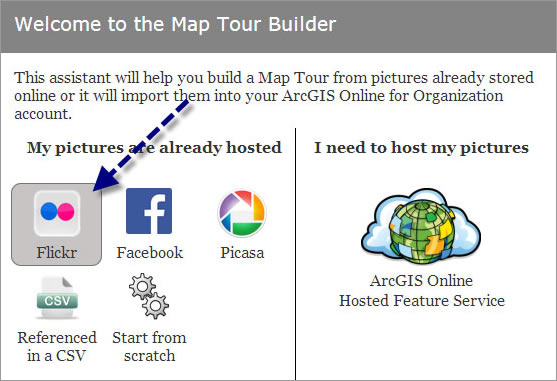
The Map Tour Builder will open automatically. Choose Flickr under the My pictures are already hosted section:
Step 4: Add Flickr photos
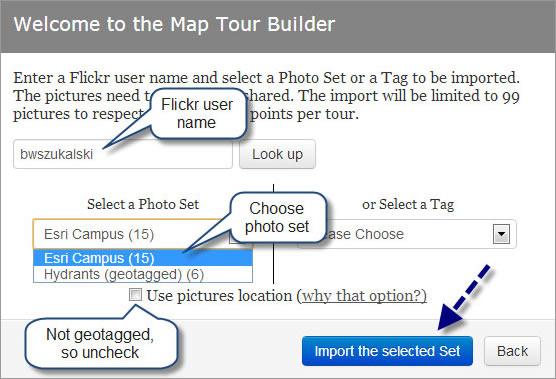
For the purposes of this tip, a map tour of the Esri campus will be created. To start, enter a Flickr user name and choose Look up. The drop down list will display all available photo sets. Choose a set and then click Import the Selected Set.
The photos in this set are not geotagged, so you can place them by dragging and dropping them on the map. Uncheck the Use pictures location to ensure that if the photo set has a location, it is not used for all photos.
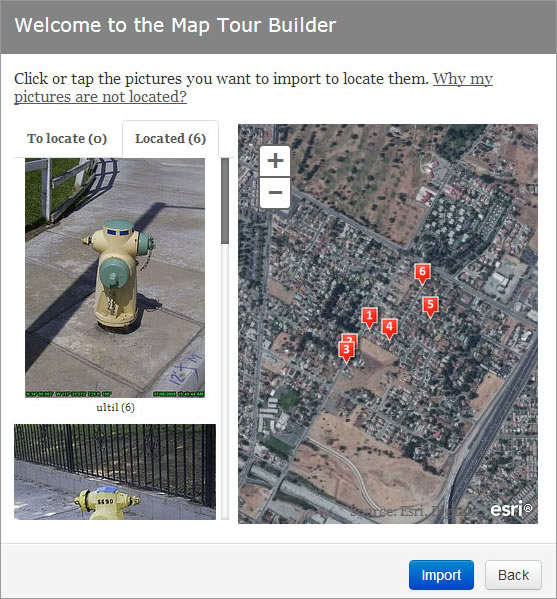
Step 5: Use the Map Tour Builder to place photos on your map
The photos from your selected set will be displayed in a list; select a photo and place it interactively on the map. You can adjust the location of photos by clicking and dragging the symbol, and you can edit locations, photos, and symbols later if desired.
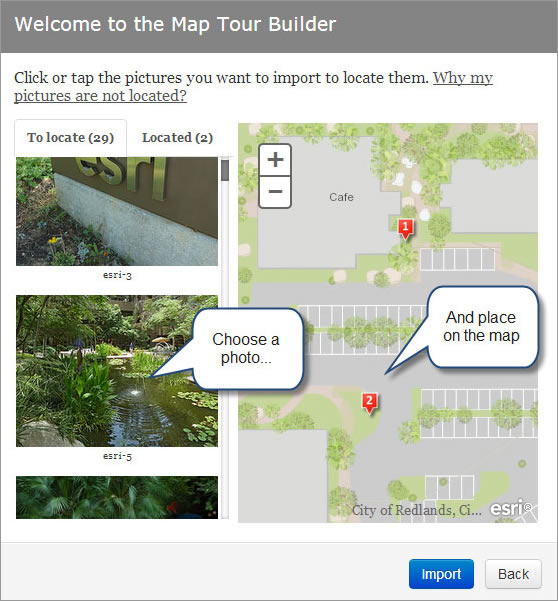
Click Import when you finish.
Step 6: Complete your map tour configuration
You’ve successfully added your photos to your map. You can make other edits while in application builder mode to complete your tour. You will want to add titles and captions for your photos. You can also reorder them, change the symbol, adjust the location, set the map zoom extent, change the color scheme and layout, add a logo, and more. Experiment with the various options to learn more about what you can do.
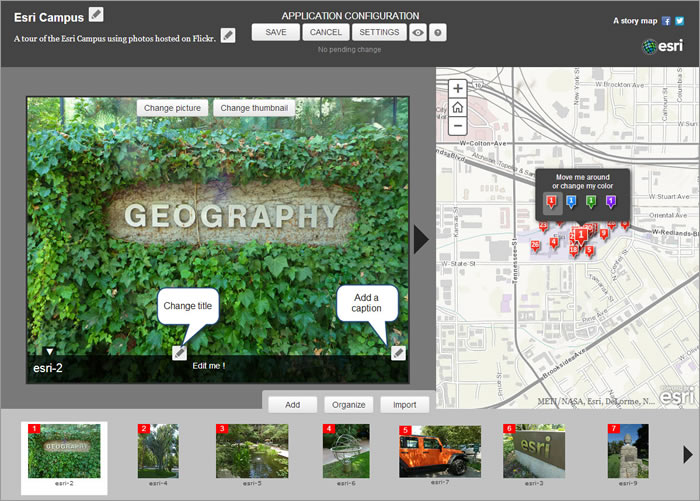
Once completed, click Save. Now you are ready to share your map tour with others.
Note that as the owner of the application, you can enter builder mode to make changes and edits at any time. Open the item and click Switch to builder mode in the upper right corner of the app. This button won’t appear unless you are the tour owner.

Add geotagged photos from Flickr
To add geotagged photos from Flickr, follow the same steps as above until step 4. At step 4, select the photo set with the geotagged photos, and make sure Use picture location is checked. All the geotagged photos will be placed on the map using the location information stored in the photo. You can drag and drop the pictures that aren’t geotagged.
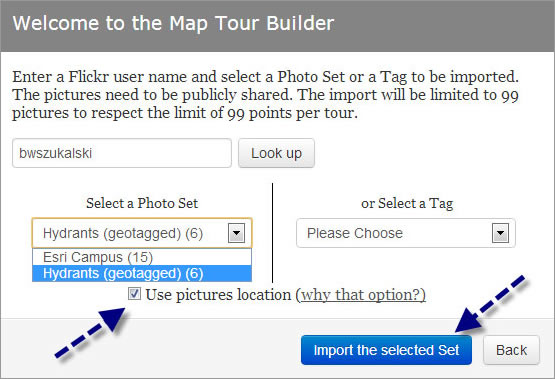
In this example, a set containing geotagged photos has been automatically placed on the map. Click a symbol to select and adjust the photo location if needed. If photos in the set were not geotagged, they will appear in the To locate tab and can be placed interactively, as described in step 5 above.
Follow the instructions in step 6 to complete and save your map tour.
Visit Map Tour Help found in several places in the Map Tour Builder application for more information.