When you want to change point symbols in the map you have created, you can select from a wide variety of ready-to-use symbols in ArcGIS.
The available symbols are organized into categories, including shapes, arrows, cartography, local government, transportation, and emergency management. But in addition to these built-in symbols, you can use any image that is hosted online as a custom symbol.
To use an image as a custom symbol in your map, follow these steps:
Step 1—Locate the symbol you want to use, and copy the URL. The symbol must be at a URL location and should point directly to the source image rather than an image viewer. For best results, use a square PNG, GIF, or JPG file that is 120 x 120 pixels or less. Larger images will be adjusted to fit.
Helpful hint: If your symbol does not fill the square, use a PNG or GIF with a transparent background, helping you avoid unwanted white space.
In this example, the following custom symbol will be used. Click the image to view it, and copy the URL. (blogs.esri.com/esri/arcgis/files/2016/08/symbol1.png)

Step 2—Open your web map. Open the sample web map. Click Modify Map to follow along with the steps below, or sign in and click Save As to save a copy of the map. You can also use your own web map with a point feature layer.
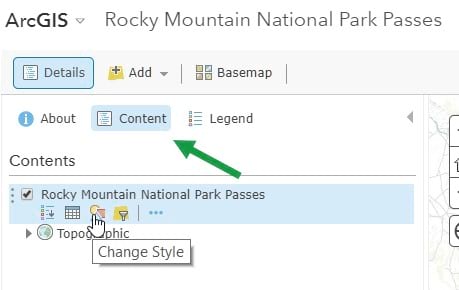
Step 3—Change the layer style. Select Content, and then click the Change Style button.
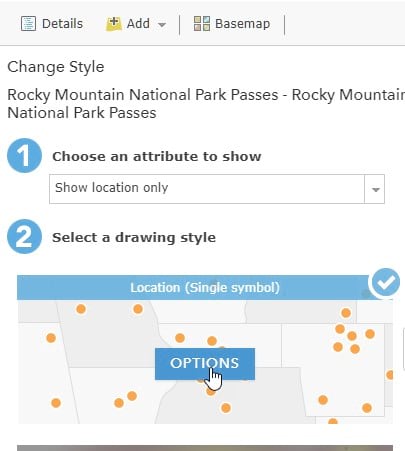
Step 4—Ensure that Show location only is selected, then click OPTIONS.
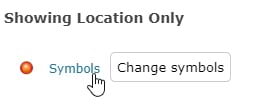
Step 5—Click Symbols to change the current symbol for the layer.
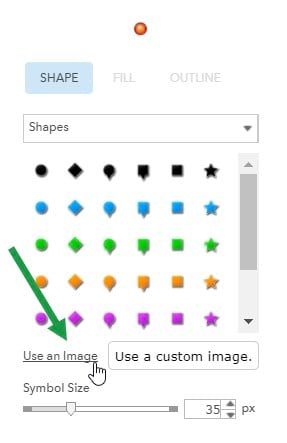
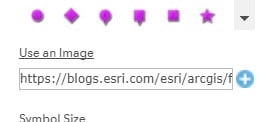
Step 6—Click any symbol category, then click Use an Image.
Step 7—Add the custom symbol.
In the text box, paste the URL obtained in step 1. http://blogs.esri.com/esri/arcgis/files/2016/08/symbol1.png
Click the Add button (the white plus sign in a blue circle) to add the custom symbol.
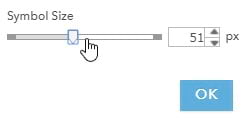
Step 8—Adjust the symbol size as desired.
Use the Symbol Size slider to set the size you like, then click OK.
After clicking OK, your custom symbols will now display on the map.
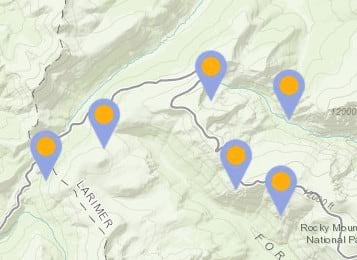
Note: When using custom symbols, ensure that the URL to the symbol does not change and that the symbol is not deleted.
Create your own symbol
You can create and host your own image to use as a custom symbol. Symbols can be authored using any graphics program. Use a PNG or GIF for a transparent background.
Remember that the center of the image is placed on the x,y point location. For example, the symbol below will be placed with its center (where the dashed lines cross) on the x,y location of the point on the map.
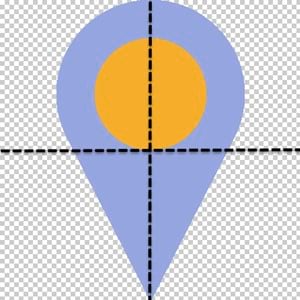
To place the bottom tip of the symbol on the x,y location, create a symbol as shown below, placing the tip of its tail at the center of the image.

For more information, see Change style.
