Explore Drought Conditions Using ArcGIS Living Atlas of the World
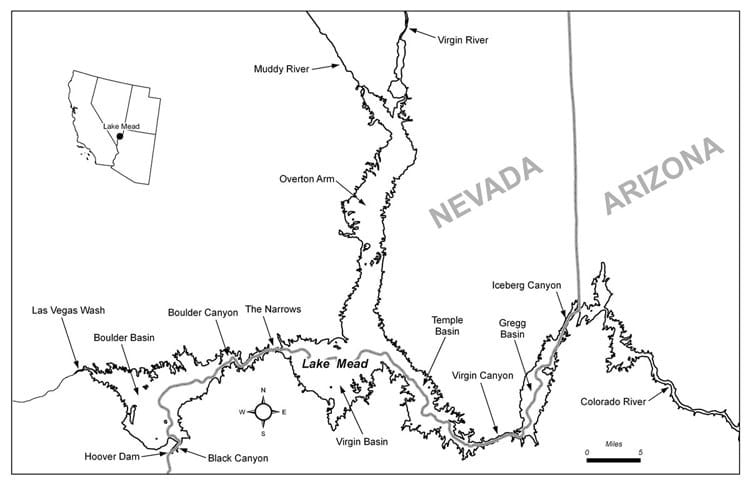
Lake Mead in Nevada is the largest reservoir in the United States, with an estimated capacity of 28,945 acre-feet. Formed by the Hoover Dam, the lake is a vital component of the Southwest water ecosystem, serving water to millions of people in Arizona, California, and Nevada, as well as portions of Mexico.
Withering drought in this part of the United States has created conditions that have resulted in the lowest Lake Mead water levels in history since the reservoir was filled in the 1930s. Years of unrelenting drought and temperatures pushed higher by climate change are shrinking the lake dramatically.
For more information on Lake Mead, click the map below and see the National Park Service’s Overview of Lake Mead.
Explore Lake Mead Water Levels Using Landsat Explorer
ArcGIS Living Atlas of the World includes authoritative content and apps that help you learn more about current topics and events such as drought conditions. Follow these steps to explore Lake Mead water levels over time using ArcGIS Living Atlas content and Landsat Explorer, one of the ArcGIS Living Atlas apps, all in a minute (or less).
Step 1: Go to the ArcGIS Living Atlas website and click the Apps tab.

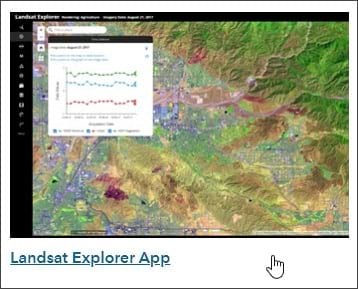
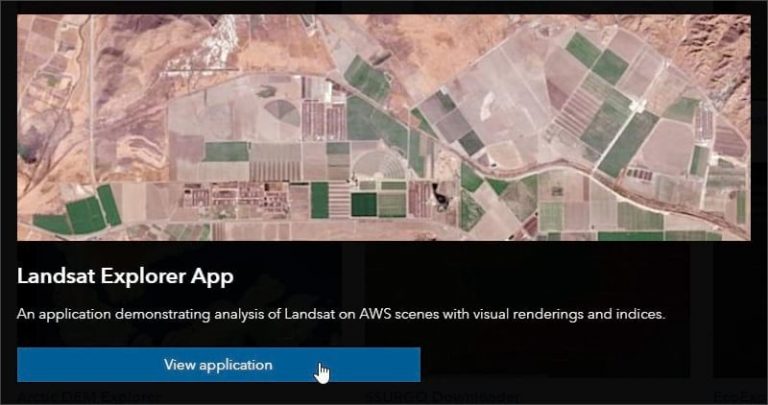
Step 2: Browse the apps to find Landsat Explorer App.
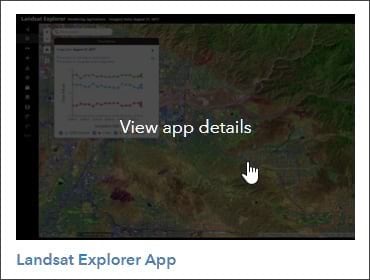
Step 3: Click the thumbnail to View app details.
Step 4: Click View application.
Note: It’s unnecessary to open Landsat Explorer from the Apps tab on the ArcGIS Living Atlas website each time you want to use it. You can bookmark the Landsat Explorer App, search for it on ArcGIS Online, or find it using search via the Browse tab on the ArcGIS Living Atlas website.
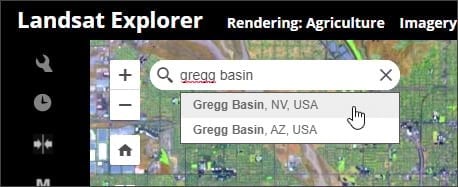
Step 5: Once Landsat Explorer opens, search for Gregg Basin, NV, USA. The map will navigate to near the eastern portion of the lake.
Step 6: Zoom out and pan to position the map. Your map should look similar to what is shown below, though you can zoom to any other area if you like.
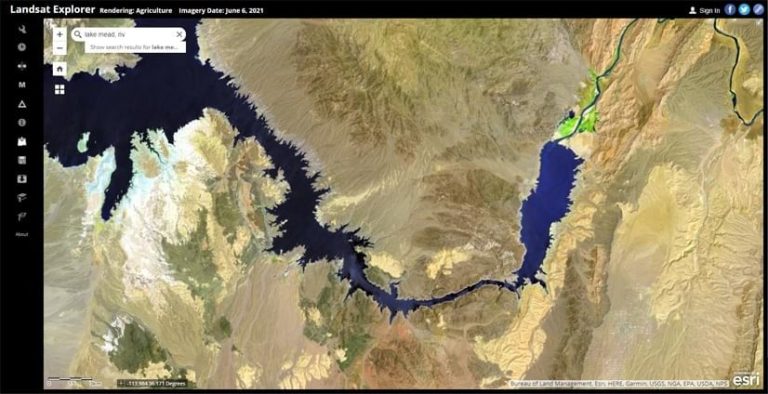
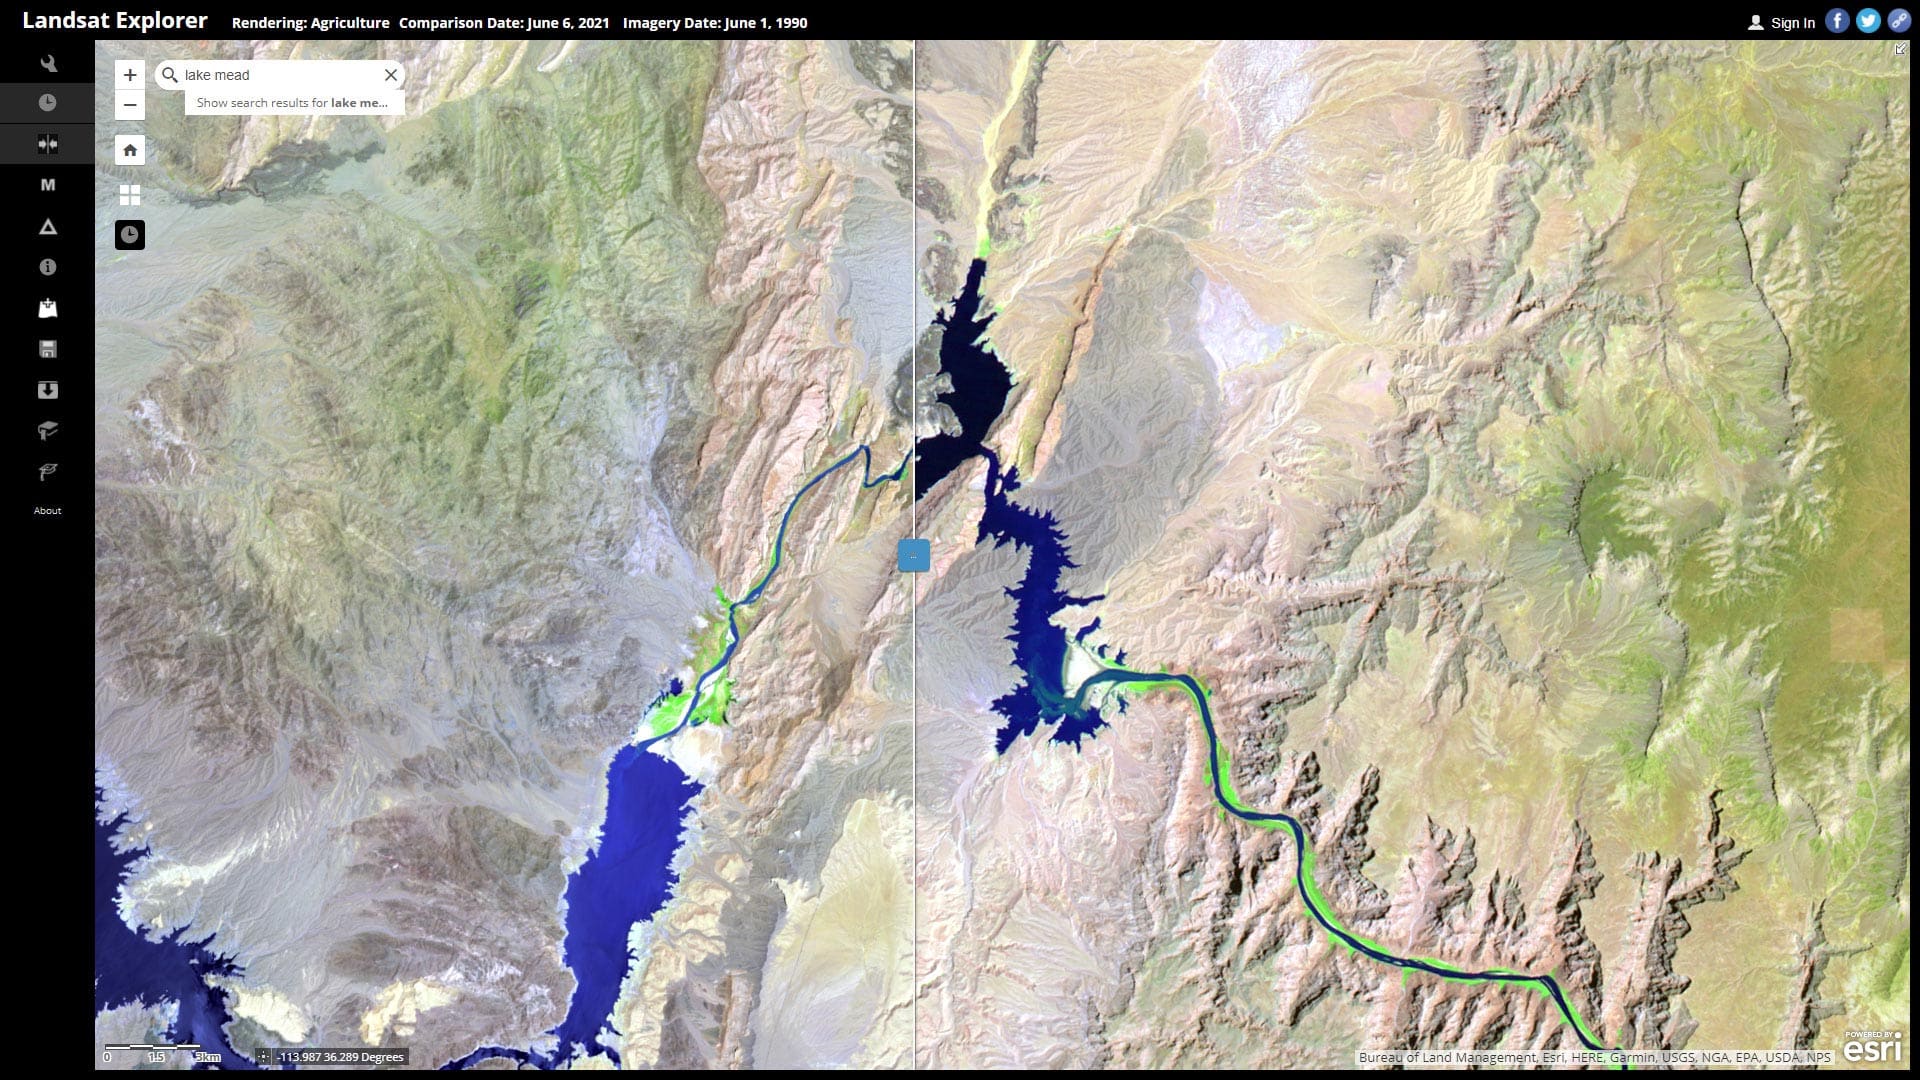
Step 7: Note the date shown at the top of the application—in this case, June 6, 2021.

This is the date of the most recent Landsat imagery captured for the area, and it will change over time as new satellite imagery is acquired. In this example, you will go back in time approximately 20 years to compare the change in lake water level.
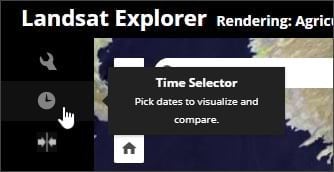
Step 8: Click Time Selector. The button looks like a clock and is the second one down on the left.
Step 9: Using the Time Selector, click the down arrow (in the upper right of the selector) to set the current Landsat image date (in this case, June 6, 2021) as the secondary layer.
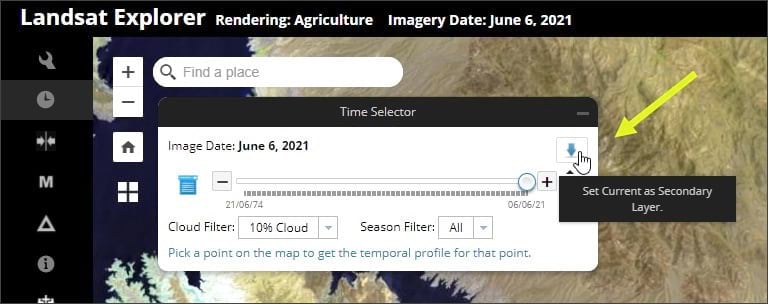
The secondary layer will appear on the left side of your comparison swipe, which is configured in Step 10 below.
Step 10: On the left side of the Time Selector, click the blue list icon to show dates in a drop-down list.
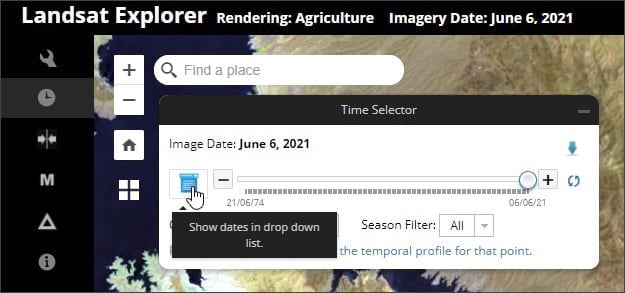
Step 11: Choose an earlier date from the drop-down list of available dates. In this example, we’ll look for the same month (June) but approximately 20 years earlier.

Step 12: Click the Swipe tool, which is right below the Time Selector.
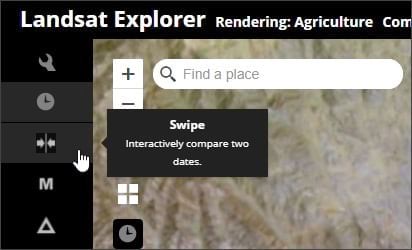
Look at the top of the app to verify the dates. The left side will be the most recent imagery selected in Step 9, with the right side displaying the date chosen in Step 11.

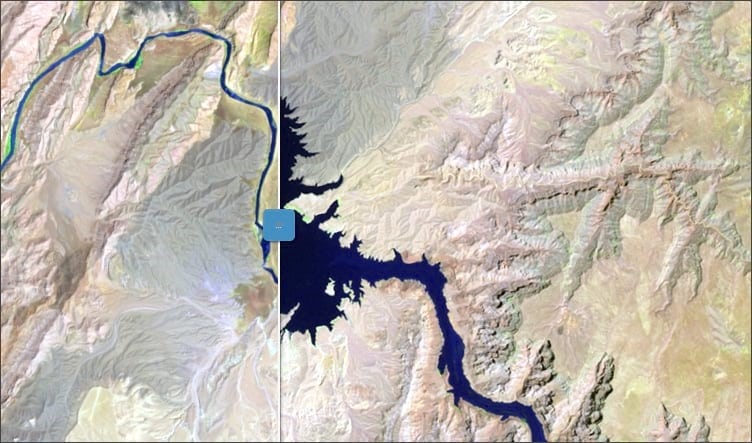
Step 13: Grab the swipe handle and slide left and right to view the change in water level over time. You will notice that the water levels in Lake Mead have dropped significantly.
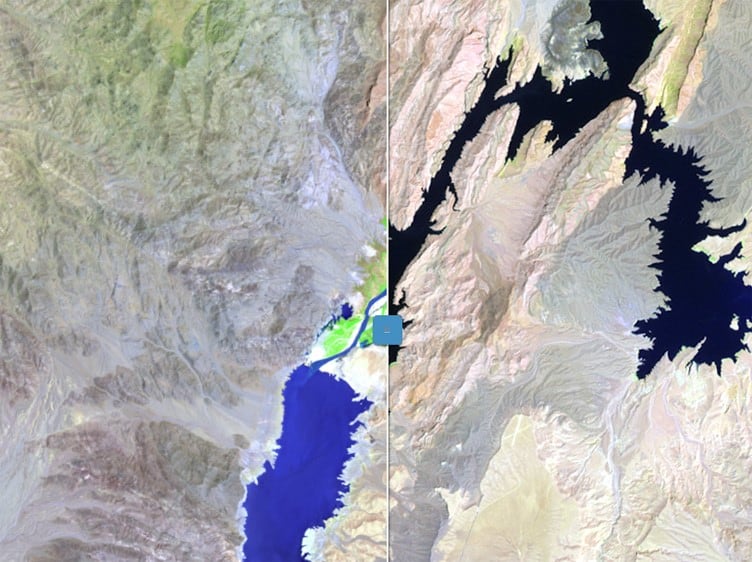
You can experiment using different dates to view changes over different time spans.
Do More with Landsat Image Rendering
Rendering is configured by changing band combinations, which highlight or accentuate certain characteristics captured in the imagery. To change rendering, click the Renderer tool in the top left, then choose the renderer you want from the drop-down list.
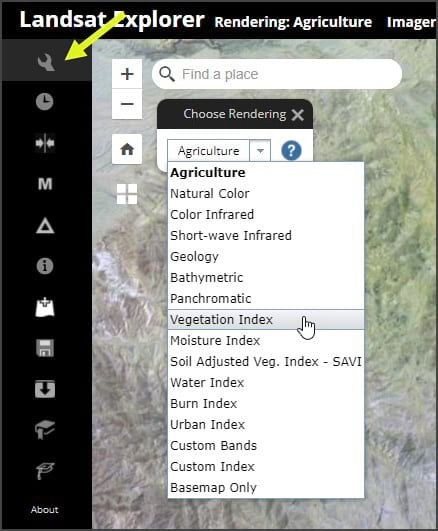
Landsat Explorer uses Agriculture as the default renderer, which shows the healthiest vegetation as bright green and sparsely vegetated areas as brown and mauve.
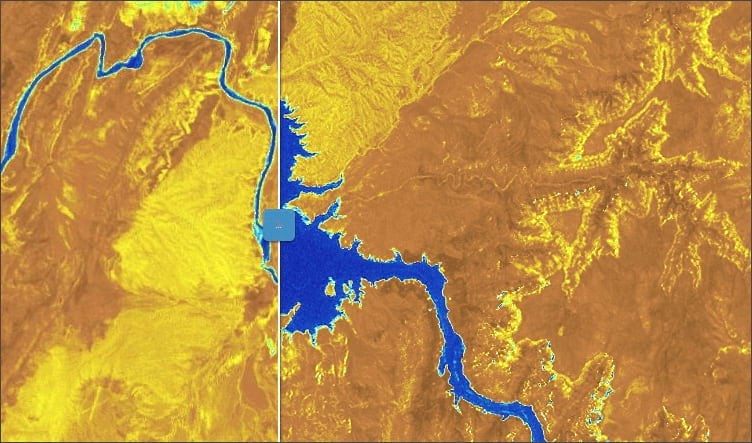
This next comparison shows Moisture Index, with high levels of moisture appearing blue and arid areas appearing as tan to brown.
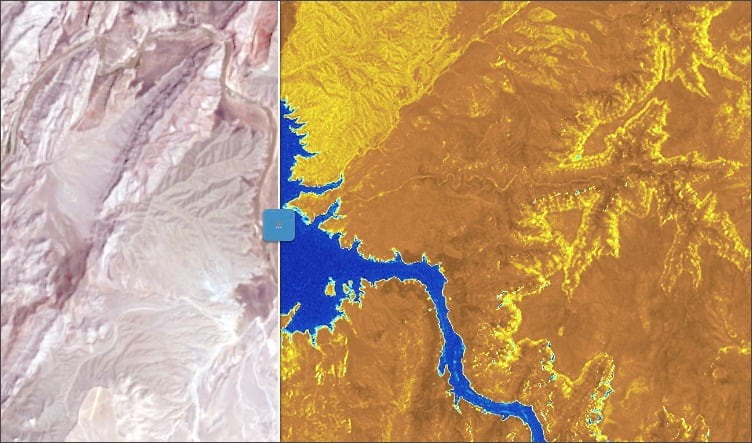
You can also choose different renderers for imagery on either side of the swipe to compare different characteristics as well as dates. In this example, Natural Color is on the left, and Moisture Index is on the right.
Note: In order to view imagery using different renderers on the left and right, choose the imagery date and renderer for the left side prior to setting it as the secondary layer (Step 9 above). The secondary layer appears on the left when you use the Swipe tool. Next, choose a different date and renderer for the current layer, which appears on the right when you use the Swipe tool.
For more information, see the following:
- Landsat Explorer App item details
- Landsat App (Learn ArcGIS)
- Get Started with Imagery (Learn ArcGIS)
- Unlock Earth’s Secrets
