The June update of ArcGIS Online introduces several new abilities for data management. One of these is an experience for creating an empty feature layer that is not based on an already applied feature template. The result is a hosted feature layer that is ready to be used and managed for any data collection workflow. Managing the feature layer is handled on the item page. Data management operations and abilities might include creating new fields, enabling attachments, configuring who can edit, creating lists, etc.
This new empty feature layer template is beneficial for many data collection projects, and the new experience for creating and managing fields makes it that much easier to get out in the field. Below is a step by step workflow of creating an empty feature layer from the new template and creating a new field with a list that will enable efficient data collection. In this example, a point feature layer will be created for capturing locations along a mountain hiking trail where maintenance needs to occur.
1: Log in to your organization and go to the Content page. Note, your role must have privileges for publishing hosted feature layers.
2: On the My Content sub tab, click the Create drop down and select Feature Layer.
- There are many options and categories available for creating a new feature layer. New with this release is the first category in the list: “Build a layer”.
4: Choose Build a layer. The four empty feature layer templates available are:
- Points- creates a hosted feature layer for collecting point data
- Lines- creates a hosted feature layer for collecting line data
- Polygons- creates a hosted feature layer for collecting polygon data
- Points, lines, and polygons- creates a hosted feature layer with the ability to collect all three types of features

5: Choose Points and click Create
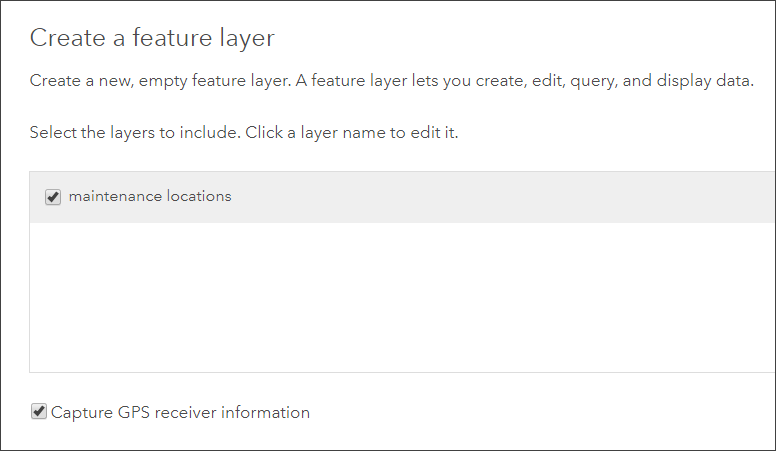
6: Alter the name of the layer, if desired, by clicking on it. Optionally, enable the ability to capture GPS receiver information. Click Next.
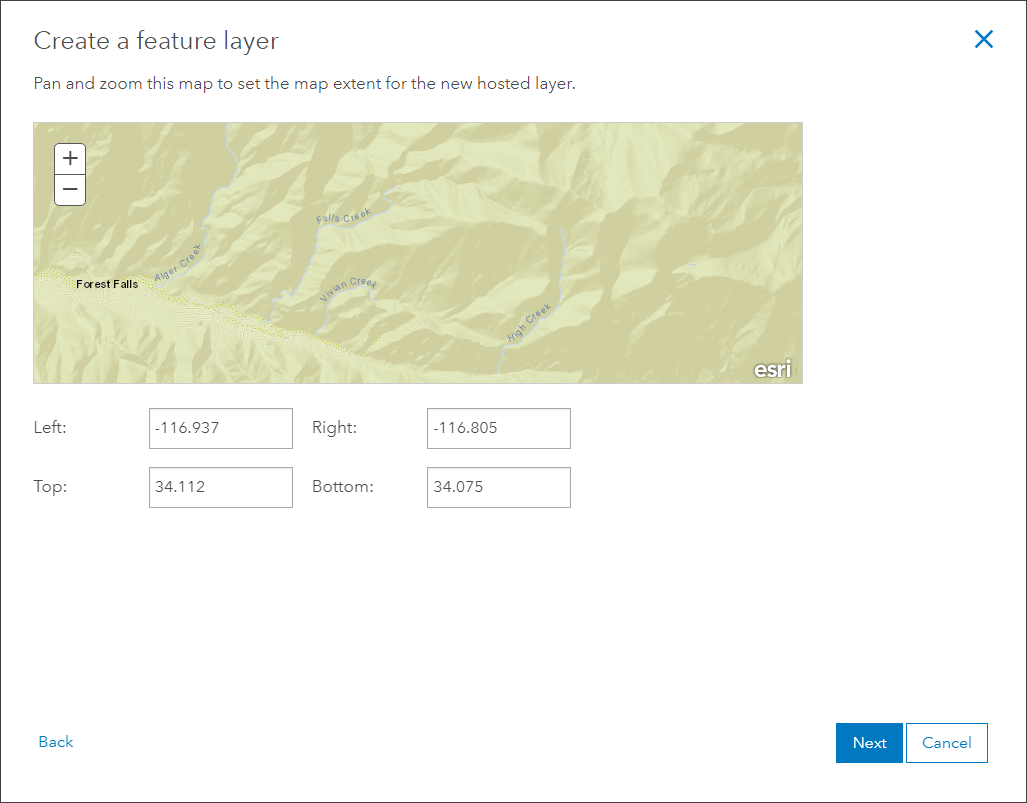
7: Set the map extent. Pan and zoom the map or manually type the exact coordinates.
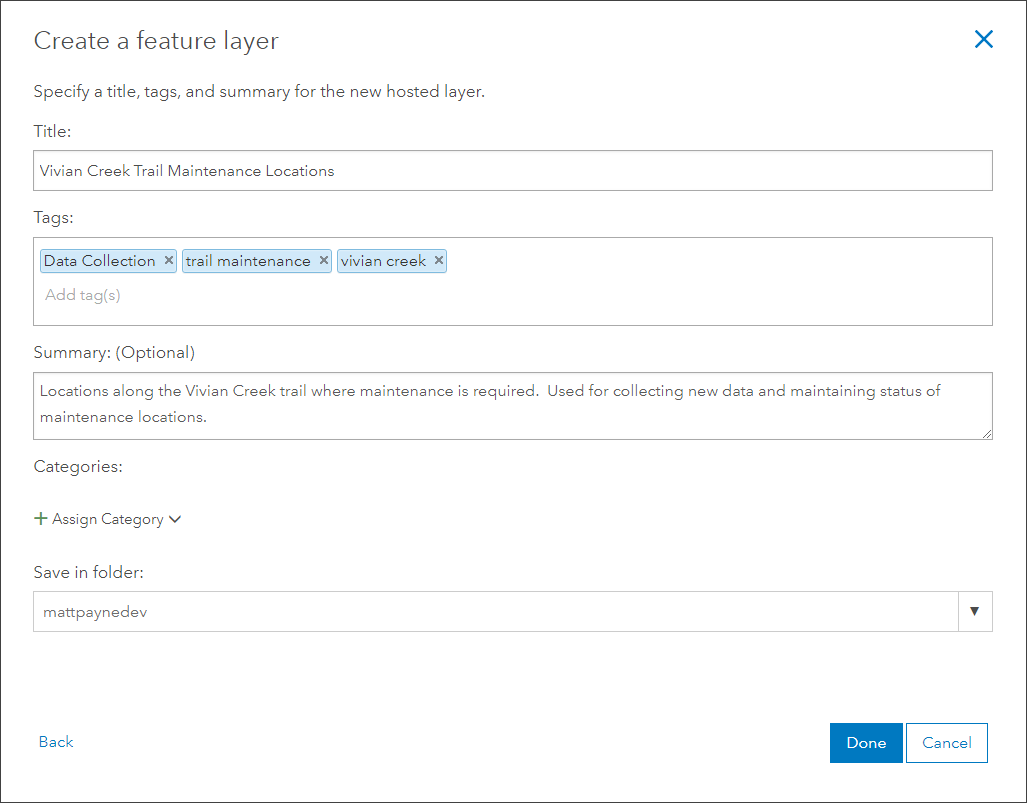
8: Set the item properties. Title and Tags are required. Choose meaningful tags that will make this new layer easily searchable throughout the entirety of the project. Click Done.
Creating Fields and Lists
After the service publishes successfully, it is ready to use for data collection, however, it is likely that a few adjustments should be made to better focus the layer for your workflow. New with this release is a better experience for managing fields and field properties. It is now possible to see a list of all fields in a layer and independently manage and edit the data in those fields as well as their properties.
For this example, it would be beneficial to add a new field to the layer that will be used for data collection. It is also beneficial to create a list on this field to help ensure accuracy in the data values that are collected.
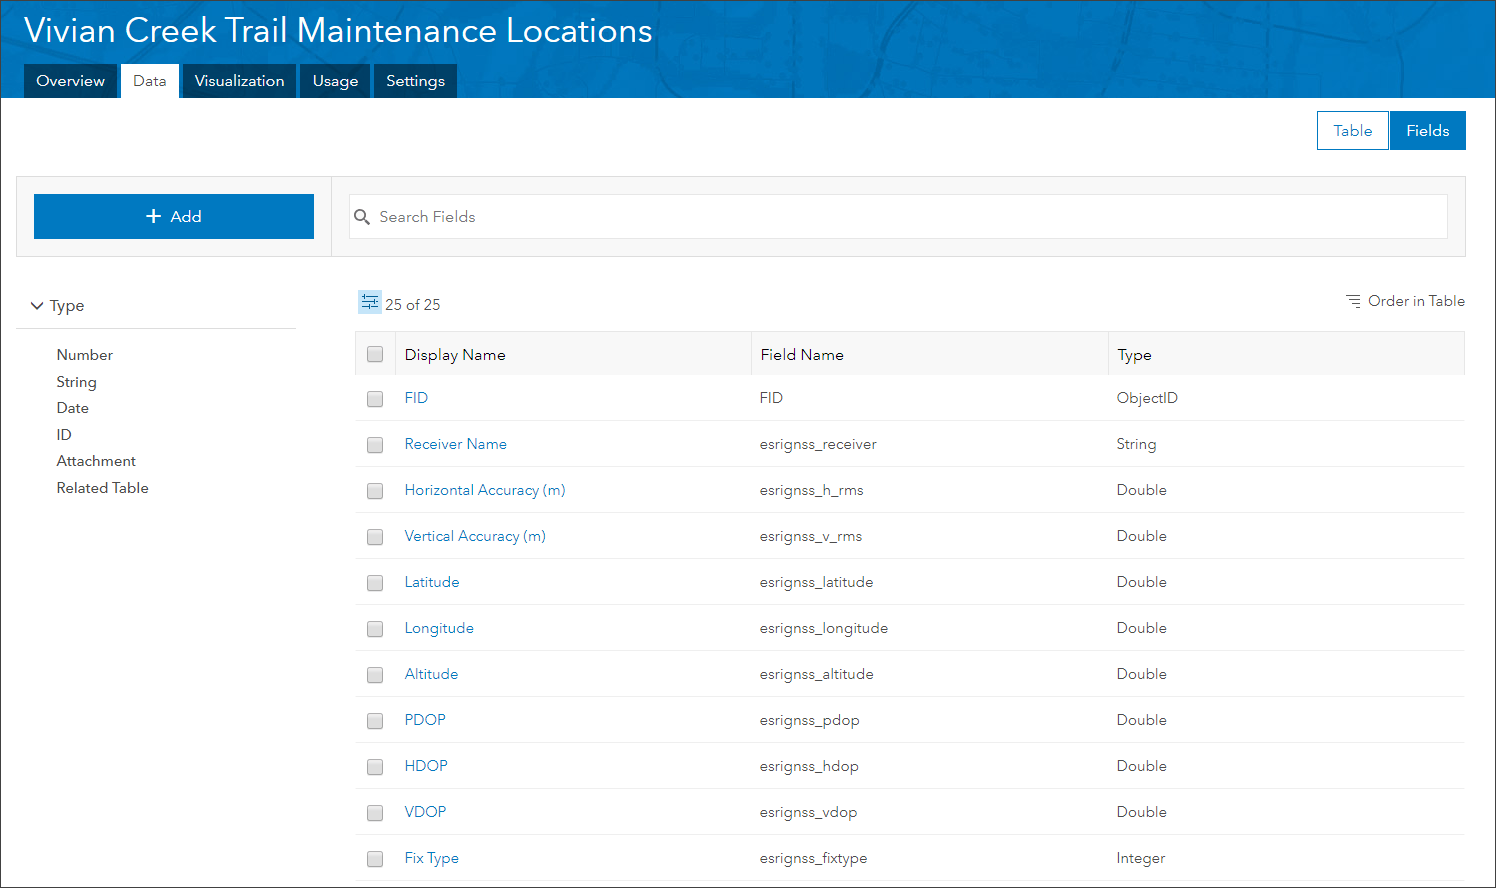
1: On the item page for the trail maintenance service, click the Data tab.
- New with this release is the Fields sub tab. This tab offers a new experience for managing fields and field details.
2: Click the Fields sub tab. Some fields are already present that are either system fields or fields associated with GPS collection and editor tracking. We’ll create a new field that will be used for marking the type of maintenance.
3: Click the + Add button. For Name input “MaintenanceType”. For Type choose “Integer” from the drop down. We’re choosing Integer because a list will be created on this field that will use coded values with the type Integer. Click Add New Field.
4: Open the details of the new MaintenanceType field by clicking on it in the field list. Several options are available such as setting a minimum / maximum value, marking the field as unique, altering the field alias, creating a list, or deleting the field.
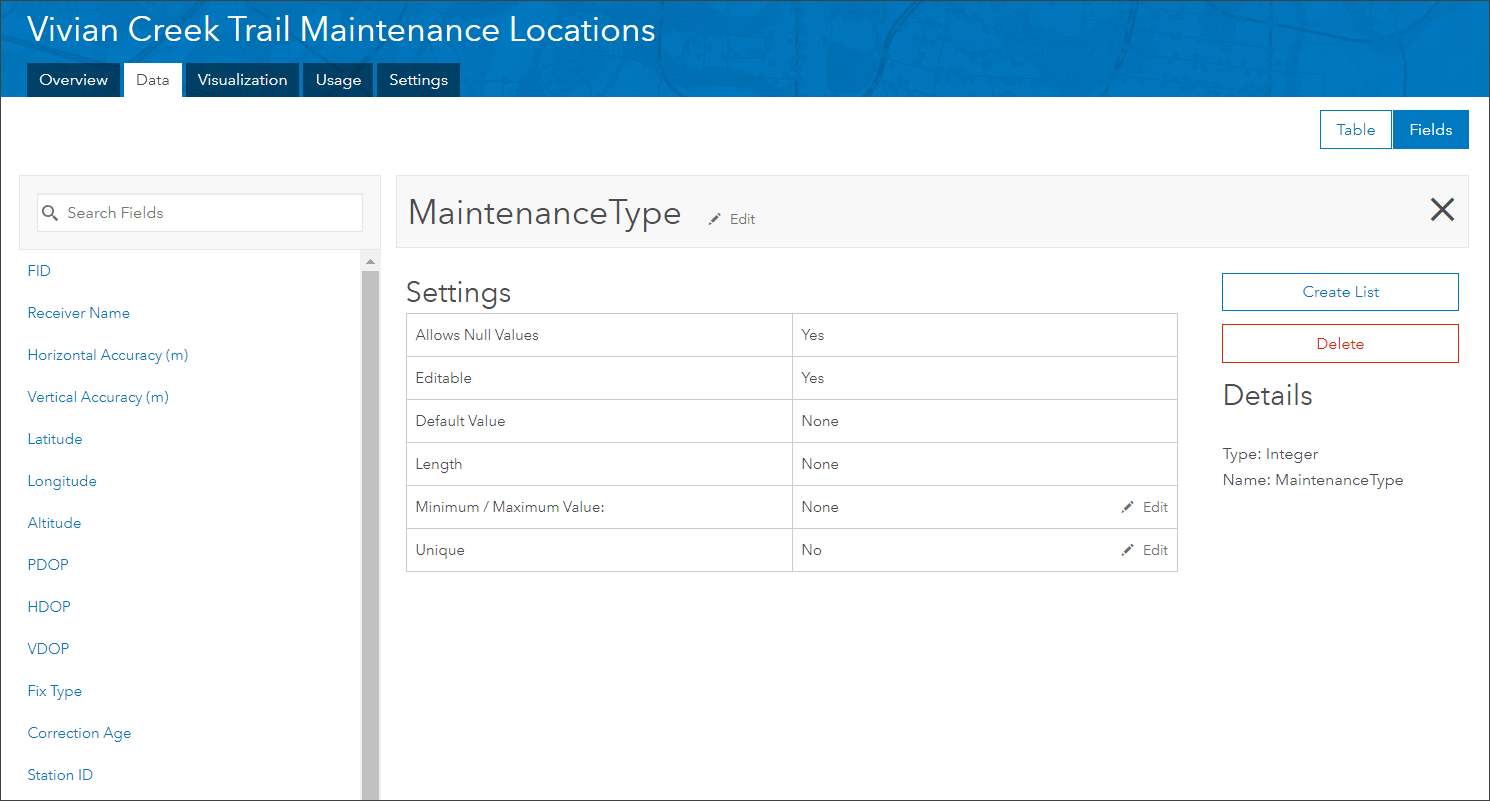
5: Click Create List.
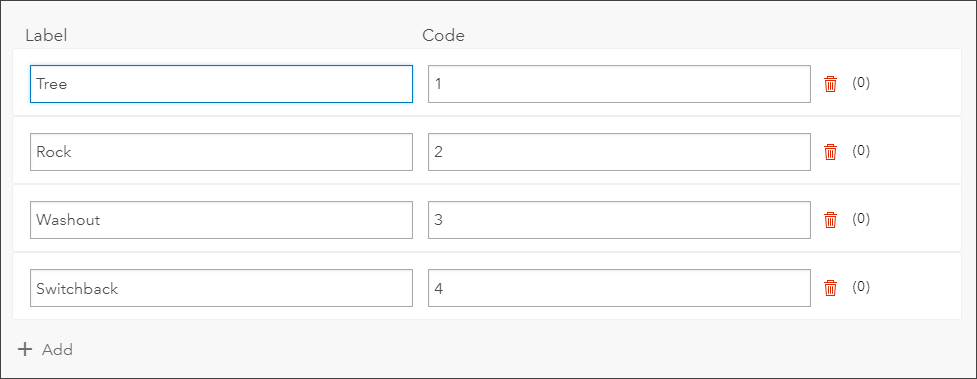
- You can ensure data quality by providing field collectors with a list of acceptable values for a field in your hosted feature layers. This helps to prevent them from typing in incorrect values. For this example, a list of four values will be created on the MaintenanceType field.
6: Populate the Label and Code parameter boxes with these four values (clicking the + Add button to add each one), then click Save:
- Label: “Tree”, Value: “1”
- Label: “Rock”, Value: “2”
- Label: “Washout”, Value “3”
- Label: “Switchback”, Value “4”
The feature layer is now ready to be used in the field for collection. In this example we kept it basic, a few more fields and other properties could be set based on your specific workflow and collection project. To find out everything new with managing field attributes plus a more in depth and detailed outline of creating lists and ranges, check out our What’s New with Managing Field Attributes (June 2018) blog.
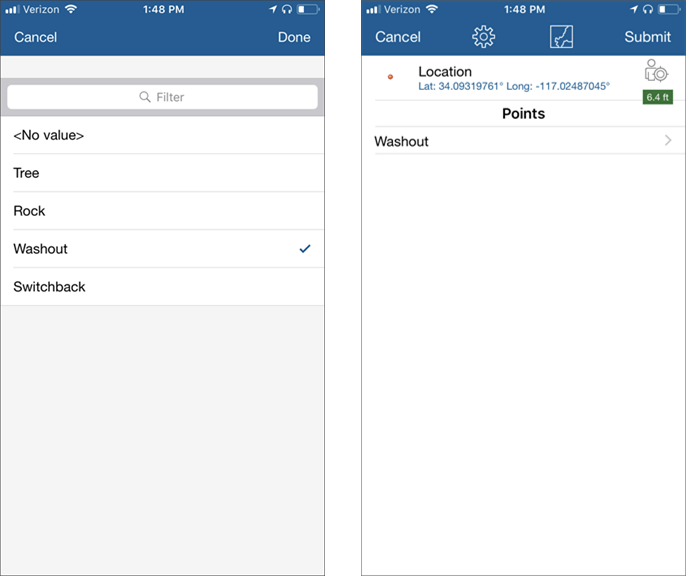
For reference, here is a look at how the list we created gets picked up by Collector for ArcGIS. The app notices the list and presents the values to be chosen from a convenient drop down list when the point location is captured.

Commenting is not enabled for this article.