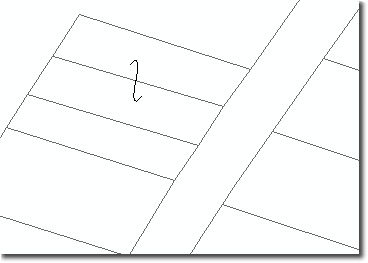
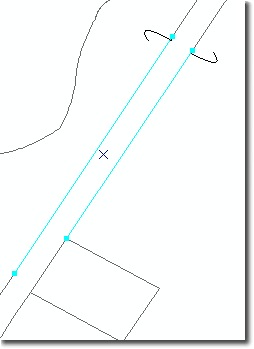
Last week we received a good question on Ask a Cartographer: is there a way to create parcel hooks with ArcGIS 9.2? After first discovering what parcel hooks were and finding an example of a typical case (shown at left), the answer seemed like a ‘no-brainer’. Sure, just use the line decoration option on a marker line representation. However, after acquiring some parcel data that included parcel hooks (thanks to Greene County, NC) and seeing the circumstances where parcel hooks (they’re also called land hooks or parcel ties) are placed on maps, I learned there are are several scenarios that need to be handled.
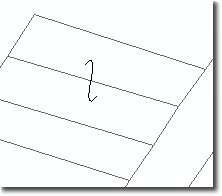
First, the basic form of the symbol is a hook, rather than a tie, which is what the symbol in upper left image initially lead me to understand. To the right is an example what the hook would look like as a representation marker symbol. We created a few of these markers and some representation rule line symbols and saved them in a style called RepParcelHooks.
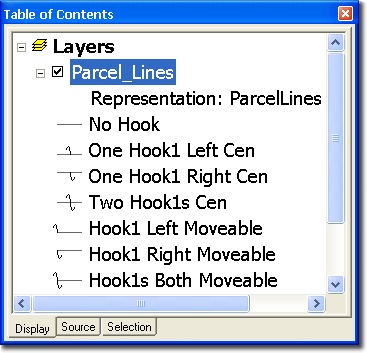
We provided two options, one where there were parcel lines included in the representation rule, and another without lines, which will just draw the marker line in the representation rule, i.e., only the hooks. The latter option will permit display of parcel hooks in a different layer (that still refers to your parcel lines data) along with other parcel line layers that may, already be annotated or have dimensions.
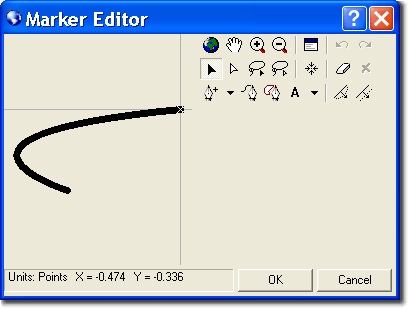
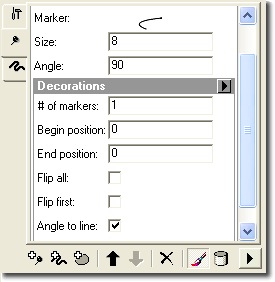
Notice that the hook symbol is inserted at the X in the Marker Editor; this allows the hook to be rotated around that point.
In terms of your data, the only requirement is that you are using a geodatabase, which allows you to use representations, and that you have an attribute that describes whether a parcel hook is located on a line, and if so, which side of the line. Even if you don’t have that attribute, it is pretty easy to use the Editor with these representation rules to add hooks for your parcel lines.
As I mentioned above, I found several scenarios that required different representation symbology options. A few are fairly simple to follow, so I’ll describe them first:
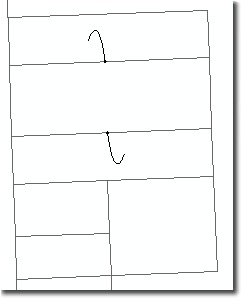
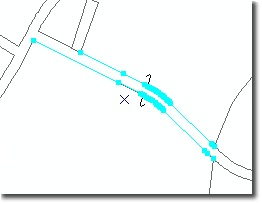
Single hook centered on a parcel line: The images below show two scenarios for this situation: one where the hooks are on different lines and the other with the hooks on the same parcel line. The representation rule (below to the right) is set for the second case, i.e., there are two marker lines. The only difference for the first case is that one of the marker line layers is not present.

Single hook at the end of a parcel line: Since parcel line features may be broken based on how their dimensions are described, ia hook may need to be shown at the beginning of a parcel line. In this case the Decorations marker placement option for a representation marker line will work well.
Single hook on opposing parcel lines that are offset:
The issue here is how to get the hooks to align so they are exactly opposed. For example, the features shown to the right will not align if the hooks are centered on the parcel lines. To do that, an override for these features’ representations is needed.
In order to fully understand how to override a feature’s representation it will be helpful to know how I set up my layer’s symbology. Before I created representations I added a field to my data that I could set to seven possible values. These were based on whether there was a parcel hook, which side of the line the hook appeared (or both sides), and whether the hook’s location would need to be customized. That way, when I created representations I could assign the first three classes to use the “On line” placement method for the markers in order to center the hooks, and use the “Decoration” placement method for the last three classes. The key to using the decoration method for this last scenario is being able to set, or override, the Begin Position parameter of the representation symbology.
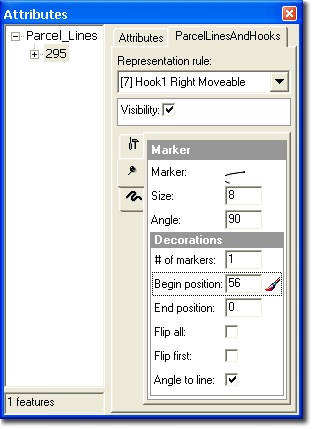
To create an representation override for a given feature it is first necessary to start editing and select one of the features. When you open the Feature Property Editor (which also opens the Attributes window), you will see an additional tab for each representation class defined for your layer’s feature class. If the feature isn’t already using the correct representation rule (based on the decoration geometric effect in this case), you need to change it. You type a new value in the Begin Position parameter (as shown to the right). You may need to experiment a bit to get the marker to be shown in the right place. The value for Begin (or End) Position parameter is in points, and is based on distance on your display.
Tips:
- The <tab> key will not work to commit your edited Begin Position value, so just click in another of the parameter’s boxes, which will force the new value to be committed and the display to refresh to show the new position of the hook marker.
- The values you type here are based on your map’s Reference Scale. This gets to one rule of thumb for working with representations, which is to set your reference scale first, then create representations.
By using the begin position parameter, you can customize the location of any parcel hook. Depending on how your parcel lines are created, you can even add multiple hooks to a single parcel line by creating a rule with additional marker lines.
While this wasn’t the simple, ‘no-brainer’ I thought it would be when I started looking at this mapping technique last week, it did turn out to be much easier than creating parcel hooks as separate features. For instance, the Angle to line option worked in most cases, though in few cases where that caused the hook to intersect with other parcel lines, I found I could override the marker’s angle to adjust the hook so it would display properly.

Commenting is not enabled for this article.