At the plenary session of this year’s Esri Developer’s Summit, we presented two workflows using ArcGIS Enterprise Webhooks: one using the code-less automation platform Microsoft Flow, another with the more robust computation platform AWS Lambda.
Today, we’ll show you how these workflows were made so you too can unlock the power of webhooks. Resources and code used in this demo have been published to GitHub.
What are Webhooks?
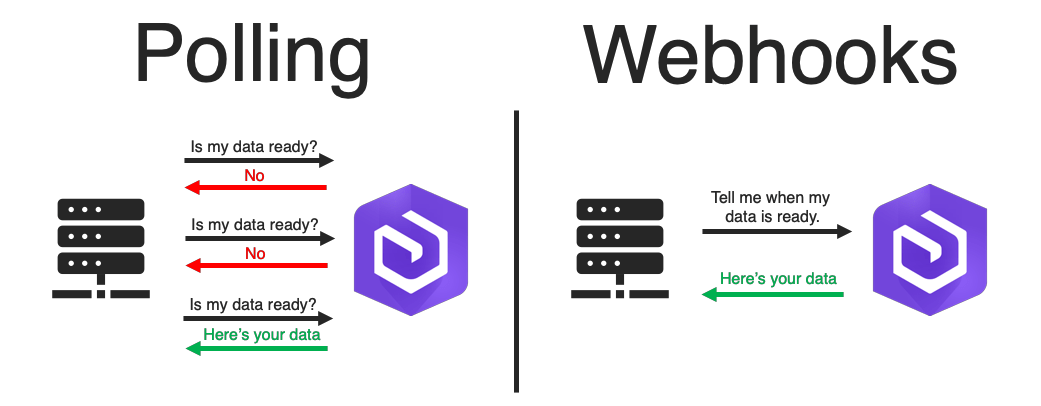
A webhook is an event-driven system that calls the client when an event occurs that the client is interested in. This is contrasted with polling, which is when the client must continuously and inefficiently check if a certain event has occurred. An appropriate analogy is if you are hosting a party and are waiting for a pizza to arrive. A “Polling” solution would be to leave the party and open the front door every 5 minutes to see if your pizza has arrived. A “Webhook” solution would be to stay at the party, and tell the delivery person to ring the doorbell when they arrive.
Webhooks in ArcGIS Enterprise
ArcGIS Enterprise 10.7 introduces webhooks for Portal resources like users, groups, and items. We can configure webhooks to trigger on many different combinations of events—a new user being created, a specific portal item being updated, an item being shared to a group, etc. The trigger itself is an HTTPS POST request to a payload URL that we’ve configured (the body of a webhook’s POST request is called the payload). This payload URL can originate from a generic web server that we manage, an automation platform like Zapier/IFTTT/Microsoft Flow, or a serverless computation engine like AWS Lambda/Azure Functions. To get more information about the specific types of webhook events, the payload schema, and other materials related to webhooks, read the documentation or read Joel’s blog about Webhooks.
Microsoft Flow
A common need for GIS Administrators is to gain real-time insight into the health of their portal. Dashboards are a useful visualization of the key metrics of a Portal, and can show real-time updates of items/users/groups. Microsoft Flow allows us to make such a dashboard via a PowerBI connector, all without writing a single line of code!
Step 1: Create a Flow
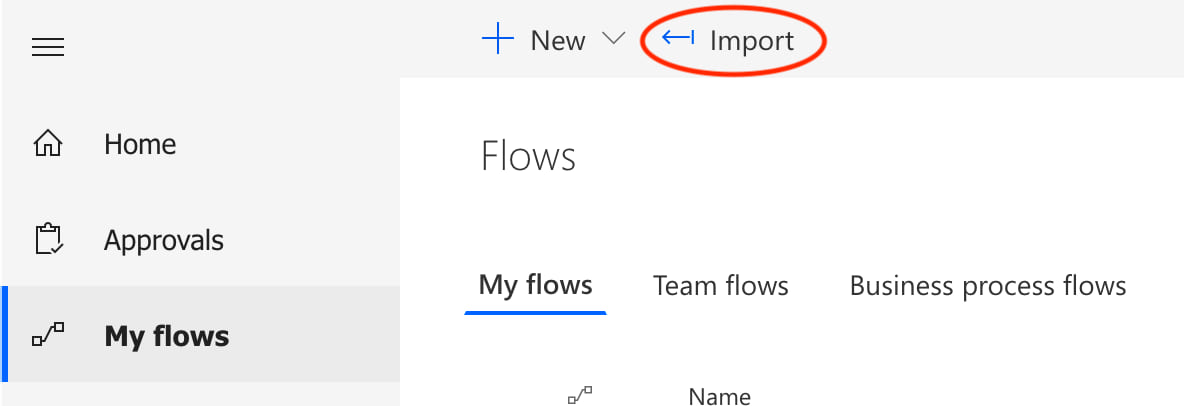
Microsoft Flow has a variety of actions and connectors that we chain together to make a flow. We can make new flows from scratch, select from Microsoft curated templates, or use an external template. To recreate the flow seen in the video, get the zip file template from GitHub. Then, open Microsoft Flow, navigate to My flows, press Import, and select the file.
The zip file just contains a template. We will need to edit 3 fields in the “Import Setup” section.
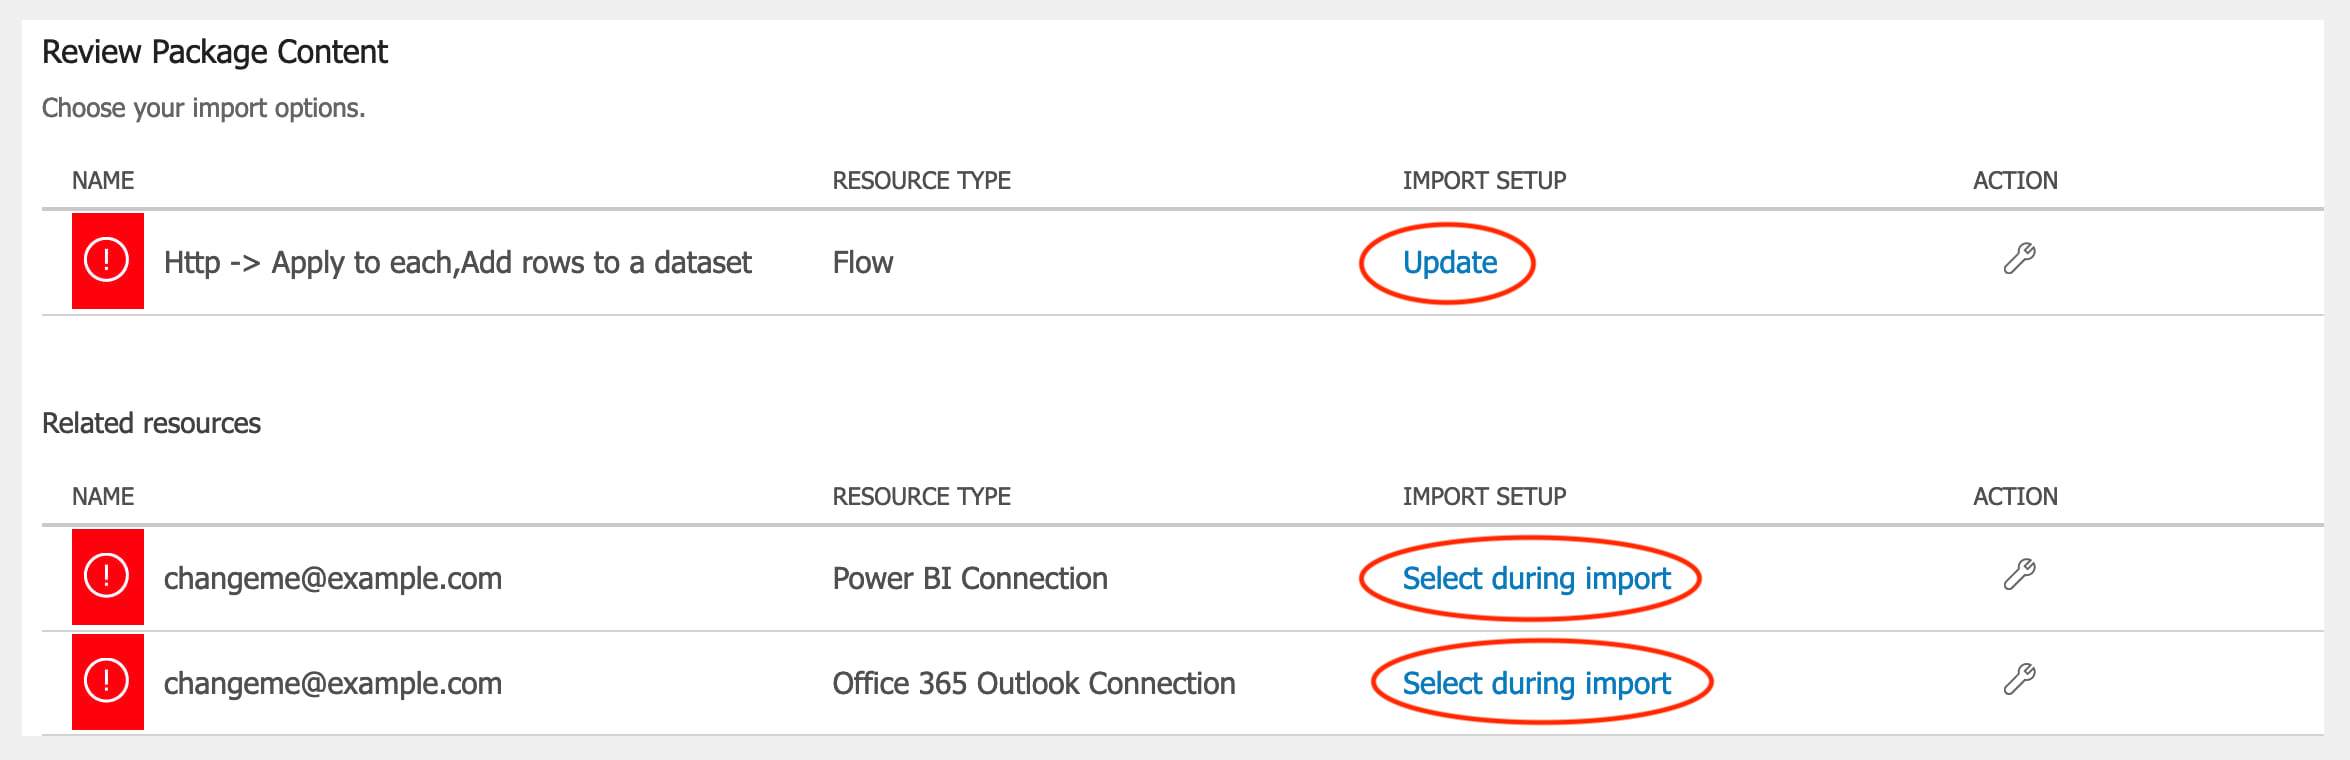
The first field should be set to “Create as new”, with the latter two being configured to your Power BI connection and Office365 connection. When we’re done, click Import to create our new flow.

Step 2: Configure Our Flow
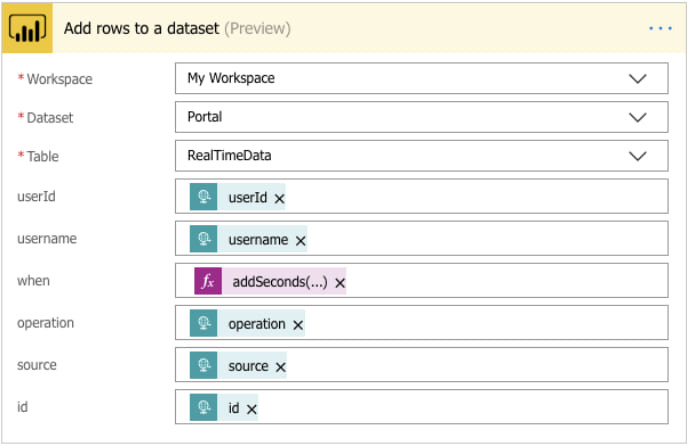
When our flow is created, click the Power BI connector and configure Workspace/Dataset/Table to point it to your Power BI. Configure the webhook payloads fields to the desired data to track.
We can add a new action by pressing + New Step and selecting from the hundreds of connectors and configuring it. For instance, to send an email, click on Microsoft Outlook connector and configure it by entering the email address, subject and email body. Other connectors like Slack, Twitter, GitHub can be configured similarly.
Step 3: Link Our Webhook to Flow
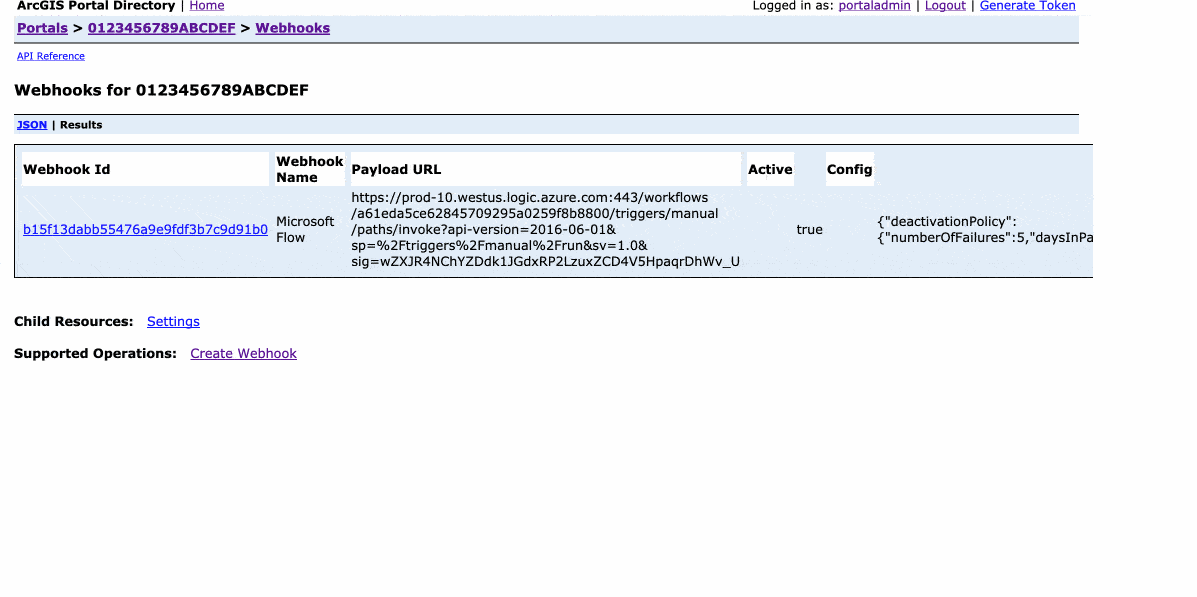
Our flow may be set up, but it needs to get invoked by a webhook to actually run. To create a webhook in Enterprise, visit the Sharing REST API at https://<computername.domainname.com>/<webadaptor>/sharing/rest. Click on Org Id, scroll to the end of the page and click Webhooks under Child Resources. This is where all the webhooks that we have registered will be listed. To create a new webhook, click Create Webhook under Supported Operations. Enter the name of the Webhook, copy the HTTP POST URL from the flow and paste it into Payload URL field, and enter the events we would like to trigger the Webhook. Click Create Webhook when everything is ready.
Go to our Portal and perform the action that would trigger a webhook event. This will make an entry to the Power BI database and send an email to the specified email address. Our PowerBI dashboard will be updated with the new information. We are now able to gain valuable insight into the key metrics of our Portal in real-time.
AWS Lambda
A common problem GIS Administrators face is forcing metadata standards on Portal items, like a valid thumbnail and appropriate tags. We can not solve this problem using Microsoft Flow’s predefined connectors and templates–we would need to write some custom code. This code can run on a traditionally managed server, or a serverless computation engine like Azure Functions/AWS Lambda. We will be using AWS Lambda to solve this problem.
Step 1: Create a Lambda Function
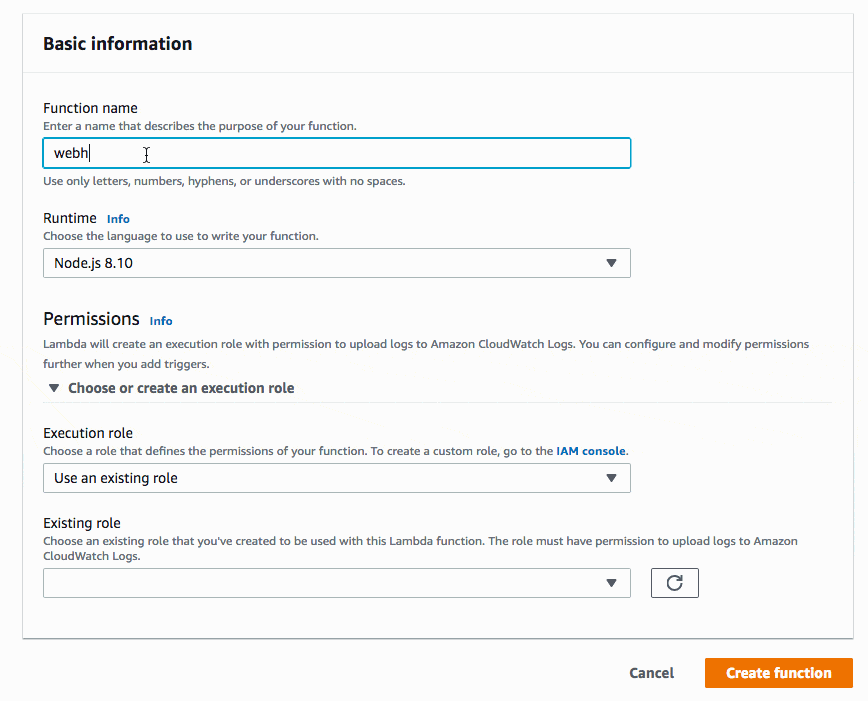
Open the AWS Management Console, press Lambda, then Create Function. Select the most recent Python version and existing role. The role with which we create the Lambda function must have permission to upload logs to Amazon CloudWatch (this is useful for debugging, since all Python print()statements are written to CloudWatch). Once we fill out the form, we will be brought to a page where we will specify our Python code to run.
Step 2: Write Our Python Code
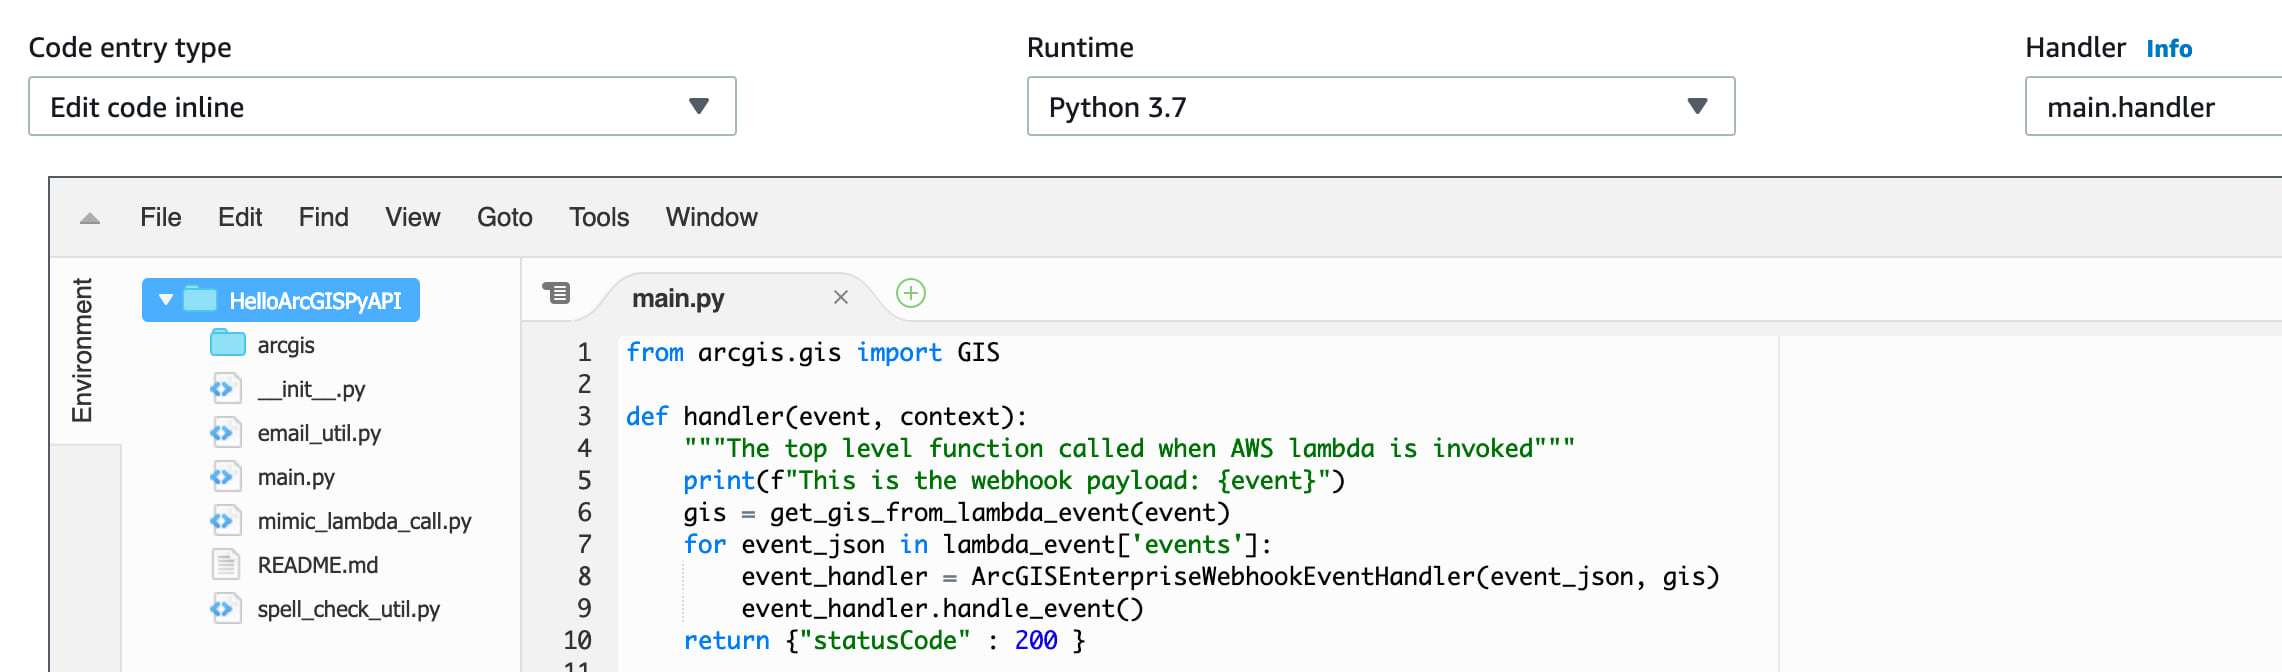
The entry point into a Lambda Function is called the Handler. A Python Handler is a module-level function with two arguments, event and context. When our handler function is invoked from our webhook, event will be the payload JSON, represented as a Python dictionary. We don’t use context, but it provides information from AWS Lambda about the execution environment. Since our Python function def handler(event, context): is specified in a main.py file, the Handler field should be filled in as “main.handler”.
To solve our Metadata problem, we have written a “Curator Bot” Python program that uses the ArcGIS API for Python to connect back to our Portal and update missing metadata in Web Map items. Clone the repository and fill in the PORTAL_URL, PORTAL_USERNAME, and PORTAL_PASSWORD variables in the config.py file. If we would like to send out emails, fill in the SMTP related variables. The GIS class is instantiated with variables from the config.py file, and the item that triggered the webhook is retrieved. If this item is a Web Map, we can loop through each operational layer and get the layer’s thumbnail and tags. If the original item is lacking tags or a thumbnail, we can update the original item with the layer’s metadata. We then can email the user from Python by connecting to an SMTP server.
Step 3: Deploy Our Code
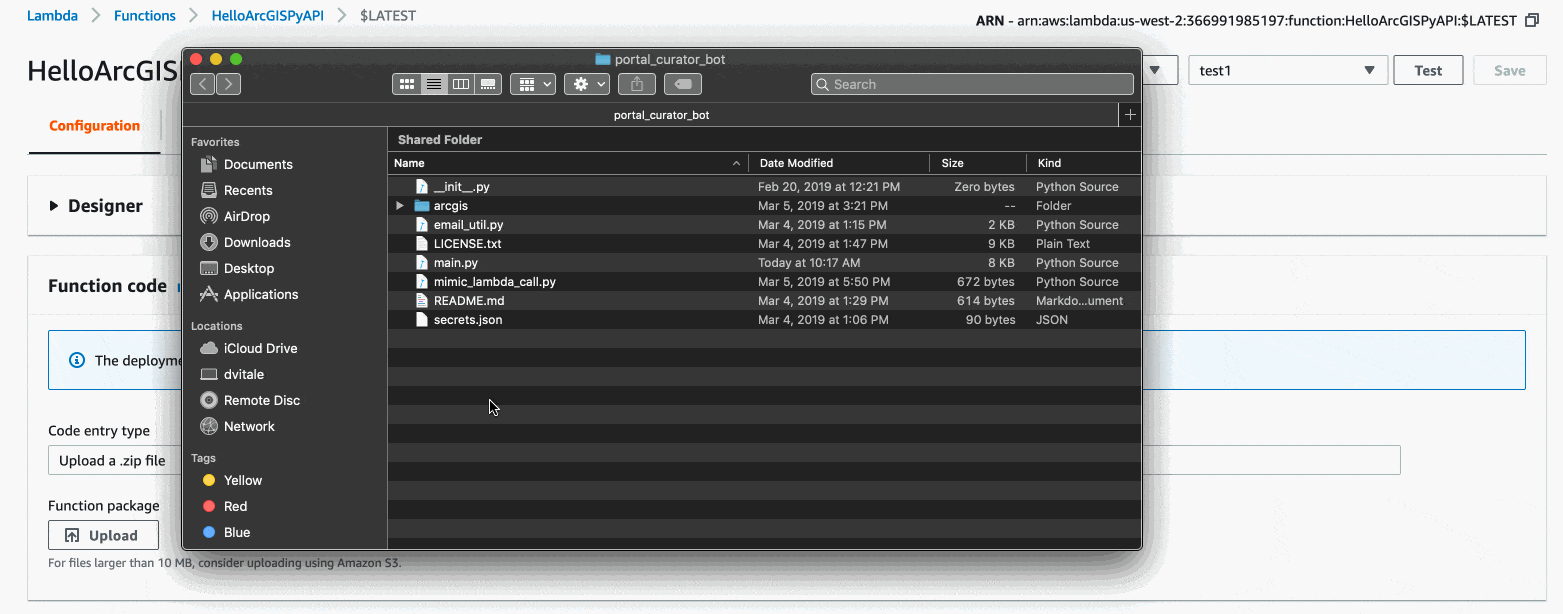
We are almost ready to deploy the Lambda Function, but we have one more thing to take care of. This code uses the ArcGIS API for Python, which is an external Python library that the default AWS Lambda runtime does not include. We will have to follow these instructions to include the arcgis package directory in the root of our archive alongside main.py. The ArcGIS API for Python is released publicly on conda and pypi.
Once we have made those changes, zip up everything so main.py is on the top level of the archive. Upload that archive, press Save, then press Actions > Publish new version.
Step 4: Link the Webhook to Lambda
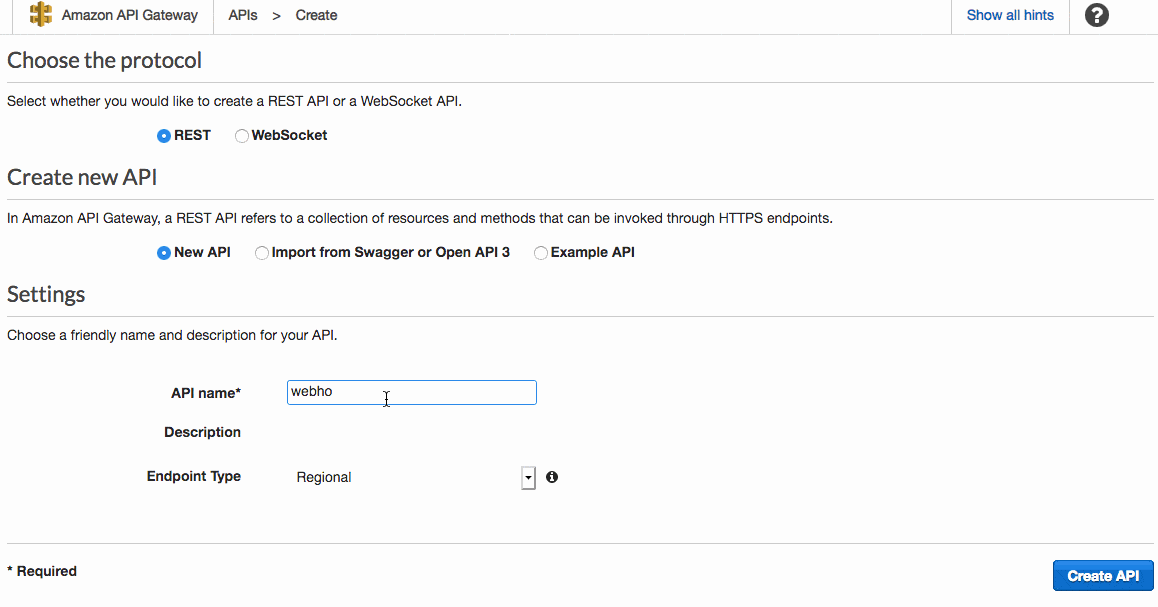
Our Lambda Function needs to accessible via an HTTPS endpoint that our webhook will POST to. This can be accomplished via the AWS API Gateway, an AWS offering that lets us create, publish, and maintain our own REST APIs. To create an API, click Create API and give it a name. Create a POST method on / by clicking Actions and choosing the POST option. In the next page, enter the name of Lambda function, then click Save. Finally, click Actions > Deploy API to deploy; our Lambda Function is ready to be triggered by a POST request. Copy the Invoke URL from the API Gateway page and paste it in the Payload URL field of a newly created webhook on the Enterprise Sharing REST API page. Specify /items to listen for all item changes, then click Create Webhook. We now have a “Curator Bot” that will automatically enforce metadata standards on all Web Maps in an organization.
Conclusion
We showed you two workflows that let you solve common problems GIS administrators face. Here are a few other workflow ideas:
- Whenever a new user is added to portal, run a script that gives the user access to other internal IT systems.
- Whenever a CSV file item is uploaded to portal, parse through the data. If missing or corrupt data is encountered, email the owner.
- Whenever an item is shared to a specific group, email external stakeholders and post to a Slack channel.
Whether you’re making a code-less dashboard in Microsoft Flow, writing code in AWS Lambda, or creating your own system, we can’t wait to see what you will create with webhooks!


Commenting is not enabled for this article.