Do you need to migrate ArcGIS Enterprise group content for one or more of the following reasons?
- Move content across environments, such as from development to staging to production, or between disconnected environments
- Create backups of specific content and restore from those backups as needed
- Share content with other organizations
If so, you’re in luck! While once feasible only through the ArcGIS REST API, as of ArcGIS Enterprise 11.4, default administrators can use group content export and import features to extract all or a set of supported items from a group into an export package and subsequently use the package to import the items into groups within the same or different organizations.
Note: As the names suggest, the group content export and import features are intended for migrating content shared with groups. If you want to migrate your entire ArcGIS Enterprise organization, use the WebGISDR tool instead.
Scenario
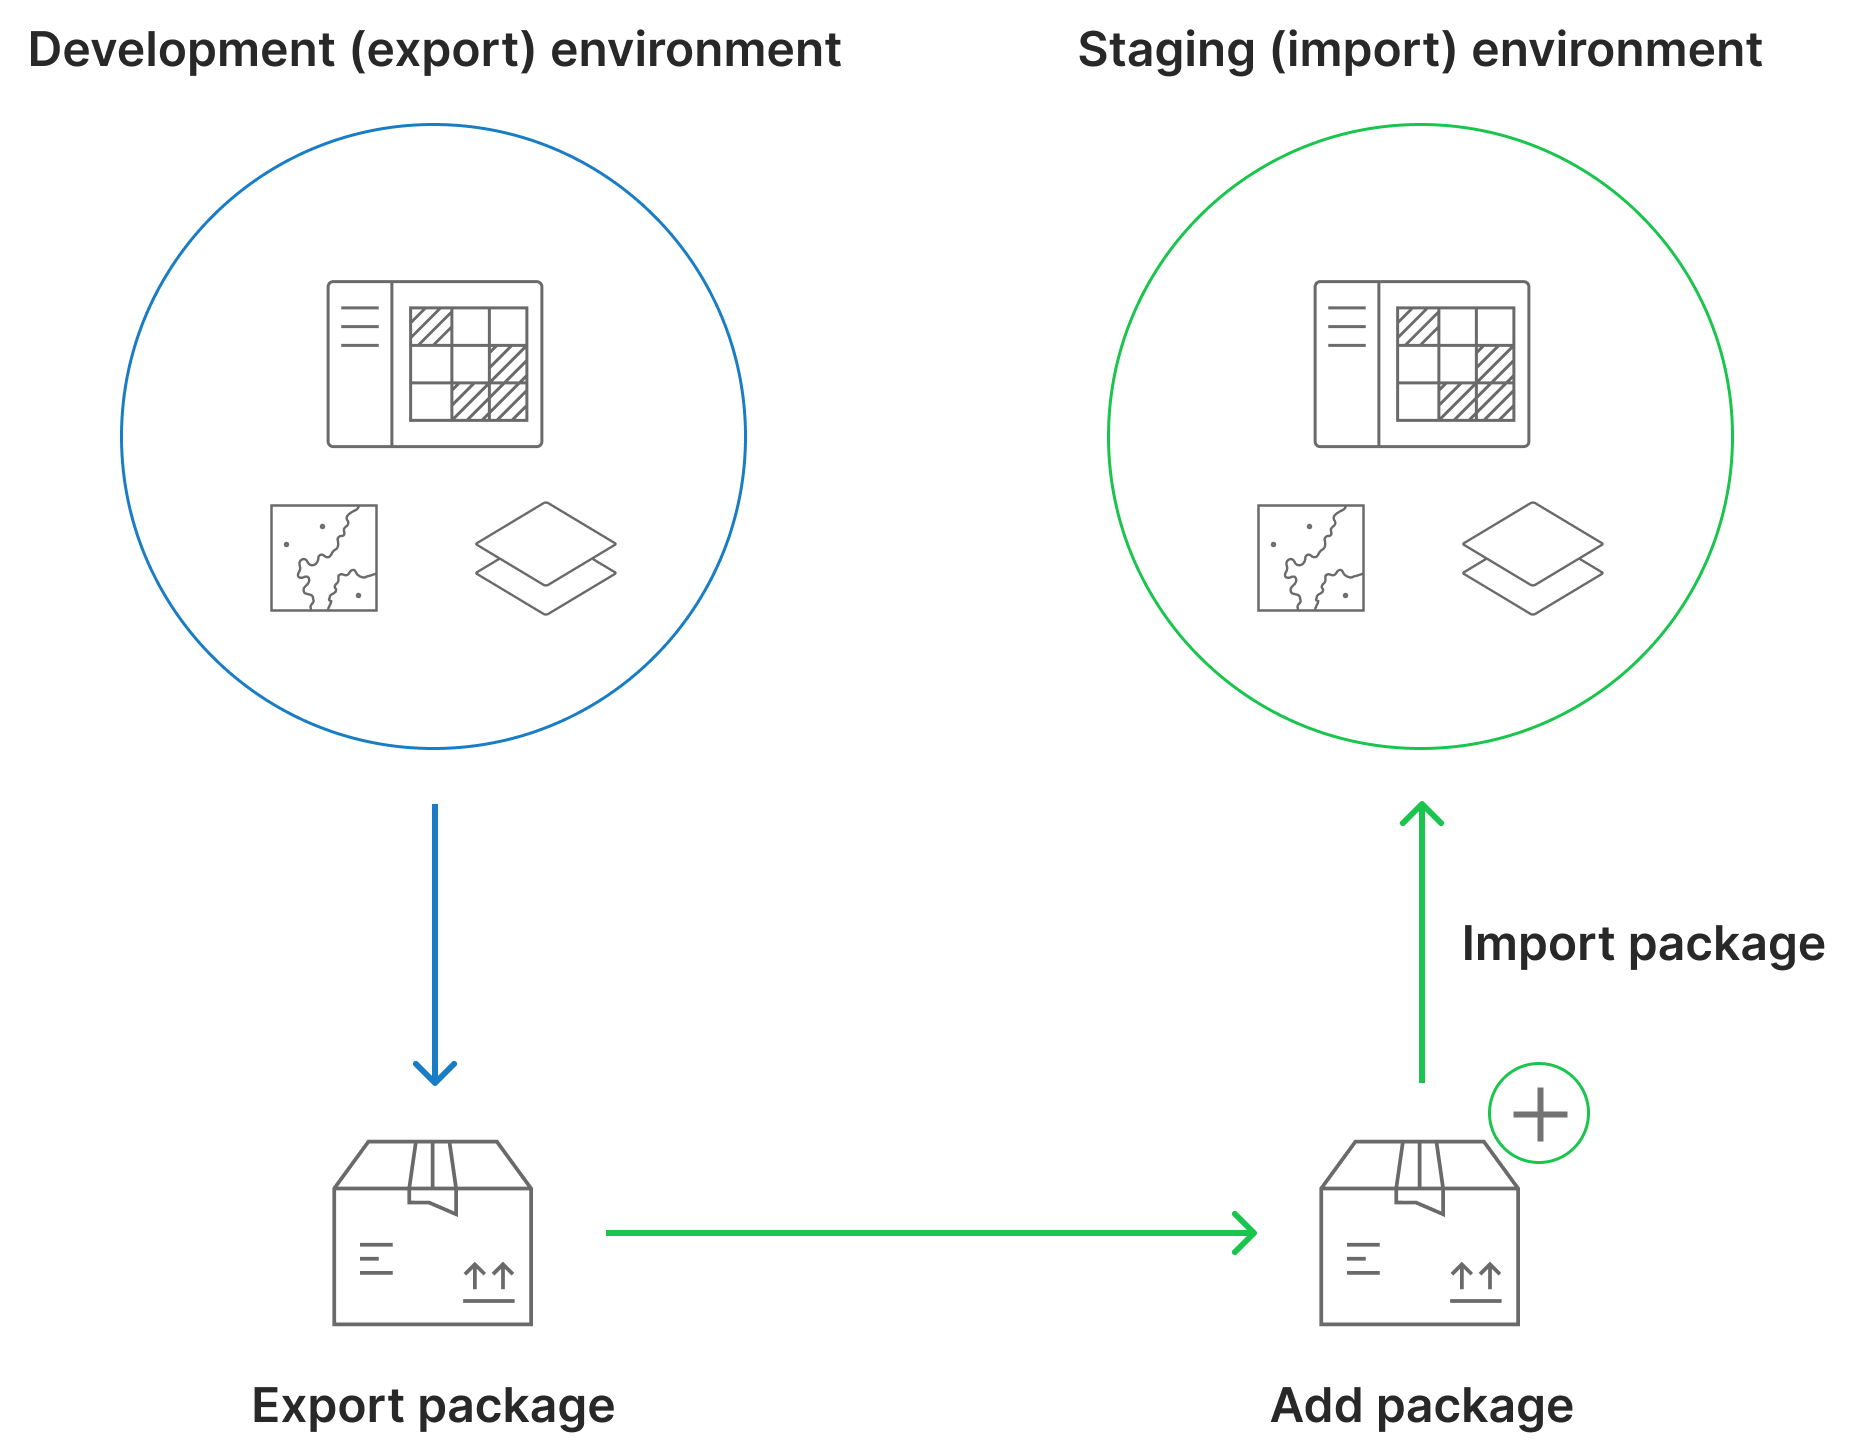
Consider a scenario where you have developed an ArcGIS Experience Builder app that includes a web map and a feature layer. You have already shared the app and its related items with a group in your development environment, and now you are ready to move them to your staging environment for additional testing. To accomplish this using the export and import features, you would follow these steps:
1. In the development environment, export the group content to an export package (.epk) using the export feature.
2. In the staging environment, add the package as an item.
3. In the staging environment, import the package contents into a group using the import feature.
Prerequisites
When exporting and importing items, you must keep the following in mind:
Note: These prerequisites are not limited to this scenario; they apply to all cases of group content export and import.
Deployments:
- Each environment must have a base ArcGIS Enterprise deployment configured.
- The staging (import) environment must be on the same or a later version of ArcGIS Enterprise than the development (export) environment.
- The development (export) environment must have a group with which the app and its related items are shared, and the staging (import) environment must have a group into which the content can be imported.
Privileges:
- You must be a member of the default administrator role.
Supported item types:
- Ensure that your content is listed in the What group items can you export list.
Size limit:
- Each item you export must be a maximum of 1 GB, and the total size of the export package must be smaller than 5 GB.
Item dependencies:
- If an item depends on other items that aren’t shared with the group, you must share those items with the group and include them in the export package. For example, when exporting a web map containing a feature layer, you must also share the layer with the group and include it in the export package.
- Item IDs are maintained during export and import, which preserves the relationship between items and their dependencies.
- URLs added directly to a web map or web app will continue to reference the source.
- Item and sublayer metadata are included when exporting and importing items.
- If an item you want to import already exists in the group, you can choose to overwrite it.
- Import layers before maps and apps.
Workflow
With the prerequisites outlined, let’s walk through the process of exporting and importing the ArcGIS Experience Builder app we discussed in the scenario above.
Export from the development environment
1. Sign in to the organization as a member of the default administrator role.
2. Click Groups at the top of the site and find the group with which the app and its related items are shared.
Tip: Use the tabs, filters, sort options, and search to help you find the group.
3. Click View details to open the group page.
4. Find and select the app and its related items.
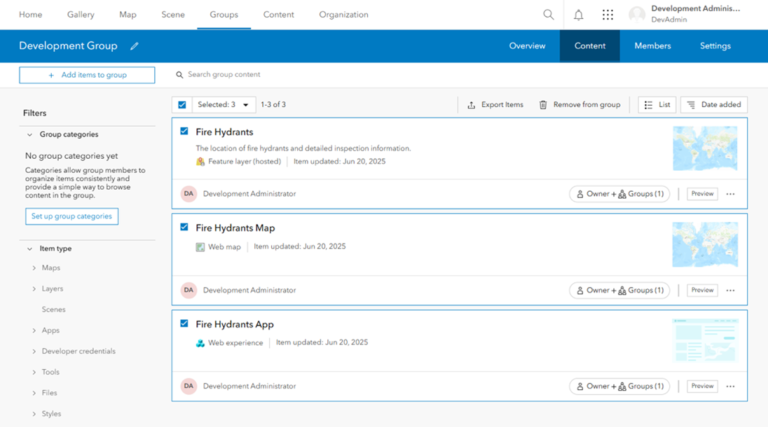
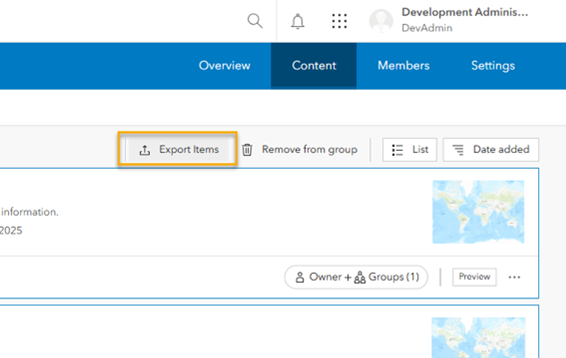
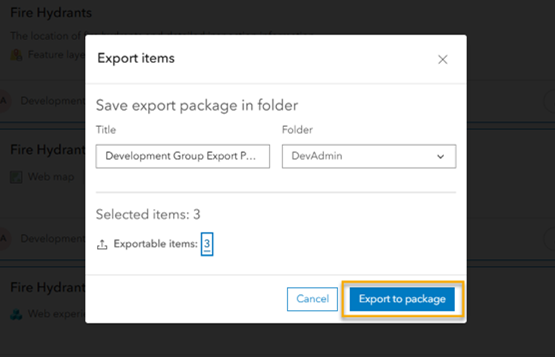
5. Click Export Items.
6. Provide a title and choose a folder in My Content where you want to save the export package.
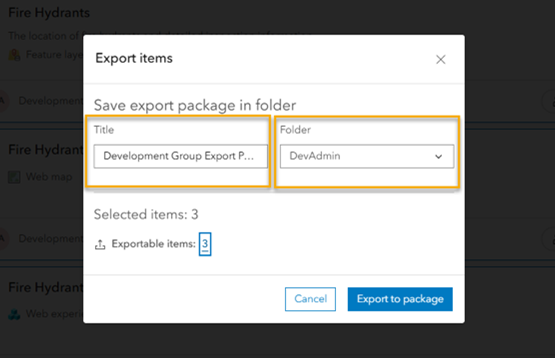
7. Click Export to package.
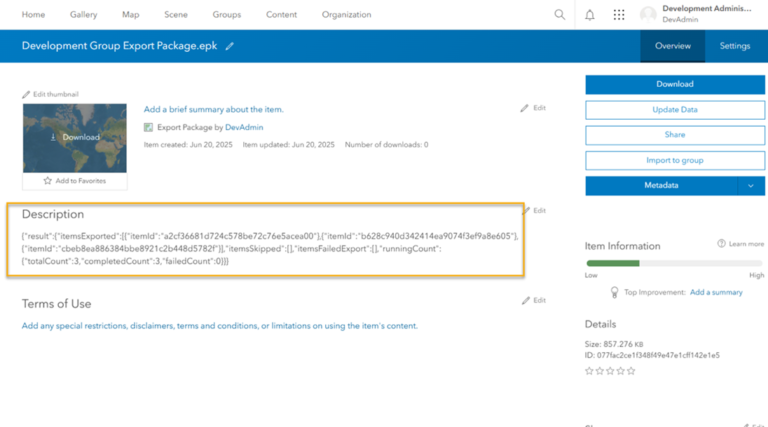
The export package appears as an item in the specified folder on the My Content tab of the Content page. The result of running the export is saved to the item description on the Overview tab of the item page.
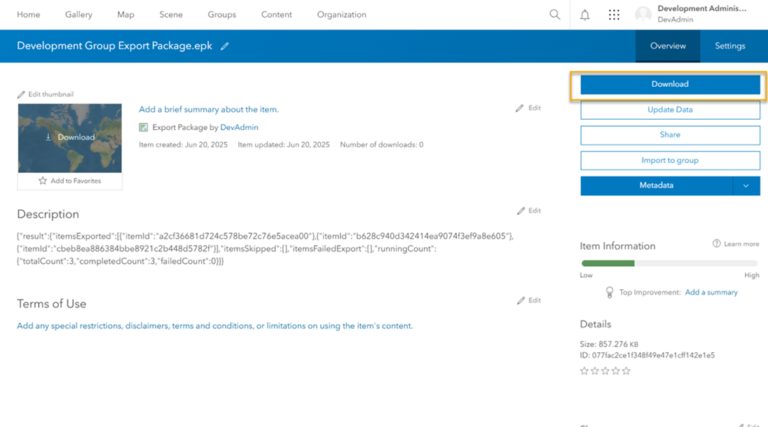
8. Download the package to share it with the staging environment.
Import into the staging environment
To import the app using the export package, you must first add the package as an item to the staging environment.
1. Sign in to the organization as a member of the default administrator role.
2. Click the My Content tab of the Content page and click New item.
3. Click Your device, browse to the location of the package on your local machine or directory on a network share, and click Open. Alternatively, drag the package into the drop zone at the top of top of the New item window.
4. Provide a title.
5. Choose a folder in My Content where you want to save the package.
6. Optionally, provide tags and a summary that describes the package.
7. Click Save.
With the package added as an item to your staging environment, you are now ready to import the app into a group.
1. On the My Content tab of the Content page, open the folder that contains the package.
2. Click the package name to open the item page.
3. Click Import to group.
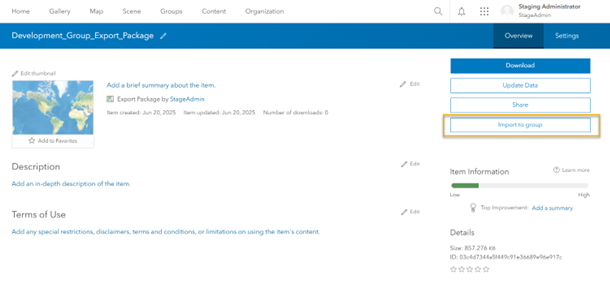
4. Choose the group into which you want to import the app and click Next.
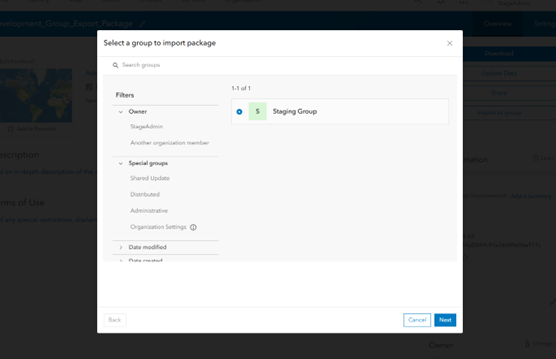
5. Select the app and its related items and click Next.

6. Review items to import.
Note: If an item already exists in the group and you want to overwrite it with the item in the export package, click Overwrite all items.
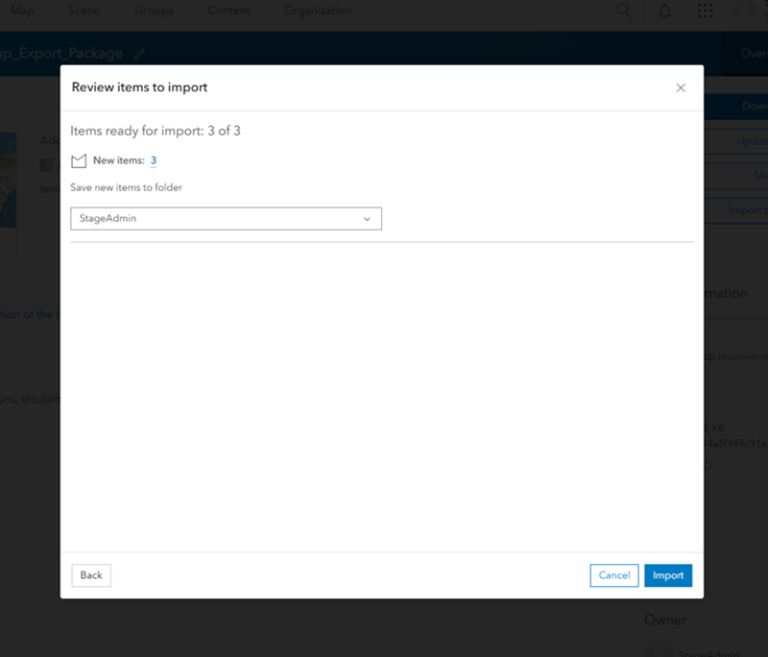
7. Click Import.
8. Review the import results and click Done.
The app and its related items appear on the group’s Content tab.
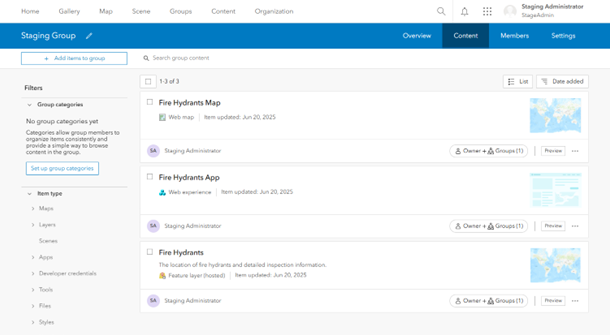
And that’s it—with just a few clicks, you moved your app from the development to the staging environment. Since item IDs remain the same across both environments, the relationship between app items and their dependencies is preserved, ensuring your app works flawlessly in the staging environment. The same streamlined workflow applies whether you’re moving the app from staging to the production environment, creating backups of the app and restoring from them, or sharing the app with other organizations. To learn more about the group content export and import features, see Export and import group content.


Commenting is not enabled for this article.