
Basemaps provide the geographic framework and visual context needed to interpret spatial data, locate features, identify geographic patterns, and explore relationships across locations. Traditionally, basemaps relied on raster tiles (PNG and JPEG) because they enabled fast rendering of rich cartographic content.
As GIS technology evolved, vector tiles emerged as an efficient alternative. Vector tiles offer faster generation times, reduce storage requirements, and allow the same geographic content to be rendered in multiple styles. As a result, most modern basemaps now use vector tile technology.
Since 2023, Esri has regularly updated their basemaps on vector tile services, while raster basemap services are in mature support. This transition works well for most organizations, but others rely on legacy applications, specialized devices, or environments that cannot render vector tiles. For these organizations, consuming vector tile-based maps can be challenging.
To address some of these scenarios, Esri introduced the ArcGIS Static Basemap Tiles Service and ArcGIS Static Map Service (WMS). These services provide rasterized access to ArcGIS Online basemap content and work well for those who use the ArcGIS Online tiling scheme and operate in connected environments.
However, these services cannot fully support organizations that:
- Operate in self-hosted environments, such as secured, air-gapped, or disconnected networks
- Use custom coordinate systems or non-standard tiling schemes
- Rely on custom basemap styles
To bridge this gap, ArcGIS Enterprise 12.2 introduces the ability to publish raster tile layers using vector tile content as the source.
This capability allows organizations to benefit from modern vector-basemap content while serving raster tiles for legacy applications, WMS clients, and WMTS clients.
Prerequisites
Before publishing a raster tile layer using vector tile content, ensure you have the following five prerequisites:
- ArcGIS Enterprise 12.2 on Windows, Linux, or Kubernetes – An ArcGIS Enterprise account that is a member of the default administrator or publisher role, or a member of a custom role with privileges to create, update, and delete content, publish server-based layers and register data stores in ArcGIS Enterprise 12.2.
- Source Vector Tile Content – Ready-to-use vector tile content and its style definition, stored in a location that ArcGIS Enterprise can access. The vector tile content is the authoritative data source, and the style definition controls how that data is rendered. You can obtain content from:
- ArcGIS Data Appliance
- Vector tile packages (VTPKs) created in ArcGIS Pro
- Cache Storage Location – A target location for generated raster tiles, such as:
- File system location
- Amazon S3
- Microsoft Azure Blob Storage
- Google Cloud Storage
- Tiling Scheme – A tiling scheme that defines the levels of detail and cache structure for the published service.
- ArcGIS API for Python – Basic familiarity with ArcGIS API for Python is recommended for publishing and cache management.
Steps to Publish Tile Layer
Here are the code snippets that you can easily modify to publish raster tile layer using vector tile content in six easy steps:
Step 1: Connect to your ArcGIS Enterprise Portal and select the hosting or federated server to which you would like to publish the raster tile layer.
from pathlib import Path
from arcgis.layers import MapImageLayer
from arcgis.geometry import Polygon
import json
from arcgis.gis import GIS, ItemProperties, ItemTypeEnum

# Connect to your GIS
# Create a connection to your portal for publishing
gis=GIS(url="https://", username="", password="")

server_list = gis.admin.federation.servers
server_list

server_id = None
for server in server_list['servers']:
    if server['serverRole'] == 'FEDERATED_SERVER': # HOSTING_SERVER
        server_id = server['id']
        break
if server_id is None:
    raise Exception("Cannot find FEDERATED_SERVER on this Enterprise configuration")
server_id
Note: If you prefer a UI-based workflow, Steps 2 and 3 can also be completed through the ArcGIS Enterprise Portal, and you can skip to Step 4.
# Location on file system where vector tile layer content resides
folder_path = Path(r"\\")
folder_path.exists()

# Create a user managed Folder data store of the location where source vector tile content & style root resides
ds_folder = gis.content.folders.create(folder="")
ds_config = {
    "type": "folder",
    "path": "/fileShares/",
    "info":{
        "isManaged": False,
        "dataStoreConnectionType": "shared",
        "path": str(folder_path)
    }
}
txt = json.dumps(ds_config)

#Add data store as an item to my portal
ds_item = ds_folder.add(item_properties=ItemProperties(
    title="",
    item_type=ItemTypeEnum.DATA_STORE,# must be this
    tags="Source Vector Tile content",
    text=txt
    )
).result()
ds_item

# Registers the Data Store to the to the server in ArcGIS Enterprise selected in step 1
gis.datastore.register(item=ds_item, server_id=server_id)
Step 3: Register Cache Store
Define where the raster cache tiles for the tile layer will be stored. Supported cache locations include: local or network file systems & object stores by cloud providers. Ensure the ArcGIS Server account has both read and write permissions to this location. Use either step 3.1 or 3.2.
Step 3.1: Sample Dictionary for adding a location using local or network file systems as a cache store.
# path to location on file system where raster cache would be created
cpath = Path(r"\\UNC_orLocal\path_to_raster_cache_location")


# Create a user managed Cache data store item configuration for location on file system where raster cache would be created
cds_config = {
    "type": "folder",
    "path": "/fileShares/myCacheDatastore_name",
    "info":{
        "isManaged": False,
        "dataStoreConnectionType": "shared",
        "purposes": ["map-tile"],
        "path": str(cpath)
    }
}

# Add data store as an item to my portal
cds_item = ds_folder.add(item_properties=ItemProperties(
    title="",
    item_type=ItemTypeEnum.DATA_STORE, # must be this
    tags="Raster Cache output",
    text=cds_config
    )
).result()
cds_item
Step 3.2: Sample dictionary for adding a location on an object store by cloud providers such as Amazon S3. See here, for object store examples to other cloud providers such as Azure BlobStore or Google CloudStore.
# Create a user managed cache data store item configuration using an object store by AWS cloudprovider where raster cache would be created.
cds_config = {
    "path": "/cloudStores/",
    "type": "objectStore",
    "provider": "amazon",
    "info": {
        "isManaged": False,
        "purposes": ["map-tile"],
        "connectionString": "{\"accessKeyId\":\"\",\"secretAccessKey\":\"\",\"regionEndpointUrl\":\"https://s3.us-west-2.amazonaws.com\",\"defaultEndpointsProtocol\":\"https\",\"credentialType\":\"accesskey\",\"region\":\"us-west-2\"}",
        "objectStore": "bucket/folder"
    }
}
ctxt = json.dumps(cds_config)
Step 3.3: Register the location provided in either step 3.1 or step 3.2 as a Cache Store with the GIS Server selected in Step 1.
cds_item = ds_folder.add(item_properties=ItemProperties(
    title="my_cachedatastore_folder",
    item_type=ItemTypeEnum.DATA_STORE, # must be this
    tags="Raster Cache output",
    text=cds_config
    )
).result()
cds_item

# Registers the Data Store to the to the server in ArcGIS Enterprise selected in step 1
gis.datastore.register(item=cds_item, server_id=server_id)
Step 4: (Optional) If you have used a UI-based workflow for Steps 2 and 3 using ArcGIS Enterprise Portal, provide the itemIds of the folder data store and cache store below.
# Step 4a.  Enter the itemID of existing datastore, where vector tiles and styles reside, if pre-registered (Skip Step2)
vds_item= ""

## Step 4b.  Enter the itemID of existing cache store if pre-registered. (Skip Step3)
cds_item= ""
Step 5: Configure the parameters for the raster tile layer.
Step 5.1: Provide the path to the vector style resource in folder data store. This style would be used to create the raster tile layer.
# 5.1. Provide the path to the vector style resource located in the data store registered at step 2 or step 4a.
# Please ensure style root resource has correct references to the Tile root resource being used.
VectorStyleRoot= Path(r"Esri_Vector_Basemap_DA2026_Install.vtiles\coloredpencil\resources\styles\root.json")

# Validates the vector style exists in the folder datastore registered at step 2 or 4a.
fullPath_VectorStyleRoot = folder_path / VectorStyleRoot
fullPath_VectorStyleRoot.exists()
In standard ready-to-serve vector tile content created using Extract package gp tool, the vector style is nested inside the .vtiles folder and is sourcing content from a single vector tile configuration.
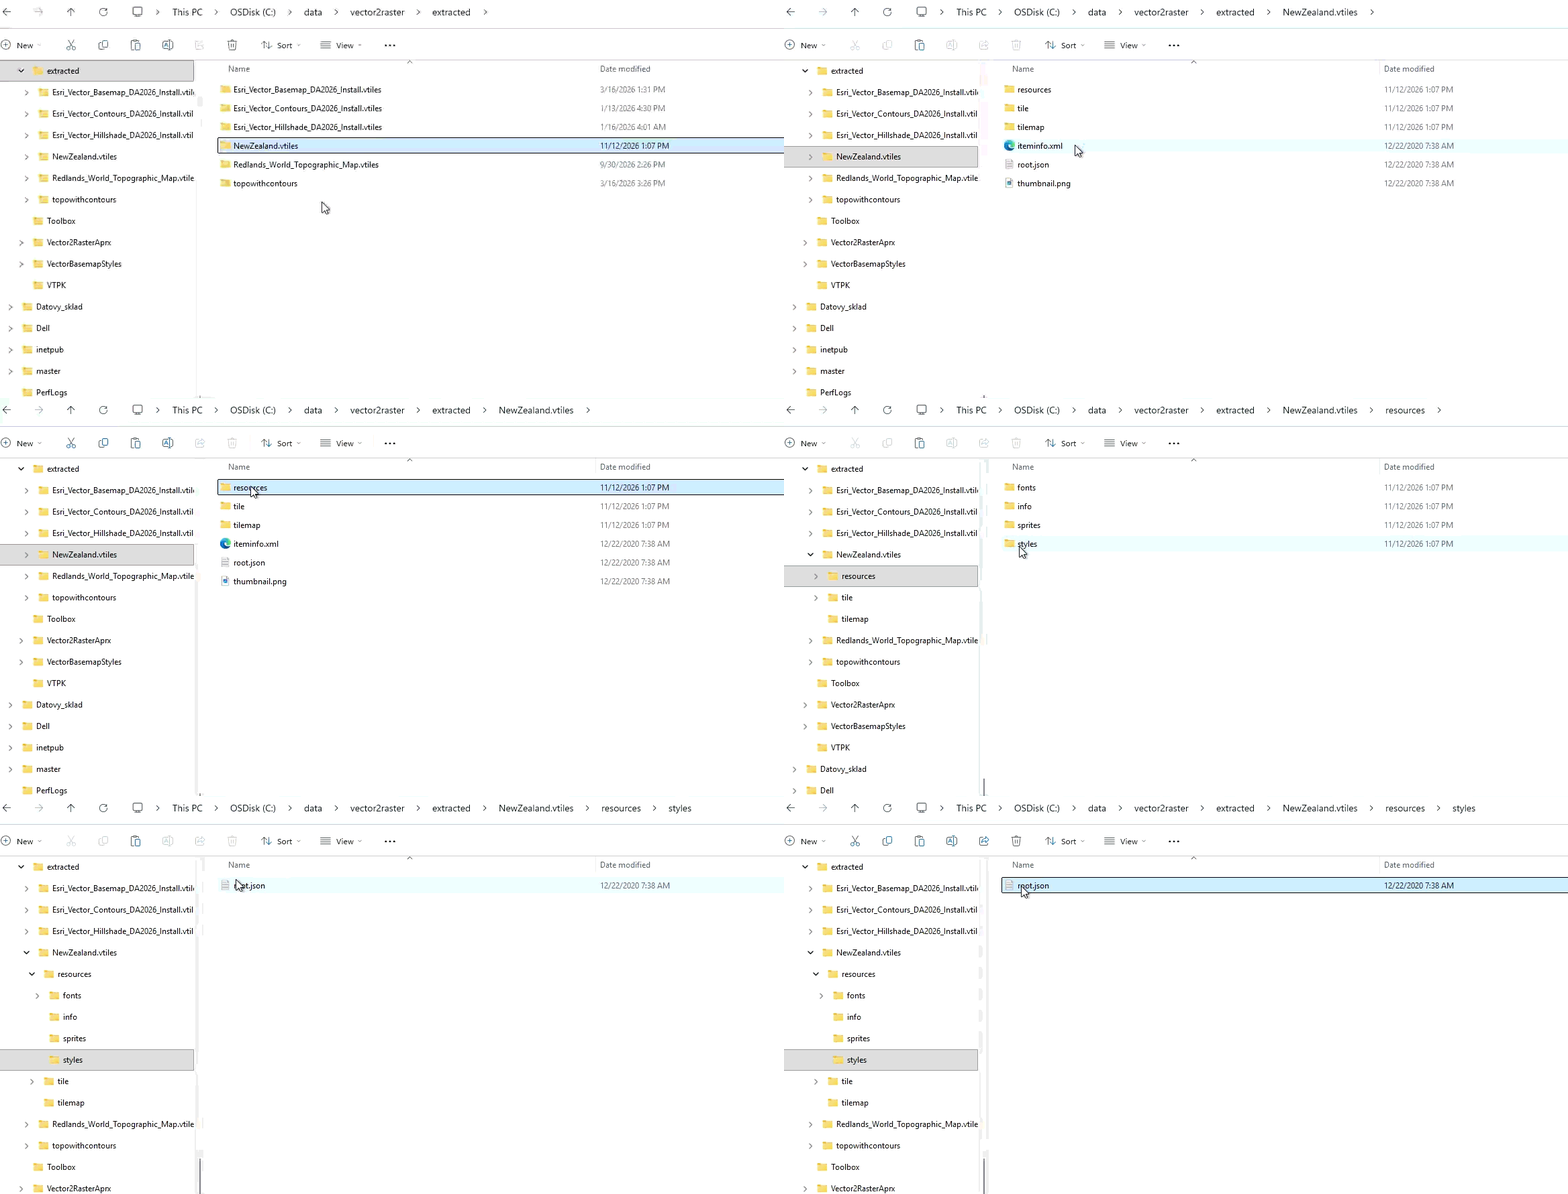
You can create a custom vector style using the vector style editor, to create a vector style that sources content from multiple vector tile contents such as contours and hillshades.
Note: It is very important to ensure that the style resource is correctly mapped to the corresponding vector tile content located on file system.
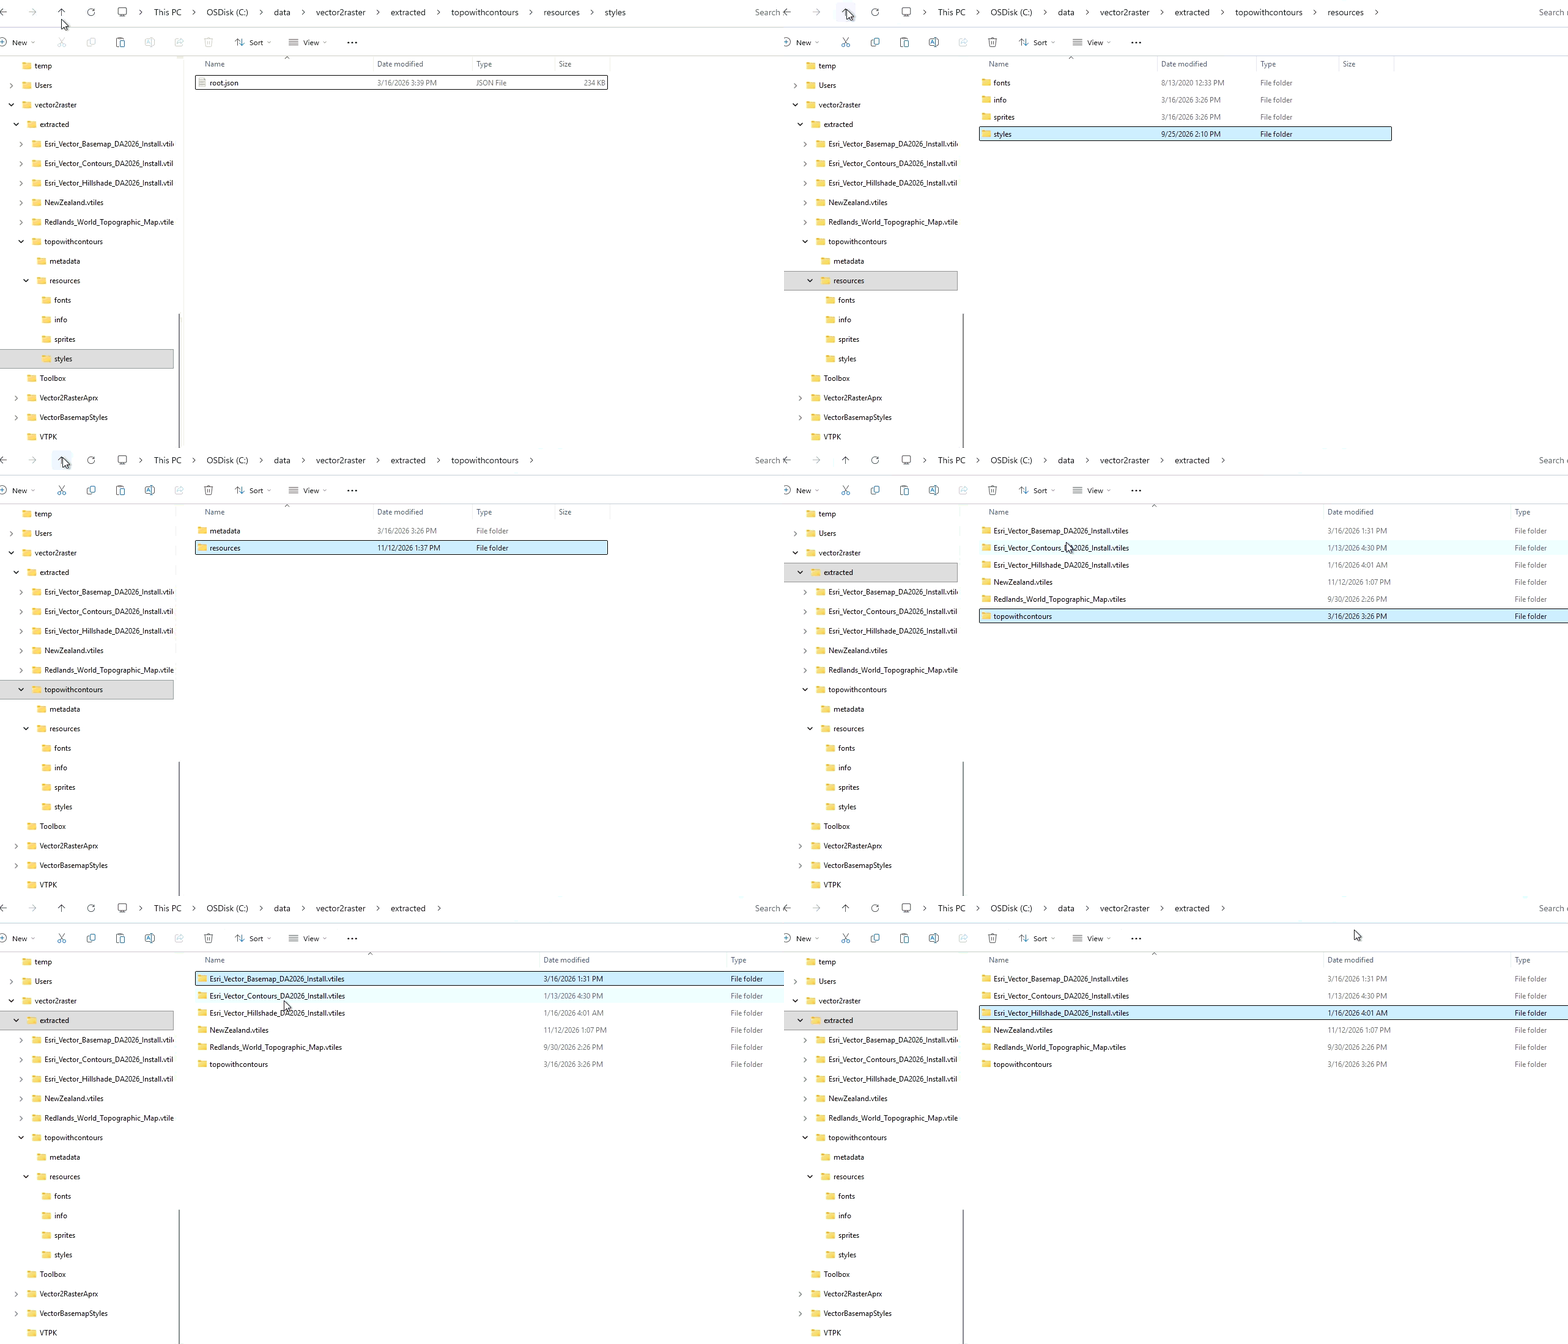
Here is an example of a vector style root resource which is referencing multiple vector tile resources located on filesystem.
{
    "version": 8,
    "sprite": "../sprites/sprite",
    "glyphs": "../fonts/{fontstack}/{range}.pbf",
    "sources": {
        "esri": {
            "type" : "vector",
			"url" : "../../../Esri_Vector_Basemap_DA2026_Install.vtiles"
        },
        "contours": {
            "type": "vector",
            "url": "../../../Esri_Vector_Contours_DA2026_Install.vtiles"
        },
        "hillshade": {
            "type": "vector",
            "url": "../../../Esri_Vector_Hillshade_DA2026_Install.vtiles"
        }
    },
If you look at the location of the style root.json in the file system, you can see its referencing the root resource of three different vector tile contents that are located three folder levels above the directory where it is located.
Step 5.2: Define the tiling scheme dictionary for the raster tile layer. This can be created using GenerateMapServerCacheTiling scheme gp tool using Ready To Serve Format format.
# 5.2 Create tiling scheme dictionary for the map service cache
scheme={
    "rasterCacheSchema": {
        "tileInfo": {
            "spatialReference": {
                "wkid": 102100,
                "latestWkid": 3857
            },
            "origin": {
                "x": -20037508.342787,
                "y": 20037508.342787
            },
            "rows": 256,
            "cols": 256,
            "dpi": 96,
            "lods": [
            {
                "level": 0,
                "resolution": 156543.033928,
                "scale": 591657527.591555
            },
            {
                "level": 1,
                "resolution": 78271.5169639999,
                "scale": 295828763.795777
            },
            {
                "level": 2,
                "resolution": 39135.7584820001,
                "scale": 147914381.897889
            },
            {
                "level": 3,
                "resolution": 19567.8792409999,
                "scale": 73957190.948944
            },
            {
                "level": 4,
                "resolution": 9783.93962049996,
                "scale": 36978595.474472
            },
            {
                "level": 5,
                "resolution": 4891.96981024998,
                "scale": 18489297.737236
            },
            {
                "level": 6,
                "resolution": 2445.98490512499,
                "scale": 9244648.868618
            },
            {
                "level": 7,
                "resolution": 1222.99245256249,
                "scale": 4622324.434309
            },
            {
                "level": 8,
                "resolution": 611.49622628138,
                "scale": 2311162.217155
            },
            {
                "level": 9,
                "resolution": 305.748113140558,
                "scale": 1155581.108577
            },
            {
                "level": 10,
                "resolution": 152.874056570411,
                "scale": 577790.554289
            },
            {
                "level": 11,
                "resolution": 76.4370282850732,
                "scale": 288895.277144
            },
            {
                "level": 12,
                "resolution": 38.2185141425366,
                "scale": 144447.638572
            },
            {
                "level": 13,
                "resolution": 19.1092570712683,
                "scale": 72223.819286
            },
            {
                "level": 14,
                "resolution": 9.55462853563415,
                "scale": 36111.909643
            },
            {
                "level": 15,
                "resolution": 4.77731426794937,
                "scale": 18055.954822
            },
            {
                "level": 16,
                "resolution": 2.38865713397468,
                "scale": 9027.977411
            },
            {
                "level": 17,
                "resolution": 1.19432856685505,
                "scale": 4513.988705
            },
            {
                "level": 18,
                "resolution": 0.597164283559817,
                "scale": 2256.994353
            },
            {
                "level": 19,
                "resolution": 0.298582141647617,
                "scale": 1128.497176
            },
            {
                "level": 20,
                "resolution": 0.14929107082380833,
                "scale": 564.248588
            },
            {
                "level": 21,
                "resolution": 0.074645535411904163,
                "scale": 282.124294
            },
            {
                "level": 22,
                "resolution": 0.037322767705952081,
                "scale": 141.062147
            },
            {
                "level": 23,
                "resolution": 0.018661383852976041,
                "scale": 70.5310735
            }
        ]
        },
        "storageInfo": {
            "packetSize": 128,
            "storageFormat": "esriMapCacheStorageModeCompactV2"
        },
        "tileImageInfo": {
            "format": "JPEG",
            "compressionQuality": 75
        },
		"wmtsScaleFactor": 0.00028000000000003521
    }
}
Step 5.3: Define properties for your map service.
# Provide the values for your service name & cache directory folder in CacheStore
desiredServiceName = "myColoredPencil1"
cacheFolderName = "/myColoredPencil1"

# 5.3. Create a dictionary for your service configuration
service_conf={
    "serviceName": desiredServiceName,
    "type": "MapServer",
    "properties": {
        "sourceVtDatastoreId": vds_item.id,
        "sourceVtStylePath": str(VectorStyleRoot),
        "pathInCachedStore": cacheFolderName,
        "cacheStoreId": cds_item.id,
        "exportTilesAllowed":"true" # set it to false if you would like disable offline capabilities
        "minScale": 591657527,
        "maxScale": 564
    }
}
service_conf
Step 6: Publish raster Tile Layer using vector style layer content.
ds = gis.datastore
ds

## 5.5. Publish the vector style as a raster tile layer where the raster tile content is located in data store managed by you
## The server_id argument must be the same value used to register both the vector tile and cache datastore items.

mil_item = ds.publish(
    config=service_conf,
    server_id=server_id,
    folder="",
    description="raster tile layer from vector style by python API",
    tags="Basemap layer using Vector tiles",
    options=scheme,
    overwrite="false"
).result()

## My raster tile layer is published and now is serving content directly from my data store
mil_item[0]
Your raster tile layer is ready to be consumed by applications!
By default, the published raster tile layer supports cache-on-demand. This means raster cache tiles are generated automatically as users navigate the map. The first request for a specific area creates the cache, and subsequent requests are served directly from the generated tiles.
Note: These layers are listed as "Tile layers" as they do not support identify or query capabilities, which are supported by "Map image layers".
The tile layers cannot be managed using ArcGIS Server Manager or ArcGIS Enterprise Manager at 12.2.
Managing and Updating the Cache
For optimal performance, especially in high-traffic areas, you can optionally pre-generate cache tiles for frequently accessed scales and regions.
You can create cache tiles using caching toolset in ArcGIS Pro or use steps below in ArcGIS API for Python. This allows users to experience faster map display performance from the very first request.
Pre-generate raster tiles for tile layer for frequently visited levels and areas:
# initiates the tile layer item for cache updates
mimg_lyr = MapImageLayer.fromitem(
    item=mil_item[0]
)
ent_mapimg_mgr = mimg_lyr.manager

# Define the Level of details at which you would like the cache to be built
lod=[18489297.737236001, 9244648.8686180003, 4622324.4343090001, 2311162.2171550002 ]

# Define the Extents at which you would like the cache to be built
extent_poly = Polygon(
    iterable={
        "xmin": -20037507.0671618,
        "ymin": -20037507.0671618,
        "xmax": 20037507.0671618,
        "ymax": 20037507.0671618,
        "spatialReference": {"wkid":102100, "latestWkid": 3857}
    }
)

# Create tiles for the mapImage layer
cache_job_poly = ent_mapimg_mgr.build_cache(
    levels=lod,
   extent=extent_poly
)
cache_job_poly
Lifecycle Management
When updated vector tile content or styles become available, there is no need to republish the service from scratch.
Simply provide the path to the new vector tile style resources and use the overwrite workflow detailed below to update the existing Tile Layer. This step uses the same parameters as Step 6 but with “overwrite” flag set to “true”.
This makes it easy to keep the service synchronized with the latest cartographic updates while preserving service URLs and client integrations.
Overwrite the raster tile layer when the source vector style or source vector tiles are updated:
# Provide the path to the new style in the folder datastore where vector tile content is located.
new_style_path = Path(r"Esri_Vector_Basemap_DA2026_Install.vtiles\DAstyles\canvasdarkbase\resources\root.json")

# Create dictonary for the raster tile layer. Note the service name, vectordatastoreID, CacheSTore ID, tiling scheme, pathInCacheStore cannot be changed.
service_conf={
    "serviceName": desiredServiceName,
    "type": "MapServer",
    "properties": {
        "sourceVtDatastoreId": vds_item.id,
        "sourceVtStylePath": str(new_style_path),
        "pathInCachedStore": cacheFolderName,
        "cacheStoreId": cds_item.id,
        "exportTilesAllowed":"true",
        "minScale": 591657527,
        "maxScale": 564
    }
}
service_conf

# Overwrite and publish the new style path as mapservice
mil_item = ds.publish(
    config=service_conf,
    server_id=server_id,
    folder="/",
    description="raster tile layer published by python API after overwrite",
    tags="rastertile, pythonAPI test, overwriting style",
    overwrite=True
).result()
To upgrade or not to upgrade production deployments…
Upgrading a production ArcGIS Enterprise deployment is a significant undertaking that requires careful planning and resource allocation. Fortunately, organizations can take advantage of the raster cache generation capabilities in ArcGIS Enterprise 12.2 without upgrading their production environment.
How it works:
- In a development or staging environment running ArcGIS Enterprise 12.2, generate raster tiles using vector tile content as the source.
- Copy the resulting cache to your production deployment, which can remain on an earlier version of ArcGIS Enterprise.
Why it matters:
- Faster cache generation: Building raster caches from vector tile content in ArcGIS Enterprise 12.2 is faster than traditional workflows that use StreetMap Premium datasets.
- No production upgrade required: Your production environment stays on its current version while still serving the new raster caches.
Conclusion
In summary, this workflow enables you to publish and manage raster tile layers directly from vector tile content while leveraging modern storage options such as network shares and cloud object stores. The result is a highly scalable service that supports both cache-on-demand and pre-generated caching workflows, offers faster cache generation times, and provides the flexibility to suit a wide range of deployment scenarios.

Article Discussion: