As the proliferation of 3D data continues to drive experiences for our users, we’re offering new tools to work with data in new ways and create scenes that are intuitive and realistic. This release of Scene Viewer contains features to help you manage integrated meshes published from ArcGIS Pro, and we’ve also extended visual improvements to water and shadow visualization. Read on further to find out how to start using these features today!
Integrated Mesh Modification
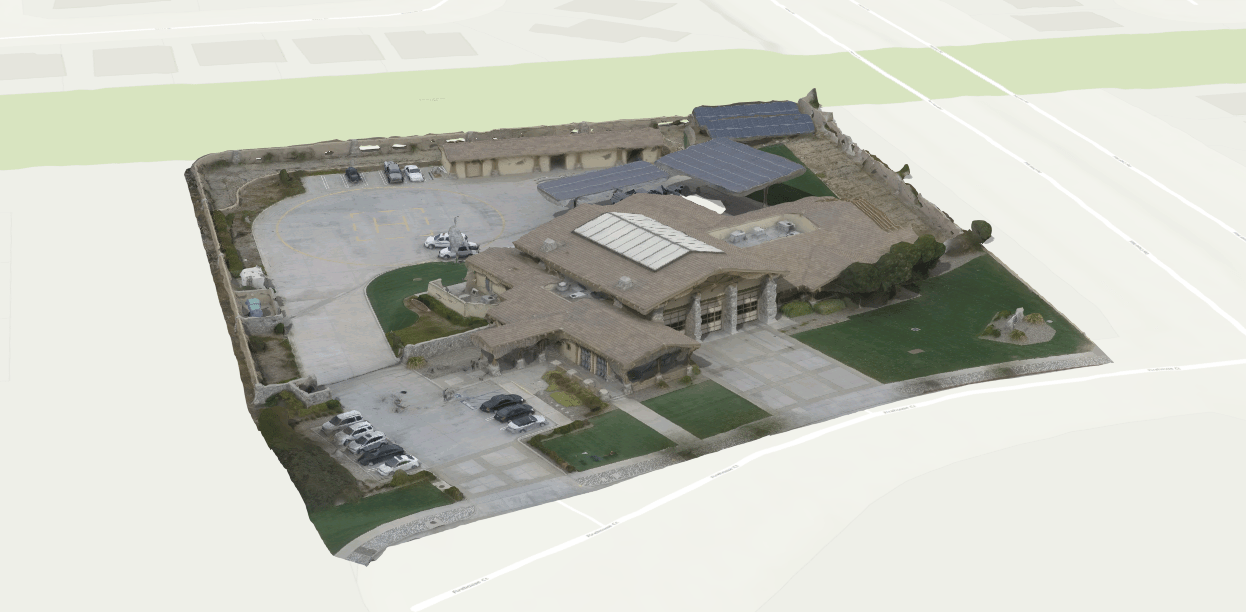
Integrated mesh is an amazing scene layer type that we’ve supported in Scene Viewer for a while now. This layer type is typically gathered from photogrammetric sources, like imagery captured by drones and processed with Drone2Map or SiteScan. We also have several partners that specialize in producing city-scale integrated mesh for purchase. Last release, we enabled users to drape point, line and polygon feature layers over Integrated Mesh. Our users have been asking for more capability to work with integrated mesh, and this release, we’re enabling the capability to modify integrated mesh using clip, mask and replace. This enables users with more options to cleanly present integrated mesh, and this feature exposes new possibilities for visualization and storytelling.
This workflow is accessible in ArcGIS Pro 2.6 (releasing later this month) by sharing a web scene with modified integrated mesh to ArcGIS Online. Developers can also customize their own experiences with mesh modification using the ArcGIS API for JavaScript.
Modifying Integrated Mesh in ArcGIS Pro
Integrated Mesh modification tools in ArcGIS Pro 2.6 are accessible in the “Integrated Mesh Layer” menu bar under the “Data” tab.
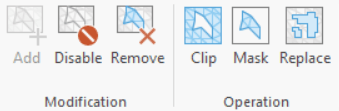
Each operation provides a way to utilize integrated mesh to better suit your workflow:
Clip enables you to edit or import a polygon that will clip a hole inside an integrated mesh scene layer. This can be useful for water features, where photogrammetric mesh generation processes are a challenge. This gives you an opportunity to utilize polygon reflective water styling where the integrated mesh has been clipped.
Mask enables you to edit or import a polygon that will mask integrated mesh edges outside of that polygon. Masking will let you collect and deliver web scenes using integrated mesh scene layers with clean edges. This can also be incorporated into workflows where you’d only like to show specific features or regions.
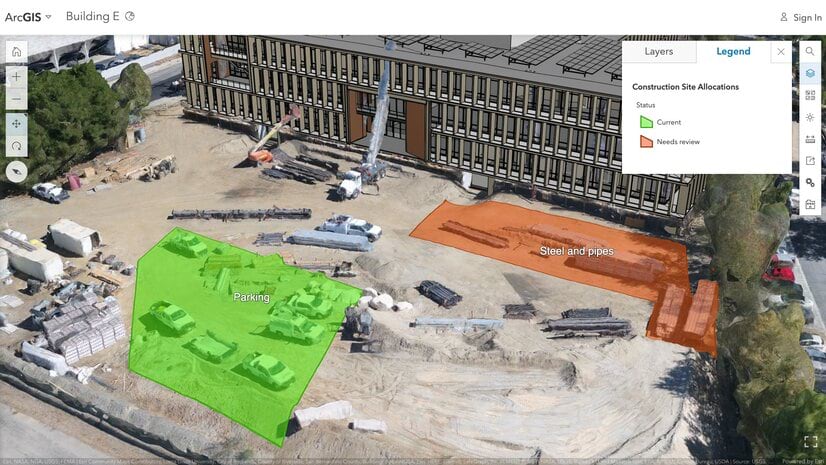
Replace enables you to edit or import a polygon that will flatten integrated mesh, giving you the opportunity to replace that section of the integrated mesh with another feature. This can be especially useful in planning and AEC workflows where building proposals are displayed on a construction site captured as integrated mesh.
Take some time to experiment with integrated mesh modification in ArcGIS Pro to understand how this process affects the results. Be mindful that modification polygons will cleanly cut at the polygon outline, so vertical features like trees and buildings may show the inside or bottom of the integrated mesh.
Publishing from ArcGIS Pro
After mesh has been modified, you can then share the results as a web scene. Modified integrated mesh will only show as modified from this published web scene.
Visualization Improvements
Beautiful scenes help produce a more intuitive and exciting experience for your users, and we have made improvements to more accurately visualize water and shadows.
Reflective Water style
At the ArcGIS Pro 2.5 release, you were able to visualize and animate water with reflections using water styling. Now we’ve added this capability to Scene Viewer and the JS API, and it looks amazing. With this release, Water styling now displays reflections of buildings, terrain, and any other 3D objects with incredible realism. The wave animation is also improved with more controls to configure the size and direction of the waves.
To turn water styling on polygon feature layers, follow these steps:
- Add a polygon feature layer representing the water feature you’d like to style.
- Click the layer or in the context menu (three dots) to the right of the polygon feature layer, click Layer Style.
- Click Layer Style.
- Select “Water” and click Options.
The Water style pane opens:
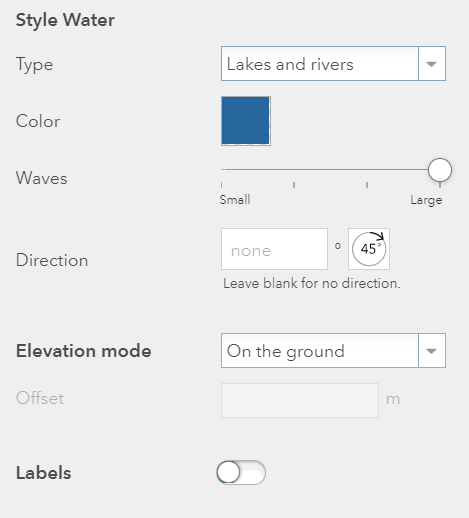
Water can be represented as three types: Lakes and rivers, Oceans and seas, and Pools. Each of these have their own unique wave styling and default color. It’s also possible to change the default color. We’ve added new options for wave size and direction that let you choose the size and direction of the waves. Water is typically ‘On the ground’, but you do have options for changing that elevation mode, say if you want to represent a rooftop pool on a Building Scene Layer and want to place that elevation mode relative to scene.
To display water reflections, change the Scene Viewer settings to “Quality”. Water reflections only display when the scene is set to “Quality”.
Enhanced Shadow Mapping
As our users publish more detailed 3D models like building scene layers, we wanted to provide a more advanced shadow mapping capability to accurately visualize the shadows from with those detailed models. The differences may seem subtle at first, but this new shadow model accentuates building edges and distinguishes features to the eye by providing realistic shadow gradients over 3D objects. You’ll see this enhancement when changing the scene setting to “Quality”.
Additionally, we’ve also added improvements to labelling polygon feature layers and 3D object scene layers. You now have the option to use callouts, which will more clearly label features with attributes in 3D object scene layers by drawing a line from the feature to the label.
We hope you explore these new features with your 3D data and discover new workflows possible with integrated mesh modification. Revisit some of your existing scenes and see how enhanced shadow mapping and reflective water styling bring more depth and realism to your experiences with Scene Viewer!

Article Discussion: