Is your organization considering implementing organization-specific (SAML or OpenID Connect) accounts in ArcGIS Online? Organization-specific accounts allow members to sign in to ArcGIS Online using the same logins they use to access your organization’s internal systems. Advantages of using organization-specific accounts in ArcGIS Online include the following:
- Members can securely authenticate and access multiple organizations using a single sign-on (SSO).
- Members do not need to create and manage additional logins and have fewer password-related frustrations.
- Administrators have less work to manage members across multiple organizations.
- Member productivity can increase with expedited access to the organization’s resources.
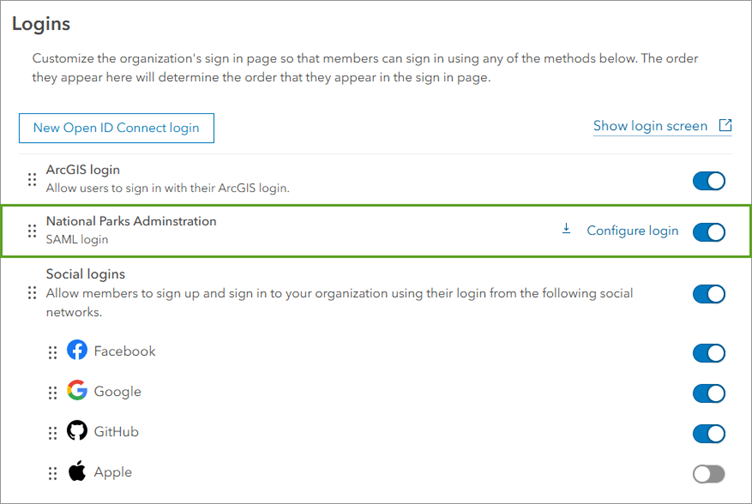
But if you’re an administrator of an established ArcGIS Online organization with ArcGIS accounts assigned to members, you may be wondering how to safely and efficiently transition these accounts and all their associated content and groups to organization-specific accounts. This article will walk you through the process and provide links to more detailed information.
1-Configure organization-specific (SAML or OpenID Connect) logins
The first step involves setting up organization-specific (SAML or OpenID Connect) logins for your organization.
a) Sign in to ArcGIS Online as an administrator or custom role with privileges to configure security settings.
b) If you haven’t done so already, go to Organization > Settings > New member defaults to configure the default settings to assign to your organization members. For example, you can specify a default user type, role, and add-on licenses for the members. If you need to change the properties for individual members, you can do so on the Organization > Members tab after their organization-specific accounts are created in step 2 below.
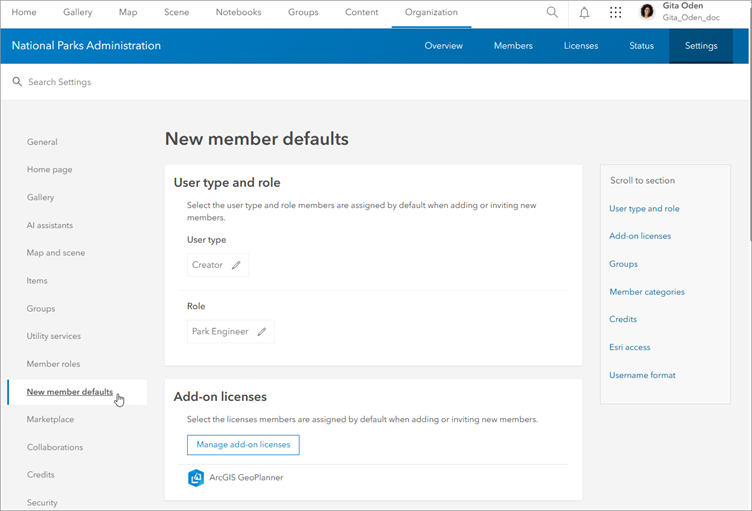
Note: To configure some new member defaults, such as member categories, you must have privileges to manage organization settings in addition to security privileges.
c) Go to Organization > Settings > Security > Logins and follow the steps to set up SAML logins or OpenID Connect logins for your organization. When specifying how members will join your organization, consider choosing the option to join automatically. This allows members to create their SAML or OpenID Connect accounts by signing in using their SAML or OpenID Connect account credentials.
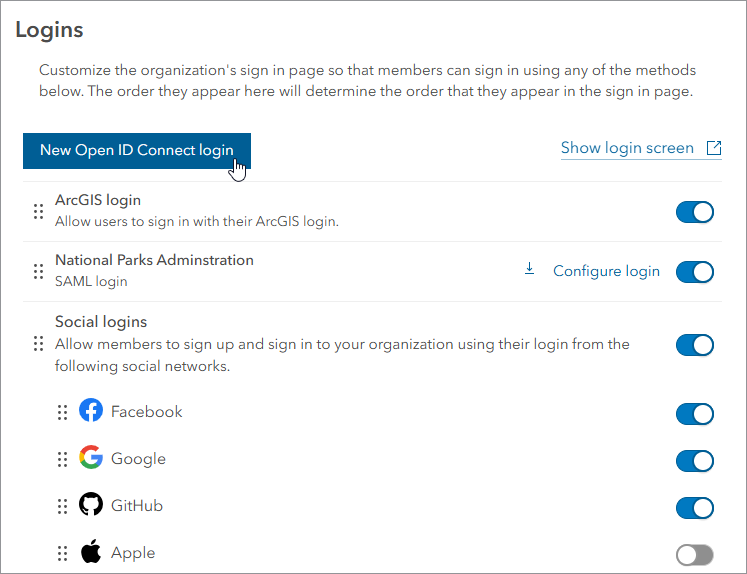
Note: You will need the parameters of your organization’s identity provider (IdP) when configuring the organization-specific logins. The IdP verifies the credentials members will use to sign in to ArcGIS Online. For detailed IdP configuration documentation, explore the ArcGIS/idp GitHub repository.
2- Create member accounts using organization-specific logins
Once you’ve successfully configured SAML or OpenID Connect logins, you can create member accounts using these logins. The two recommended approaches for this step are as follows:
- If, when configuring SAML or OpenID Connect logins as described in step 1, you chose the option to allow members to join automatically, organization members can create their own organization-specific accounts by signing in to ArcGIS Online with their SAML or OpenID Connect login credentials.
- If you would prefer to create all of the member accounts yourself, you can create the accounts in bulk by uploading a .csv or .txt file of member information, including their email address, name, SAML or OpenID Connect ID, user type, and role. This approach is outlined in the following steps.
Create organization-specific accounts in bulk
a) Sign in to ArcGIS Online as an administrator or custom role with privileges to invite members.
Note: If you are setting member properties, such as assigning groups or member categories, you will need additional privileges to manage organization settings.
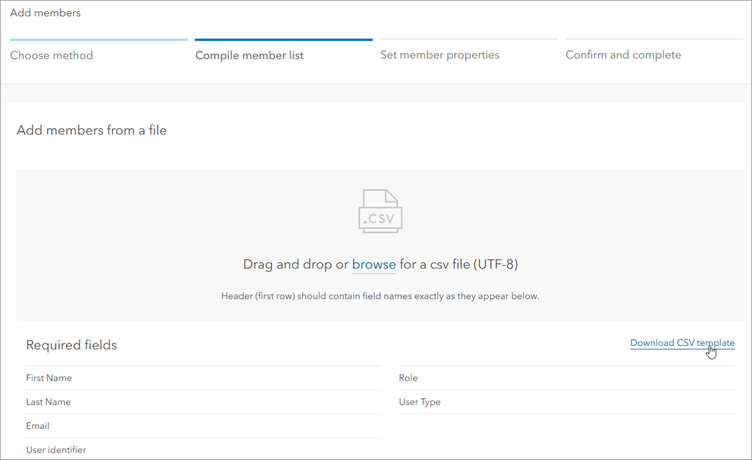
b) Go to Organization > Members > Invite members and follow the steps to add members using their organization-specific IDs without sending invitations. Use a .csv or .txt file of member information to add the members in bulk.
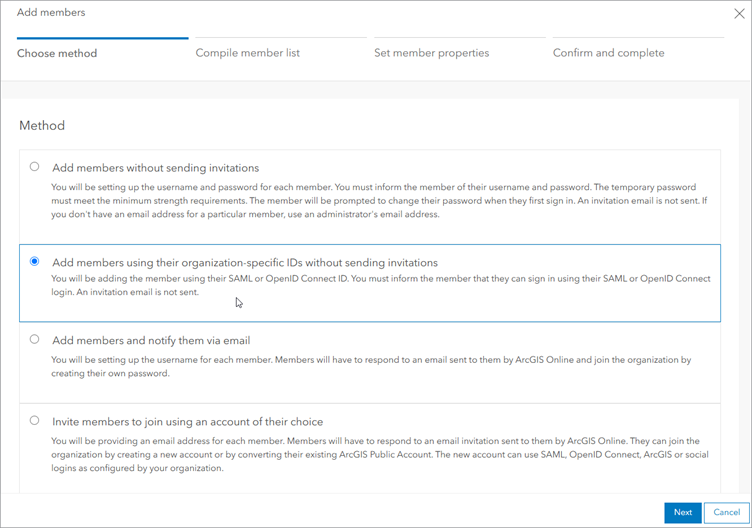
Tip: You can download a CSV template from the Compile member list step of the Add members workflow and use it to create your member information file.
3-Transfer content and groups to the organization-specific accounts and delete the original ArcGIS accounts
You now have the new organization-specific accounts set up for all organization members. In this step of the workflow, you delete the original ArcGIS accounts as they are no longer needed. During the process of deleting each account, you must transfer any groups or content items associated with the original account to the new organization-specific account. Any add-on licenses assigned to the original accounts are automatically revoked and can be reassigned to the new organization-specific accounts in step 4.
Note: If your organization has items or groups that do not need to be transferred—for example, those that are temporary, outdated, or deprecated—you may choose to keep them in the organization for now, mark them as deprecated, and delete them (along with their associated accounts) later, depending on your organization’s needs.
a) Sign in to ArcGIS Online as an administrator or custom role with privileges to delete members.
b) Go to Organization > Members and follow the steps to delete members.
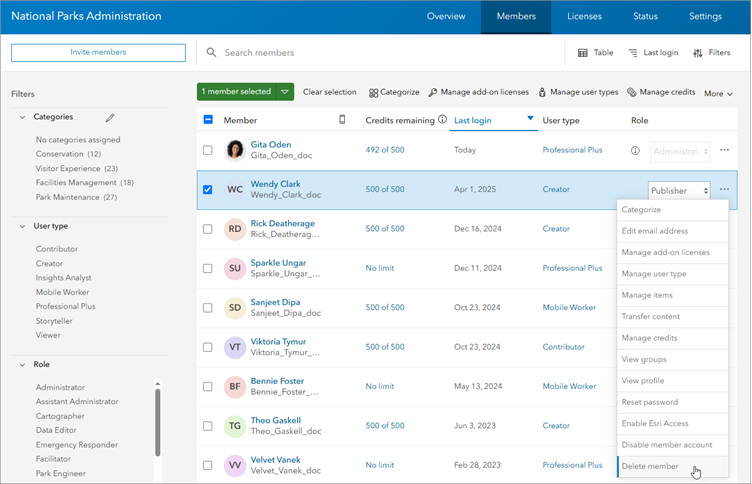
c) If prompted, choose the Transfer content and groups option and select the corresponding organization-specific account as the member to which you are transferring the content and groups.
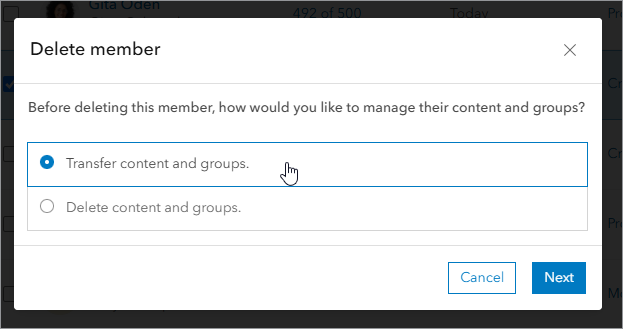
d) Repeat the previous two steps for each ArcGIS account you are deleting.
Tip: You can automate the migration process using ArcGIS API for Python. Download this sample script to get started.
4-Update member settings
Now that the new accounts are set up, you may want to update settings for individual members to choose different options from the new member defaults you configured previously. For example, you can update settings such as user type, role, assigned groups, credit limit, and so on.
a) Sign in to ArcGIS Online as an administrator or custom role with the appropriate privileges. The privileges you need depend on the settings you are updating.
b) Go to Organization > Members.
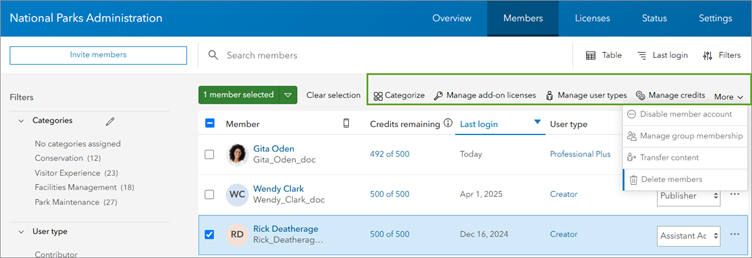
c) Follow the steps to update the settings as needed for individual members or groups of members.
5-Reassign add-on licenses
Once you’ve deleted the original ArcGIS accounts and updated member settings for the new accounts, the add-on licenses that were revoked in step 3 are now available to be reassigned to the new organization-specific accounts as needed.
Note: This may not be necessary if your organization had enough surplus licenses to assign to the new accounts when you configured the new member defaults in step 1.
a) Sign in to ArcGIS Online as an administrator or custom role with privileges to manage licenses.
b) Go to Organization > Members and select up to 100 members from the list.
c) Click Manage add-on licenses and select add-on licenses to assign.
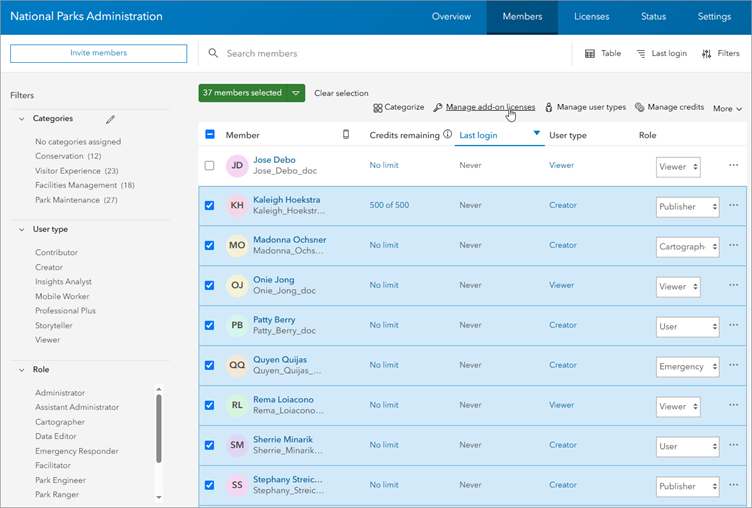
You can only assign add-on licenses that are compatible with all selected members’ user types. If necessary, click the members selected drop-down menu to remove any members with an incompatible user type. For example, ArcGIS Pro add-on licenses are only compatible with the Creator user type, so you can remove members with other assigned user types from the members selected list to proceed with assigning the Pro licenses.
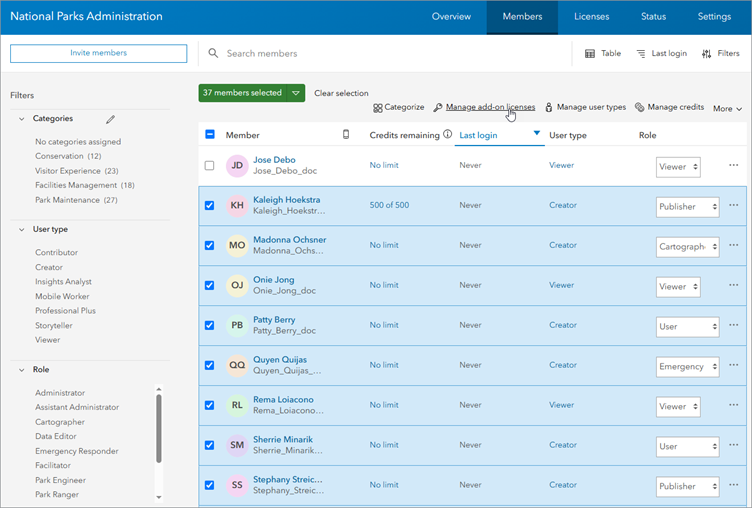
d) Repeat the previous two steps until you have finished assigning add-on licenses.
6-Provide account information to members
Your new organization-specific accounts have been created and are now ready to use. The final step is to notify members, through email or some other mechanism, that they can sign in to the organization with their SAML or OpenID Connect logins.
Learn more
To learn more about configuring organization-specific accounts and managing members in your organization, explore the following resources:
Configure security settings (help documentation)
Set up SAML logins (help documentation)
Set up OpenID Connect logins (help documentation)
ArcGIS/idp GitHub repository (IdP documentation)
Invite and add members (help documentation)
Configure new member defaults (help documentation)
Time-saving tips for managing members (blog article)


Commenting is not enabled for this article.