As a GIS professional, you’re no stranger to a little data editing and maintenance. But what if there was a way to reduce the time spent inputting data and tailor your editing experience in Map Viewer? Forms allow you to do both by setting up your own custom data entry form for geographic features and their attributes. If you’re thinking “Forms? I thought that was for ArcGIS Field Maps!” you’ll be happy to hear that Forms are part of the ArcGIS ecosystem – meaning they work in ArcGIS Field Maps, Survey123, web apps, Map Viewer, and any other app that uses the JavaScript 4x editor widget. This blog will walk through
Form basics
Before digging into the different components of Forms, you’ll need an editable dataset and a web map. If you don’t have a map ready to go, follow along with a sample map here of Wildlife Observations in Tongass National Forest with data shared by the NRIS Wildlife and Aquatic Surveys.
Getting started
With an editable layer selected in the layer pane first click the Configure editing button, then the Forms  button on the Settings (light) toolbar. This will open the form builder, allowing you to configure and customize a Form without leaving Map Viewer. The Form builder is extremely similar to Field Maps, so after learning the basics you can switch between any of the applications with ease.

Field selection
To start building a form, drag the desired attribute fields into the center box. These are the fields that will display when you are creating, updating, or deleting a feature with the form. Alternatively, if you want to include previously configured pop-ups click the Convert Pop-ups button for an instant configuration of the form.

Field configuration
Once you’ve determined which fields will be included in the form, you can begin to fine-tune each individual field. Start by customizing the display name, or title, of form fields in the Properties panel on the right. While short descriptive titles are often appropriate, you can also use display names to ask guiding questions for the data editor like “How many animals did you see?”
You can provide further context for the user by adding descriptions and placeholder text in the form. For example, there is a Total Animals Observed field in the Wildlife Observations sample map. Although the display name gives a good indication of what should be entered here, you can add a description to clarify, such as “Enter the total amount of observed animals.” Additionally, you can include hint text like “1, 2, 3, etc.” so the data editor knows to enter the value as a number, not text. These subtle guides are especially useful for editors who may be unfamiliar with the dataset.

Required fields
While descriptions and placeholders are helpful, you may want to further minimize data entry blunders by enforcing required fields. Checking the Required box prevents users from submitting a feature when that field is empty. Additionally, individual fields within the form can be set to read-only which will display a predetermined value and block any attempted changes from the editor.

Input Types
Further customize the form by using various input types, which determine how options appear for data entry. Selecting an appropriate input type for fields can both cut down on QA/QC time and create a more visually pleasing form. For example, the Common Name field has a long list of values (domains). Rather than risk a data editor incorrectly spelling or fabricating a name, you can apply the Combo box input type. Now the data editor can scroll through the pre-populated list and select the correct value. Available input types are listed in the chart below.
| Input Type |
Display in Form |
| Single / Multiline (text fields) | 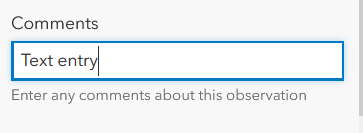 |
| Radio buttons | 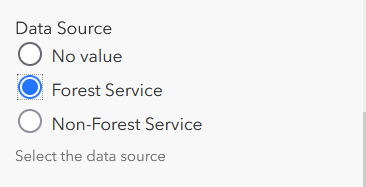 |
| Combo box | 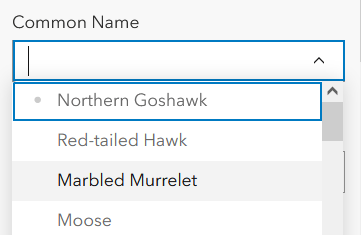 |
| Double / Integer (number fields) |  |
| Date / Date & Time (date fields) | 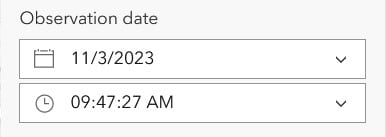 |
| Timestamp offset (Timestamp offset fields) |  |
| Switch |  |
| Barcode scanner |  |
Note: Input types are dependent on what field type you are working with. For instance you can’t apply a radio button input for a date field. See the Field Maps documentation for more guidelines on this.
Grouping
To enhance the layout of a form, organize the fields into collapsible sections with grouping. To group your form fields, drag the Group element from the Properties panel into the draft, and migrate attribute fields into the group as needed. In addition to logically categorizing fields, groups can make a much cleaner and more efficient form by collapsing sections.
Pro tip: Skip down to the Conditional visibility section to learn how to make groups even more efficient.

Advanced form tips & tricks
By following the suggestions above, you will end up with an intuitive and descriptive form. If you really want to optimize the editing process, this section will touch on some of the more advanced capabilities available in Forms–but don’t be intimidated! Even beginners can incorporate these features into their own forms.
Calculated expressions
You may already be familiar with Arcade, an expression language that can be used to manipulate or calculate data across the ArcGIS ecosystem. Forms are no exception, as users can create calculated expressions within the form editor. With a field selected, scroll to the bottom of the Properties panel on the right and expand the Calculated Expressions section. Click the Add Expression button to launch the Arcade editor and begin writing the expression.
The following example shows how calculated expressions work in Forms. In the Wildlife Observations form, there is a Time of Day field that prompts the editor to enter the general time of animal observation (morning, afternoon, or evening). Rather than having the data collector manually enter the value in each record, you can write a calculated expression to automatically enter the correct value. To do this, follow the steps below.
- Click Add Expression with the Time of Day field selected.
- Expand the Calculated Expressions section in the Properties panel, then click Add Expression.
- Enter the expression below that evaluates the time of observation from the Observation Date (survey_obs) field.
- Click OK to save. Your form will now automatically apply the correct value to the form.

This is just one example of how calculated expressions can come to life in a form and minimize time spent entering data. To explore more complex examples, check out this blog on Common calculated expressions for ArcGIS Field Maps.
Conditional visibility
Below Calculated Expressions in the Properties panel is Conditional Visibility. Conditional visibility allows you to build expressions based on a true or false evaluation in your data. The form will then will dynamically show or hide the fields based on the expression results. If you have a dataset with lots of attribute fields that are dependent on other inputs, conditional visibility is an easy way to filter out irrelevant fields.
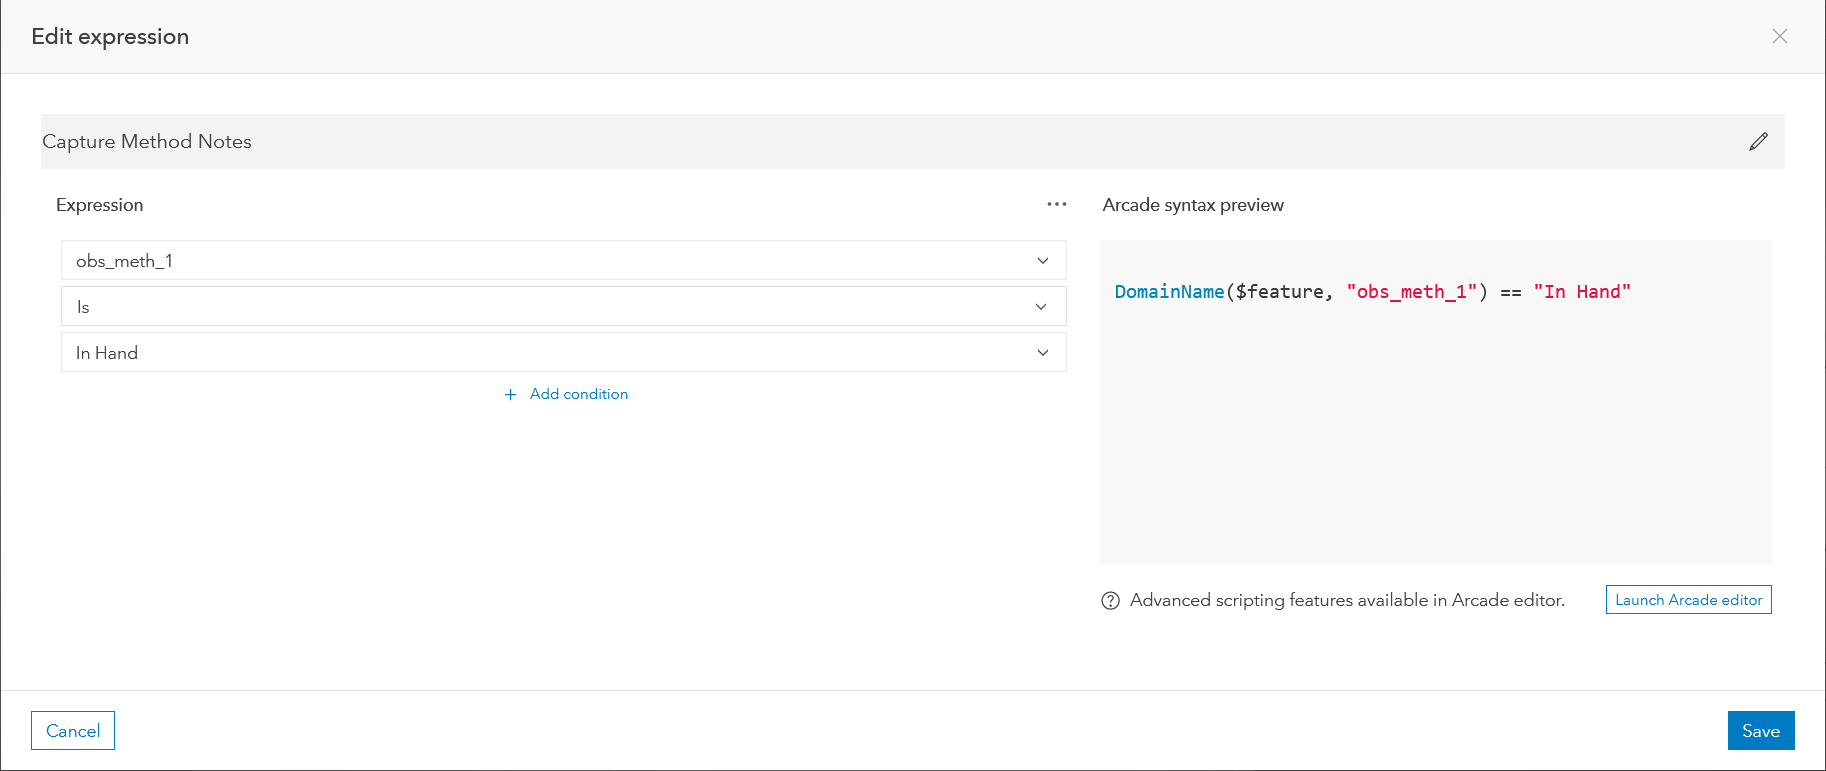
In the Wildlife Observations example there is an Observation Method field that tracks how the animal was observed. Some values may need further clarification, such as the “In Hand” method. To provide more context on how the animal was captured, an additional form field titled In Hand Capture Method Notes should appear when the editor has selected “In Hand” for the Observation Method. Follow the instructions below to dynamically hide fields.
- Select the In Hand Capture Method Notes form field and expand Conditional Visibility in the Properties panel. This will launch the expression builder.
- Using the drop-down menus, add the expression pictured below: obs_meth_1 is In Hand.
- Click Save to save and exit. Your form will now hide this field until a user enters “In Hand” for the Observation Method.
Note: To create a more advanced expression, launch the Arcade editor in the lower right corner to start scripting.

What’s new in forms
FeatureSet Support
As of November 2022 in ArcGIS Online, users can leverage Arcade FeatureSets in calculated expressions. What does this mean for Forms? Using FeatureSets, you can now pull data from other layers in your web-map and automatically calculate fields in your form. For deeper dive into Forms & FeatureSets, read this article on using Arcade FeatureSet expressions in Forms.
In addition to support FeatureSets in calculated expressions, we are excited to now support FeatureSets in conditional visibility, editable, and required expressions. This means that fields are able to have dependent visibility based on other layers in your web-map.
Related Records Editing
The team has made many exciting updates to related records editing. As of October 2023, users can view, create, and update related records in ArcGIS Online that have been published from ArcGIS Pro. To learn more about these capabilities, explore the blogs linked below:
- Viewing Related Records in Map Viewer
- Introducing Related Record Editing in Map Viewer
- Now Featuring: Feature-to-Feature editing in Map Viewer
Forming forms
As you’ve seen throughout this blog, Forms are an extremely powerful tool to streamline editing within Map Viewer. Taking the time to properly configure forms will make the data editing process more efficient and reduce the need for data review afterwards. Now, go forth and let Forms do the work for you!

Great feature Rebekah. Can you please let me know if this is available within ArcGIS Enterprise (and what version), or is it just AGOL? Also interested in the ability to edit related records in Enterprise via Smart Forms, as well as records with a many to many relationship as I don’t believe this functionality is provided in the editing tools within WAB or Exp Builder. Kind regards
Hi there Chris, Smart Forms are currently available in Enterprise! As for related records editing you many find this article helpful: https://www.esri.com/arcgis-blog/products/arcgis-online/mapping/introducing-related-record-editing-in-map-viewer/ support for enterprise services is coming, and we will be supporting other relationship types like many-to-many in future updates
thanks for your reply and useful links Rebekah. Can you confirm that when you say “currently available”, you mean Enterprise 11.1 and later? Kind regards
Initial support for Smart Forms was added into Enterprise 11.0, but other more recent feature updates may be specific to 11.1 (or still in the works)