You asked, we delivered! As of October 2023, you can edit feature-to-feature relationships in ArcGIS Online and Enterprise 11.3. Although only feature-to-table relationships were previously supported, you can now view, create, and edit related records for two or more directly related features. In this blog, we will cover
- Feature-to-feature relationships
- How to get started
- Creating and viewing related features
- Best practices
To take a deeper dive into related records be sure to check out our original blog, Introducing Related Record Editing in Map Viewer.
Feature-to-feature relationships
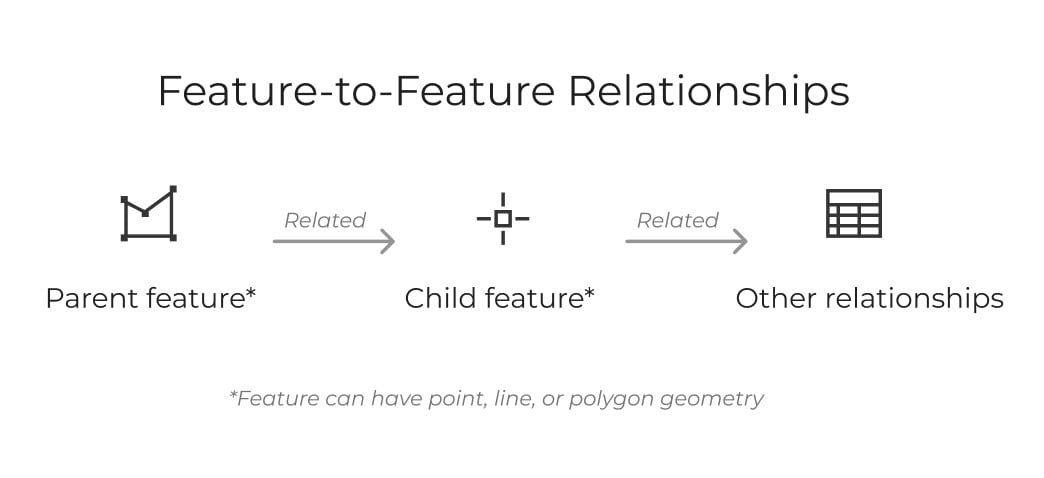
Similar to feature-to-table relationships, feature-to-feature relationships link a parent to a child through a common field. For example, say you have a map containing all of the park boundaries and tree points within the city of Boulder, Colorado. In order to easily track what trees belong to which park, a relationship from the parks (parent feature) to the trees (children features) has been established using the Global ID field. This direct relationship between two features comprises a feature-to-feature relationship.
How to get started
Feature layer with relationships
To edit a feature-to-feature relationship in Map Viewer, you must have a feature layer containing two or more related features.* You can author relationships in ArcGIS Pro and publish to ArcGIS Online.
*Note: Currently only 1:1 or 1:M cardinality is supported for feature-to-table and feature-to-feature relationships in ArcGIS Online.
Configuring the form
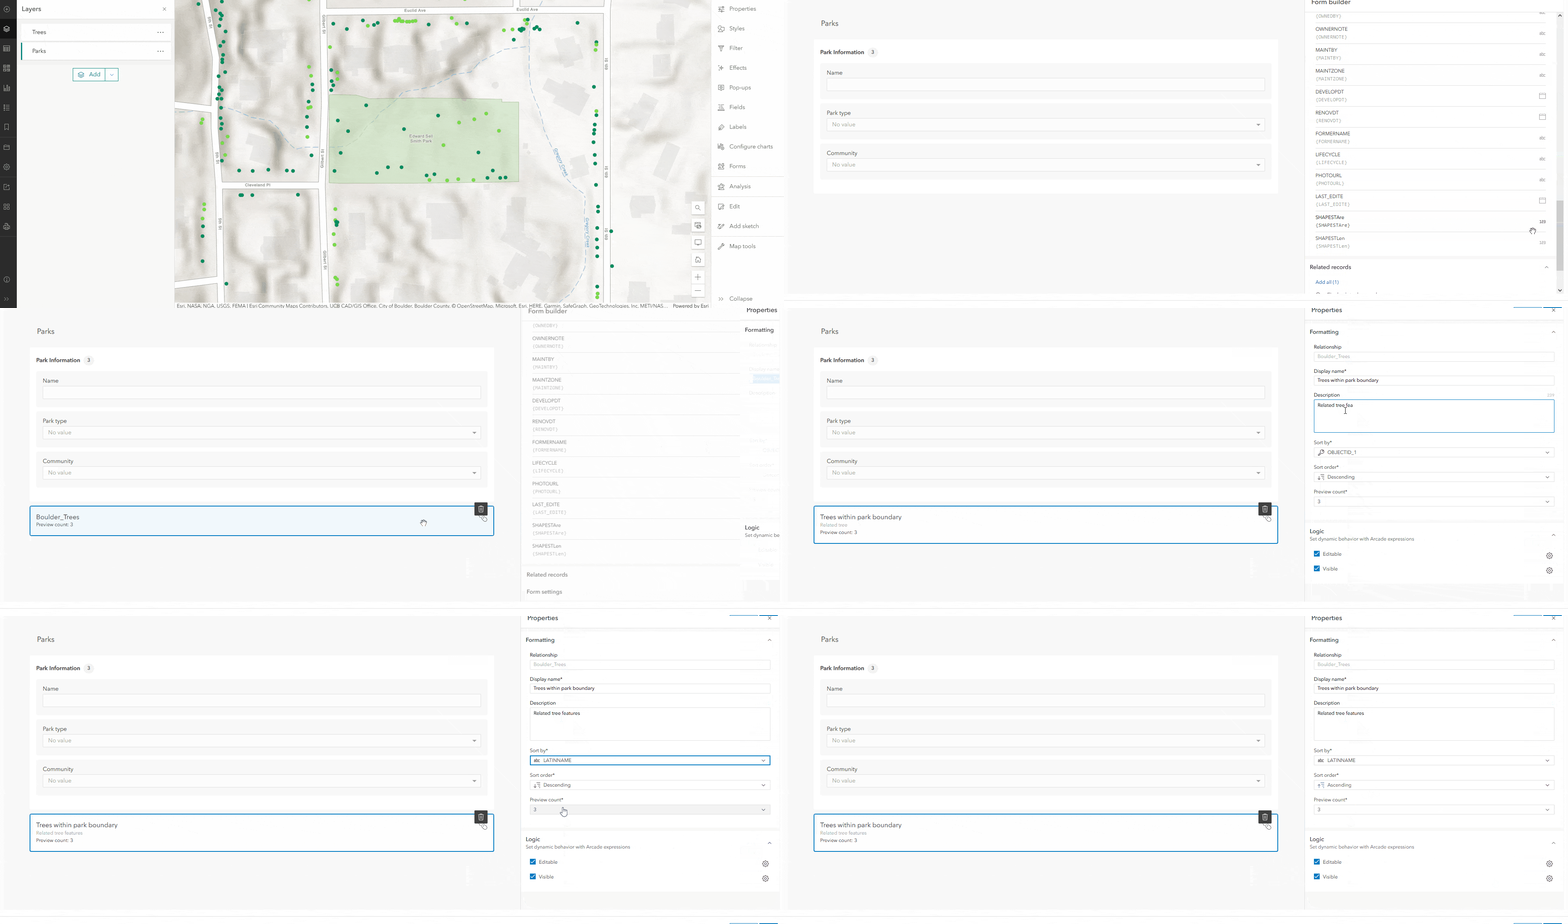
Prior to editing or viewing related records, you must configure the form on the selected layer. The form builder will automatically detect if there is a feature-to-feature relationship on the selected layer and list it under the related records element section. To add the element, simply drag and drop into the form or click “Add all”.
Just like any other form element, you can customize the settings for the related record element. Enter the title, add a description, or change the sort by field and sort order. Once you are satisfied with your settings, click Ok to save and exit.*
*Note: If your dataset contains multiple relationships, make sure you add the related record element and configure the form for each layer.
Creating and viewing related features
Creating related features
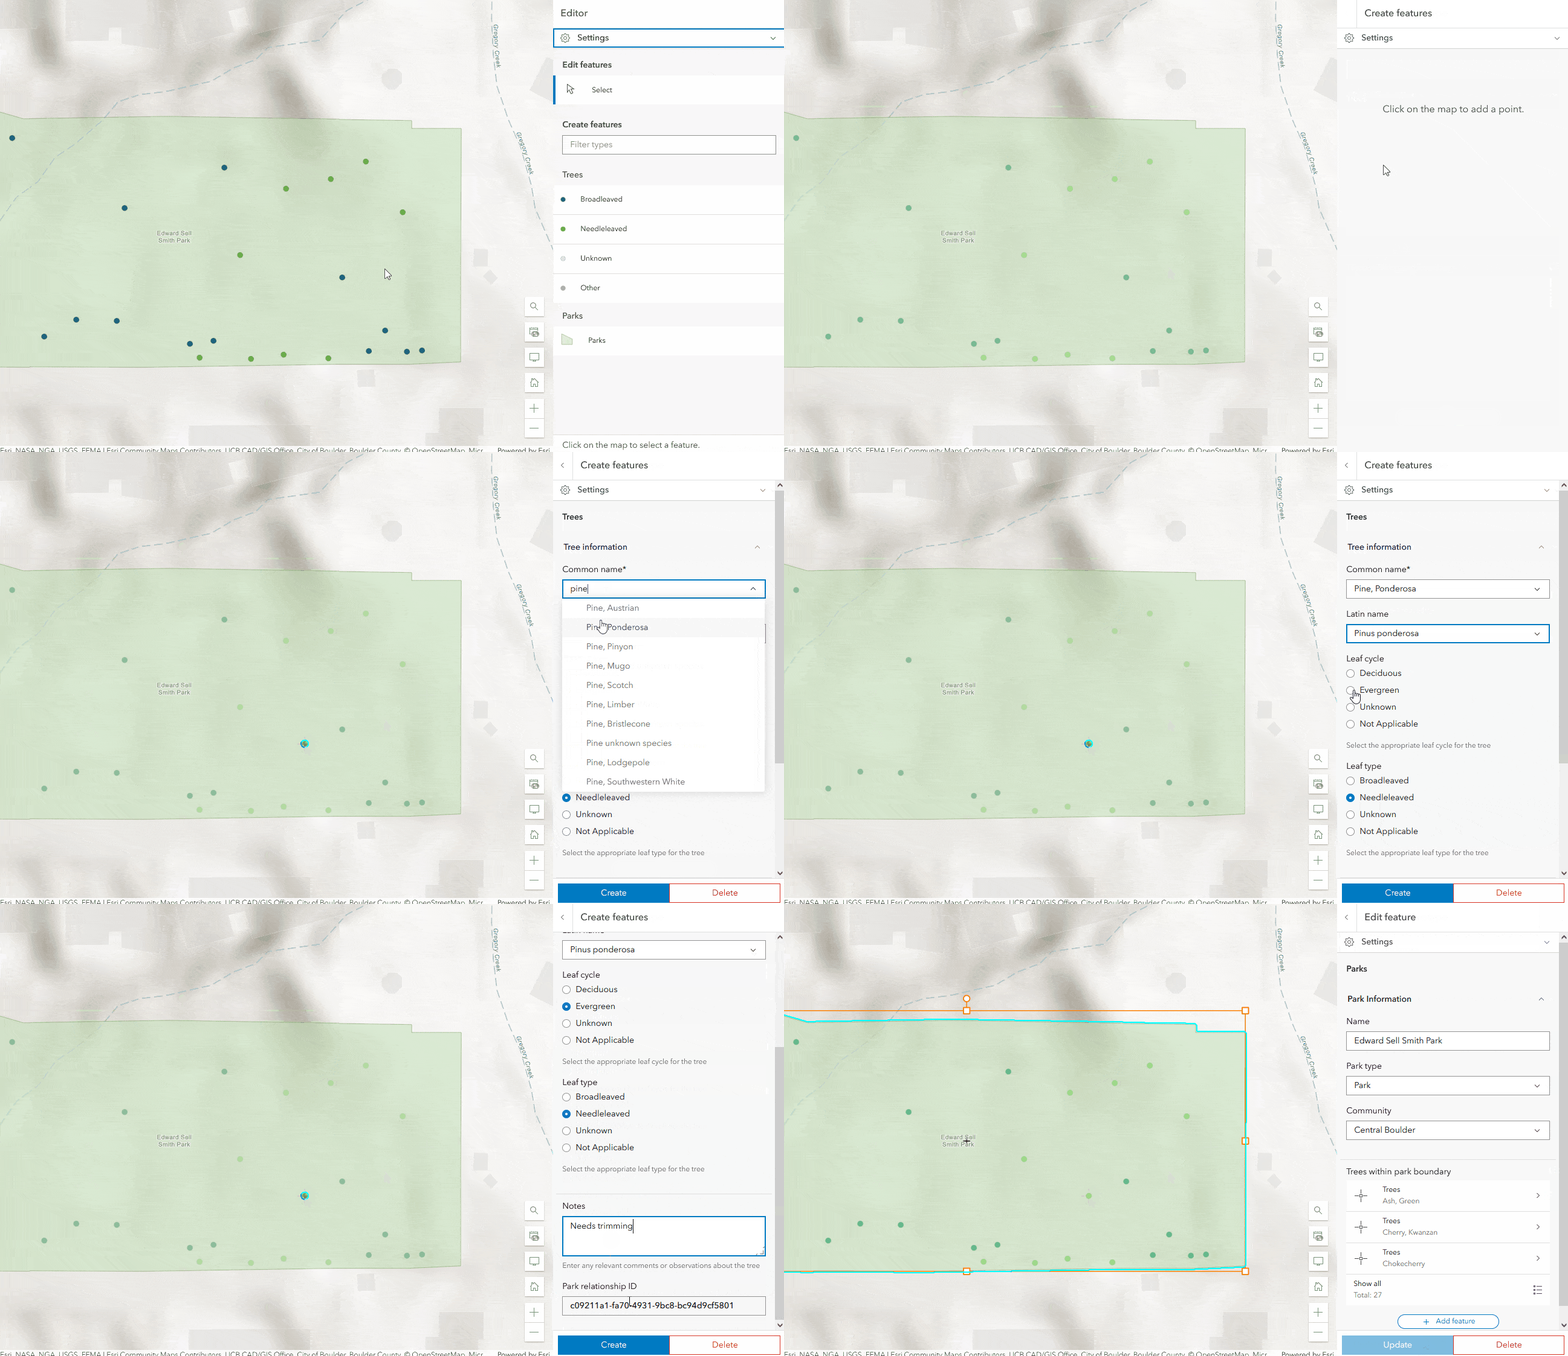
Before you can create a related feature, the parent feature must be created first. For example, a user must have a park boundary feature before they are able to add a tree to the relationship. Follow the steps below to add related features:
- Select the desired parent feature to display its form and attributes.
- Click the “Add feature” button to start creating a new child feature for the related layer.
- Add the new feature on the map.
- Add any relevant attribute values.
- Click “Create” to finish creating the new feature.
Navigating through related features
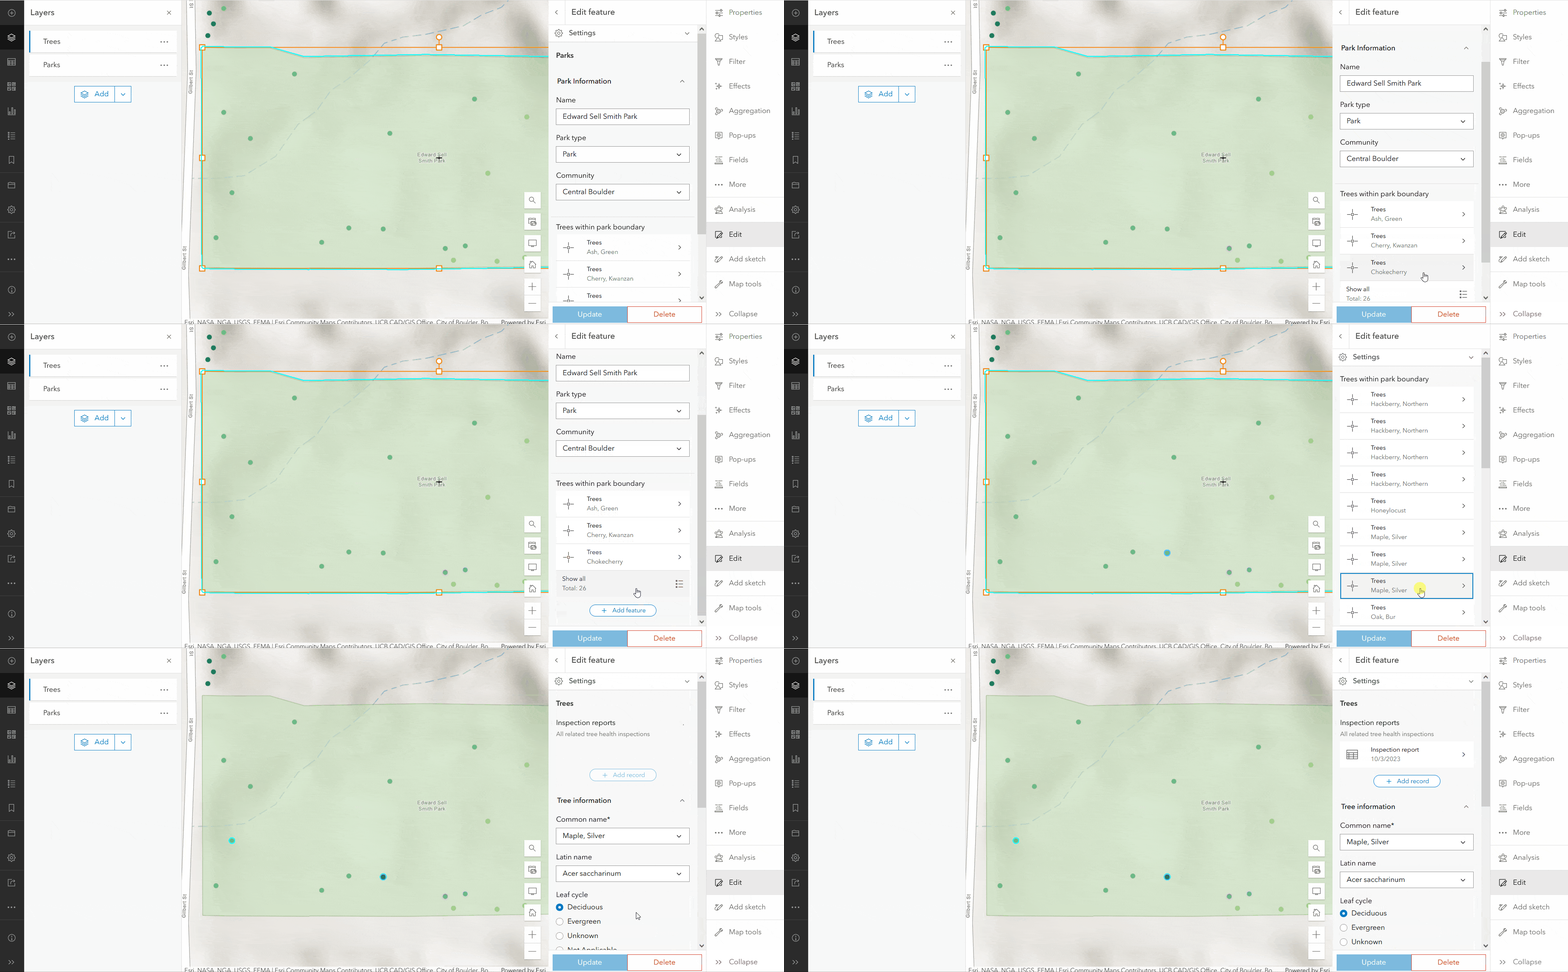
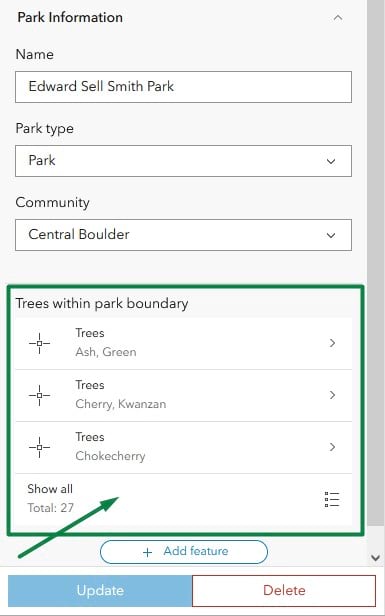
If you have edited or viewed related records in Map Viewer before, you’ll be familiar with the experience of navigating through related features. When the parent feature is selected you will see all related features underneath the element you added to the form. Hovering over each feature in the editor panel will highlight the corresponding feature on the map. To view or edit a specific feature, click on the desired record.
Best practices
To optimize feature-to-feature editing in Map Viewer, take a look at these best practices listed below:

Commenting is not enabled for this article.