Recently I reviewed my original post Tips and Tricks for Working with Legends in ArcGIS Pro and I realized some cool tricks were missing, and some useful new legend features have been added. So here are 10 more tips and tricks for working with legends.
Note: This article uses terms such as legend items and fitting strategies that were explained in the original tips and tricks. It may be helpful to review that post before reading this one.
1. Use the manual columns fitting strategy to decide which item belongs in which column
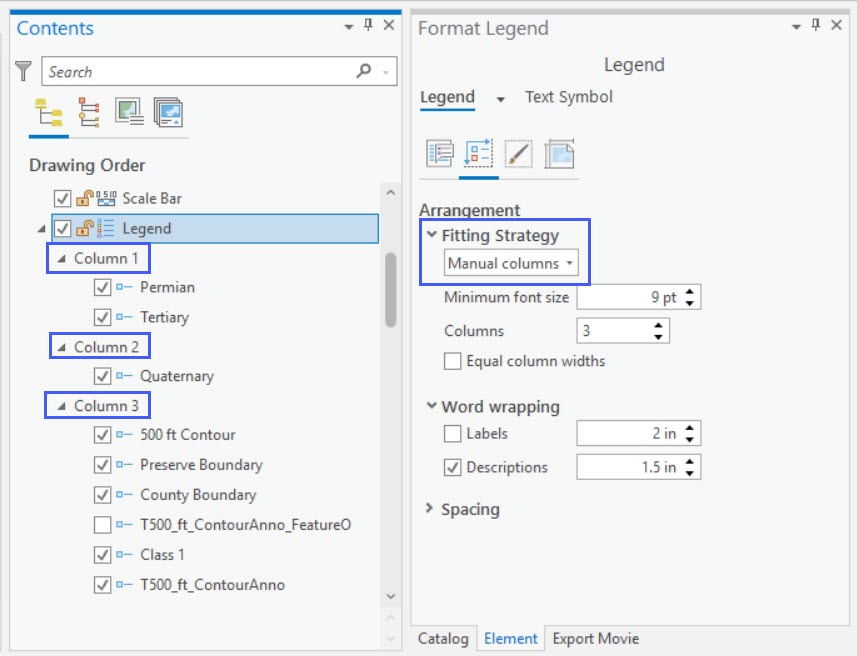
Introduced in ArcGIS Pro 2.7 the manual columns fitting strategy allows you to set the number of columns in your legend and decide which items belong in which columns by dragging and dropping them in the Contents Pane. This is the only fitting strategy that shows the column breaks in the Contents Pane.
2. Keep legend items in a single column
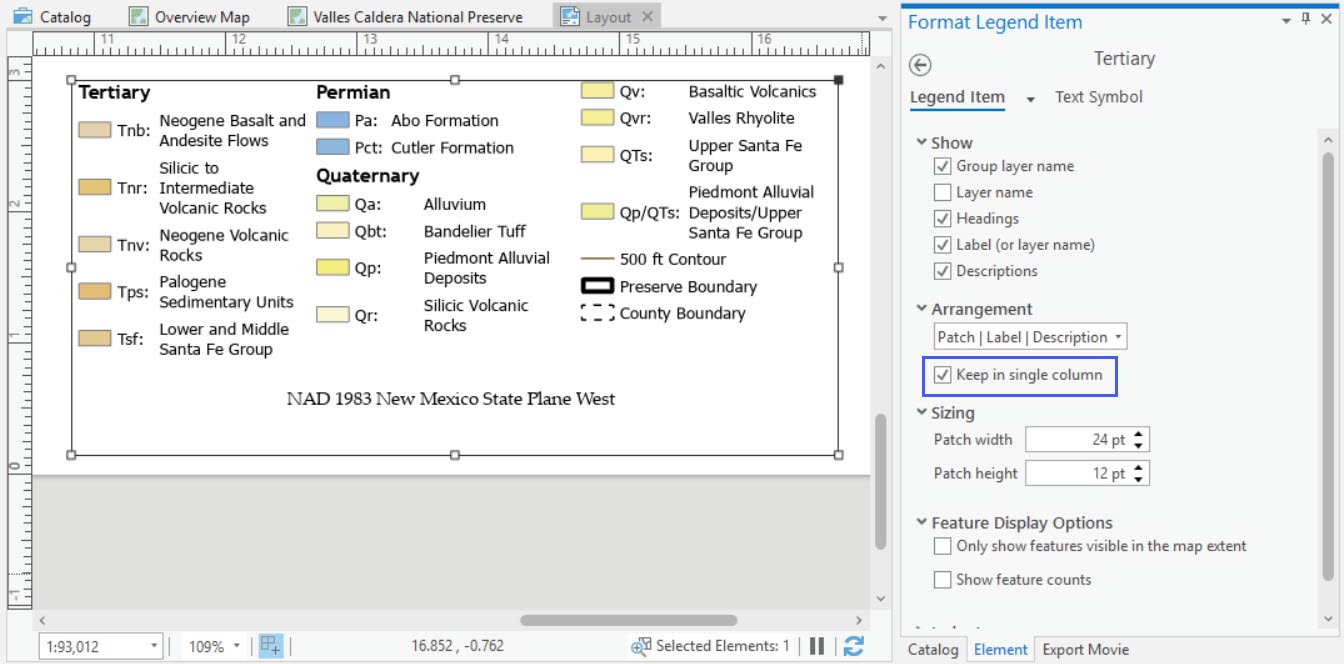
Legend items for layers with unique values symbology (and some other symbology types) can contain many symbols, each on their own line. You can choose to allow these lines to flow into multiple columns, or to keep all the lines in the same column. And you can choose different behavior for different items.
3. Minimum font size for legend fitting strategies
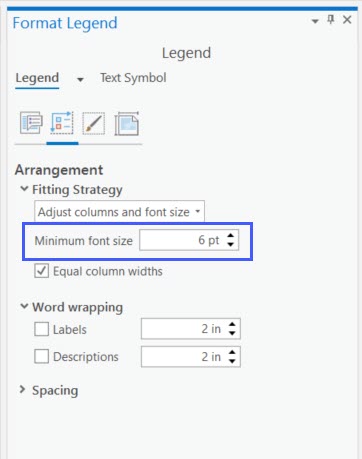
Legend fitting strategies are pretty awesome, but sometimes there is a catch. Certain strategies like adjust font size, manual columns, and adjust columns and font size shrink the text so everything fits. This can make the legend hard to read. The solution? Set the minimum font size for the fitting strategy. The legend won’t shrink the text below that size. The default minimum font size is 6, but you may want to make it larger for posters or larger maps.
4. Word wrapping for labels and descriptions
When you have a legend with a lot of text it can get really wide. To fix this try word wrapping for labels and descriptions. You can set the maximum width for the label and description. If the text is longer than that width, it will automatically flow to a new line. This makes your legend text more compact, and can help align the text better. To set word wrapping, right-click on the legend and choose Properties to open the Element pane. Go to the Arrangement tab and check word wrapping for labels, descriptions, or both and adjust the width as desired.
Wait… what is the difference between labels and descriptions?
Labels are the name of the item in the legend. There is a symbol and then a label describing it. All legend items have labels of some kind. Descriptions are additional text you can add for some symbology types. For example, unique values symbology supports descriptions. Not all legends have descriptions.

5. Quickly change the font for the entire legend
There are so many places you can adjust the text in your legend. Labels, descriptions, title, headings they can all have different fonts and colors. Which can be a lot of fun! Sometimes though, you just need to quickly update all the text in your layout. In that case, the easiest way to do this is by adjust the font, font style, or font color on the ribbon. You can even make all the text bigger or smaller while preserving the differences in sizes by using the increase or decrease font size buttons. Changing one of these from the ribbon applies it to all the text in your legend, saving you the trouble of selecting each text item and adjusting it.

6. Make legend items dynamic
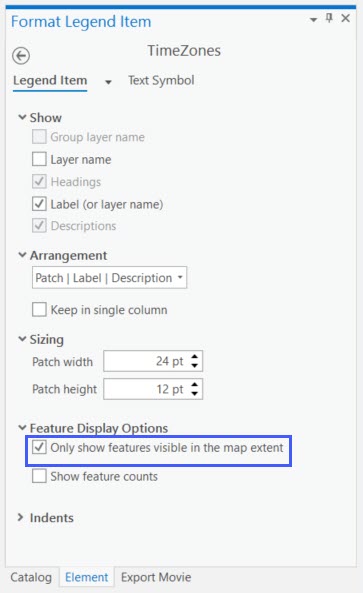
Wouldn’t it be cool if your legend only showed symbols that were visible in your map frame? When layers or symbols exist in your map but can’t be seen on the layout you may not want to show them in your legend. To avoid showing these symbols, you can make legend items dynamic by choosing to only show features visible in the map extent. Dynamic legend items automatically update when changes are made affecting that visibility so you don’t have to keep track of what is and isn’t visible. And, because the dynamic legend option is set on the legend item, you can have some items that are dynamic and some that aren’t. So if you always want to show a boundary line in your legend, but only want to include land use types that are visible, you can make that happen.
Note: Dynamic legends are powerful in a map series because each page shows something different.
7. Adjust legend patch sizes
Legends automatically take the patch (symbol) size from the symbology in the map. However, sometimes symbol sizes that work well in the map can be too large or too small for the legend. No worries though, you can adjust the patch size in the legend itself to get the look you want.
To do this, right click the legend item and choose Properties to open the Element pane. Under sizing change the patch width and height to get the size you want. For point symbols you need to check Scale to fit patch size to let the software know you are okay with overriding the set symbol size in the legend.
8. Adjust settings for all legend items at once
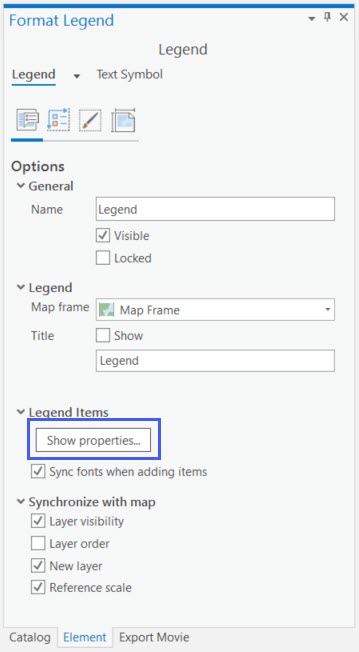
There are so many ways to customize individual legend item settings. But what if you want to adjust a setting for all the legend items? Maybe you want all the items to be dynamic or have a set patch size or stay in a single column. Instead of selecting each legend item and adjusting the settings, you can use a shortcut to set it for all the items at once. To do this, right-click on the legend and choose Properties to open the Element pane. On the Options tab click Show properties under the Legend Items heading to get the properties for all the legend items.
Note: You can also manually select all the legend items at once and open the Element pane. If you want….
9. Save a default legend item
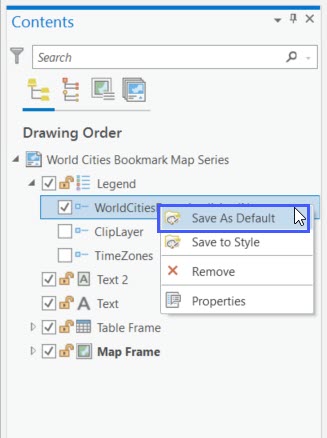
Adjusting all the legend item properties at once is great, but what about new items that get added later? You still have to manually change the settings for them don’t you? Well you could… or you could use the Save a default legend item button to automatically apply those settings to any new items.
To do this select a legend item using the settings you want for all new legend items (a certain font color, to always be dynamic, to have the text display and then the patch, etc) then right-click that item and choose Save As Default. All new items added to the legend will be given those settings.
10. Save a legend or legend item to a style to reuse again and again.
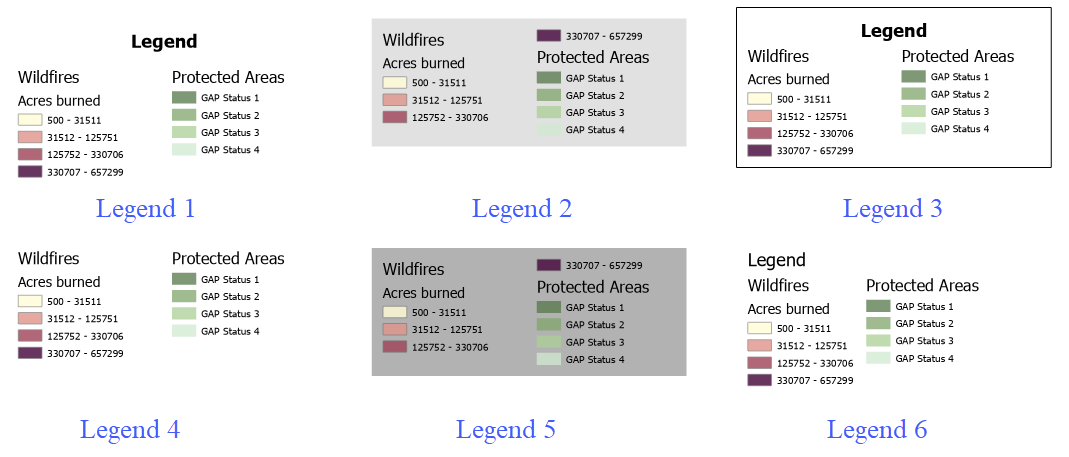
Creating legends is hard, and you shouldn’t have to remember and reapply the same settings every time you need to create a new legend. That’s why ArcGIS Pro 2.9 added the ability to save a legend (and legend items!) to a style. Now, once you’ve built your perfect legend you can right-click on it and choose Save to Style. The newly created legend style will then be available in the legend dropdown gallery to use when inserting a new legend! This also works for legend items, although to use a legend item style, you have to first select an item in the legend and then change the style via the Format ribbon.
And… if you don’t want to create your own style there are 6 default styles to choose from.
Note 1: A legend style remembers the properties of the legend, not the items in a legend. Items are unique to the map associated with the legend.
Note 2: When you save a legend style the default legend item style is included.

Article Discussion: