Dealing with image service retirement
Sometimes services in ArcGIS Living Atlas of the World get retired. This can happen as datasets get old, are no longer updated by the data owner, or receive very little engagement from the community. Users who rely on these image services for their work might be frustrated when those services retire. Validating and implementing changes in information products still takes time even with suggested replacements from Living Atlas.
Service retirement is unavoidable. So, what can be done when an image service that you rely on is retired? There’s more than one answer to that question. But in this blog, we’ll show you one way of dealing with this situation and that’s to create raster data from vector data.
Twelve image services from the United States Geological Survey’s (USGS) Gap Analysis Project (GAP) are retiring in December 2026. In this blog, we describe a workflow to download species range data in vector format from the USGS and transform it into raster data. This allows you to create your own replacement version of these species datasets.
Creating a raster dataset from vector features is a common GIS workflow. This demonstration specifically covers creating species range rasters, but it can be easily modified to transform most any vector data.
Transform vector data to raster data
Converting vector data to raster data is common. The USGS already publishes the entire GAP species range and distribution data for download. This blog demonstrates how you can download and transform these vector datasets into rasters in preparation for the services retiring from Living Atlas.
You can find the USGS GAP species range and habitat source data at the GAP website data page here [https://www.usgs.gov/programs/gap-analysis-project/data]. We will demonstrate the workflow using the USA Bighorn Sheep range data and a 30-meter land cover raster dataset from Living Atlas as a template. However, this workflow is easily adapted for other vector features and raster sizes.
Step #1: Download and extract the vector data
- Download the “Range Data Shapefile and CSV table” from here [https://www.sciencebase.gov/catalog/item/59f5ec03e4b063d5d307e35b].
- Unzip the download to a convenient location on your computer. The output folder should be named “mBISHx_CONUS_Range_2001v1”.
- This folder includes the shapefile of the species range map.
Step #2: Add the shapefile to a map in Pro to explore its attributes
- Open an ArcGIS Pro project, add the range shapefile to a map.
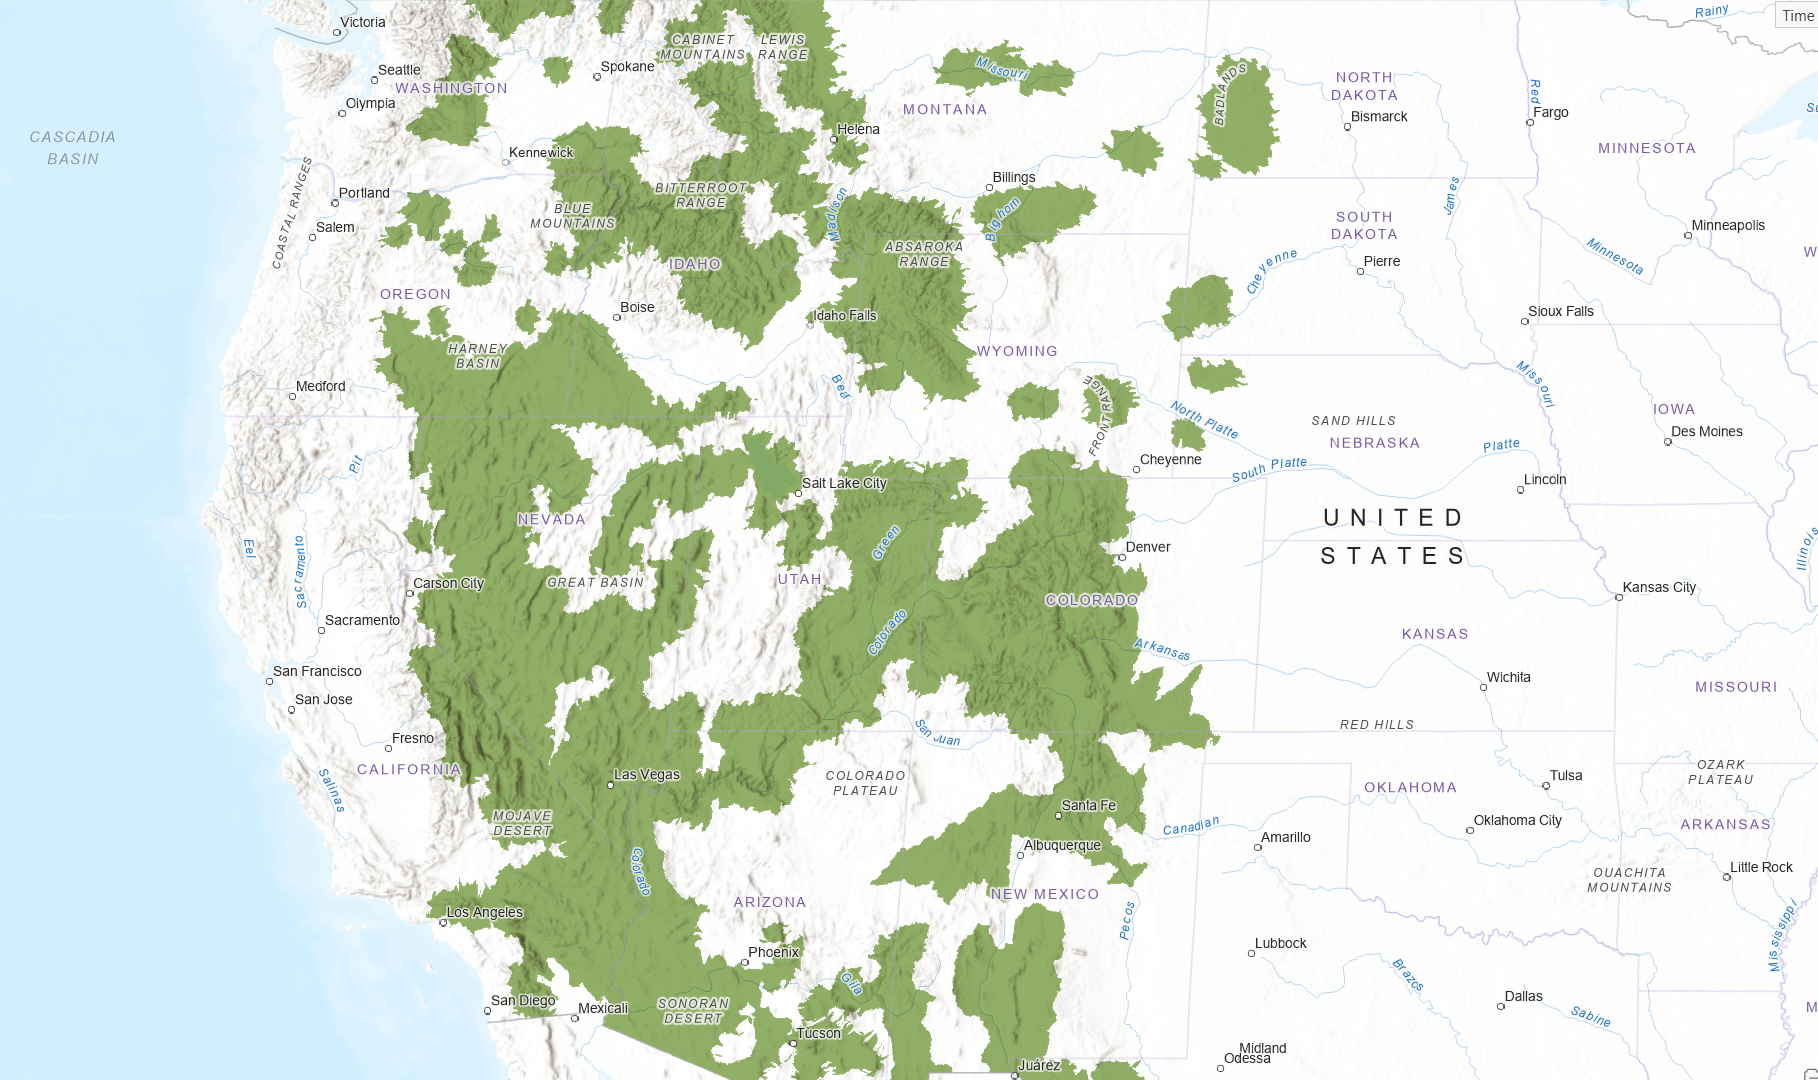
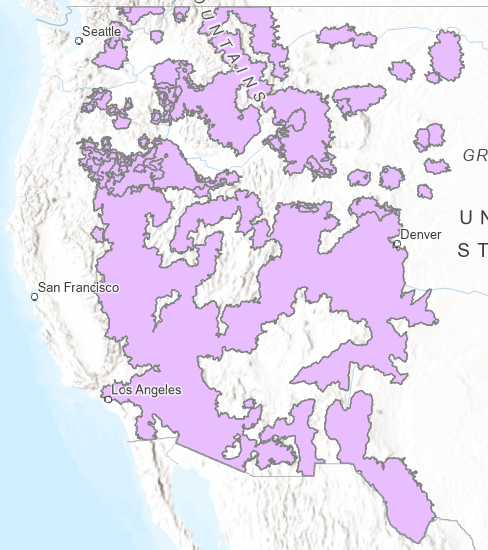
- The range features should look something like this, and you should see “mBISHx_CONUS_2001v1” in Contents.
- Open the attribute table, explore the available fields for use when rasterizing. We will use the ‘FID’ field as the “Field” parameter when we run the geoprocessing tool later.
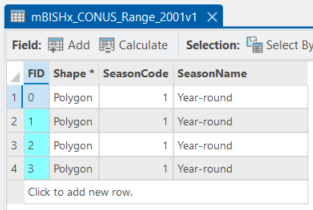
Note: Our ultimate goal is to create a raster with a value of ‘1’ in all areas of the species range and ‘NoData’ everywhere else. We see from the attribute table that every polygon feature shares the same ‘SeasonCode’ value or ‘1’. Because of this it would have been easier to use the ‘SeasonCode’ as the “Field” parameter in our tool. However, we will use the ‘FID’ field to ensure this workflow demonstration is more broadly applicable. This adds one additional step to the workflow.
Step #3: Add a template raster from ArcGIS Living Atlas
- Using the Add Data dialog, search for “USA NLCD Land Cover” in Living Atlas and add it to your map. Turn off visibility of this layer in Contents since it will only be used as a template for our output raster properties.
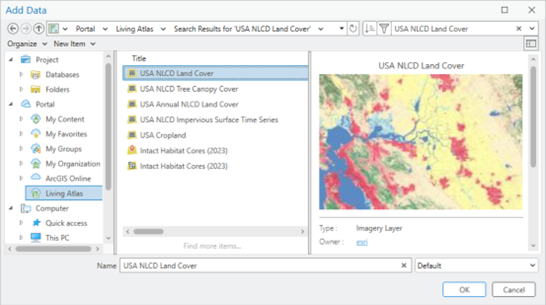
- The USA NLCD Land Cover dataset has a 30-meter pixel size and is in the North American Albers Equal Area Conic projection. The output from our geoprocessing tool will inherit these same properties.
Step #4: Run ‘Feature to Raster’ geoprocessing tool
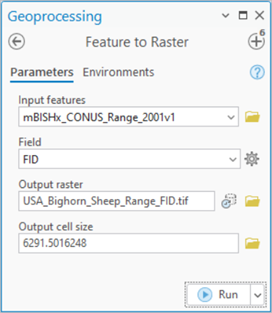
- Search for “Feature to Raster” in the Geoprocessing pane and open the tool.
- Make the following selections on the tool Parameters tab:
- Input Features: “mBISHx_CONUS_2001v1” (the shapefile we downloaded earlier)
- Field: “FID”
- Output raster: C:\Scratch\USA_Bighorn_Sheep_Range_FID.tif (Be sure to save the output to a folder on your computer so you can output to TIFF format.)
- Output cell size: (Ignore this parameter for now. You will set this on the Environments tab)
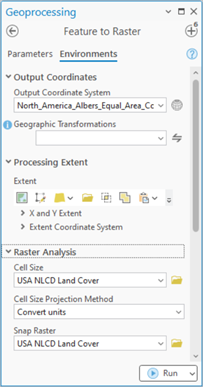
- Make the following selections on the Environments tab:
- Output Coordinate System: (Select “USA NLCD Land Cover” from the drop-down)
- Cell Size: (Select “USA NLCD Land Cover” from the drop-down)
- Snap Raster: (Select “USA NLCD Land Cover” from the drop-down)
- Click the Run button.
- The output should include four unique raster values, one for each of the unique ‘FID’ values. These four values represent the Bighorn sheep range while everything that is not part of the range is NoData.
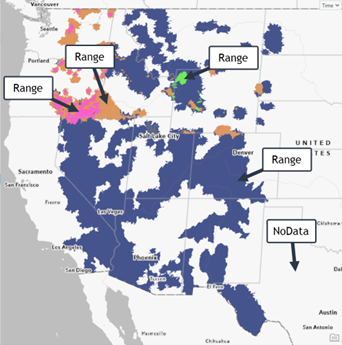
However, we would like all the range area to have the same value of ‘1’ and ‘NoData’ everywhere else. We will use the next step to achieve this result.
Step #5: Run ‘Reclassify’ geoprocessing tool
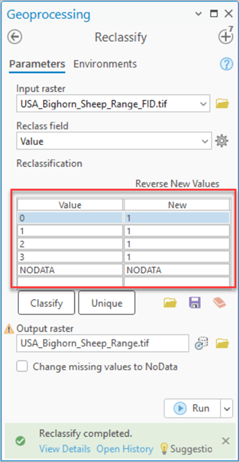
- Search for “Reclassify” in the geoprocessing pane and open the tool.
- Make the following selections on the Parameters tab:
- Input Raster: (Select “USA_Bighorn_Sheep_Range_FID.tif” from the dropdown)
- Reclass field: Value
- Reclassification: (See the table below and update all numeric values to 1 and leave NODATA as is.)
- Output raster: C:\Scratch\USA_Bighorn_Sheep_Range.tif (Be sure to save the output to a folder on your computer so you can out to TIFF format.)
- Click the Run button.
The final output should look like this with a raster value of ‘1’ for all the Bighorn Sheep range area and NoData everywhere else.
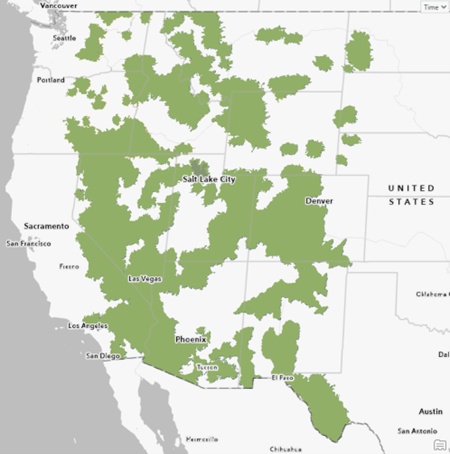
You now have a species range map in raster format that can be used in your analysis or other workflows. You could also share this TIFF raster with others by publishing it to your ArcGIS Online organization and even share it with everyone.
Now you know the basics of a common GIS workflow to convert vector features to raster data using geoprocessing tools in ArcGIS Pro. We hope this will help you in modifying your workflows if/when service retirements impacts your work.
More Information
Join us at the Esri Community for expert advice, answers to your questions about Living Atlas, and much more!

Article Discussion: