With the range of powerful mapping, analytics, reporting, and sharing capabilities available in Business Analyst Web App, organizations typically have a wide variety of users including decision makers, analysts, and GIS experts. While the broad access to Business Analyst across your organization increases its value, it also presents the challenge of offering the tailored application experience according to end user needs.
This blog introduces ArcGIS administrators to Business Analyst Web App customization and helps them learn how to tailor the Business Analyst Web experience for their organization and end user needs.
Available only to administrators, organization preferences in the Business Analyst Web App empowers administrators to setup and customize the application in 4 easy steps for all Business Analysts Web users in the organization.
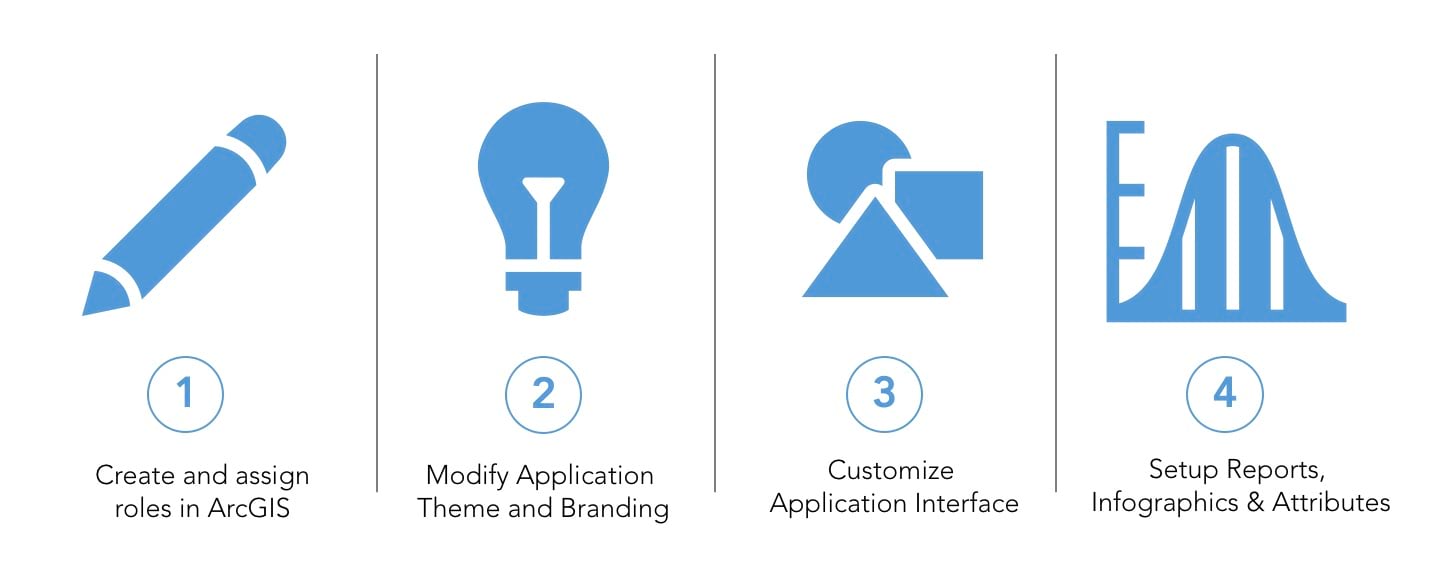
Step 1: Create and Assign Roles in ArcGIS
Start with understanding who in your organization are the users for Business Analyst Web and what their job functions are. They could be a combination of decision makers, analysts, GIS experts, and more. For example, in retail companies, they could be acquisition managers, market researchers, and business intelligence analysts.
Depending on the type of user, you can determine the kind of privileges as well as the ArcGIS role they would need to use Business Analyst Web App most effectively. Use the default ArcGIS roles (e.g. Publisher) or create custom roles (e.g. Market Researcher) and assign each user a specific role. For example, by default “Publisher” and “Administrator” role members get access to all Business Analyst Web capabilities. Using the organizational preferences, you can choose to customize what is available to members in these default roles or you can choose to customize the application for a custom role.
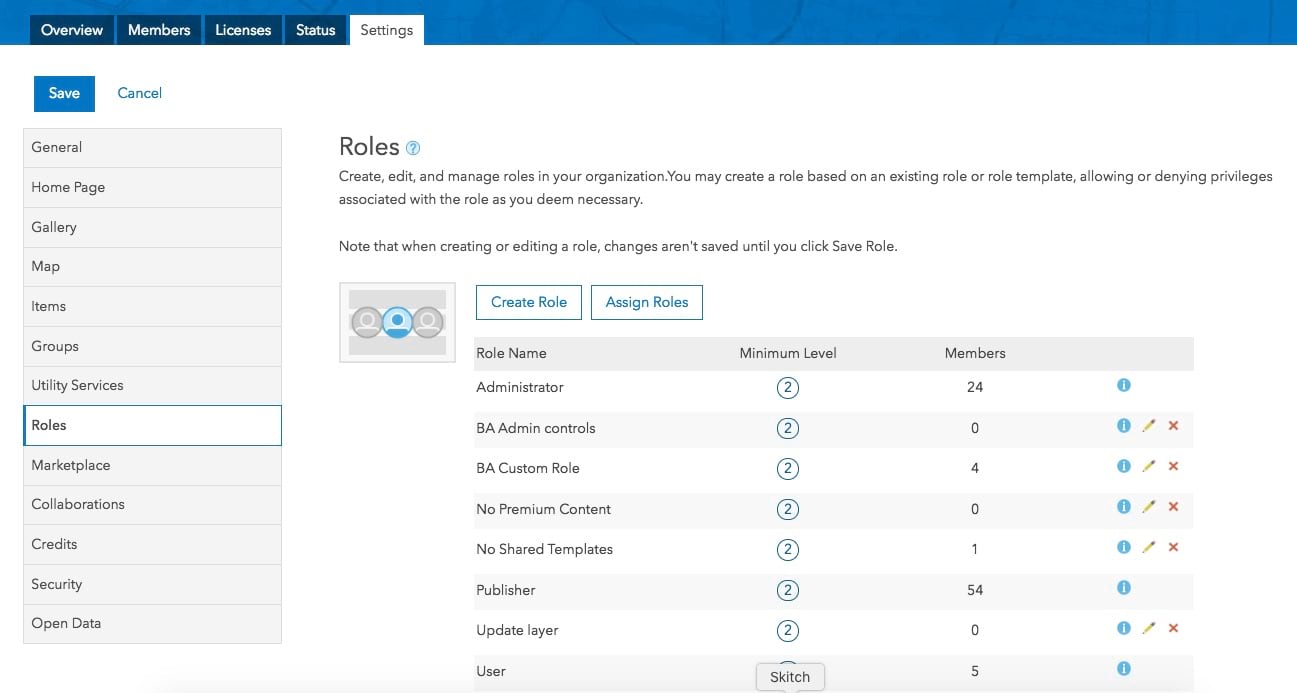
Make sure to configure Business Analyst Web licenses as well for all users planning to use Business Analyst Web.
Step 2: Modify Application Theme to Align with Your Organization’s Branding
Use the App Theme preference to customize the look of the application the way you want. Add your own logo, change the app title, and apply a theme color of your choice. You can also simply choose to use the ArcGIS organization name, theme color, and logo that is used for other ArcGIS Apps in your organization.
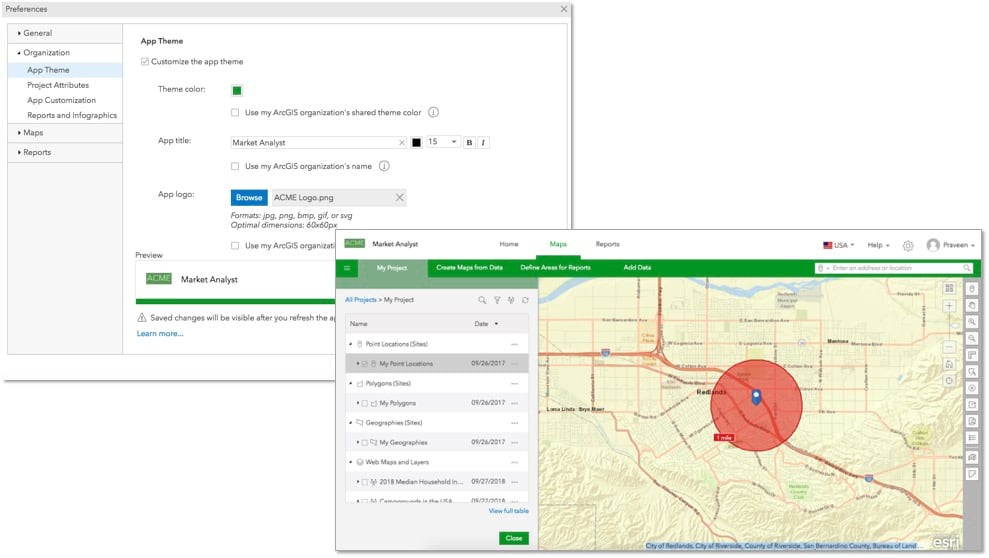
This setup applies for all users in your organization and helps you roll out the application in a way that reflects your company’s branding.
Step 3: Customize Application Interface
Using the App Customization preference, you can disable and enable different workflows in the application by various pre-defined and custom roles in ArcGIS. For example, let’s say you have two custom roles in ArcGIS Online. Users in the first custom role are acquisition managers who primarily view maps, create sites, and run reports in the Business Analyst Web App. Users in the second custom role are market researchers who run analysis as well as create and setup custom data and report templates so others in the organization can use them. To simplify the web app experience for the acquisition manager users, you can enable only the mapping, site creation, and report running workflows and hide all other workflows. Similarly, for market research users, you can keep all the workflows or enable only the Suitability Analysis, Custom Data Setup and Build workflows for Reports and Infographics and hide other workflows.
This preference also allows you to preview the settings for each role as well as use optional preset configurations.
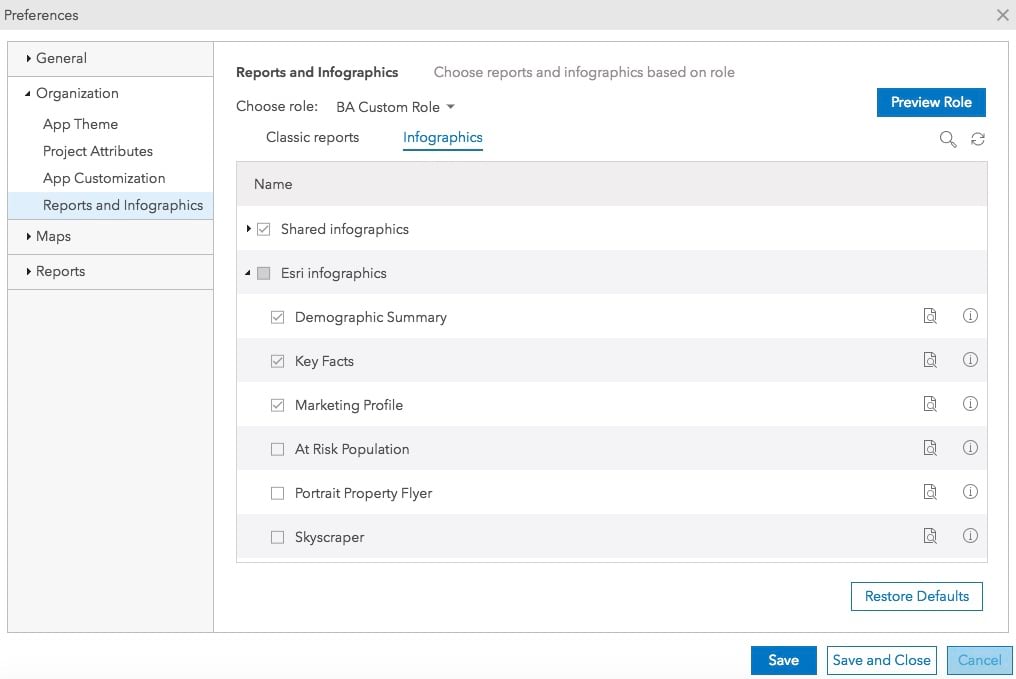
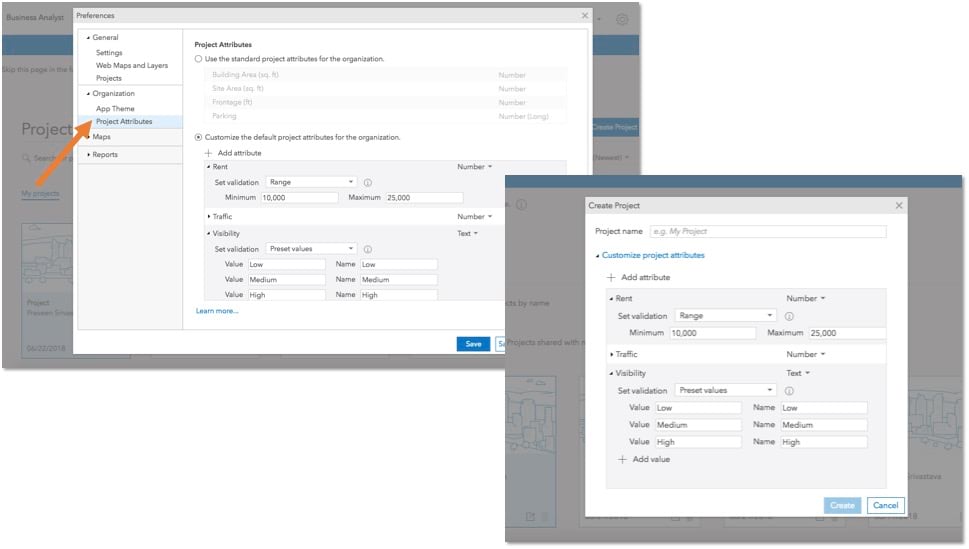
Step 4: Setup Reports and Infographics and Default Site Attributes
You can leverage the Reports and Infographics preference and the Project Attributes preference to further configure the application:
a) Customize the classic reports and infographics available in the application by various ArcGIS roles. If some users in your organization do not need access to all reports or infographics, you can simplify and improve their experience by keeping only the reports they need. This customization also helps optimize your organization’s credit usage by enabling only the reports and infographics that your organization needs.
b) By default, any new project includes Building area, Site area, Frontage, and Parking as site attributes. If your organization uses a different set of attributes (e.g. Rent, Traffic, Visibility), they would need to be changed every time a new project is created. Using the Project Attributes organizational preference, you can define site attributes that will be used automatically for all new projects.
Whatever the user need, or the organization need, Business Analyst empowers administrators with easy and effective customization capabilities to help them maximize the impact of the application in their organization.
Interested in learning more? Check out the Business Analyst help documentation.

Commenting is not enabled for this article.