Custom widgets let you extend your ArcGIS Experience Builder app to meet your exact needs. Previously, building one required a solid grasp of ExB’s widget development conventions and real programming experience. With this skill, that changes — building a custom widget becomes far easier, and even if you’re not a developer, you can let AI build the widget for you.
We built an Agent Skill to take that load off you.
What is the skill?
Experience Builder now shares a skill that teaches an AI coding agent how to build widgets the right way. When you ask your agent for widget work, the skill hands it everything it needs — the conventions, the framework APIs, the file structure, and a widget skeleton to start from — so the agent implements your request correctly instead of guessing.
At a high level, the skill covers:
- When & how — creating new widgets or modifying existing ones, and clarifying requirements before writing code.
- Environment rules — detecting your setup (for Developer Edition, widgets live under
client/your-extensions/widgets/). - File anatomy —
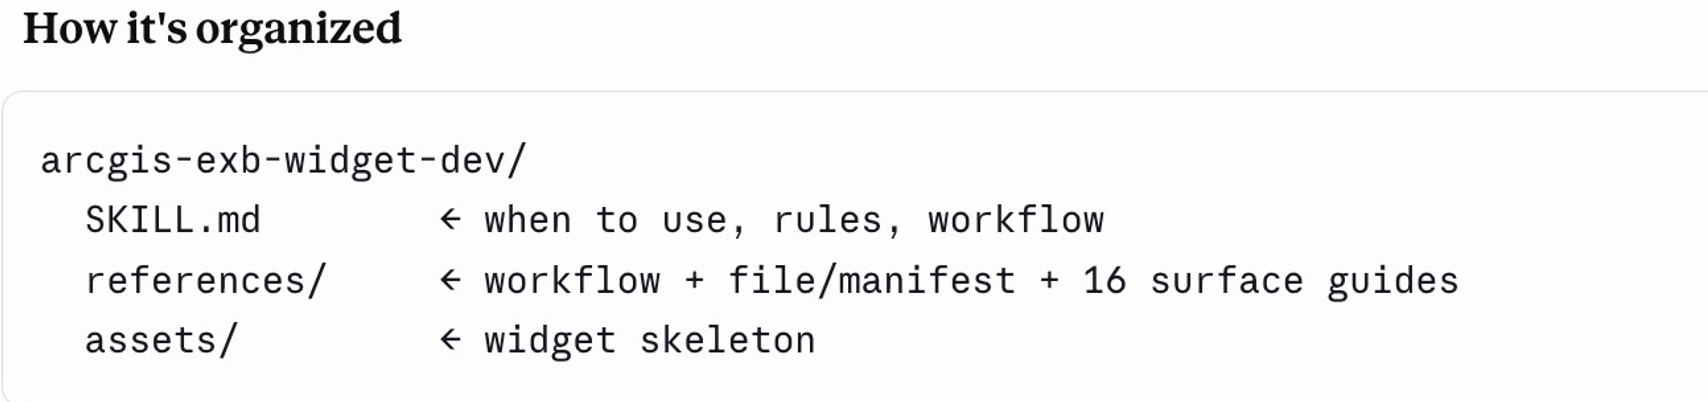
manifest.json,config.json, and the config / runtime / setting source files, plus translations, tests, and the icon. - Implementation surfaces — focused reference guides for data sources, map and layer views, message/data actions, UI theming, state, ArcGIS web components, accessibility, and more. The agent loads only what a given task needs.
- Core conventions — functional components, a clean runtime/builder boundary, framework selectors over raw IDs, and backward-compatible config.
Because SKILL.md is an open standard, the skill isn’t tied to one product. It works with any Agent Skills–compatible coding agent — Claude Code, GitHub Copilot, Codex, Cursor, and others.
Get the skill
The skill is open source and available from the Esri Experience Builder SDK resources repository:
👉 https://github.com/esri/arcgis-experience-builder-sdk-resources
Download the /skills/arcgis-exb-widget-dev folder from there, and you’re ready to follow the tutorial below.
Tutorial: Build a Responsive Text Widget
Let’s walk through a real example end to end. We’ll build a custom text widget whose font size adapts to the app’s screen size — larger on desktop, smaller on mobile — without writing any of the widget scaffolding ourselves.
Prerequisites
- Download, install, and runn ArcGIS Experience Builder Developer Edition — (Any recent version works.)
- Download the
arcgis-exb-widget-devskill folder from the SDK resources repo. - A coding agent — this tutorial uses Copilot but the steps are the same for Claude code, Codex, or Cursor.
Step 1 — Point your agent to the skill
Place the downloaded skill folder in the location your agent scans for skills. The path depends on the agent:
| Agent | Path |
|---|---|
| Claude Code | ${root}/.claude/skills/ |
| GitHub Copilot (VS Code) | ${root}/.github/skills/ |
| Codex | ${root}/.agents/skills/ |
| Cursor | ${root}/.cursor/skills/ |
A common choice is to drop it right inside your Developer Edition directory so it travels with the project. Keep the folder intact — SKILL.md must stay at the root, with references/ and assets/ alongside it.
That’s the whole setup. From here on, the agent auto-invokes the skill whenever it works on an ExB custom widget — no manual toggling needed.
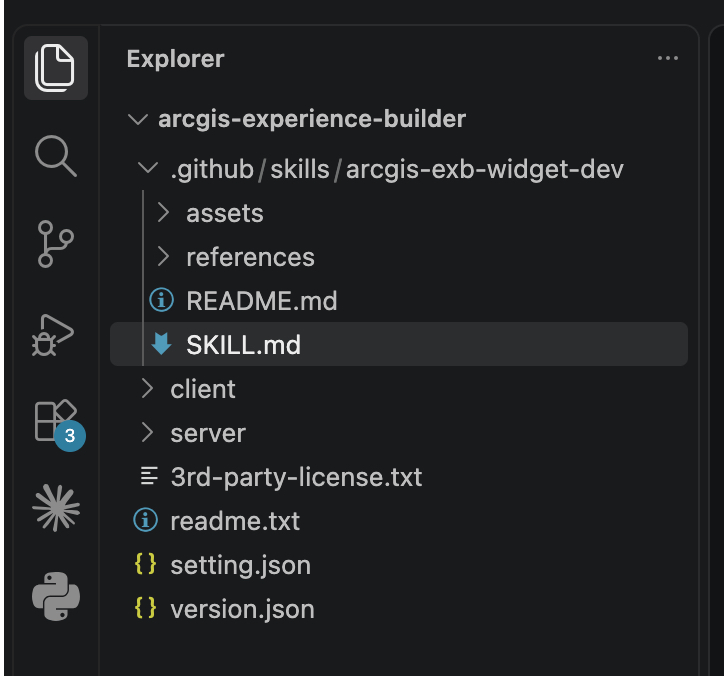
💡 The README in the skill package has the full, per-agent setup instructions if you need them.
Step 2 — Describe the widget you want
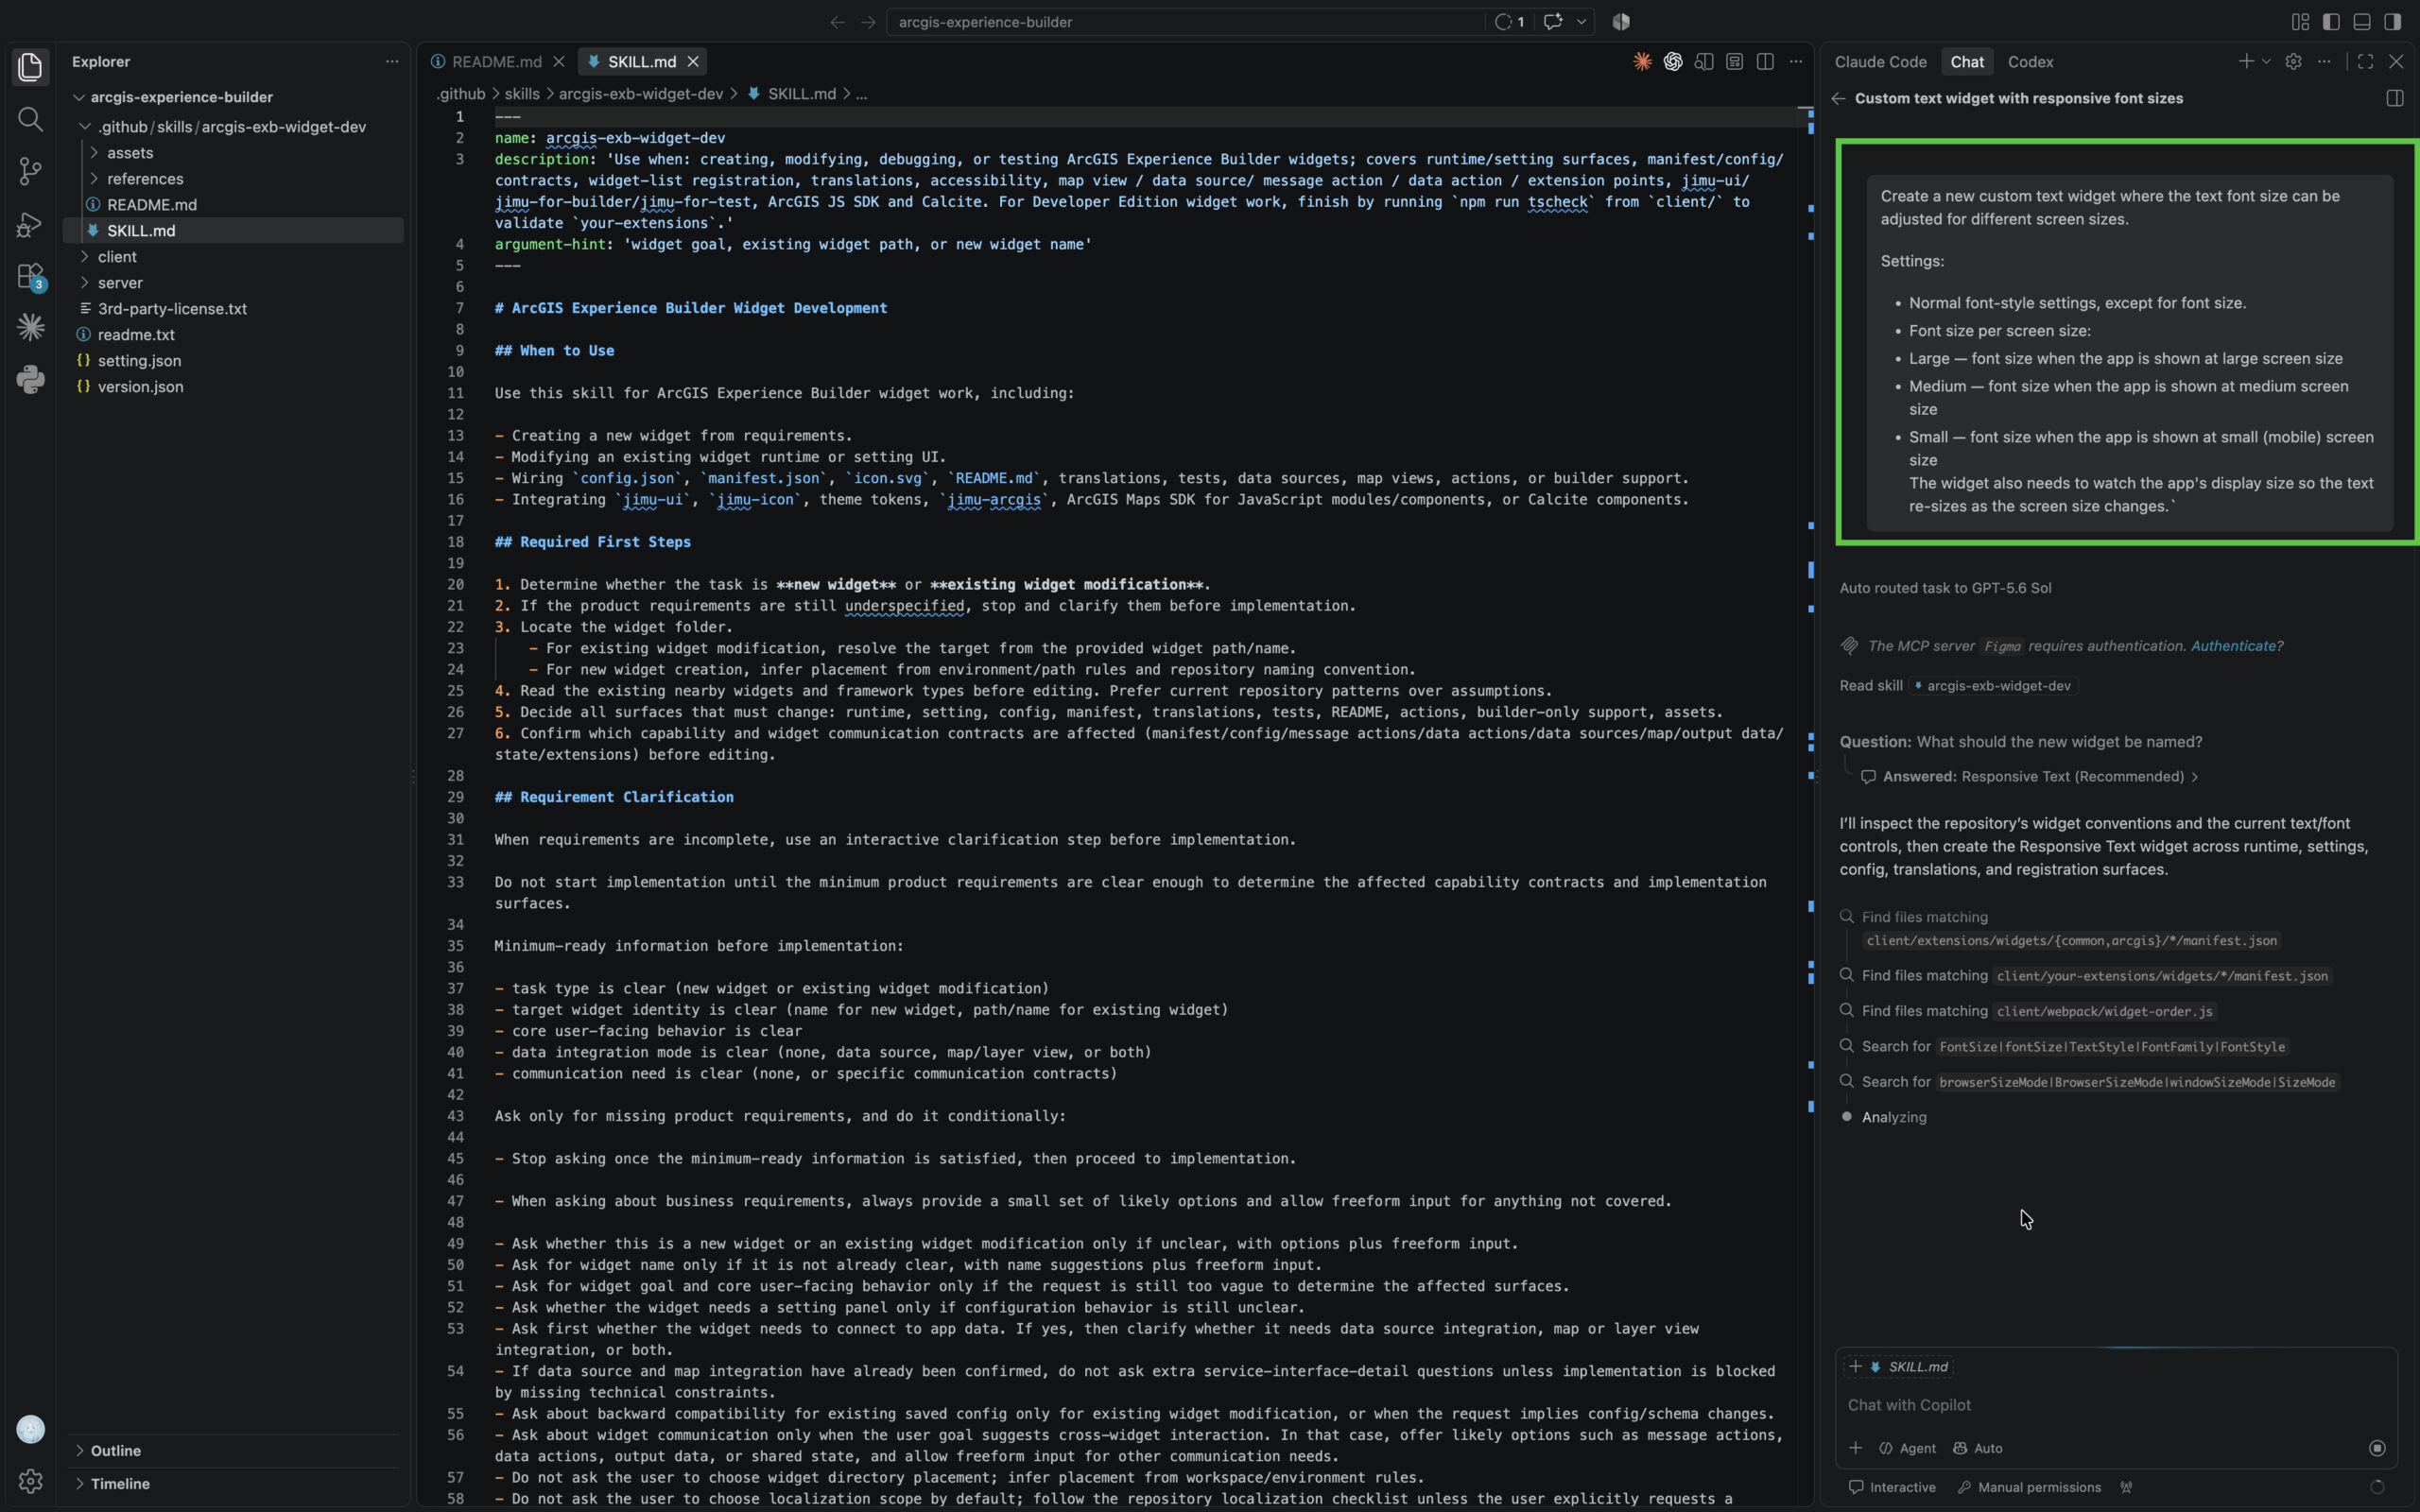
Now give the agent the task in plain language. Here’s the example prompt used in this tutorial:
Create a new custom text widget where the text font size can be adjusted at different screen sizes.Settings:
– Normal font-style settings, except for font size.
– Font size per screen size:
– Large — font size when the app is shown at large screen size
– Medium — font size when the app is shown at medium screen size
– Small — font size when the app is shown at small (mobile) screen sizeThe widget also needs to watch the app’s display size so the text
re-sizes as the screen size changes.
Notice there’s nothing about file paths, manifests, or framework APIs — you describe what the widget does, and the skill handles how to build it correctly.
Step 3 — Let the agent build it
The agent works through the task using the skill’s guidance: it scaffolds the widget, wires up the setting panel for the per-screen-size font sizes, adds the runtime logic to watch the app’s display size, and drops everything into client/your-extensions/widgets/.
In this run it took several minutes, and the agent finished with a summary of what it built.
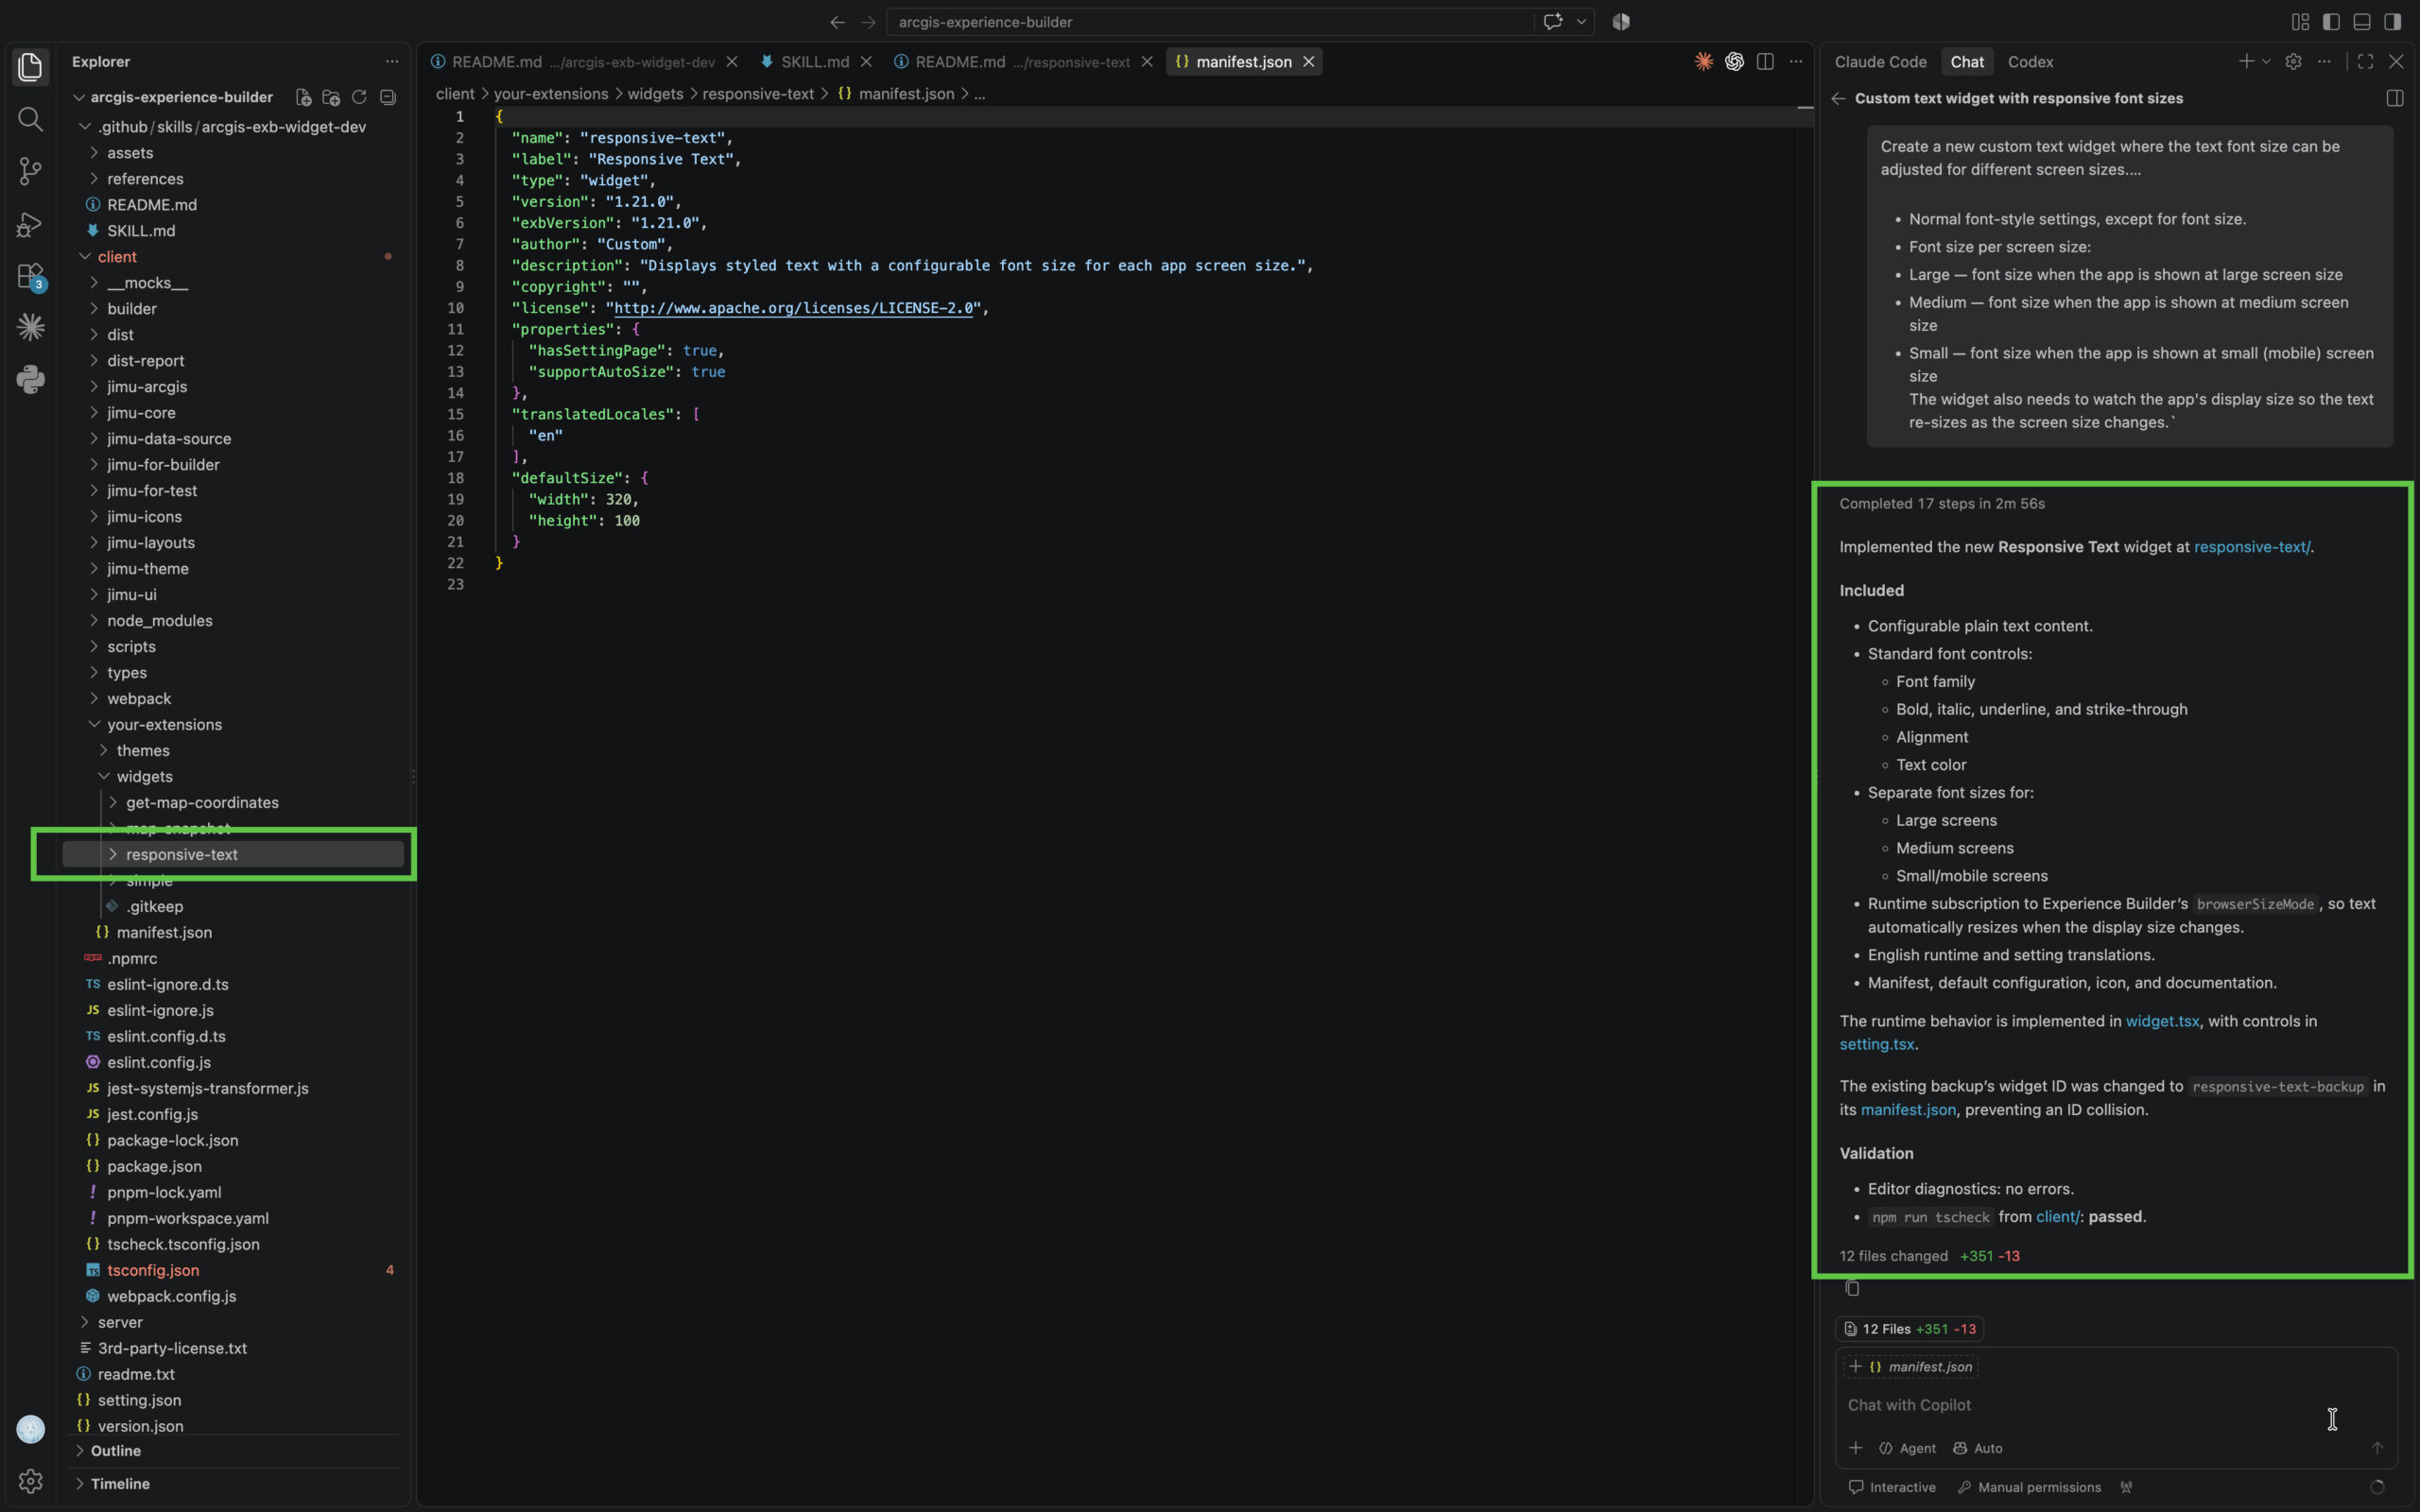
Step 4 — Run it in Experience Builder
Restart the client to pick up the new widget, then refresh Experience Builder. The custom widget shows up in the widget panel — with a sensible name and icon.
Add it to a page and open its settings: you can set the text content and define a font size for each screen mode, exactly as requested.
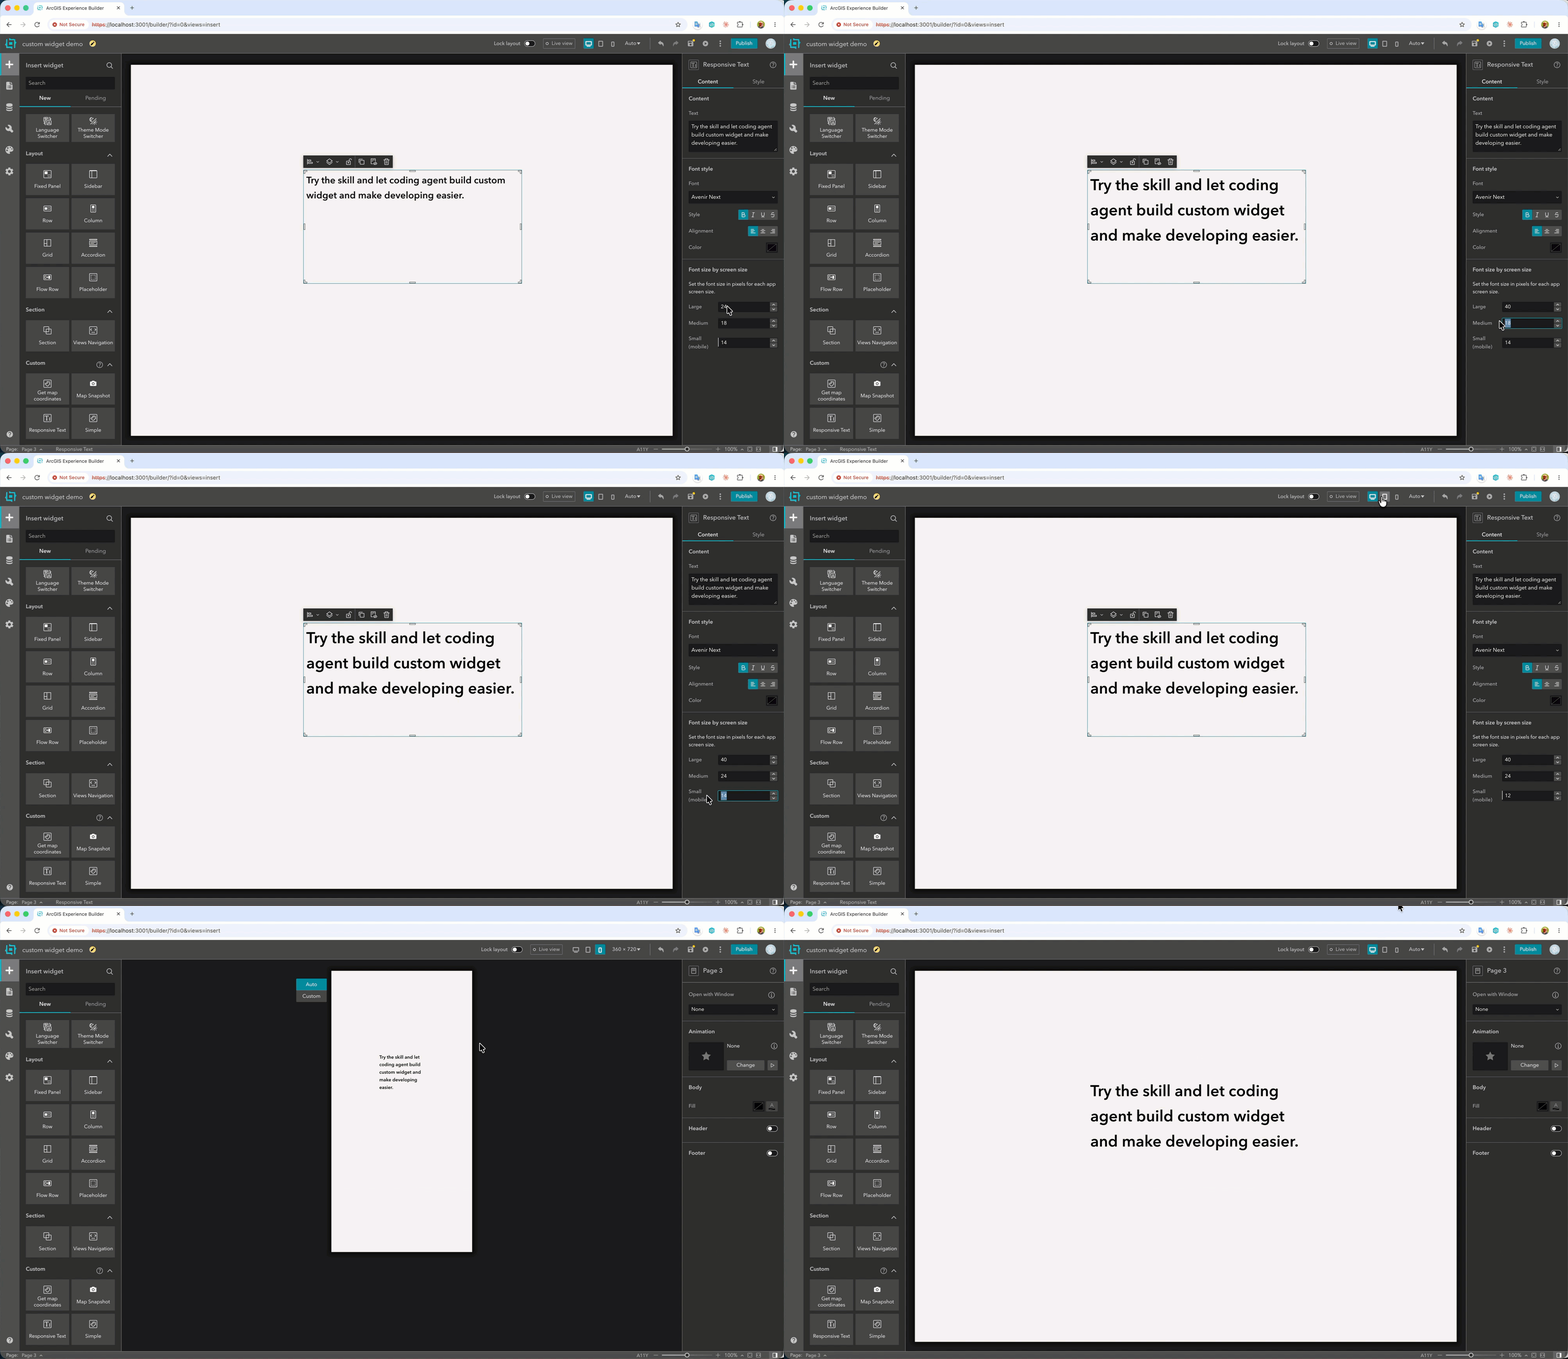
Now switch between screen modes (or resize the app), and watch the text re-size to match.
Wrap-up
With one shared skill and a plain-language prompt, you went from an idea to a working, convention-correct Experience Builder widget — no boilerplate, no guesswork. Whether or not you write code, you can describe the widget you need and let the agent build it. The same skill can modify existing widgets too.
For very complex widgets you’ll still want to put more thought into the design and be more specific in your prompt — but even then, the skill takes a real load off the development work.
Try it yourself: grab the skill from the Experience Builder SDK resources repo, point your agent at it, and describe the widget you’ve always wanted to build.

@Wei Ying – thank you for this post – very helpful. I was able to follow the instructions beautifully to recreate the Responsive Text widget. I tried creating another widget with much less success – I wanted to recreate the Distance and Direction widget from WebAppBuilder specifically for the portion that allows you to create a line from a single point and a distance and bearing (or from two points). Unfortunately the agent did not use the ArcGIS JavaScript API Draw or Sketch classes in the widget, so it missed out on a lot of the interactive drawing UI/UX provided by those classes (cursor change to a crosshair, showing the line before you click to finish, tooltips, etc. etc.). The widget GitHub Copilot created also didn’t really play well with an existing draw widget in the app. I tried several times pointing the agent at the existing draw widget as an example, as well as the legacy Distance and Direction widget from a downloaded copy of WebAppBuilder developer edition for an example for the logic and UI (but not the code classes). Are there certain skills that should be added to the skills.md file to make sure any widget created also pulls from existing classes / examples, and plays well with other widgets. For example, I’m not sure how “activating” a widget works – I would want to activate the draw widget when clicking it, and activate the new distance bearing widget when clicking on it, so the app knows which widget is in control of the Map.