Under construction…
Apologies, this blog article is being updated.

Please check back soon, this resource will be even better once we finish.
ArcGIS Experience Builder enables you to deliver responsive web experiences without writing any code. You can create apps and/or pages that contain 2D and 3D maps, text, and media. Experiences can focus on one type of content or can combine and link many types of content to create a complete experience and destination for your audience.
To create an experience, drag, position, and configure widgets such as maps, images, text, and tools. You can add triggers and actions to make widgets work together, within a single app and across multiple pages. Start an experience using an existing template or create one from scratch. You can also save your work as a new reusable template. ArcGIS Experience Builder is built into ArcGIS Online, so you can leverage all of your existing content.
For more information on the basics see:
This tutorial
This tutorial explains how to get started with Experience Builder by building a simple, pagecentric experience. You can view the completed example that you will build in the following steps.
Create a pagecentric experience
Experience Builder enables you to build a variety of apps. Follow these steps to create a simple pagecentric experience using the Gallery template.
Step 1 – Sign in.
Go to experience.arcgis.com and sign in to your ArcGIS account, or sign in and launch Experience Builder from the app launcher.
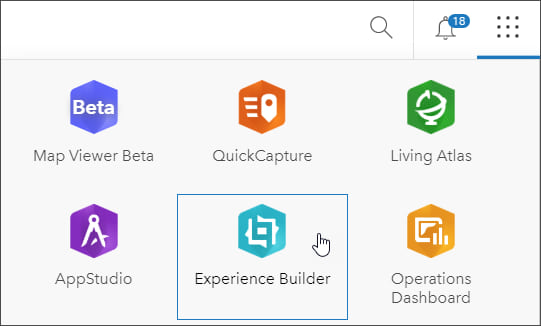
After signing in, you will see a gallery where you will find experiences that you have created, have been shared with you, or are publicly available.
Step 2 – Click Create New

This step advances you to the template gallery, where you can choose from available templates and begin creating a new experience.
Step 3 – Choose a template.
The template gallery contains a variety of default templates, as well as templates that have been shared. To get more information about any template, hover over the thumbnail.
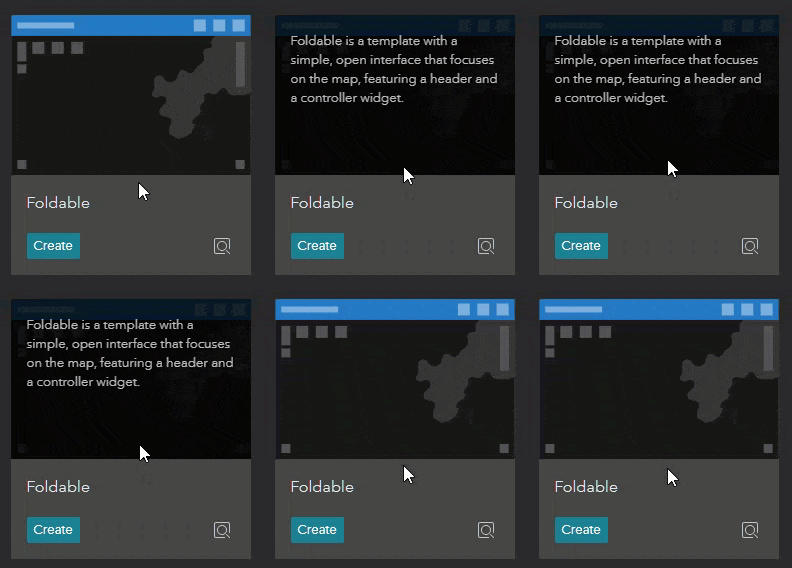
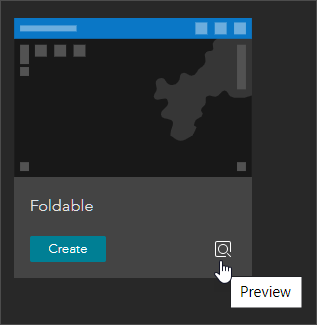
You can also Preview the template.
In this tutorial we will use the Gallery template. Locate the template, and click Create to begin.
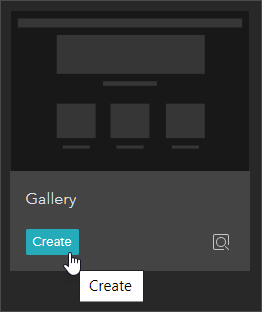
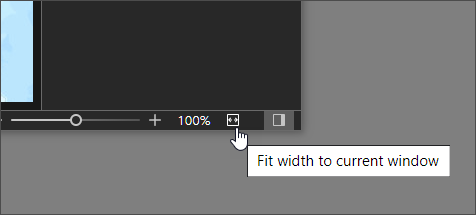
Gallery is a basic template for a pagecentric experience. It includes an image at the top of the page and prominent thumbnails to highlight content. If you can’t see the entire template, fit the app to the the current window.
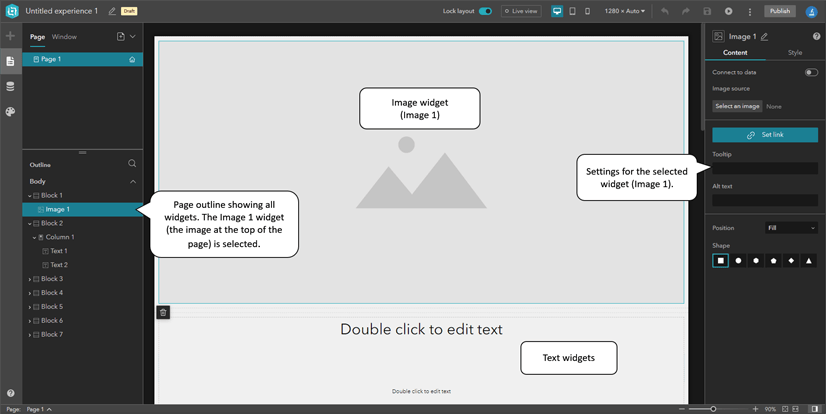
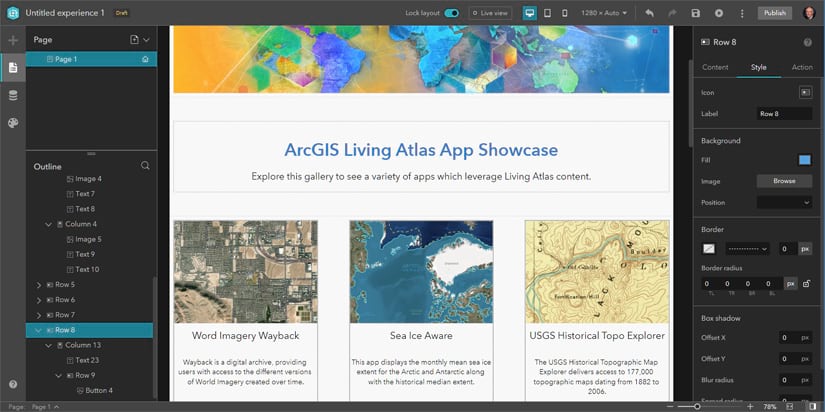
In the panel on the left you will see the outline of the current page. Click the arrows to expand the view to show all the widgets in the template. Click any widget, or select it in the outline, to view it’s current settings and make changes in the settings panel on the right.
The header bar at the top of Experience Builder has additional tools that will be used to create the experience.
Lock layout prevents accidentally moving and removing some widgets. Live view lets you work with the app using its current settings. Additional tools let you preview the app on different size devices, undo/redo changes, save, and publish. Don’t forget to save your work from time to time.
Follow these steps to create your experience.
Configure the page
A page is a document that is the foundation for the app’s layout. For this example, the page should fill the entire width of the browser.
Step 1 – Select the page from the side panel.
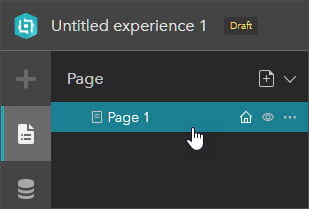
Step 2 – Make a custom size page.
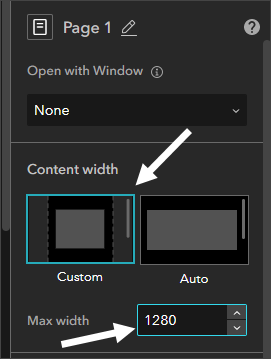
Note that in the page settings panel the default is Auto. This ensures that the page will fill the browser. However for this example, we will choose Custom and design a page around a width of 1280.
In Content width click Custom and set the Max width to 1280 pixels.
Configure the Image widget
Follow these steps to edit settings for the image widget located at top of the page.
Step 1 – Select the Image widget at the top of the page. You can click the widget to select it, or select it from the outline panel on the left.
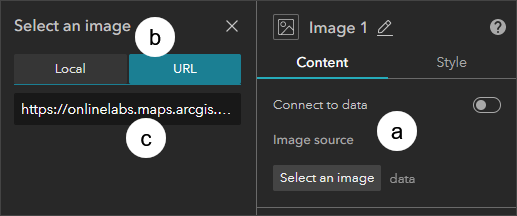
Step 2 – Add the image using a URL.
(a) – In the settings panel click Select an image
(b) – Select URL
(c) – Paste the following into the URL input:
https://onlinelabs.maps.arcgis.com/sharing/rest/content/items/46e8176749ac4f51b88357b0238c435f/data
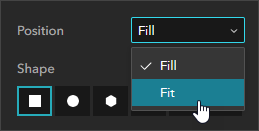
Step 3 – Set the image position to Fit.
Change the title and subtitle
Step 3 – Double click the title and subtitle (which are text widgets) to enter enter new text.
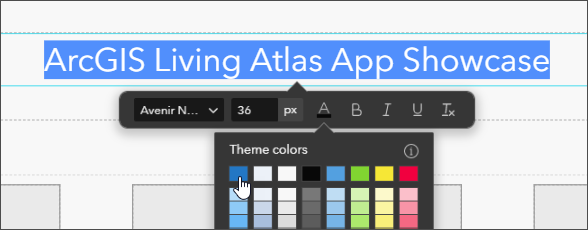
Step 4 – Select the text to display the edit toolbar to make changes. Make changes as desired, such as color and typography.
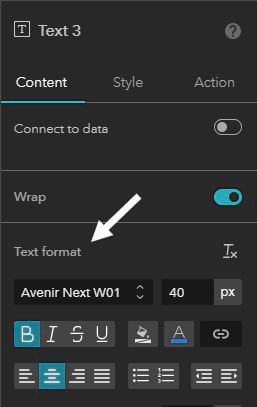
You can also change the current settings in the settings panel.
After making edits to the title and subtitle, your app should look something like this, depending on the text and settings you chose.
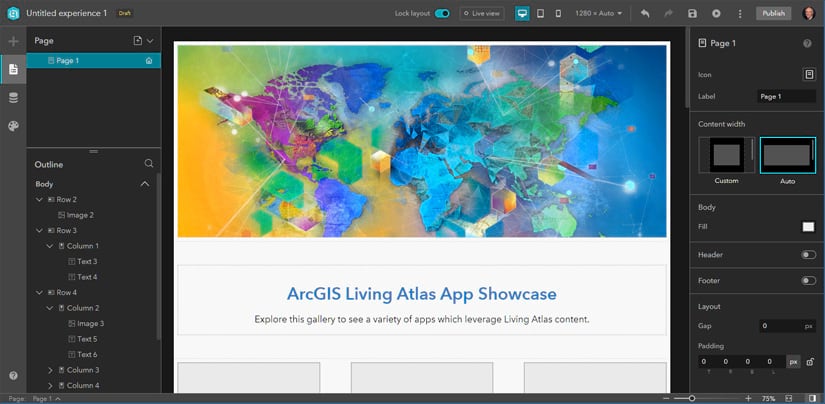
Gallery rows
The Gallery template includes several rows with image and text widgets. You can think of these as “cards” which can be used to highlight your content. In the steps below you will edit the settings for one of the cards, and can apply those steps to other cards.
Step 5 – Select the image widget in the first card.
You can click the widget to select it, or select it from the outline panel on the left.
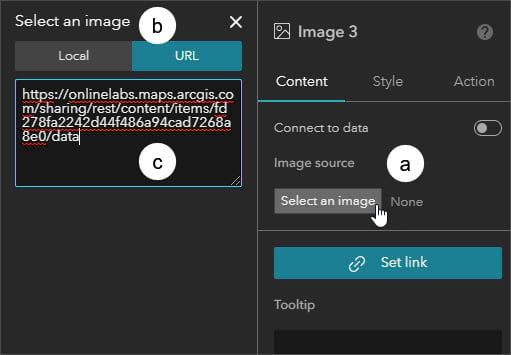
Step 6 – Add an image using a URL.
(a) – In the settings panel click Select an image
(b) – Select URL
(c) – Paste the following into the URL input:
https://www.arcgis.com/sharing/rest/content/items/fd278fa2242d44f486a94cad7268a8e0/data
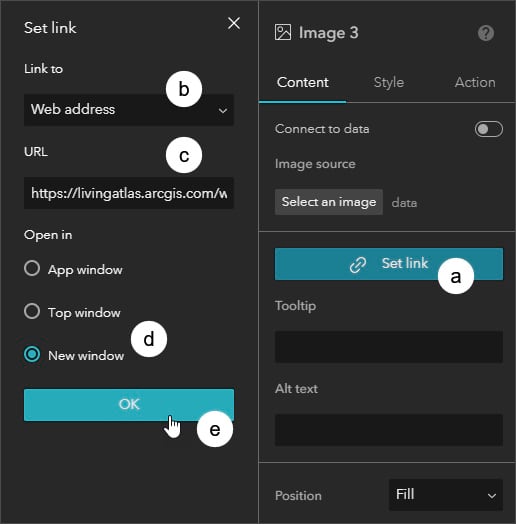
Step 7 – Add a link to the image widget to open an app. This will open the app when the image in the card is clicked.
(a) – Click Set link.
(b) – Select Web address from the dropdown.
(c) – Enter the app URL. Use the following URL: https://livingatlas.arcgis.com/wayback/
(d) – Choose to open the app in a New window.
(e) – When finished, click OK.
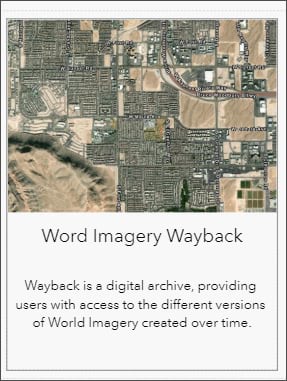
Step 8 – Edit the card title text.
Double click to edit the card title text widget and enter “World Imagery Wayback.”
Step 9 – Edit the card summary text.
Double click to edit the card summary text widget and enter “Wayback is a digital archive providing access to the different versions of World Imagery created over time.”
The completed card should look like the following:
Step 10 – Complete the remaining two cards in the row by repeating Step 5 through Step 9. The following can be used for the cards:
Second card:
Image: https://www.arcgis.com/sharing/rest/content/items/ffc7b01dfbd2450db2bd660611e4ea54/data
App link: https://livingatlas.arcgis.com/sea-ice/
Title: Sea Ice Aware
Description: This app displays the monthly mean sea ice extent for the Arctic and Antarctic along with the historical median extent.
Third card:
Image: https://www.arcgis.com/sharing/rest/content/items/a35416cb27674729996dd0e590b17fc7/data
App link: https://livingatlas.arcgis.com/topoexplorer/
Title: USGS Historical Topo Explorer
Description: The USGS Historical Topographic Map Explorer delivers access to 177,000 topographic maps dating from 1882 to 2006.
After completing the above, the experience should look similar to the screen capture below:
Step 11 – Complete your experience.
You can complete your experience by editing the settings for the rest of the widgets in the template. Click a widget, or select it from the outline, to display its settings and make changes.
The majority of the remaining widgets are the same as those described above. The rest are straightforward enough that what you have learned above can be easily applied to the rest of the template.
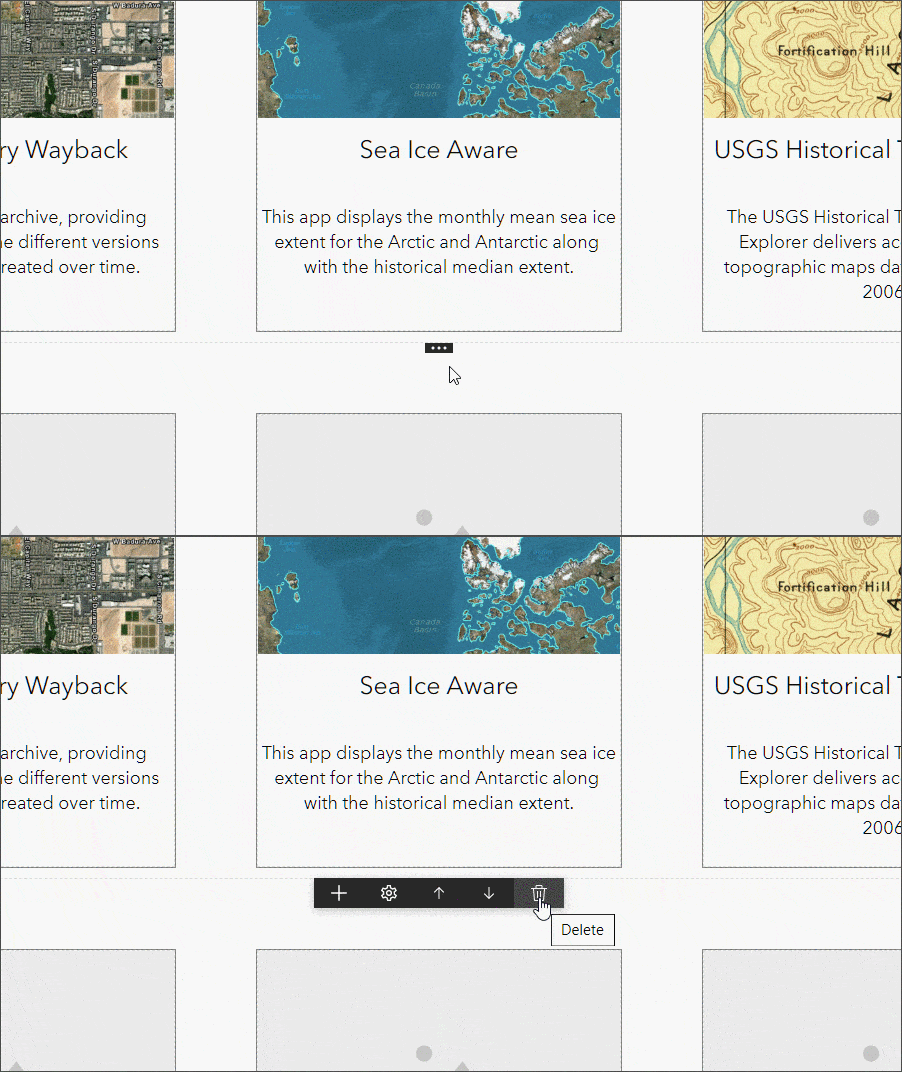
You can streamline the experience by removing entire rows. Select the row from the outline, then move your mouse to the top center of the row to display the edit toolbar where you can click Delete.
More information
For more information see
- ArcGIS Experience Builder
- ArcGIS Experience Builder overview and concepts
- What is ArcGIS Experience Builder?
- Widgets overview
- Create your first web experience
- Get started with ArcGIS Experience Builder: Foldable template
This article was originally published on February 19, 2020, and has been updated.

Commenting is not enabled for this article.